
Debugging VLANs on my TP-Link Managed Switch
source link: https://mtlynch.io/notes/debugging-vlans-tp-link/
Go to the source link to view the article. You can view the picture content, updated content and better typesetting reading experience. If the link is broken, please click the button below to view the snapshot at that time.

Debugging VLANs on my TP-Link Managed Switch
July 4, 2023
13-minute read
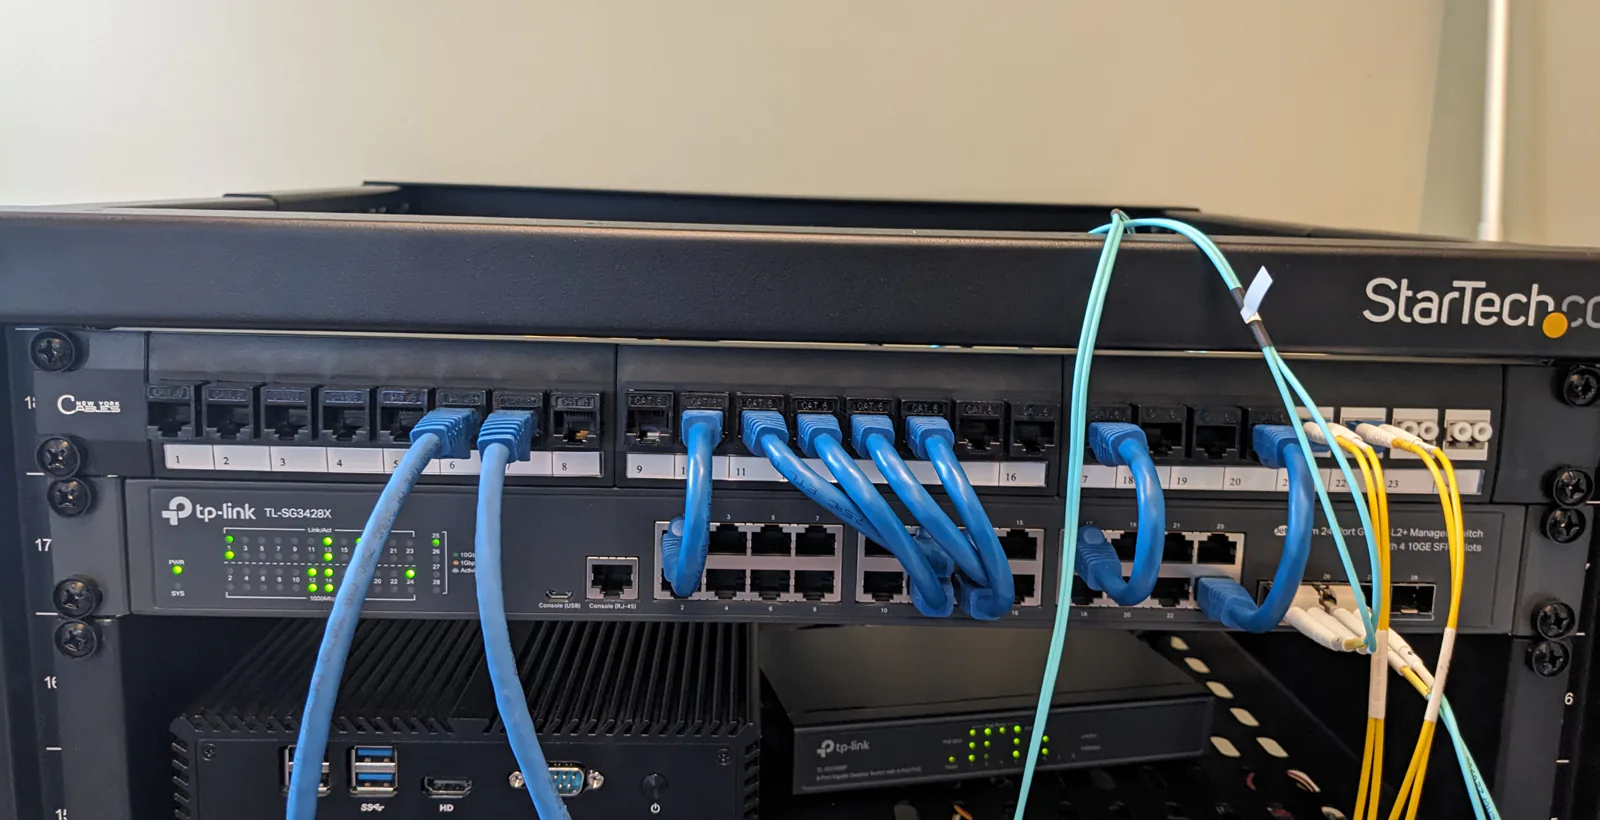
I recently bought my first-ever managed networking switch, a TP-Link JetStream TL-SG3428X.
The main feature of a managed switch is that it lets you segment your network into VLANs. I was excited about this functionality, but it took me hours of trial and error to get VLANs working.
I found TP-Link’s VLAN documentation lacking, so I’m sharing my notes in case they’re helpful to others.
Background 🔗︎
If you’re not familiar with VLANs, my favorite explainer is Raid Owl’s video on the subject.
Tagged ports, untagged ports, and PVIDs 🔗︎
Different devices use different terminology to describe VLAN features.
On TP-Link switches, the relevant settings to know are:
- Tagged ports
- Untagged ports
- PVIDs
Tagged ports 🔗︎
When you add a port to a VLAN as a tagged port, the switch allows the device connected to that port to send and receive traffic to the VLAN.
On tagged ports, the switch preserves VLAN tags on packets, so you should add VLAN-aware devices as tagged ports of a VLAN. VLAN-aware devices are things like firewalls, other managed switches, and wireless access points that support VLANs.
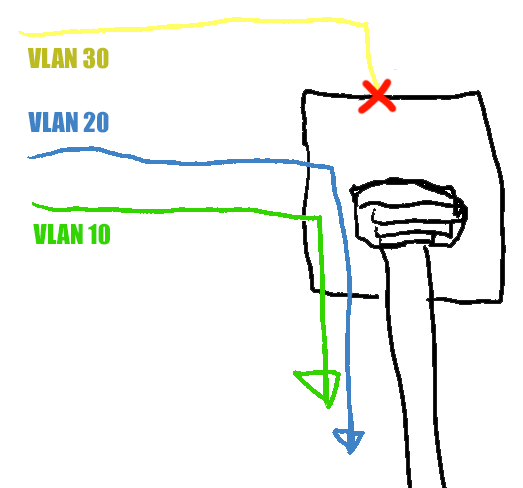
For example, if you add port 5 to VLANs 10 and 20 as a tagged port, then the switch will send packets to that port with VLAN tags 10 and 20. It won’t strip off the tags, so the device on port 5 will receive packets with the VLAN tag still set. The device won’t receive packets with any other VLAN tag, as only 10 and 20 are allowed.
Example: Adding a port to VLANs 10 and 20 as a tagged port. The switch will allow traffic tagged with VLANs 10 and 20 but reject other traffic, such as packets tagged with VLAN 30.
Untagged ports 🔗︎
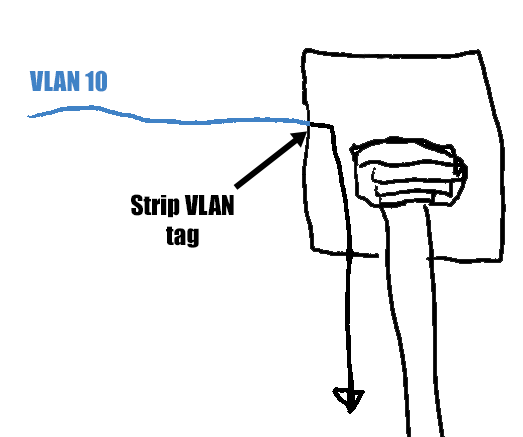
When you add a port to a VLAN as an untagged port, the switch allows the device connected to that port to send and receive traffic to the VLAN, just like for tagged ports. The difference with an untagged port is that, before passing along packets to the port, the switch will strip the VLAN tag from network packets.
Untagged ports are for non-VLAN-aware devices, like regular desktop PCs, scanners, or printers. The switch strips the VLAN tags because the device attached to the port doesn’t know anything about VLANs.
For example, if you add port 6 to VLAN 10 as an untagged port, then the switch will send packets with VLAN tags 10 to that port, but it will strip off the tag before passing the packet along. The device on port 6 will receive packets without any VLAN tag. The device won’t receive packets with any other VLAN tag, as only VLAN 10 is allowed.
PVIDs 🔗︎
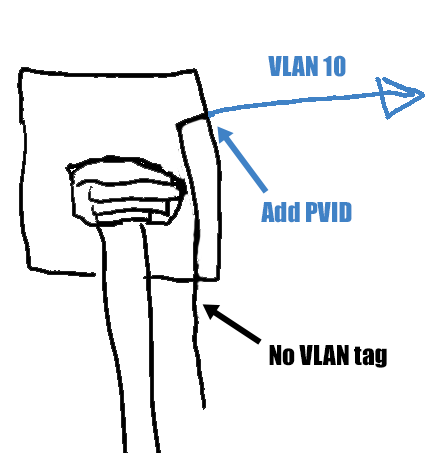
On TP-Link switches, each port has a PVID, or port VLAN identifier. When a packet goes from the attached device into the switch through the given port, the switch adds the port’s PVID to the packet as a VLAN tag.
While tagged and untagged ports define how packets go from the switch to the port, the PVID affects packets that come from the port into the switch.
You don’t need to set a PVID for ports that are connected to VLAN-aware devices because those devices are adding their own VLAN tags.
You do need to set a PVID for ports connected to non-VLAN-aware devices, as the switch needs to add the correct VLAN tag on behalf of the non-VLAN-aware device.
How to reach VLAN settings on a TP-Link managed switch 🔗︎
TP-Link buries the VLAN settings amid a cluster of similar-sounding options. I wasn’t even sure if I was configuring the right settings at first.
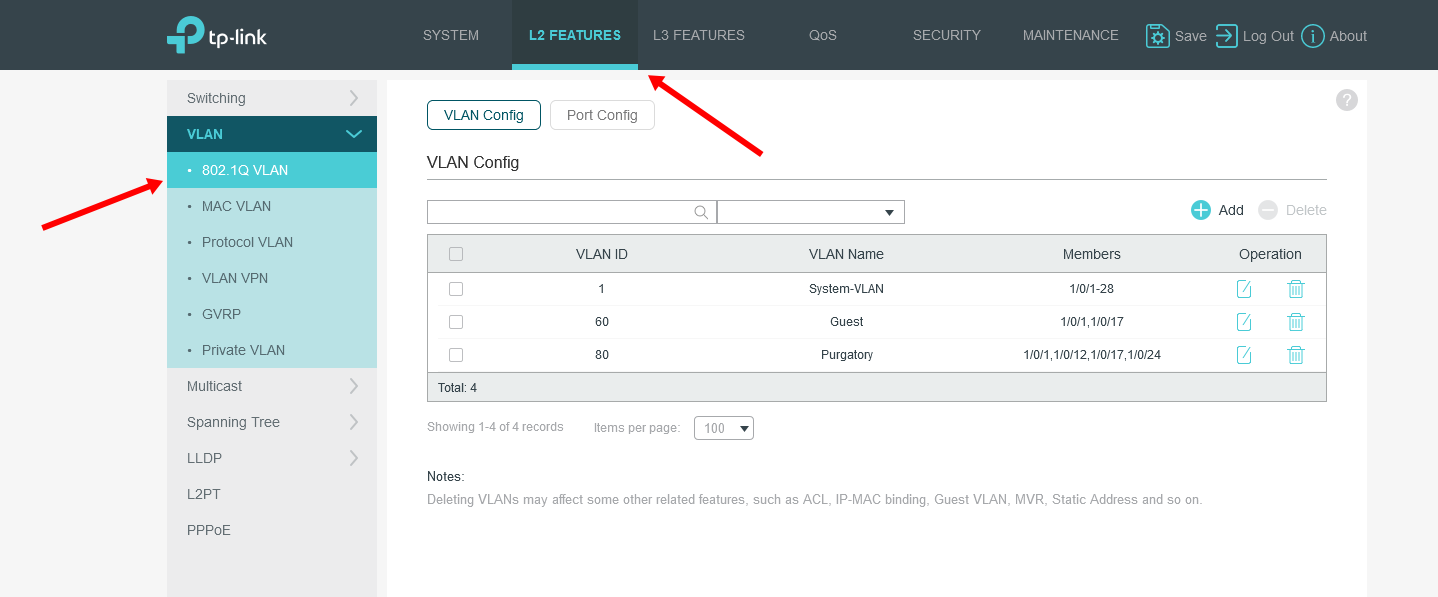
If you have a TP-Link switch with a similar interface to mine, you can find your VLAN settings by doing the following:
- From the navbar, click “L2 Features”
- From the left sidebar, click “VLAN”
- From the submenu, click “802.1Q VLAN”
How to find VLAN settings on a TP-Link managed switch
The “VLAN Config” tab lets you add VLANs to the switch and configure which ports are members of the VLAN.
The “Port Config” tab lets you configure the PVID for any ports. Again, you’d only set a PVID for ports that are attached directly to non-VLAN-aware devices that need to be on a VLAN. If you’re setting a PVID for a port, it should be a member of a single VLAN as an untagged port.
Why does TP-Link make us manage PVIDs manually? 🔗︎
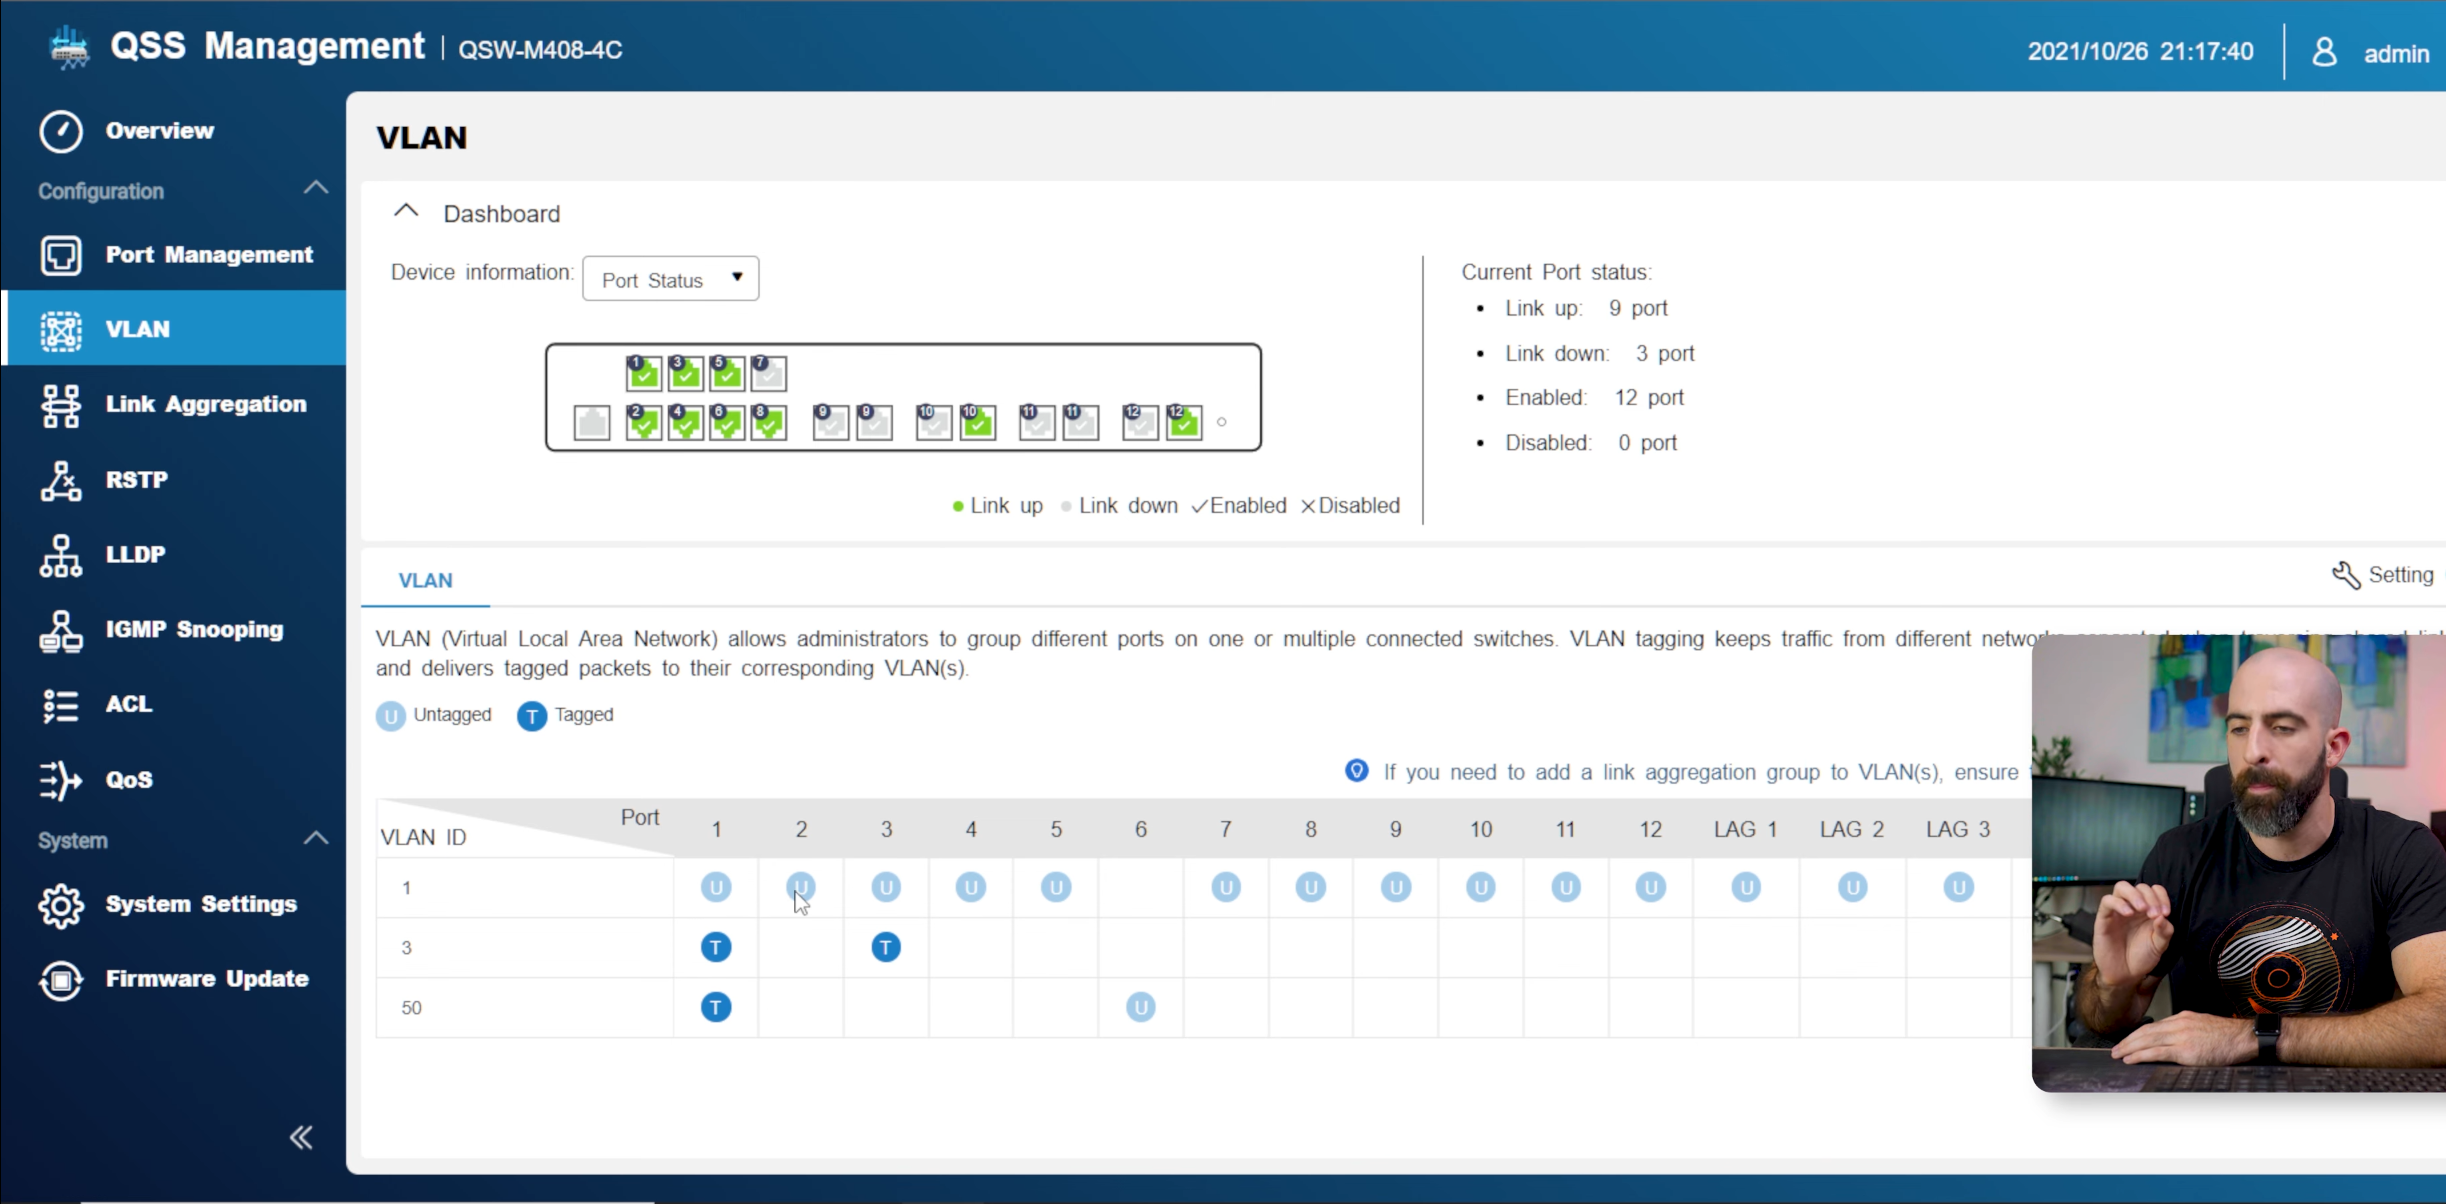
Some switches leave PVID out of the configuration. They just show tagged ports and untagged ports — the switch automatically sets the PVID for you.
A screenshot of the VLAN admin interface on a QNAP managed switch. QNAP’s interface is vastly more intuitive than TP-Link’s.
On switches that don’t expose a PVID setting, adding a port to VLAN 20 as an untagged port implicitly sets the port’s PVID to 20. I wish TP-Link had taken this approach because their implementation is needlessly complicated.
Here’s my rule of thumb for managing untagged ports and PVIDs on a TP-Link switch:
- If you connect a non-VLAN-aware device to the switch, it should only be a member of a single VLAN.
- Add the device’s port to the VLAN as an untagged port.
- Set the port’s PVID to the VLAN’s ID.
- Remove the port from any other VLANs.
For example, if you connected a printer to port 16 on your switch and wanted it to be in VLAN 20, you’d add port 16 to VLAN 20 as an untagged port, and you’d set port 16’s PVID to 20.
TP-Link technically allows you to add a port to multiple VLANs as untagged, but I don’t think there’s ever a reason to do this. It would mean that the device can receive packets from devices on other VLANs, but it can only send packets to devices on the single VLAN that matches the port’s PVID.
My home network, before the managed switch 🔗︎
Before I got the managed switch, I was already using VLANs, but I connected them through an unmanaged switch.
The relevant network devices in my setup were:
- My desktop PC, which has full access to all VLANs
- My Ruckus WiFI access point, which hosts two WLAN networks with distinct VLANs
- My OPNSense firewall, which enforces firewall rules on packets crossing VLANs or to the Internet
- My Proxmox server, which tags certain VMs’ network interfaces with VLAN IDs
My home network before I added a managed switch
Note that in this diagram, I have no VLAN-aware devices connected in series. This simplified configuration a lot, which I didn’t realize until I upgraded to a managed switch.
Mistake 1: Replacing unmanaged switch with managed switch kills Internet on WiFi 🔗︎
When I purchased my TP-Link TL-SG3428X, I just dropped it in as a replacement for my previous unmanaged switch. Not much changed about my network diagram:
My home network before I added a managed switch
A few minutes after installing the new managed switch, my fiance told me she lost Internet access on her laptop. I checked my phone and saw the same thing.
The WiFi devices could all join the WiFi network, but the network didn’t have Internet access. How could that be? I hadn’t changed any of my firewall settings. I just replaced an unmanaged switch with a managed one.
After several hours, I realized what the problem was. My managed switch was dropping all tagged packets. Traffic could get from WiFi devices to the access point, but the switch was rejecting VLAN-tagged packets because it didn’t know anything about my VLANs.
When I replaced my unmanaged switch with a managed switch, the managed switch began dropping VLAN-tagged traffic from my wireless access point.
The solution was to tell my VLANs managed switch about my existing VLANs. Otherwise, the switch would just continue dropping all VLAN-tagged packets.
Here was my managed switch configuration after the fix:
| VLAN ID | VLAN Name | Ports (Tagged) |
|---|---|---|
| 1 | System | All |
| 10 | Trusted | 1 (firewall), 17 (wireless access point) |
| 20 | Guest | 1 (firewall), 17 (wireless access point) |
After that configuration change, my WiFi devices got Internet again. The switch recognized their VLAN tags and passed traffic through to my OPNsense firewall.
Mistake 2: Forgetting to add my router to the VLAN 🔗︎
I ran into another issue when I tried to add an untrusted device to my network. I have solar panels on my house, and to monitor their status, I have to use this proprietary IoT device.
An untrusted IoT device on my network that tracks the status of my outdoor solar panels
The IoT device needs Internet access to upload metrics to the vendor’s cloud dashboard. I have no idea what other mischief this little box might be doing, so I don’t want it to have access to anything on my home network.
I created a new VLAN from my OPNsense firewall called “Purgatory” for devices I trust even less than guests. Devices in Purgatory can access DNS servers and public Internet IPs, but they can’t access any other VLAN.
Firewall rules for Purgatory VLAN
I then added the solar monitoring IoT device’s port on the TP-Link switch to the Purgatory VLAN. The IoT device is a non-VLAN-aware device, so I set it as an untagged port for Purgatory and assigned the Purgatory VLAN ID (80) as the port’s PVID.
Assigning the port to the VLAN as an untagged port strips the VLAN tag from packets before they reach the IoT device. Assigning the PVID adds the VLAN tag to packets that the IoT device sends into the switch.
I added the untrusted IoT device to the Purgatory VLAN as an untagged port.
But it didn’t work. The cloud dashboard immediately reported the IoT device as offline.
I can’t run any kind of diagnostics from the IoT device, so I needed a different system to debug this. I added my Dell Optiplex NixOS system to the Purgatory VLAN, and it lost network access too. It couldn’t ping anything on the network as long as it was part of the Purgatory VLAN.
I was banging my head against the wall trying to figure out what was wrong. I tried adding the test device as a tagged port, as an untagged port, with PVID 1, and with PVID 80. Nothing worked. I couldn’t get the device to join the network.
I checked my OPNsense firewall, and it didn’t show any traffic on the Purgatory VLAN at all. I checked DHCP settings to verify I had a DHCP server running for the Purgatory VLAN, and I did.
After three nights of pulling my hair out trying to understand the behavior, it finally dawned on me: I never added my OPNsense firewall to the Purgatory VLAN!
Here’s what was happening:
- IoT device sends traffic to the TP-Link managed switch.
- Switch adds the VLAN tag for Purgatory.
- Purgatory packets have nowhere to go because there weren’t any other hosts on the Purgatory VLAN.
The solution was simple: add the OPNsense firewall to the Purgatory VLAN. Because the firewall is VLAN-aware, I added it as a tagged port:
My corrected TP-Link VLAN configuration for the Purgatory VLAN, which allows the IoT device to reach the Internet through my OPNsense firewall
| VLAN ID | VLAN Name | Ports (Tagged) | Ports (Untagged) |
|---|---|---|---|
| 80 | Purgatory | 1 (firewall) | 24 (IoT device) |
My original PVID for port 24 was correct. It had to have a PVID of 80 because the switch needs to tag packets the IoT device sends to the switch with the VLAN tag 80 for Purgatory.
Once I made these changes, the IoT device was able to connect to its cloud dashboard, and it was appropriately isolated from my home network.
Tips for debugging VLAN issues 🔗︎
One of the biggest challenges in debugging VLAN issues was finding a way to observe what effect my configuration changes had. If I changed a port from a tagged port to an untagged port, how could I test whether that made a difference?
Open up Wireshark 🔗︎
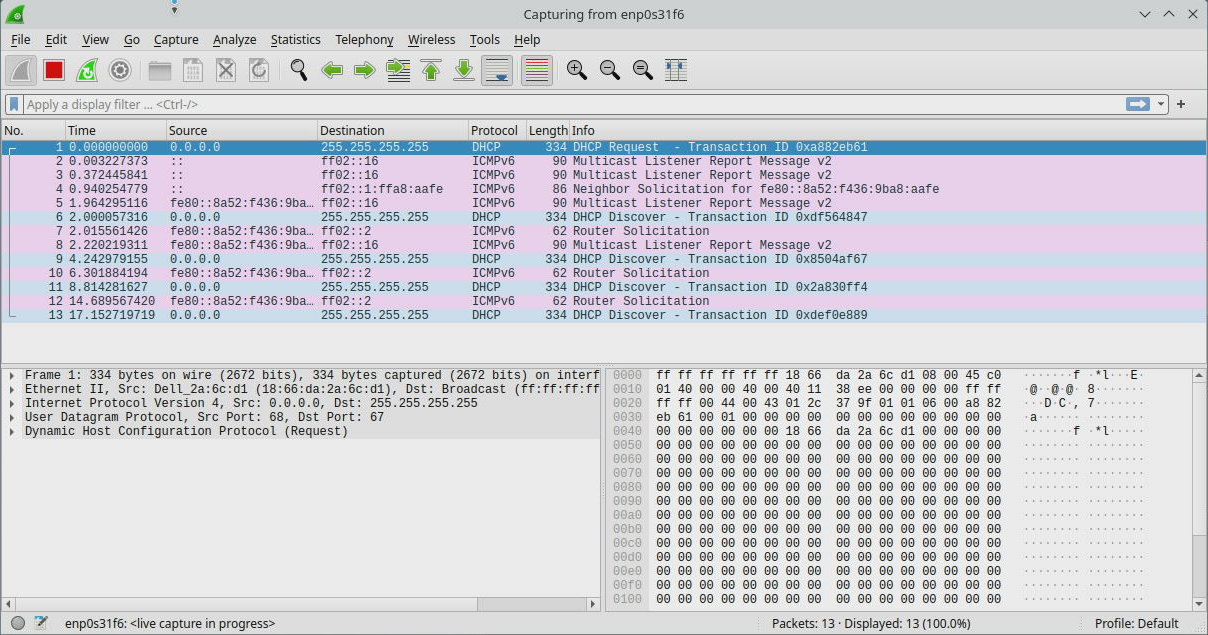
I tried several different command-line tools to diagnose my device’s network status, but the most useful one ended up being Wireshark.
I’m normally reluctant to pull in Wireshark. It’s a fantastic tool, but I always get lost trying to find the information relevant to my problem. I expect that if I open Wireshark, I’m going to have to re-learn its filter query language, and I’m never excited to do that.
In this case, I didn’t have to do anything clever with Wireshark at all. As soon as I pulled it up and saw traffic trying to exit my device and nothing coming back, I realized what was wrong.
Wireshark’s output made me realize when my switch was dropping all traffic from my test device.
Rebooting 🔗︎
One of the major headaches of debugging VLAN issues is that I was never sure when my test computer “reacted” to the new VLAN settings.
I wish this wasn’t the most reliable technique I found for resetting network state, but it was. It’s a pain because it takes 30-90 seconds, depending on what kind of system the host is running, so it’s a slow test cycle. But it did, more than any other method, ensure that the system reset its network state in response to changes I made in the switch’s VLAN configuration.
I’m sure there are better ways, but I didn’t find them.
Using a remote management tool 🔗︎
I’m biased because TinyPilot is my product, but I found TinyPilo helpful in debugging VLAN issues.
I originally tried debugging my VLANs in a VM on my Proxmox VM server, but that was too different from the actual IoT device I was trying to simulate. The Proxmox server is VLAN-aware, whereas I was trying to test a non-VLAN-aware device. Treating the Proxmox server as an untagged port would lock me out of the Proxmox server entirely.
With TinyPilot, I always had access to the device I was testing, even if that device lost network connectivity. And I could do everything from my main desktop because I’m configuring everything through browser tabs.
Demo of controlling a bare-metal test server in one browser window and adjusting the VLAN settings for its switch port in another window
ping 🔗︎
The most reliable method I found to see drops in network connectivity was the tried and true ping utility.
I used two ping commands in two terminal windows. One was to the firewall at 10.0.80.1 and one was to google.com. The windows would tell me when I gained and lost connectivity to my local network and to Google, respectively.
ping 10.0.80.1    # Test connection to router
ping google.com   # Test connection to Internet
ifconfig 🔗︎
I was surprised at how unhelpful the ifconfig command was. I thought that the following commands would force network settings to reset:
IFACE="eth0"

sudo ifconfig "${IFACE}" down && \
  sudo ifconfig "${IFACE}" up && \
  sudo ifconfig "${IFACE}"
Often, running those commands did not reset network state. I’d remove the device from a network at the switch level, then reset the device’s network interface with ifconfig, but the device would still think it had an IP on the old VLAN. It wouldn’t pick up its IP address on the new subnet until I rebooted.
dhclient 🔗︎
I’ve seen others recommend dhclient. This command sequence is supposed to force the host to release its DHCP lease and request a new one:
dhclient -r
dhclient
I couldn’t get that to work on my test systems. The first command just hung and didn’t release the DHCP lease.
nslookup 🔗︎
I tried nslookup, which I hadn’t used much before. It tells you the results of DNS lookups.
nslookup ended up not being useful for VLAN debugging, but it’s a good tool to keep in my back pocket.
Gotchas 🔗︎
These were the gotchas I ran into when configuring VLANs on my TP-Link switch.
- I specified an untagged port for a VLAN, but I forgot to set the PVID for that port also.
- I added a port to a VLAN, but I forgot to add my router’s port to the same VLAN.
- I forgot that if VLAN-aware device A connects to the firewall through VLAN-aware device B, then device B must know about all of A’s VLANs. Otherwise, device B will simply drop all packets for unrecognized VLANs before they can reach the firewall.
- If you don’t hit the “Save” button in the TP-Link navbar, the switch will wipe out your changes the next time the switch reboots.
Recommend
About Joyk
Aggregate valuable and interesting links.
Joyk means Joy of geeK
