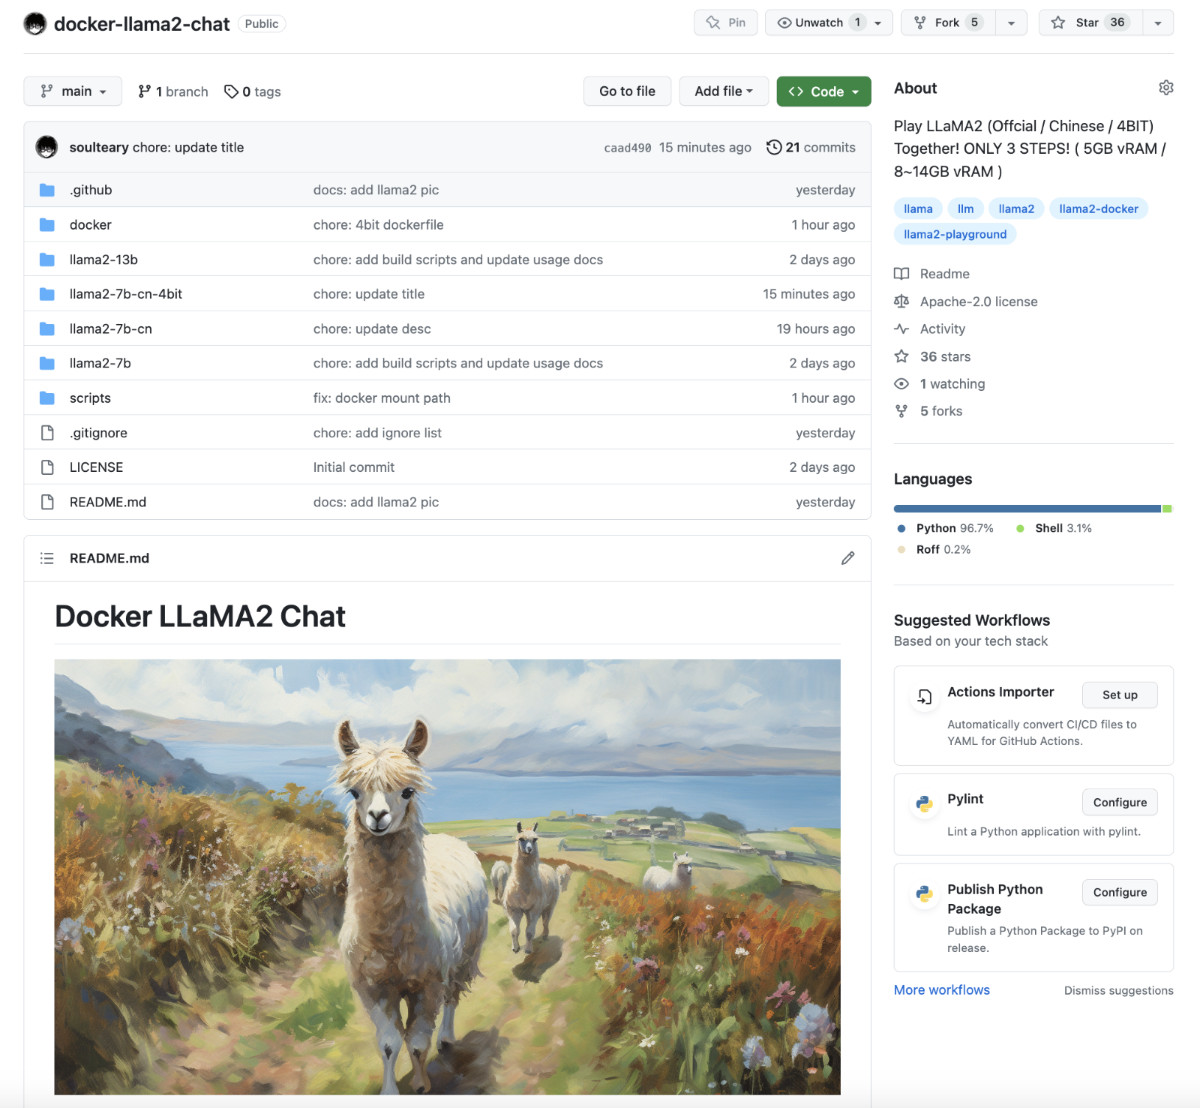

使用 Transformers 量化 Meta AI LLaMA2 中文版大模型
source link: https://soulteary.com/2023/07/22/quantizing-meta-ai-llama2-chinese-version-large-models-using-transformers.html
Go to the source link to view the article. You can view the picture content, updated content and better typesetting reading experience. If the link is broken, please click the button below to view the snapshot at that time.

使用 Transformers 量化 Meta AI LLaMA2 中文版大模型
本篇文章聊聊如何使用 HuggingFace 的 Transformers 来量化 Meta AI 出品的 LLaMA2 大模型,让模型能够只使用 5GB 左右显存就能够运行。
在前两篇文章《使用 Docker 快速上手官方版 LLaMA2 开源大模型》和《使用 Docker 快速上手中文版 LLaMA2 开源大模型》中,我们聊过了如何快速上手和使用新鲜出炉的 Meta AI LLaMA2 大模型。
经过实际测试,不论是原版模型(英文),还是中文版模型(双语),我们都需要 13~14 GB 显存,才能够将其运行起来。
为了能够让更多同学能够玩起来 LLaMA2 模型,我尝试使用HuggingFace 的 Transformers 对模型进行了量化,量化后的模型只需要 5GB 左右显存即可运行。

完整的代码和模型,我已经上传到了 GitHub 和 HuggingFace,感兴趣的同学可以自取。
本文中所有的方法,你都可以参考并在非 Docker 容器中使用。
为了简单省事,可以参考前两篇文章,可以快速的搞定原版或者中文版的 LLaMA2 模型运行环境和 Docker 镜像。如果你本地环境完备,那么忽略 Docker 相关的命令,直接在 Bash 中执行各种具体的程序命令即可。
接下来,我们以使用 LLaMA2 中文模型镜像为例,进行模型的量化操作。
在前文中,我们使用下面的命令快速启动一个 LLaMA2 中文模型应用:
docker run --gpus all --ipc=host --ulimit memlock=-1 --ulimit stack=67108864 --rm -it -v `pwd`/LinkSoul:/app/LinkSoul -p 7860:7860 soulteary/llama2:7b-cn bash
因为要对量化的模型进行保存,我们首先对上面的命令进行简单调整,添加一个参数:
docker run --gpus all --ipc=host --ulimit memlock=-1 --ulimit stack=67108864 --rm -it -v `pwd`/LinkSoul:/app/LinkSoul -v `pwd`/soulteary:/app/soulteary -p 7860:7860 soulteary/llama2:7b-cn bash
这里我们多添加一个参数 -v `pwd`/soulteary:/app/soulteary ,来将当前执行命令的目录下的 soulteary 目录映射到容器内的 /app/soulteary,用来保存未来的量化后的模型文件。
执行命令后,我们将进入环境完备的 Docker 容器内部的交互式命令行环境中。
使用 Transformers 对 LLaMA2 进行量化
这里,我们只使用 HuggingFace 出品的 Transformers 就能够完成一切所需的工作,不需要引入其他的开源项目。
Transformers 量化模型的核心配置
Transformers 的量化功能实现是调用了bitsandbytes。想正确调用这个函数库进行量化,则需要在 AutoModelForCausalLM.from_pretrained 方法中完成 quantization_config 的参数配置。
在 Transformers 的 utils/quantization_config.py#L37 源代码中,我们能够直观的看到函数的运行方式和参数定义,最简单的 4BIT 量化的配置如下:
model = AutoModelForCausalLM.from_pretrained(
	# 要载入的模型名称
    model_id,
	# 仅使用本地模型,不通过网络下载模型
    local_files_only=True,
	# 指定模型精度,保持和之前文章中的模型程序相同 `model.py`
    torch_dtype=torch.float16,
	# 量化配置
    quantization_config = BitsAndBytesConfig(
		# 量化数据类型设置
        bnb_4bit_quant_type="nf4",
		# 量化数据的数据格式
        bnb_4bit_compute_dtype=torch.bfloat16
    ),
	# 自动分配设备资源
    device_map='auto'
)
这里的 bnb_4bit_quant_type 之所以设置为 nf4,是因为在 HuggingFace 的 QLoRA 大模型量化实践中,使用 nf4 (NormalFloat)这种新的数据类型,能够在不牺牲性能的前提下,尽可能节省内存消耗。
而 bnb_4bit_compute_dtype 之所以设置为 torch.bfloat16 则是因为 HuggingFace 的另外一篇说明,我们可以使用这种新的数据格式,来减少传统 FP32 的“空间浪费” 和避免 FP32 转换 FP16 存在的潜在的溢出问题。
编写模型量化程序
综上所述,不难写出一段简单的不到三十行的程序,来完成对于 LLaMA2 模型的量化(相关程序,我上传到了 soulteary/docker-llama2-chat/llama2-7b-cn-4bit/quantization_4bit.py):
import torch
from transformers import AutoModelForCausalLM, BitsAndBytesConfig

# 使用中文版
model_id = 'LinkSoul/Chinese-Llama-2-7b'
# 或者,使用原版
# model_id = 'meta-llama/Llama-2-7b-chat-hf'

model = AutoModelForCausalLM.from_pretrained(
    model_id,
    local_files_only=True,
    torch_dtype=torch.float16,
    quantization_config = BitsAndBytesConfig(
        bnb_4bit_quant_type="nf4",
        bnb_4bit_compute_dtype=torch.bfloat16
    ),
    device_map='auto'
)

import os
output = "soulteary/Chinese-Llama-2-7b-4bit"
if not os.path.exists(output):
    os.mkdir(output)

model.save_pretrained(output)
print("done")
对模型执行量化操作
我们将上面的内容保存为 quantization_4bit.py,放置于和 LLaMA2 模型目录 meta-llama 或 LinkSoul 同级的目录中,然后使用 python quantization_4bit.py 执行程序,即可开始模型的量化工作:
# python quantization_4bit.py

Loading checkpoint shards: 100%|██████████████████████████████████████████████████████████████████| 3/3 [00:15<00:00,  5.01s/it]
done
稍等片刻,就能够在当前程序目录中找到自动创建,并保存来新的模型对目录 soulteary/Chinese-Llama-2-7b-4bit/ 啦:
# du -hs soulteary/Chinese-Llama-2-7b-4bit/

13G	soulteary/Chinese-Llama-2-7b-4bit/

# ls -al soulteary/Chinese-Llama-2-7b-4bit/

total 13161144
drwxr-xr-x 2 root root       4096 Jul 21 18:12 .
drwxr-xr-x 3 root root       4096 Jul 21 18:11 ..
-rw-r--r-- 1 root root        629 Jul 21 18:11 config.json
-rw-r--r-- 1 root root        132 Jul 21 18:11 generation_config.json
-rw-r--r-- 1 root root 9976638098 Jul 21 18:12 pytorch_model-00001-of-00002.bin
-rw-r--r-- 1 root root 3500316839 Jul 21 18:12 pytorch_model-00002-of-00002.bin
-rw-r--r-- 1 root root      26788 Jul 21 18:12 pytorch_model.bin.index.json
补齐模型运行文件
模型量化计算是结束了,但是此时的模型还不能使用,因为缺少了 tokenizer 相关的程序文件。类似 LLaMA2 官方版本和中文版本全部兼容,这里的量化版的模型和量化前的模型,也是全部兼容的。
解决这个问题非常简单,我们只需要将量化前的模型中的文件复制到新模型目录即可:
cp LinkSoul/Chinese-Llama-2-7b/tokenizer.model soulteary/Chinese-Llama-2-7b-4bit/

cp LinkSoul/Chinese-Llama-2-7b/special_tokens_map.json soulteary/Chinese-Llama-2-7b-4bit/

cp LinkSoul/Chinese-Llama-2-7b/tokenizer_config.json soulteary/Chinese-Llama-2-7b-4bit/
调整模型程序
前文中提到,这里量化的程序和原版程序没有使用上的区别,所以多数程序都可以保持原样。不过因为是新的模型文件,还是要进行几处简单的调整的。
更新模型运行程序
前文中提到,这里量化的程序和原版程序没有使用上的区别,所以多数程序都可以保持原样。为了能够让模型正确的通过 4BIT 方式加载和运行,我们需要调整两处内容:
我们需要调整前两篇文章中相关项目使用的 model.py 中的 model_id 变量,以及在 AutoModelForCausalLM.from_pretrained 调用中加上 load_in_4bit=True:
model_id = 'soulteary/Chinese-Llama-2-7b-4bit'

if torch.cuda.is_available():
    model = AutoModelForCausalLM.from_pretrained(
        model_id,
        load_in_4bit=True,
        local_files_only=True,
        torch_dtype=torch.float16,
        device_map='auto'
    )
else:
    model = None
tokenizer = AutoTokenizer.from_pretrained(model_id)
这部分完整的代码在 soulteary/docker-llama2-chat/llama2-7b-cn-4bit/model.py 可以找到。
运行模型应用
模型应用程序,我上传到了soulteary/docker-llama2-chat/llama2-7b-cn-4bit,因为和前两篇文章中没有什么区别,就不展开了。
如果你选择不在容器内运行,直接使用 python app.py ,模型程序就会快速的运行起来。
构建新的容器镜像
构建 4BIT 的镜像,和之前的文章中一样,执行脚本,等待镜像构建完成即可:
bash scripts/make-7b-cn-4bit.sh
如果你之前跟着前两篇文章走过一遍,那么这个应该操作能够在 1~2 秒内完成。
使用容器启动模型应用
使用容器启动应用和之前的文章也并没有什么区别,执行命令,调用下面的脚本即可:
bash scripts/run-7b-cn-4bit.sh
等待日志中出现 Running on local URL: http://0.0.0.0:7860,我们就能够正常进行使用和测试啦。

显存资源使用
显存资源一直是大家都比较关注的部分,模型启动大概需要 5G 出头的显存资源。
+-----------------------------------------------------------------------------+
| NVIDIA-SMI 525.125.06   Driver Version: 525.125.06   CUDA Version: 12.0     |
|-------------------------------+----------------------+----------------------+
| GPU  Name        Persistence-M| Bus-Id        Disp.A | Volatile Uncorr. ECC |
| Fan  Temp  Perf  Pwr:Usage/Cap|         Memory-Usage | GPU-Util  Compute M. |
|                               |                      |               MIG M. |
|===============================+======================+======================|
|   0  NVIDIA GeForce ...  Off  | 00000000:01:00.0 Off |                  Off |
| 31%   61C    P2   366W / 450W |   5199MiB / 24564MiB |     99%      Default |
|                               |                      |                  N/A |
+-------------------------------+----------------------+----------------------+

+-----------------------------------------------------------------------------+
| Processes:                                                                  |
|  GPU   GI   CI        PID   Type   Process name                  GPU Memory |
|        ID   ID                                                   Usage      |
|=============================================================================|
|    0   N/A  N/A      1396      G   /usr/lib/xorg/Xorg                167MiB |
|    0   N/A  N/A      1572      G   /usr/bin/gnome-shell               16MiB |
|    0   N/A  N/A      8595      C   python                           5012MiB |
+-----------------------------------------------------------------------------+
使用一段时间后,依旧还在 6GB 以内,是不是感觉还凑合?
+-----------------------------------------------------------------------------+
| NVIDIA-SMI 525.125.06   Driver Version: 525.125.06   CUDA Version: 12.0     |
|-------------------------------+----------------------+----------------------+
| GPU  Name        Persistence-M| Bus-Id        Disp.A | Volatile Uncorr. ECC |
| Fan  Temp  Perf  Pwr:Usage/Cap|         Memory-Usage | GPU-Util  Compute M. |
|                               |                      |               MIG M. |
|===============================+======================+======================|
|   0  NVIDIA GeForce ...  Off  | 00000000:01:00.0 Off |                  Off |
| 32%   50C    P8    35W / 450W |   5725MiB / 24564MiB |      0%      Default |
|                               |                      |                  N/A |
+-------------------------------+----------------------+----------------------+

+-----------------------------------------------------------------------------+
| Processes:                                                                  |
|  GPU   GI   CI        PID   Type   Process name                  GPU Memory |
|        ID   ID                                                   Usage      |
|=============================================================================|
|    0   N/A  N/A      1402      G   /usr/lib/xorg/Xorg                167MiB |
|    0   N/A  N/A      1608      G   /usr/bin/gnome-shell               16MiB |
|    0   N/A  N/A     24950      C   python                           5538MiB |
+-----------------------------------------------------------------------------+
并不是所有的同学都是人手一张或几张 4090 或者 A100,所以即使量化会带来一些效果的下降,但总归比因为显存不足无法跑起来模型,不能一起玩要好呀。
况且,即使效果下降,依旧是适合做非常多场景下的使用的。后面的文章里,我们再做展开。
工程的艺术就在于 “trade-off”,前一阵线下偶然听到一位新朋友提起,有一种将心底藏了很久的东西唤醒的感觉。
Recommend
-
 18
18
在前面的文章《
-
 6
6
模型杂谈:使用 IN8 量化推理运行 Meta “开源泄露”的大模型(LLaMA)2023年03月13日
-
 5
5
阿里云宣布支持Llama2全系列训练部署 2023...
-
 12
12
使用 Docker 快速上手官方版 LLaMA2 开源大模型2023年07月21日
-
 6
6
快速玩转 Llama2!阿里云机器学习 PAI 推出最佳实践(二)——全参数微调训练 精选 原创 阿里云...
-
 5
5
本文基于阿里云机器学习PAI实现大语言模型Llama2低代码 Lora 微调及部署,适合想要快速开箱体验预训练模型的开发者近期,Meta 宣布大语言模型 Llama2 开源,包含7B、13B、70B不同尺寸,分别对应70亿、130亿、700亿参数量,并在每个规格下都有专门适配对话场景...
-
 7
7
构建能够使用 CPU 运行的 MetaAI LLaMA2 中文大模型2023年07月23日
-
 8
8
使用 Docker 快速上手中文版 LLaMA2 开源大模型2023年07月21日
-
 4
4
AIWeekly via Mac OS 实时周报:ht...
-
 4
4
Llama2开源后,国产大模型在卷什么? 机器之心 发表于 2023年08月19日 06:29
About Joyk
Aggregate valuable and interesting links.
Joyk means Joy of geeK