

Building a tiny 6-drive M.2 NAS with the Rock 5 model B
source link: https://www.jeffgeerling.com/blog/2023/building-tiny-6-drive-m2-nas-rock-5-model-b
Go to the source link to view the article. You can view the picture content, updated content and better typesetting reading experience. If the link is broken, please click the button below to view the snapshot at that time.

Building a tiny 6-drive M.2 NAS with the Rock 5 model B
July 10, 2023
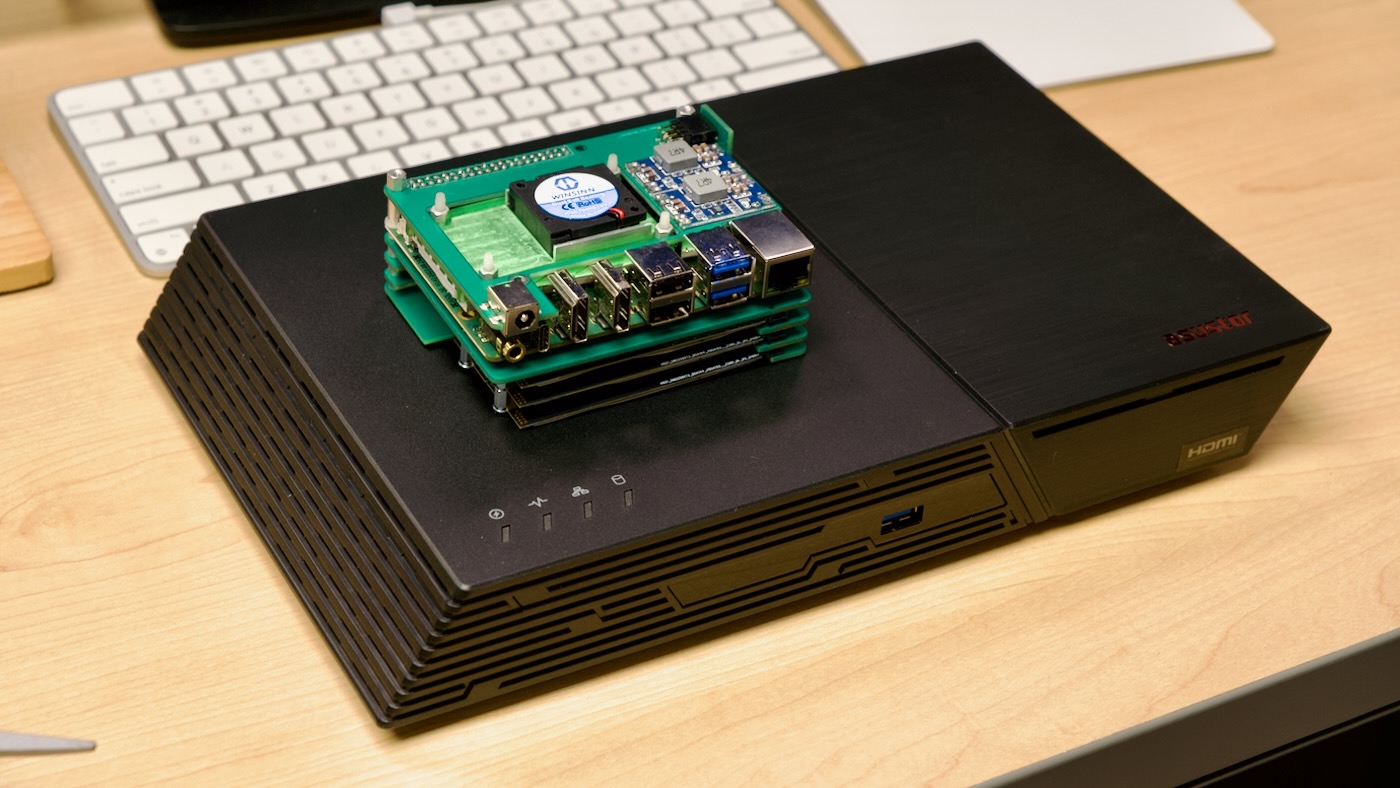
As promised in my video comparing SilverTip Lab's DIY Pocket NAS (express your interest here) to the ASUSTOR Flashstor 12 Pro, this blog post outlines how I built a 6-drive M.2 NAS with the Rock 5 model B.
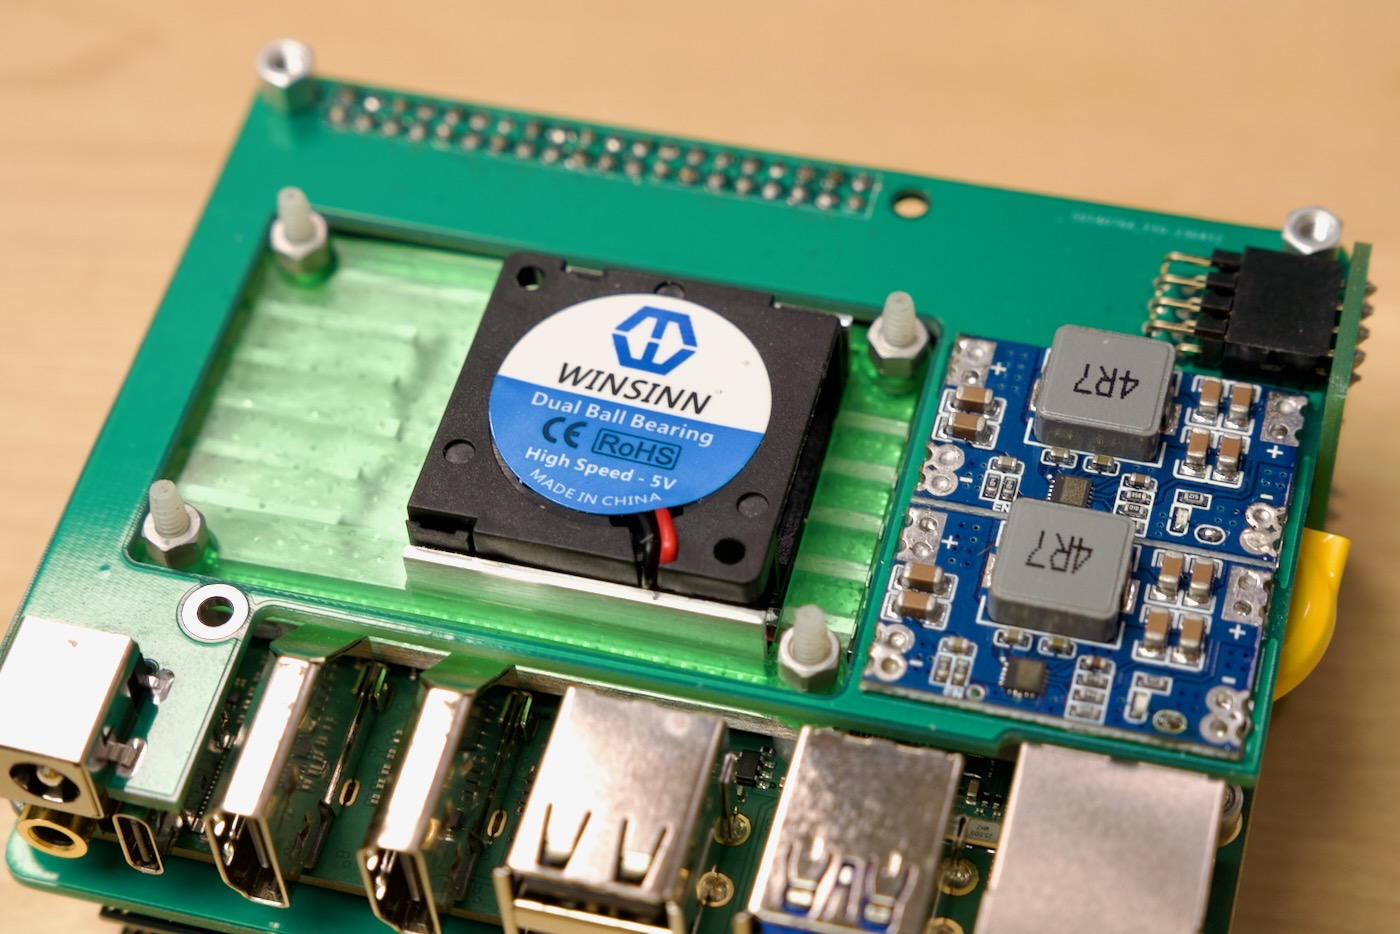
The Rockchip RK3588 SoC on the Rock 5 packs an 8-core CPU (4x A76, 4x A55, in a 'big.LITTLE' configuration). This SoC powers a PCIe Gen 3 x4 M.2 slot on the back, which is used in this tiny 6-drive design to make a compact, but fast, all-flash NAS:
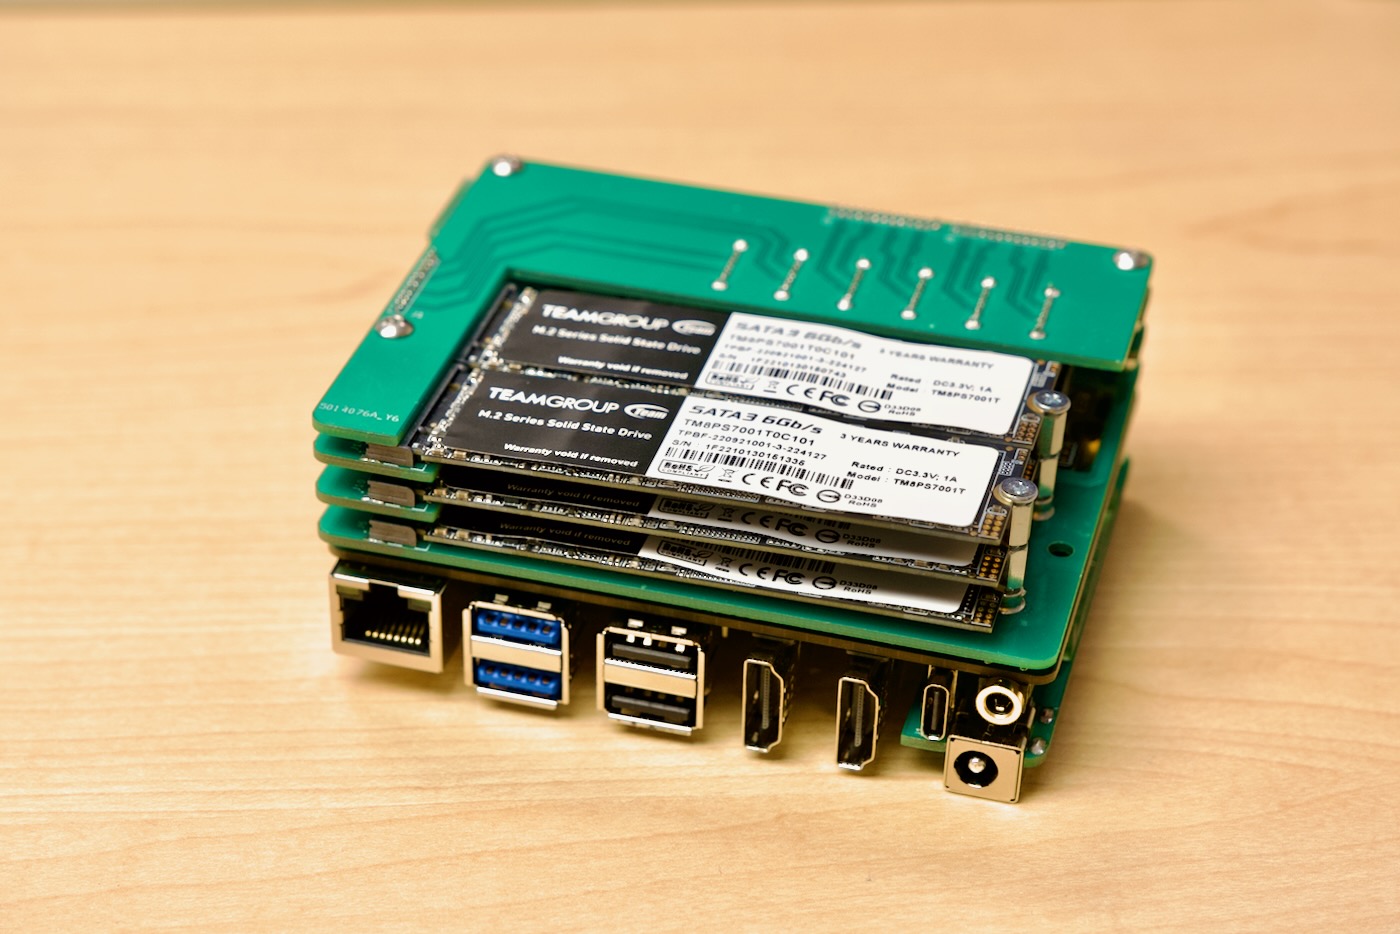
Pair that with the built-in 2.5 Gbps Ethernet port on the Rock 5, and... could this little package compete against commercial offerings like those from QNAP and ASUSTOR? It's certainly a lot more compact:
Watch the video linked at the top of this post to find out. And if you're interested in a Pocket NAS-style device (the one I tested is just a prototype), express your interest here!
The rest of this blog post details how I set up OpenMediaVault on the Rock 5 to test SMB sharing performance on my network.
Preparing the Rock 5 for OMV (Armbian setup)
- Download Armbian 23.02 Bullseye CLI (minimal) (Go to 'Archived versions for reference and troubleshooting) – the specific version I downloaded was
Armbian_23.02.2_Rock-5b_bullseye_legacy_5.10.110_minimal.img.xz - Flash the ISO to a microSD card with Etcher
- Insert the microSD card and boot the Rock 5
- Log into the Rock 5 via SSH and follow the first time setup (initial login is
root/1234) - Install
git:apt update && apt install -y git - Get the fan set up (see separate instructions below)
- Run updates:
sudo apt update && sudo apt upgrade -y - Reboot:
sudo reboot
Set up the PWM fan
- Clone the fan control software to the Rock 5:
git clone https://github.com/XZhouQD/Rock5B_Naive_Pwm_Fan.git - Switch to root user:
sudo su - Enter the fan control directory:
cd Rock5B_Naive_Pwm_Fan - Copy the fan control binary:
cp fan_pwm /usr/local/bin/. - Make it executable:
chmod +x /usr/local/bin/fan_pwm - Set up the fan control systemd service:
cp fan_pwm.service /etc/systemd/system/. - Reload systemd:
systemctl daemon-reload - Start the fan service and enable it at system boot:
systemctl start fan_pwm && systemctl enable fan_pwm
As an alternative to the PWM fan control app detailed above, you could instead use https://github.com/pymumu/fan-control-rock5b.
Install OMV
The last step is to install OpenMediaVault, a nice NAS-style management UI and ecosystem that works great on Arm boards like the Rock 5 model B.
- Install OMV:
sudo wget -O - https://github.com/OpenMediaVault-Plugin-Developers/installScript/raw/master/install | sudo bash - After reboot, access the IP address of the Rock 5, and log into openmediavault with login
admin/openmediavault. In OMV, to create a SMB share for testing (make sure you click 'Apply' when it pops up in the UI after each step!):
- Go to Storage > Software RAID, and add a new software RAID device. I chose three drives and RAID 5, but you can choose what you want.
- While the RAID volume is sycning, go to File Systems, and add a new one; I chose EXT4 for mine.
- After the File System is created, it is not mounted. You have to click on it and click the 'Play' button to mount it.
- Go to 'Shared Folders' and create a new one; I created one with the defaults called 'test'.
- Go to Services > SMB/CIFS > Settings, and check the 'Enabled' checkbox. Click 'Save' at the bottom of the settings page.
- Go to Services > SMB/CIFS > Shares, and add a new SMB Share. Select the Shared Folder you created earlier, and configure permissions as you see fit. I enabled full public read/write access for testing.
- Wait for OMV to finish syncing the RAID 5 array (you can monitor progress under Storage > Software RAID).
- Once the array is finished syncing, the 'State' should read "clean"
- On another computer on the network, access the SMB share. On my Mac, in the Finder, I chose Go > Connect to Server (⌘ K), then entered the address
smb://[ip address of Rock 5]/test
Log in using a user account on the system, and you can now copy files to and from the SMB share to your heart's content!
On the Rock 5 model B, I was getting around 100 MB/sec write speeds, and 200 MB/sec read speeds, using a 3-drive RAID 5 volume over my 2.5 Gbps network. Write speeds were an improvement over the Raspberry Pi CM4 NAS I built last year, but not double or triple the speed as I was hoping. And SMB read speeds could hit about 1.9-2.1 Gbps but still couldn't saturate the Ethernet connection. So... good, but not as marked an improvement over a slower and older Pi as I was hoping.
For more details, and a full comparison, watch the full video on the Pocket NAS and Flashstor 12 Pro.
Recommend
About Joyk
Aggregate valuable and interesting links.
Joyk means Joy of geeK