
【vue3】组合式API之setup()介绍与reactive()函数的使用
source link: https://blog.51cto.com/u_16171599/6561269
Go to the source link to view the article. You can view the picture content, updated content and better typesetting reading experience. If the link is broken, please click the button below to view the snapshot at that time.

==>😉博主:初映CY的前说(前端领域) ,📒本文核心:setup()概念、 reactive()的使用
【前言】vue3作为vue2的升级版,有着很多的新特性,其中就包括了组合式API,也就是是 Composition API。学习组合式API有什么优点呢?之前的vue2中结构不是挺不错的吗?那么接下来的事件,我将带着你从浅到深分析为什么我们需要学习组合式API以及我们的setup()函数作为入口函数的一个基本的使用方式。
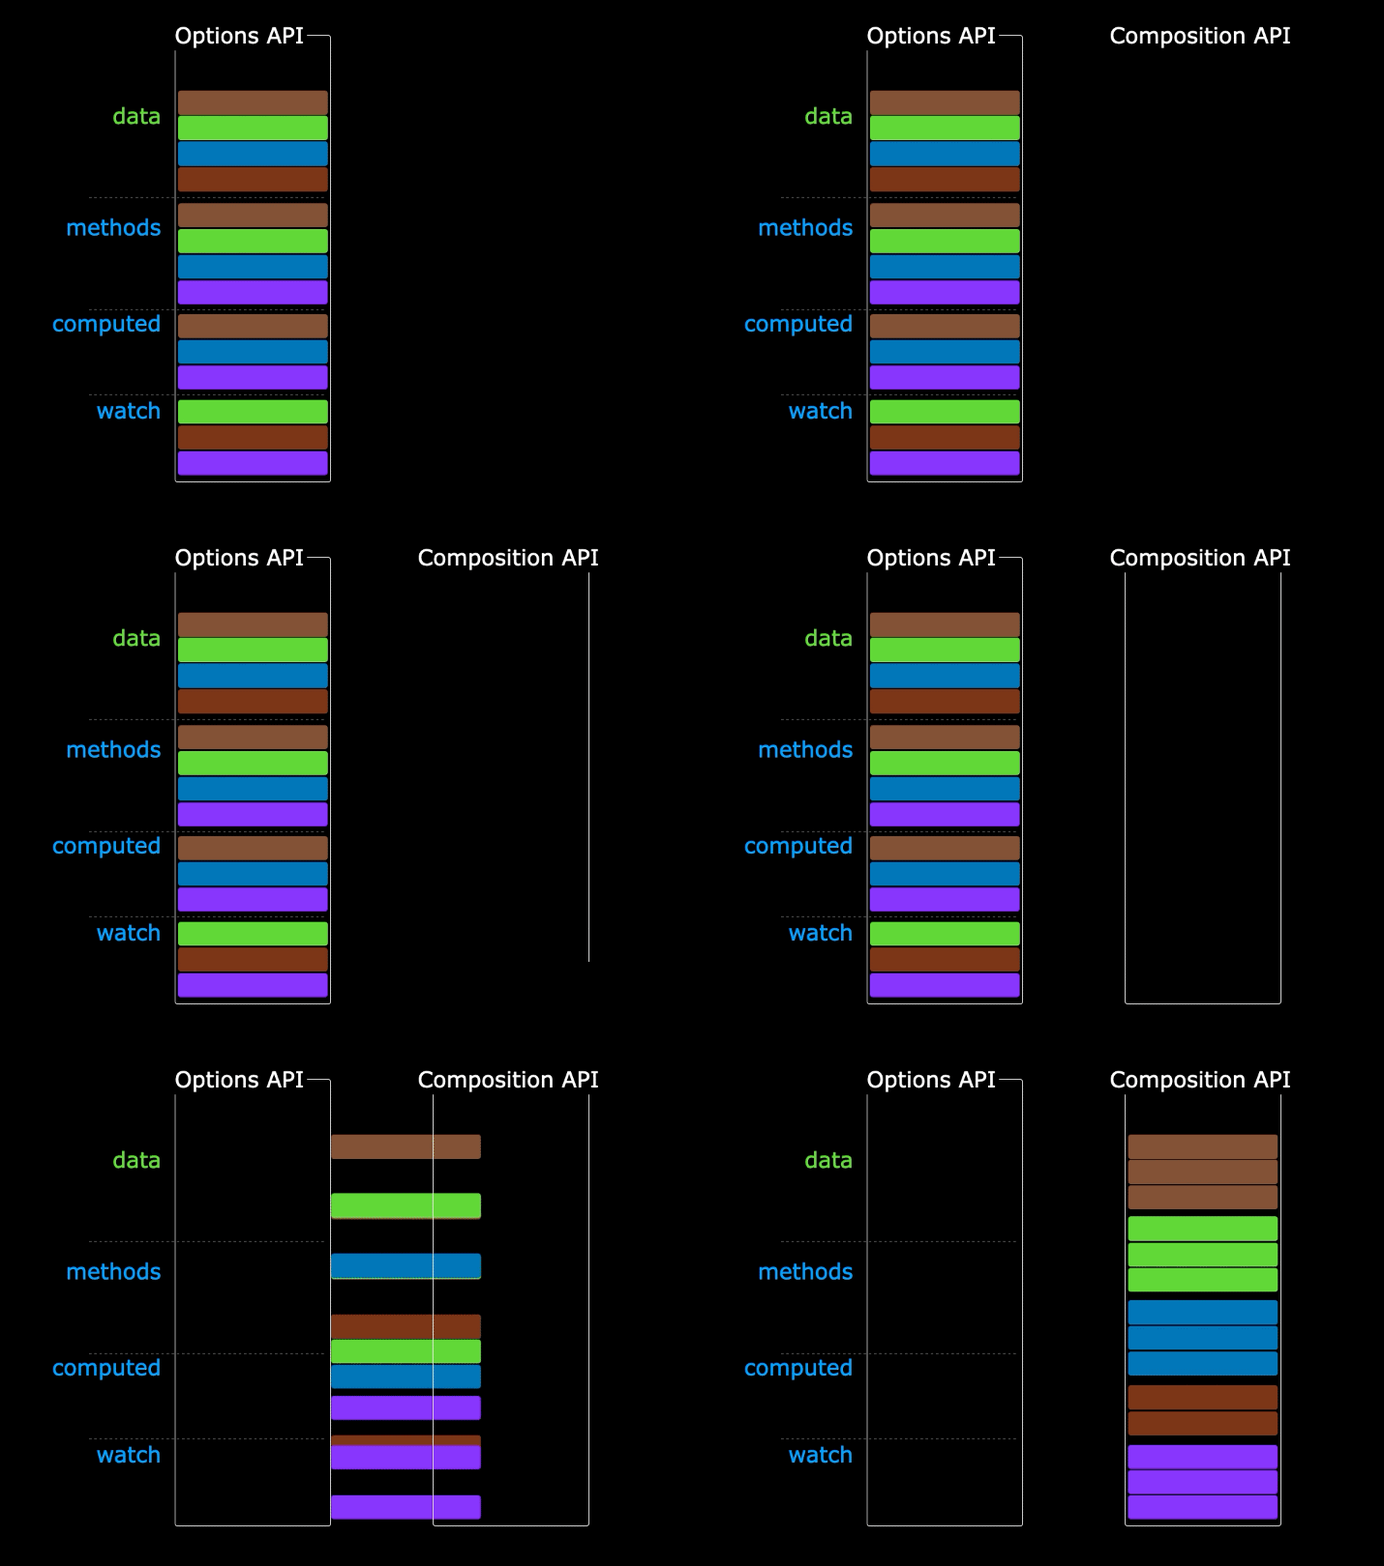
- ⭐一、组合式API对比vue2项目结构
- 在vue2当中
- 在vue3当中
- ⭐二、setup()函数的使用
- 2.1setup()函数的基础概念
- 2.2.setup()初体验
- 2.3.reactive()函数
- 2.3.1reactive()的进一步抽离
- 2.3.2reactive()再进行进一步文件拆分并且引入
⭐一、组合式API对比vue2项目结构
在vue2当中
- 1.优点:易于学习和使用,写代码的位置已经约定好。
- 2.缺点:对于大型项目,不利于代码的复用、不利于管理和维护。
- 3.解释:同一功能的数据和业务逻辑分散在同一个文件的 N 个地方,随着业务复杂度的上升,我们需要经常在类似于data()以及methods中进行来回的处理
在vue3当中
- 1.优点:可以把同一功能的数据和业务逻辑组织到一起,方便复用和维护。
- 2.缺点:需要有良好的代码组织和拆分能力,相对没有 Vue2 容易上手。
- 3.解释:注意:为了能让大家较好的过渡到 Vue3.0 版本,目前也是支持 Vue2.x 选项 API 的写法。

⭐二、setup()函数的使用
2.1setup()函数的基础概念
Vue3 中的 setup() 是 Vue3 新增的组件配置项,用于替代 Vue2 中的 data()、methods()、computed() 等配置项。setup() 提供了更简洁的编写方式,且能够更好地利用 Vue3 提供的 Composition API。setup() 函数接受两个参数,分别是 props 和 context。其中,props 是组件接收的属性值,context 包含了一些组件的配置信息。
- 1.是什么:setup 是 Vue3 中新增的组件配置项,作为组合 API 的入口函数。
- 2.执行时机:实例创建前调用,甚至早于 Vue2 中的 beforeCreate。
- 3.注意点:由于执行 setup 的时候实例还没有 created,所以在 setup 中是不能直接使用 data 和 methods 中的数据的,所以 Vue3 setup 中的 this 也被绑定为了 undefined。
虽然 Vue2 中的 data 和 methods 配置项虽然在 Vue3 中也能使用,但不建议了,建议数据和方法都写在 setup 函数中,并通过 return 进行返回可在模版中直接使用(一般情况下 setup 不能为异步函数)。
2.2.setup()初体验
App.vue
<template>
    <h1 @click="say()">{{ msg }}</h1>
</template>
<script>
    export default {
        setup() {
            const msg = 'Hello Vue3'
            const say = () => {
                console.log(msg)
            }
            return { msg, say }
        },
    }
</script>
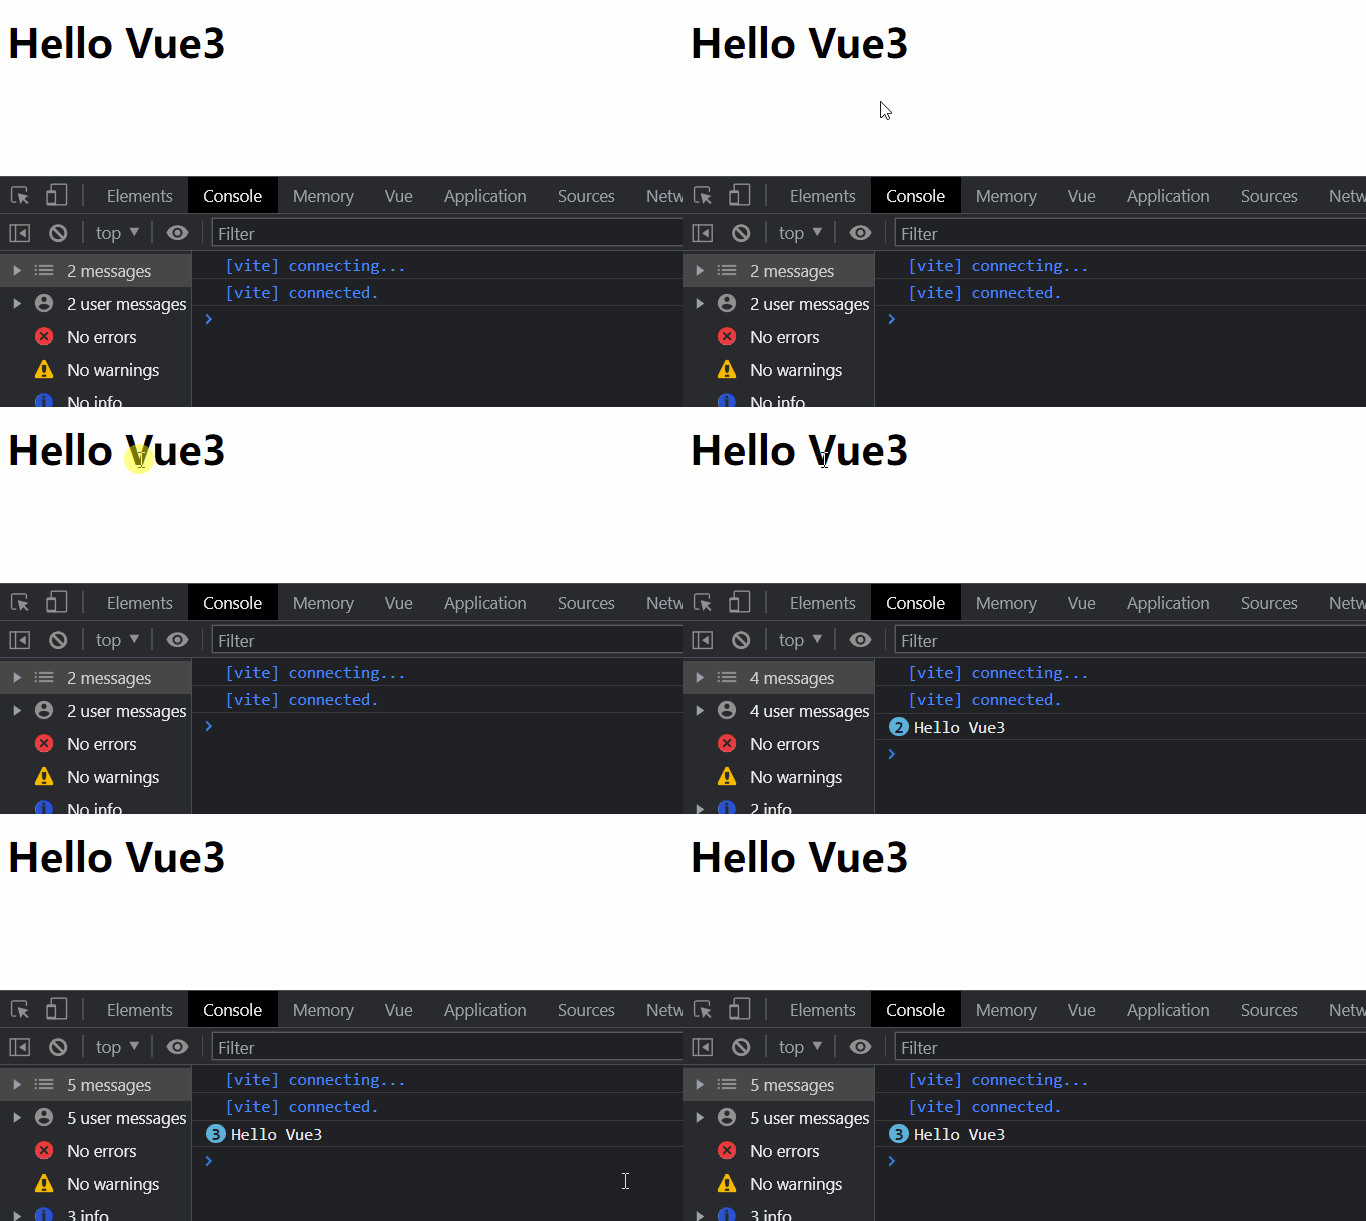
效果查看:

注意:酷似于vue2中的data()与methods都是需要写在return才可作为结果进行调用。
【小小面试题补充】setup 中 return 的一定只能是一个对象吗?(setup 也可以返回一个渲染函数)
App.vue
<script>
    import { h } from 'vue'
    export default {
        name: 'App',
        setup() {
            return () => h('h2', 'Hello Vue3')
        },
    }
</script>
控制台则是打印出了h2标签的Hello Vue3。
2.3.reactive()函数
使用 reactive 函数包装数组为响应式数据。reactive 是一个函数,用来将普通对象/数组包装成响应式式数据使用,无法直接处理基本数据类型(因为它是基于 Proxy 的,而 Proxy 只能代理的是对象)。
比如当我有一个需求:点击删除当前行信息
App.vue
<template>
    <ul>
        <li v-for="(item, index) in arr" :key="item" @click="removeItem(index)">{{ item }}</li>
    </ul>
</template>

<script>
    export default {
        name: 'App',
        setup() {
            const arr = ['a', 'b', 'c']
            const removeItem = (index) => {
                arr.splice(index, 1)
            }
            return {
                arr,
                removeItem,
            }
        },
    }
</script>
通过vueTools查看,我点击过后数据是被删除了,但页面上并没有事实的渲染出来

此时,使用 reactive()包装数组使变成响应式数据,别忘了导入
<template>
    <ul>
        <li v-for="(item, index) in arr" :key="item" @click="removeItem(index)">{{ item }}</li>
    </ul>
</template>

<script>
    import { reactive } from 'vue'
    export default {
        name: 'App',
        setup() {
            const arr = reactive(['a', 'b', 'c'])
            const removeItem = (index) => {
                arr.splice(index, 1)
            }
            return {
                arr,
                removeItem,
            }
        },
    }
</script>
此刻页面也就具有了响应式,点击时删除,页面则是响应式的
同理:我们用reactive()来包裹我们的对象来使用
<template>
    <form @submit.prevent="handleSubmit">
        <input type="text" v-model="user.id" />
        <input type="text" v-model="user.name" />
        <input type="submit" />
    </form>
    <ul>
        <li v-for="(item, index) in state.arr" :key="item.id" @click="removeItem(index)">{{ item.name }}</li>
    </ul>
</template>

<script>
    import { reactive } from 'vue'
    export default {
        name: 'App',
        setup() {
            const state = reactive({
                arr: [
                    {
                        id: 0,
                        name: 'ifer',
                    },
                    {
                        id: 1,
                        name: 'elser',
                    },
                    {
                        id: 2,
                        name: 'xxx',
                    },
                ],
            })
            const removeItem = (index) => {
                // 默认是递归监听的,对象里面任何一个数据的变化都是响应式的
                state.arr.splice(index, 1)
            }

            const user = reactive({
                id: '',
                name: '',
            })
            const handleSubmit = () => {
                state.arr.push({
                    id: user.id,
                    name: user.name,
                })
                user.id = ''
                user.name = ''
            }
            return {
                state,
                removeItem,
                user,
                handleSubmit,
            }
        },
    }
</script>
上述代码的解意:
我定义了输入框,定义了删除、添加事件的操作,通过v-model打到双向绑定数据来完成对我的数据进行增加与删除。
到目前你是不是对setup()的使用有了更加清晰的认识呢?下面再来简化一下我们的写法。
2.3.1reactive()的进一步抽离
优化:将同一功能的数据和业务逻辑抽离为一个函数,代码更易读,更容易复用。
<template>
    <form @submit.prevent="handleSubmit">
        <input type="text" v-model="user.id" />
        <input type="text" v-model="user.name" />
        <input type="submit" />
    </form>
    <ul>
        <li v-for="(item, index) in state.arr" :key="item.id" @click="removeItem(index)">{{ item.name }}</li>
    </ul>
</template>

<script>
    import { reactive } from 'vue'
    function useRemoveItem() {
        const state = reactive({
            arr: [
                {
                    id: 0,
                    name: 'ifer',
                },
                {
                    id: 1,
                    name: 'elser',
                },
                {
                    id: 2,
                    name: 'xxx',
                },
            ],
        })
        const removeItem = (index) => {
            state.arr.splice(index, 1)
        }
        return { state, removeItem }
    }
    function useAddItem(state) {
        const user = reactive({
            id: '',
            name: '',
        })
        const handleSubmit = () => {
            state.arr.push({
                id: user.id,
                name: user.name,
            })
            user.id = ''
            user.name = ''
        }
        return {
            user,
            handleSubmit,
        }
    }
    export default {
        name: 'App',
        setup() {
            const { state, removeItem } = useRemoveItem()
            const { user, handleSubmit } = useAddItem(state)
            return {
                state,
                removeItem,
                user,
                handleSubmit,
            }
        },
    }
</script>将方法抽离出来,用类似于导入的方式进行一个抽离,将数据与方法放在一起,便于我们的统一管理。
2.3.2reactive()再进行进一步文件拆分并且引入

App.vue
<template>
  <form >
      <input type="text" v-model="user.id" />
      <input type="text" v-model="user.name" />
      <button type="submit" @click.prevent="submit">提交</button>
  </form>
  <ul>
      <li v-for="(item, index) in state.arr" :key="item.id" @click="removeItem(index)">{{ item.name }}</li>
  </ul>
</template>

<script>
import {useRemoveItem,handleSubmit} from './hooks'
  export default {
      name: 'App',
      setup() {
          const { state, removeItem } = useRemoveItem()
          const { user, submit } = handleSubmit(state)
          return {
              state,removeItem,user,submit
          }
      },
  }
</script>
hooks/index.js
import { reactive } from 'vue'
export const useRemoveItem=()=> {
  const state= reactive( {
          arr: [
                    {
                        id: 0,
                        name: 'ifer',
                    },
                    {
                        id: 1,
                        name: 'elser',
                    },
                    {
                        id: 2,
                        name: 'xxx',
                    },
                ]
              })
  const removeItem=(index)=>{
      state.arr.splice(index,1)
            console.log(state.arr);
          }
      return { state, removeItem }
}
export const handleSubmit=(state)=>{
  const user = reactive({
                id: '',
                name: '',
            })
            console.log(1);
  const submit = () => {
       state.arr.push({
        ...user
       })
       user.id = ''
       user.name = ''
            }
      return { user, submit }
}
至此本文结束,愿你有所收获!
期待大家的关注与支持! 你的肯定是我更新的最大动力!!!
Recommend
About Joyk
Aggregate valuable and interesting links.
Joyk means Joy of geeK