

Figma Tips and Tricks for Mastering the Left Panel to Boost Productivity | UX Pl...
source link: https://uxplanet.org/figma-tips-95b6c38b046b
Go to the source link to view the article. You can view the picture content, updated content and better typesetting reading experience. If the link is broken, please click the button below to view the snapshot at that time.

Figma Tips for Mastering the Left Panel and Boosting Productivity
Unlock Your Figma Potential: Expert Tips for Leveraging the Left Panel in Your Design Workflow
Using Figma is more fun when you know it well. It is true that Just knowing the tools isn’t enough to get a UX design job. But being good with this design tool can give you a big plus. This is because you’ll work faster, saving time that you can use for other important UX and UI design tasks.
Last month, I wrote about how to use the right panel in Figma. This time, I want to talk about the left panel. Even though the left panel seems simple, there’s more to it than you might think. It has lots of helpful features that can make your work easier. Let’s start.
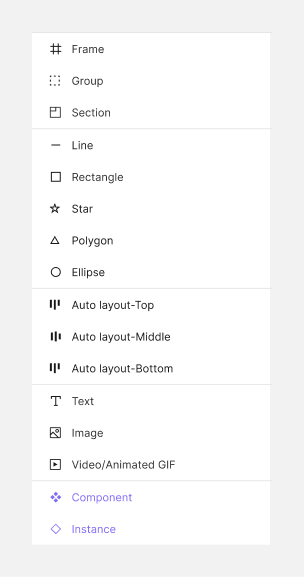
The icons in the tree
Have you ever thought about the icons on the tree? Here’s an image with all of them to help you know what each one means.
Change the names of multiple layers in bulk action
You can change all the names of the layers one by one or change them in bulk.
Select all of them, hit CMD+R (CTRL+R on Windows), and a modal will open. Then you can type the name you want, and all will change.
The modal has many options like changing all the names, changing part of the name, and also numbering the screens, which is very useful for this case:
Imagine this: you’re working on a flow with many screens and want to number them so each number is the next step, for example, a login flow. First, the user adds the username, then the password, and then clicks the login button.
If you want to number them, select all, click CMD+R, click the number button, and hit Rename. Figma will and the numbers one after the other.
You should be aware that the order will be the same as in the tree, not the order on the canvas.

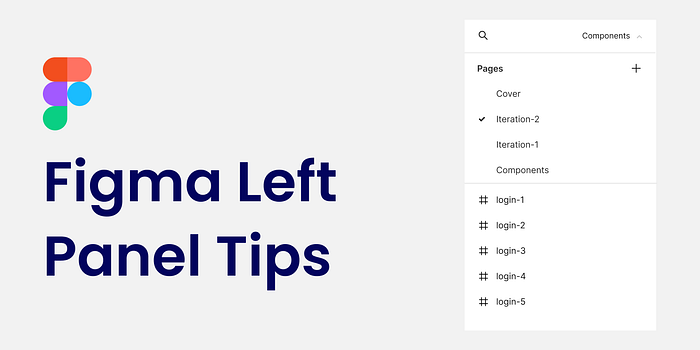
The search feature
The search feature is an excellent option if you’re working on a large Figma file and want to find a specific component or element on a specific page or the whole file. You can type the name and search for it.
Additionally, you can filter the search by Text, Frame/Group, Component, Instance, Image, Shape, Other, Match case, and Whole words. This will give you the ability to find the object quickly.
Apart from that, the search has the option to replace. This is a great option for this case: You create screens with a button and notice that it has a misspelling in a word. You can search for the word and replace it with one click.
Pro tip: You can also click on each result, and Figma will show you where the element appears on the screen.
Navigate with the keyboard inside a frame
It’s always a great idea to improve your design workflow by working more with the keyboard than the mouse because it’s faster.
The next tip is one of the best productivity Figma tips. You can select the layers below by clicking on enter or the layer above by clicking Shift+Enter.
I use this a lot when I work with components with nested layers from the design system, and I want to select a layer above the selected layer. So instead of moving the mouse and selecting it from the tree, I select it by clicking Shift+Enter.
Give it a try; I promise you that you’ll like this trick.

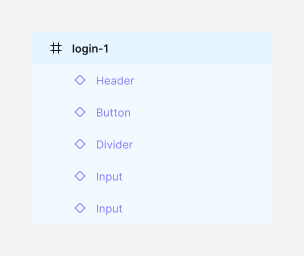
When selecting an object, the tree marks what’s inside
When you click on an object that includes other objects inside, you’ll see the selected layer, shown in strong blue, and what’s inside it, shown in soft blue.
Get rid of unused layers and keep things clean and tidy
If you have one or multiple objects or layers you’re not using anymore in your Figma file, eliminate them. This keeps the tree and the canvas clean and stops you from getting confused with unnecessary information on the screen.
I know it sounds obvious, but I’ve seen a lot of designers working in chaos, which slows them down.
Moving objects inside the Figma auto layout
When you select an object inside an auto layout, you can move it above or under another object in the tree with the mouse. However, a better way would be to use your keyboard’s up and down keys.
For instance, you can use this to move a row to the top or bottom when working with tables.
Naming your layers (only for Figma components)
There’s always a debate about whether organizing the names of the layers in the tree is necessary.
Some people say yes, and some people say no. For me, it’s unnecessary to name the objects in the tree except for one case, the components.
There are two reasons for this:
Working organized: Components are an important part of our workflow, and keeping them organized is beneficial for the people that build the Figma design system UI kit because it makes them work more comfortably.
Swapping components: If the names are different inside components that you can swap, some options you selected can change. Let’s say you have a button with an icon inside, and you change the icon’s color and then replace the icon itself. The color you choose will be different. If you want to learn more about this case, you can read my article.

Collapse all the layers
If you have many layers open, making your work difficult to manage, hit OPTION+L (ALT+L in Windows), and all the layers will collapse.

Moving layers up and down
If you want to move layers up and down, just hit OPTION+CMD+↑ or OPTION+CMD+↓ (CTRL+ALT+↑ or CTRL+ALT+↓ on a PC).
It won’t change your entire workflow, but you will work much faster if you work with the keyboard.

Select the next layer
If you want to select the next layer at the same level, just hit the Tab button.

Hide/show the left and right panels (Figma sidebars disappeared)
If you want to hide or show the left and right panels, click the shortcut Shift+/ or right-click and select “Show/Hide UI.”
This is useful when:
- You want to present something on the page and use the whole screen.
- If you accidentally hide the interface and don’t know how to show it again (it happens to all of us 🙂).

To summarize
In this article, I shared with you some tips and tricks on how you could work better with the Figma left panel. We reviewed some great features like the search and the changing names in bulk action that could save you a lot of time when working with many layers in Figma.
Apart from these two important features, we looked at other small tips, like collapsing all the layers, understanding the icons inside the tree, and navigating with the keyboard inside a frame.
Personal Figma tutoring with me
Get one-on-one tutoring with me! Whether you’re a beginner or looking to refine your skills, I’ll work with you to help you gain confidence and improve your Figma skills as a designer.
Ready to take the first step? Simply fill out this form, and let’s get started!
Thank you for reading the article. I hope this article helped you understand how to work better with the left panel. Please feel free to share it with your friends or team members, and if you have any questions, please let me know.
If you enjoyed my article, I suggest you follow me and subscribe so you’ll receive an email whenever I post.
Want to get the most out of Medium? Click here to become a member. As a member, you’ll support me and lots of other writers.
Recommend
About Joyk
Aggregate valuable and interesting links.
Joyk means Joy of geeK