
5

在树莓派上实现numpy的conv2d卷积神经网络做图像分类,加载pytorch的模型参数,推理mn...
source link: https://www.cnblogs.com/LiuXinyu12378/p/17444152.html
Go to the source link to view the article. You can view the picture content, updated content and better typesetting reading experience. If the link is broken, please click the button below to view the snapshot at that time.

在树莓派上实现numpy的conv2d卷积神经网络做图像分类,加载pytorch的模型参数,推理mnist手写数字识别,并使用多进程加速
这几天又在玩树莓派,先是搞了个物联网,又在尝试在树莓派上搞一些简单的神经网络,这次搞得是卷积识别mnist手写数字识别
训练代码在电脑上,cpu就能训练,很快的:
import torch
import torch.nn as nn
import torch.optim as optim
from torchvision import datasets, transforms
import numpy as np

# 设置随机种子
torch.manual_seed(42)

# 定义数据预处理
transform = transforms.Compose([
    transforms.ToTensor(),
    # transforms.Normalize((0.1307,), (0.3081,))
])

# 加载训练数据集
train_dataset = datasets.MNIST('data', train=True, download=True, transform=transform)
train_loader = torch.utils.data.DataLoader(train_dataset, batch_size=64, shuffle=True)

# 构建卷积神经网络模型
class Net(nn.Module):
    def __init__(self):
        super(Net, self).__init__()
        self.conv1 = nn.Conv2d(1, 10, kernel_size=5)
        self.pool = nn.MaxPool2d(2)
        self.fc = nn.Linear(10 * 12 * 12, 10)

    def forward(self, x):
        x = self.pool(torch.relu(self.conv1(x)))
        x = x.view(-1, 10 * 12 * 12)
        x = self.fc(x)
        return x

model = Net()

# 定义损失函数和优化器
criterion = nn.CrossEntropyLoss()
optimizer = optim.SGD(model.parameters(), lr=0.01, momentum=0.5)

# 训练模型
def train(model, device, train_loader, optimizer, criterion, epochs):
    model.train()
    for epoch in range(epochs):
        for batch_idx, (data, target) in enumerate(train_loader):
            data, target = data.to(device), target.to(device)
            optimizer.zero_grad()
            output = model(data)
            loss = criterion(output, target)
            loss.backward()
            optimizer.step()
            if batch_idx % 100 == 0:
                print(f'Train Epoch: {epoch+1} [{batch_idx * len(data)}/{len(train_loader.dataset)} '
                      f'({100. * batch_idx / len(train_loader):.0f}%)]\tLoss: {loss.item():.6f}')

# 在GPU上训练(如果可用),否则使用CPU
device = torch.device("cuda" if torch.cuda.is_available() else "cpu")
model.to(device)

# 训练模型
train(model, device, train_loader, optimizer, criterion, epochs=5)

# 保存模型为NumPy数据
model_state = model.state_dict()
numpy_model_state = {key: value.cpu().numpy() for key, value in model_state.items()}
np.savez('model.npz', **numpy_model_state)
print("Model saved as model.npz")
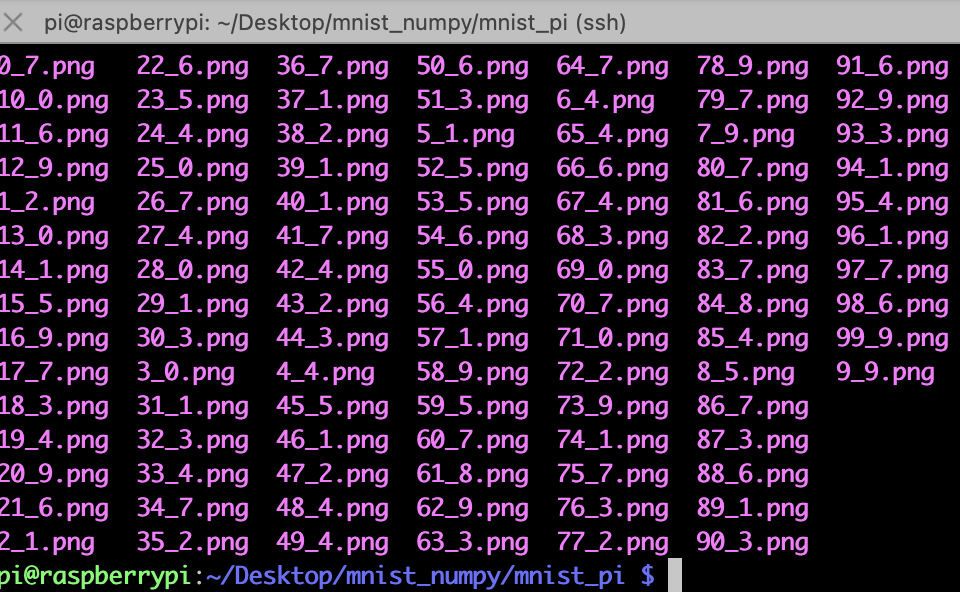
然后需要自己在dataset里导出一些图片:我保存在了mnist_pi文件夹下,“_”后面的是标签,主要是在pc端导出保存到树莓派下
树莓派推理端的代码,需要numpy手动重新搭建网络,并且需要手动实现conv2d卷积神经网络和maxpool2d最大池化,然后加载那些保存的矩阵参数,做矩阵乘法和加法
import numpy as np
import os
from PIL import Image
def conv2d(input, weight, bias, stride=1, padding=0):
batch_size, in_channels, in_height, in_width = input.shape
out_channels, in_channels, kernel_size, _ = weight.shape
# 计算输出特征图的大小
out_height = (in_height + 2 * padding - kernel_size) // stride + 1
out_width = (in_width + 2 * padding - kernel_size) // stride + 1
# 添加padding
padded_input = np.pad(input, ((0, 0), (0, 0), (padding, padding), (padding, padding)), mode='constant')
# 初始化输出特征图
output = np.zeros((batch_size, out_channels, out_height, out_width))
# 执行卷积操作
for b in range(batch_size):
for c_out in range(out_channels):
for h_out in range(out_height):
for w_out in range(out_width):
h_start = h_out * stride
h_end = h_start + kernel_size
w_start = w_out * stride
w_end = w_start + kernel_size
# 提取对应位置的输入图像区域
input_region = padded_input[b, :, h_start:h_end, w_start:w_end]
# 计算卷积结果
x = input_region * weight[c_out]
bia = bias[c_out]
conv_result = np.sum(x, axis=(0,1, 2)) + bia
# 将卷积结果存储到输出特征图中
output[b, c_out, h_out, w_out] = conv_result
return output
def max_pool2d(input, kernel_size, stride=None, padding=0):
batch_size, channels, in_height, in_width = input.shape
if stride is None:
stride = kernel_size
out_height = (in_height - kernel_size + 2 * padding) // stride + 1
out_width = (in_width - kernel_size + 2 * padding) // stride + 1
padded_input = np.pad(input, ((0, 0), (0, 0), (padding, padding), (padding, padding)), mode='constant')
output = np.zeros((batch_size, channels, out_height, out_width))
for b in range(batch_size):
for c in range(channels):
for h_out in range(out_height):
for w_out in range(out_width):
h_start = h_out * stride
h_end = h_start + kernel_size
w_start = w_out * stride
w_end = w_start + kernel_size
input_region = padded_input[b, c, h_start:h_end, w_start:w_end]
output[b, c, h_out, w_out] = np.max(input_region)
return output
# 加载保存的模型数据
model_data = np.load('model.npz')
# 提取模型参数
conv_weight = model_data['conv1.weight']
conv_bias = model_data['conv1.bias']
fc_weight = model_data['fc.weight']
fc_bias = model_data['fc.bias']
# 进行推理
def inference(images):
# 执行卷积操作
conv_output = conv2d(images, conv_weight, conv_bias, stride=1, padding=0)
conv_output = np.maximum(conv_output, 0) # ReLU激活函数
#maxpool2d
pool = max_pool2d(conv_output,2)
# 执行全连接操作
flattened = pool.reshape(pool.shape[0], -1)
fc_output = np.dot(flattened, fc_weight.T) + fc_bias
fc_output = np.maximum(fc_output, 0) # ReLU激活函数
# 获取预测结果
predictions = np.argmax(fc_output, axis=1)
return predictions
folder_path = './mnist_pi' # 替换为图片所在的文件夹路径
def infer_images_in_folder(folder_path):
for file_name in os.listdir(folder_path):
file_path = os.path.join(folder_path, file_name)
if os.path.isfile(file_path) and file_name.endswith(('.jpg', '.jpeg', '.png')):
image = Image.open(file_path)
label = file_name.split(".")[0].split("_")[1]
image = np.array(image)/255.0
image = np.expand_dims(image,axis=0)
image = np.expand_dims(image,axis=0)
print("file_path:",file_path,"img size:",image.shape,"label:",label)
predicted_class = inference(image)
print('Predicted class:', predicted_class)
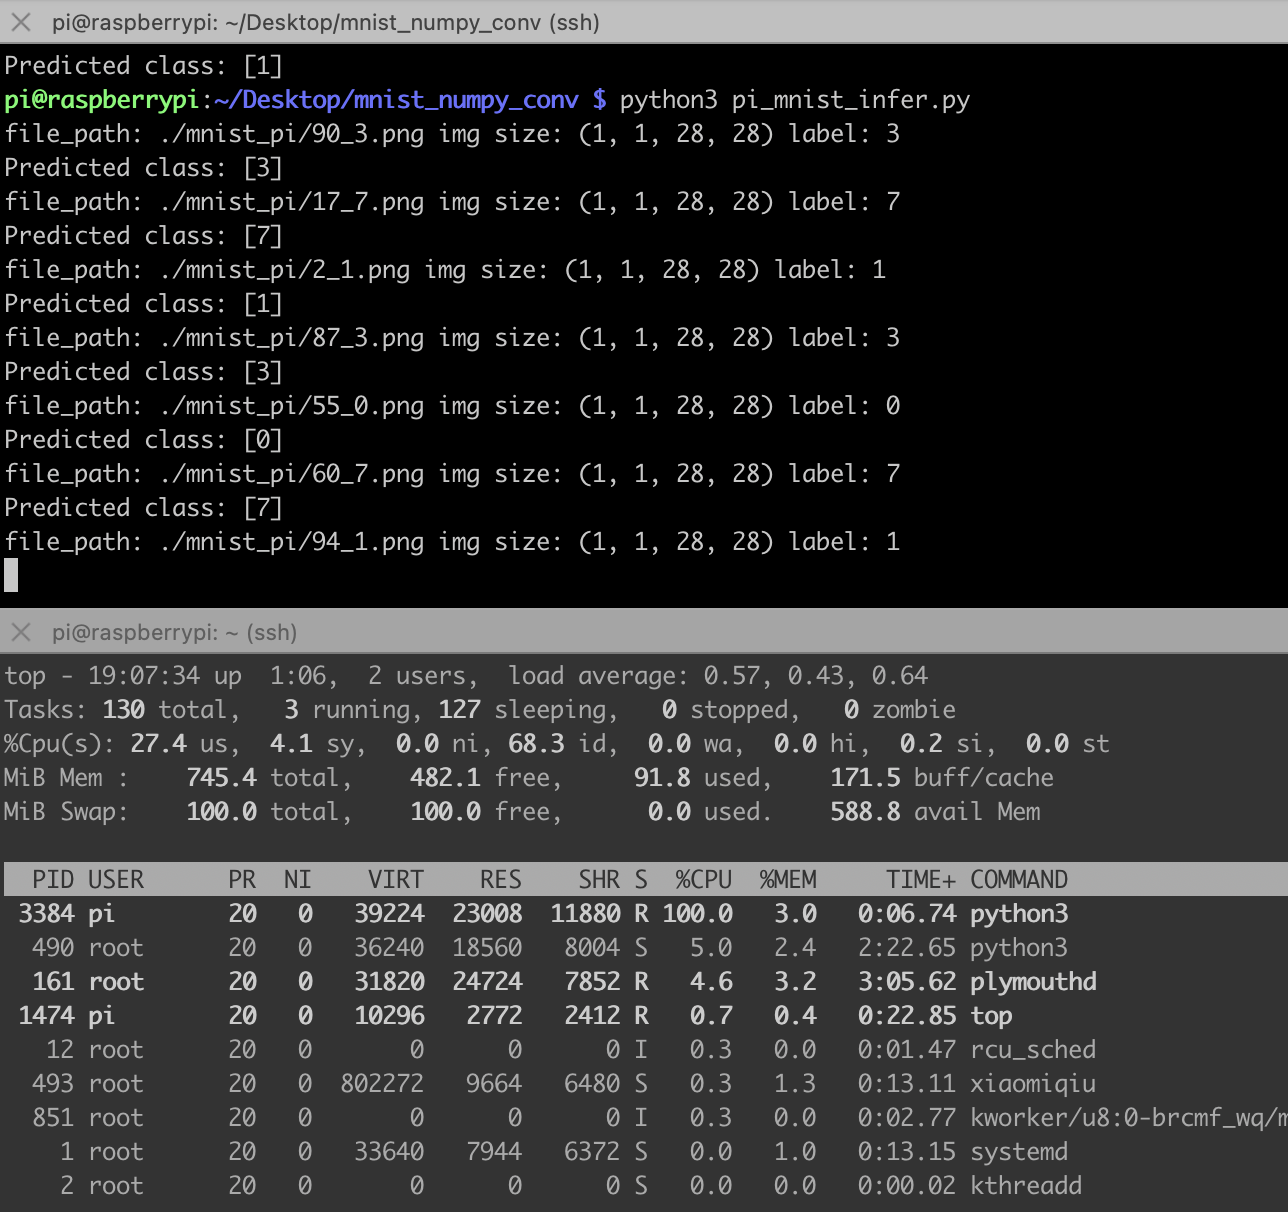
infer_images_in_folder(folder_path)
这代码完全就是numpy推理,不需要安装pytorch,树莓派也装不动pytorch,太重了,下面是推理结果,比之前的MLP网络慢很多,主要是手动实现的卷积网络全靠循环实现。
那我们给它加加速吧,下面是一个多线程加速程序:
import numpy as np
import os
from PIL import Image
from multiprocessing import Pool

def conv2d(input, weight, bias, stride=1, padding=0):
    batch_size, in_channels, in_height, in_width = input.shape
    out_channels, in_channels, kernel_size, _ = weight.shape

    # 计算输出特征图的大小
    out_height = (in_height + 2 * padding - kernel_size) // stride + 1
    out_width = (in_width + 2 * padding - kernel_size) // stride + 1

    # 添加padding
    padded_input = np.pad(input, ((0, 0), (0, 0), (padding, padding), (padding, padding)), mode='constant')

    # 初始化输出特征图
    output = np.zeros((batch_size, out_channels, out_height, out_width))

    # 执行卷积操作
    for b in range(batch_size):
        for c_out in range(out_channels):
            for h_out in range(out_height):
                for w_out in range(out_width):
                    h_start = h_out * stride
                    h_end = h_start + kernel_size
                    w_start = w_out * stride
                    w_end = w_start + kernel_size

                    # 提取对应位置的输入图像区域
                    input_region = padded_input[b, :, h_start:h_end, w_start:w_end]

                    # 计算卷积结果
                    x = input_region * weight[c_out]
                    bia = bias[c_out]
                    conv_result = np.sum(x, axis=(0,1, 2)) + bia

                    # 将卷积结果存储到输出特征图中
                    output[b, c_out, h_out, w_out] = conv_result

    return output

def max_pool2d(input, kernel_size, stride=None, padding=0):
    batch_size, channels, in_height, in_width = input.shape

    if stride is None:
        stride = kernel_size

    out_height = (in_height - kernel_size + 2 * padding) // stride + 1
    out_width = (in_width - kernel_size + 2 * padding) // stride + 1

    padded_input = np.pad(input, ((0, 0), (0, 0), (padding, padding), (padding, padding)), mode='constant')

    output = np.zeros((batch_size, channels, out_height, out_width))

    for b in range(batch_size):
        for c in range(channels):
            for h_out in range(out_height):
                for w_out in range(out_width):
                    h_start = h_out * stride
                    h_end = h_start + kernel_size
                    w_start = w_out * stride
                    w_end = w_start + kernel_size

                    input_region = padded_input[b, c, h_start:h_end, w_start:w_end]

                    output[b, c, h_out, w_out] = np.max(input_region)

    return output

# 加载保存的模型数据
model_data = np.load('model.npz')

# 提取模型参数
conv_weight = model_data['conv1.weight']
conv_bias = model_data['conv1.bias']
fc_weight = model_data['fc.weight']
fc_bias = model_data['fc.bias']

# 进行推理
def inference(images):
    # 执行卷积操作
    conv_output = conv2d(images, conv_weight, conv_bias, stride=1, padding=0)
    conv_output = np.maximum(conv_output, 0)  # ReLU激活函数
    # maxpool2d
    pool = max_pool2d(conv_output, 2)
    # 执行全连接操作
    flattened = pool.reshape(pool.shape[0], -1)
    fc_output = np.dot(flattened, fc_weight.T) + fc_bias
    fc_output = np.maximum(fc_output, 0)  # ReLU激活函数

    # 获取预测结果
    predictions = np.argmax(fc_output, axis=1)

    return predictions

labels = []
preds = []
def infer_image(file_path):
    image = Image.open(file_path)
    label = file_path.split("/")[-1].split(".")[0].split("_")[1]
    image = np.array(image) / 255.0
    image = np.expand_dims(image, axis=0)
    image = np.expand_dims(image, axis=0)
    print("file_path:", file_path, "img size:", image.shape, "label:", label)
    predicted_class = inference(image)
    print('Predicted class:', predicted_class)


folder_path = './mnist_pi'  # 替换为图片所在的文件夹路径
pool = Pool(processes=4)  # 设置进程数为2,可以根据需要进行调整

def infer_images_in_folder(folder_path):
    for file_name in os.listdir(folder_path):
        file_path = os.path.join(folder_path, file_name)
        if os.path.isfile(file_path) and file_name.endswith(('.jpg', '.jpeg', '.png')):
            pool.apply_async(infer_image, args=(file_path,))

    pool.close()
    pool.join()


infer_images_in_folder(folder_path)
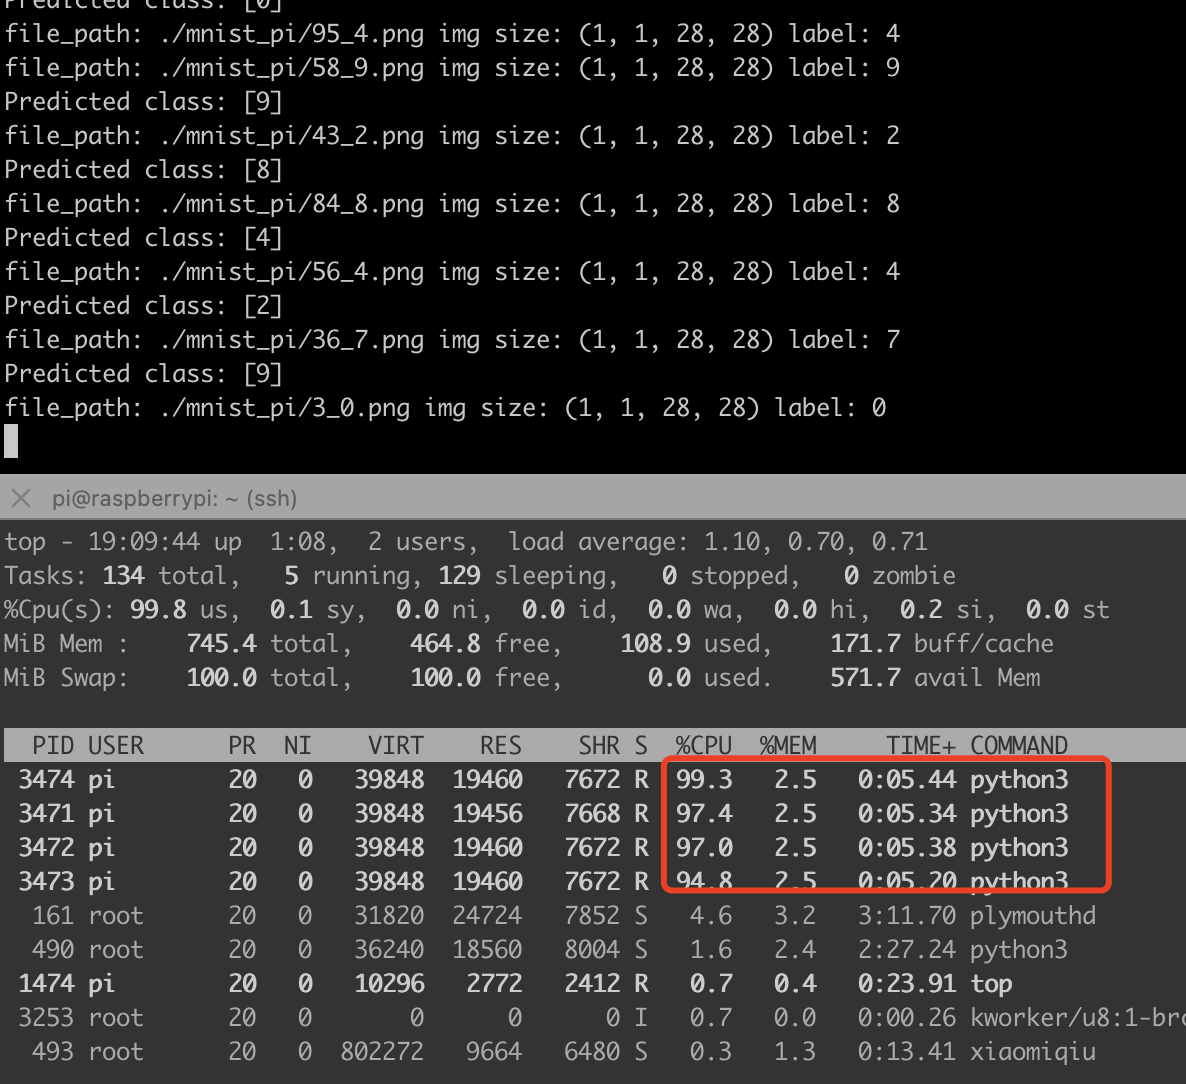
下图可以看出来,我的树莓派3b+,cpu直接拉满,速度提升4倍:
Recommend
About Joyk
Aggregate valuable and interesting links.
Joyk means Joy of geeK