

flutter系列之:做一个修改组件属性的动画
source link: http://www.flydean.com/30-flutter-ui-animate-resize/
Go to the source link to view the article. You can view the picture content, updated content and better typesetting reading experience. If the link is broken, please click the button below to view the snapshot at that time.

什么是动画呢?动画实际上就是不同的图片连续起来形成的。flutter为我们提供了一个AnimationController来对动画进行详尽的控制,不过直接是用AnimationController是比较复杂的,如果只是对一个widget的属性进行修改,可以做成动画吗?
答案是肯定的,一起来看看吧。
flutter中的动画widget
如果你只是希望动画展示widget的属性的变化,比如比如长度,高度,宽度或者颜色等进行动态变化,那么可以直接使用flutter提供的AnimatedContainer。
先来看下AnimatedContainer的定义:
class AnimatedContainer extends ImplicitlyAnimatedWidget
AnimatedContainer继承自ImplicitlyAnimatedWidget,什么是ImplicitlyAnimatedWidget呢?翻译过来就是隐式的动画widget。
这个widget会自动根据widget属性的变化生成对应的动画。在使用上非常的简单。
AnimatedContainers使用举例
AnimatedContainer是一个container,所以它可以包含child属性,但是AnimatedContainer的动画只是针对容器本身来说的,动画并不会应用到它的child中。
所以为了展示widget本身的变化,我们可以给widget设置一个BoxDecoration,设置它的颜色跟borderRadius。
如下所示:
body: Center(
          child: AnimatedContainer(
            width: 200,
            height: 200,
            decoration: BoxDecoration(
              color: Colors.blue,
              borderRadius: BorderRadius.circular(10),
            ),
            duration: const Duration(seconds: 1),
            curve: Curves.easeInBack,
          ),
        )
上面的代码会在界面上展示一个长度和宽度都等于200的Container,它的背景是blue,还有一个圆形的borderRadius。
并且我们定义了动画的duration和变动曲线的方式。
接下来我们只需要在setState方法中对AnimatedContainer中的属性进行变化,就会自动触发动画效果。
为了实现这个动画的功能,我们需要把width,height等属性用动态变量存储起来,这样才可以在setState的时候对属性进行变动。
我们将这些属性放在一个StatefulWidget的State中:
  double _width = 100;
  double _height = 100;
  Color _color = Colors.blue;
  BorderRadiusGeometry _borderRadius = BorderRadius.circular(10);
这样我们在build方法中使用上面定义的属性:
        body: Center(
          child: AnimatedContainer(
            width: _width,
            height: _height,
            decoration: BoxDecoration(
              color: _color,
              borderRadius: _borderRadius,
            ),
            duration: const Duration(seconds: 1),
            curve: Curves.easeInBack,
          ),
        )
然后在floatingActionButton的onPressed中修改这些属性,从而实现widget属性变化的动画功能:
floatingActionButton: FloatingActionButton(
          onPressed: () {
            setState(() {
              final random = Random();

              _width = random.nextInt(200).toDouble();
              _height = random.nextInt(200).toDouble();

              _color = Color.fromRGBO(
                random.nextInt(256),
                random.nextInt(256),
                random.nextInt(256),
                1,
              );

              _borderRadius =
                  BorderRadius.circular(random.nextInt(10).toDouble());
            });
          }
最后实现的效果如下:
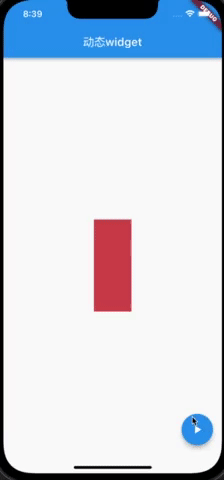
如果你只是希望使用简单的widget动画,那么AnimatedContainer可能是你最好的选择。
Recommend
About Joyk
Aggregate valuable and interesting links.
Joyk means Joy of geeK