

如何将c#在线编辑器嵌入自己项目
source link: https://www.cnblogs.com/hejiale010426/p/17380575.html
Go to the source link to view the article. You can view the picture content, updated content and better typesetting reading experience. If the link is broken, please click the button below to view the snapshot at that time.

如何将c#在线编辑器嵌入自己项目
首先我们需要介绍一下这个在线编辑器,当前的在线编辑器支持c#的代码编译运行,并且无需后台服务,基于WebAssembly实现的在浏览器端去执行我们的c#代码,基于Roslyn提供的Api封装一套简单的编译,并且封装了js的支持,让嵌入的方式更简单。
使用现有项目嵌入在线编辑器
最简单的嵌入方式是使用别人已经部署好的界面去嵌入到自己的项目当中,这样的好处就是代码量极少,但是强依赖于他人的项目,下面我将提供一个简单的案例在react中嵌入已经存在的编辑器,我将使用自己的博客项目,在博客项目中嵌入在线编辑器。
yarn start
我在我的项目中添加了编辑器的单独页面,下面是完整的代码,
import React, { Component } from 'react'
import './index.css';

export default class Ide extends Component {

    render() {
        return (
            <iframe style={{height:"100%",width:'100%'}} src='https://webassembly.tokengo.top:8843/'></iframe>
        )
    }
}
看到上面的实现方式,是通过iframe直接嵌入的,当然这是因为我提供的网站并没有做跨域限制,所以可以直接嵌入,也可以供大家一快使用。

效果如图所示。
然后右键编辑区域,会出现执行按钮,点击执行
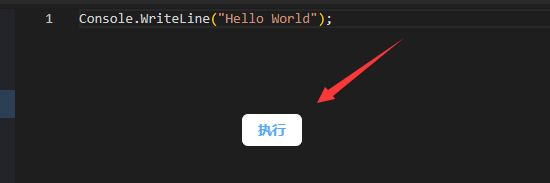
将在下面的输出中显示输出信息

这样就非常简单的将在线编辑器嵌入到自己博客中
嵌入独有的编辑器
当然,也有人觉得嵌入他人的博客会受制于他人,如果别人的站点挂了就无法使用,所以想知道是否可以自己搭建
这里提供俩个方案,一个使用现成的docker镜像,直接部署一个使用,另一个就是使用sdk功能自己实现界面编辑,只需要使用sdk提供的编译功能
docker部署
这是提供的基本的镜像registry.cn-shenzhen.aliyuncs.com/gotrays/web-actuator:latest,由阿里云的免费镜像仓库提供。
可以使用一下命令拉起执行一个简单的仓库
docker run -p 8888:80 --name web-actuator registry.cn-shenzhen.aliyuncs.com/gotrays/web-actuator:latest
使用SDK功能
项目将简单的介绍在JavaScript中使用动态编辑c#的SDK。
实现我们需要拉去SDK的代码
git clone https://github.com/239573049/WebActuator.git
然后使用vs打开WebActuator.sln解决方案,
选中WebActuator.WebAssembly项目进行发布
发布以后打开发布的文件夹,打开_framework 文件夹,然后删除文件夹下面的*.gz文件,因为默认使用的br压缩,所以不需要使用*.gz
下面是发布的根目录,我们需要复制除了index.html的文件到我们自己的项目当中

嵌入项目截图

打开我们的index.html
  <script src="_framework/blazor.webassembly.js" autostart="false"></script>
  <script type="module">
    import { BrotliDecode } from './decode.min.js';
    import * as exportManage from './exportManage.js';
    window.exportManage = exportManage;
    Blazor.start({
      loadBootResource: function (type, name, defaultUri, integrity) {
          if (type !== 'dotnetjs') {
          return (async function () {
            const response = await fetch(defaultUri + '.br', { cache: 'no-cache' });
            if (!response.ok) {
              throw new Error(response.statusText);
            }
            const originalResponseBuffer = await response.arrayBuffer();
            const originalResponseArray = new Int8Array(originalResponseBuffer);
            const decompressedResponseArray = BrotliDecode(originalResponseArray);
            const contentType = type ===
              'dotnetwasm' ? 'application/wasm' : 'application/octet-stream';
            return new Response(decompressedResponseArray,
              { headers: { 'content-type': contentType } });
          })();
        }
      }
    });
  </script>
将以上代码添加的我们项目的index.html中
然后在我们需要实现的界面进行编译初始化
let assemblys=["https://assembly.tokengo.top:8843/System.dll",
      "https://assembly.tokengo.top:8843/System.Buffers.dll",
      "https://assembly.tokengo.top:8843/System.Collections.dll",
      "https://assembly.tokengo.top:8843/System.Core.dll",
      "https://assembly.tokengo.top:8843/System.Linq.Expressions.dll",
      "https://assembly.tokengo.top:8843/System.Linq.Parallel.dll",
      "https://assembly.tokengo.top:8843/mscorlib.dll",
      "https://assembly.tokengo.top:8843/System.Linq.dll",
      "https://assembly.tokengo.top:8843/System.Console.dll",
      "https://assembly.tokengo.top:8843/System.Runtime.dll",
      "https://assembly.tokengo.top:8843/System.Net.Http.dll",
      "https://assembly.tokengo.top:8843/System.Private.CoreLib.dll",
      "https://assembly.tokengo.top:8843/System.Console.dll"]
   await window.exportManage.SetReferences(assemblys);
使用 await window.exportManage.SetReferences(assemblys);提供默认需要编译的程序集
await window.exportManage.SetReferences(assemblys);的代码是在exportManage.js中提供的api
这是用于初始化编译所需要的程序集,基本默认就这些,当然也可以添加其他的程序集,
监听Console输出
window.OnWriteLine = (message: string) => {
            console.log(message);
    }

window.OnDiagnostic = (json: string) => {
		console.log(json);
    }
上面是SDK提供的控制台拦截器,
OnWriteLine是控制台的输出
OnDiagnostic是早编译的错误和日志
创建了俩个监听器然后就可以调用编辑方法了,调用
await window.exportManage.RunSubmission(`Console.WriteLine("hello world");`, false);
执行编译,然后我们就可以在浏览器控制台中看到编译输出了
如果你想要重复写那么多代码可以修改WebActuator.Web项目当中的ClientApp的代码
项目提供了基于monaco实现的简单的编辑器。
APIs列表:
// 获取当前引用
window.exportManage.Using()

// 添加默认引用
window.exportManage.SetUsing(using)

 // 删除指定引用
window.exportManage.RemoveUsing(using)

// 清空全局引用
window.exportManage.ClearUsing()

// 获取当前编译的语言版本
window.exportManage.LanguageVersion()

// 修改编译的语言版本
window.exportManage.SetLanguageVersion(languageVersion)

// 获取当前依赖的程序集URL
window.exportManage.References()

// 添加编译依赖的程序集
window.exportManage.SetReferences(references)

// 只编译代码
window.exportManage.TryCompile(source, concurrentBuild)

// 执行编译代码
window.exportManage.RunSubmission(code, concurrentBuild)
以上只是当前版本的APIs,后续还会优化并且更新,打造一个好用方便的在线编译c#代码的编辑器。
来自token的分享
仓库地址:https://github.com/239573049/WebActuator 欢迎PR和star
技术交流群:737776595
本文作者:tokengo
本文链接:https://www.cnblogs.com/hejiale010426/p/17380575.html
版权声明:本作品采用知识共享署名-非商业性使用-禁止演绎 2.5 中国大陆许可协议进行许可。
Recommend
About Joyk
Aggregate valuable and interesting links.
Joyk means Joy of geeK