

cesium源码编译调试及调用全过程 - 孤草之魂
source link: https://www.cnblogs.com/kk8085/p/17341433.html
Go to the source link to view the article. You can view the picture content, updated content and better typesetting reading experience. If the link is broken, please click the button below to view the snapshot at that time.

cesium源码编译调试及调用全过程
完整记录一次cesium源码从下载、打包、调用、调试的全过程。
本文使用软件或API版本:
VSCode
Node:12.18.3
cesium版本:1.94
总体步骤:
- 下载源码
- 执行npm install和npm start启动web服务
- 打包源码(打包前可以先将申请到的cesium的token更改到ion.js文件中的默认值中)
- 运行测试html页面,并进行源码调试
详细图文步骤如下:
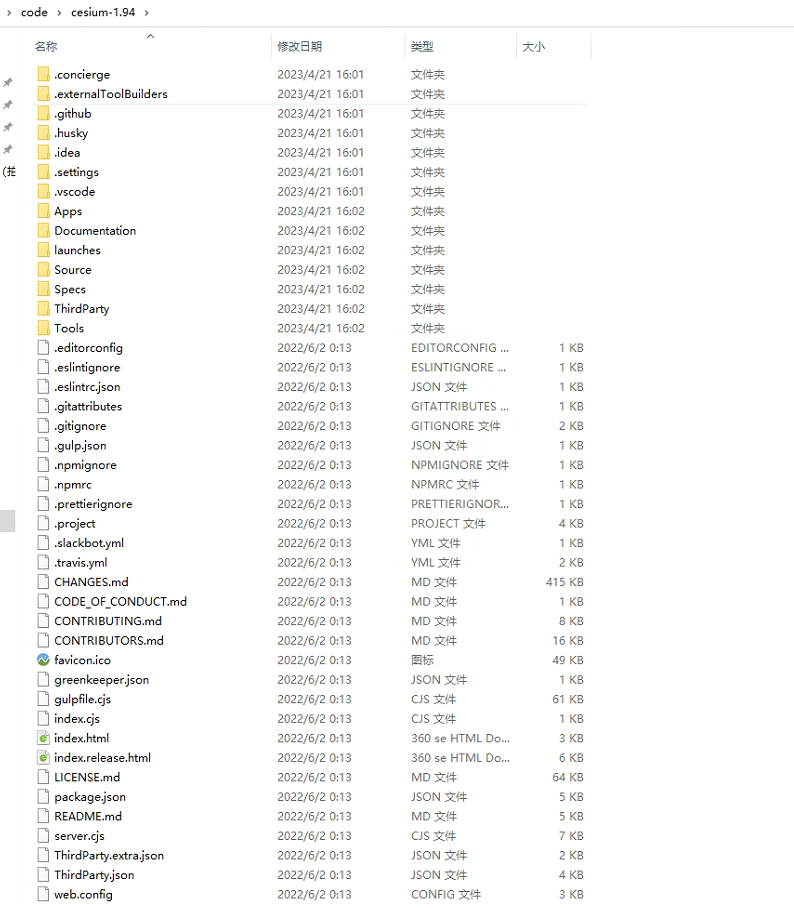
1、从github上搜索cesium,从Release中找到需要使用的版本,下载Source code(zip)源码:
https://github.com/CesiumGS/cesium/archive/refs/tags/1.94.zip

下载成功后,如下所示:
2、使用vscode打开,并执行安装、运行命令
npm install

如果在执行npm install报错,可以尝试多执行几次(有时候发现第一次报错,第二次就成功不错了,具体问题要具体分析),或者根据报错确定缺少哪个依赖包,进行单独安装。
安装完成后,会在目录下生成一个node_modules文件夹

然后执行启动命令
npm start

这样就可以访问Apps里的应用了。默认端口是8080,可以把地址拷贝到浏览器上去访问:

(1)npm start启动cesium 访问的命令,如果8080端口被占用,需要更改一个新的端口或者用命令起一个新的端口,它没有webpack那么智能,在端口被占用的情况下,自己可以换一个新的端口。
更改默认端口可以在server.cjs中修改:

也可以手动换个端口号运行,执行以下命令:
node server.js --port 8081
(2)Cesium的npm start命令启动的服务, 只能在本机查看 ,不能通过局域网访问,如果需要在局域网内访问,可以执行以下命令:
npm run startPublic
3、运行示例页面(需要先运行命令打包)
打开Hello World发现页面是空的:(http://localhost:8080/Apps/HelloWorld.html)

没关系,我们可以找到对应Apps目录下的HelloWorld.html,打开它:

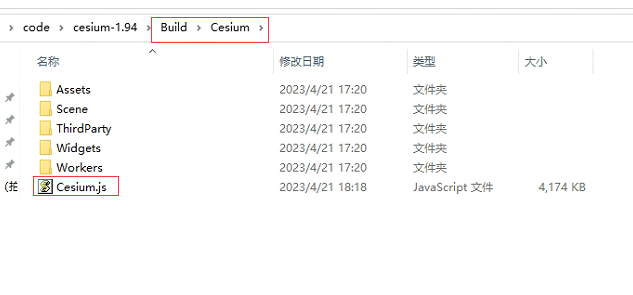
发现cesium的引用是在Build目录下,而我们的目录下并没有Build,此时我们需要先进行打包,运行以下命令
npm run minifyRelease 或 npm run minify
运行后,会生成Build\Cesium文件夹(Hello World.html页面引用的api):
如果需要生成可调试的源码,需要使用命令:
npm run combine
这时生成的cesium.js在CesiumUnminified目录下,页面的引用需要修改为:
<script src="../Build/CesiumUnminified/Cesium.js"></script>
    <style>
      @import url(../Build/CesiumUnminified/Widgets/widgets.css);
      html,
      body,
      #cesiumContainer {
        width: 100%;
        height: 100%;
        margin: 0;
        padding: 0;
        overflow: hidden;
      }
    </style>
具体打包命令参考:https://www.cnblogs.com/kk8085/p/17341177.html
这时候再通过npm start启动web服务,访问Hello World.html:

但是还是报错,没有球体出来,这是因为需要申请cesium token,申请地址:
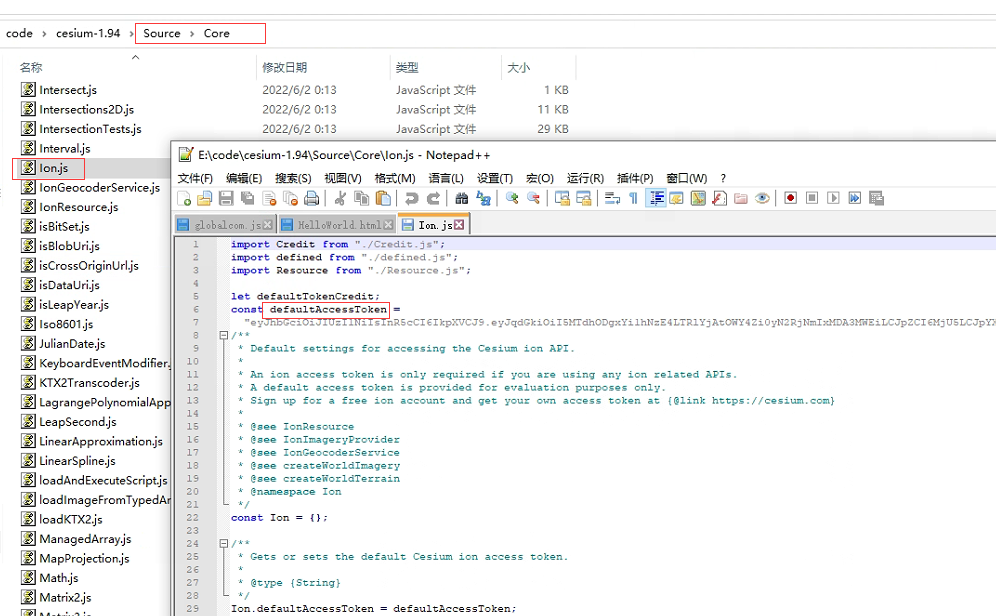
把申请下来的tokens放在Ion文件defaultAccessToken中或者在调用页面初始化cesium前设置token。
(1)可以找到文件Source\Core\Ion.js,打开修改defaultAccessToken值,这种方式是在源码中修改,修改完后需要重新打包。
(2)在调用页面初始化cesium前设置token
Cesium.Ion.defaultAccessToken = cesium_tk;
let viewer = new Cesium.Viewer('cesiumContainer', {
        // baseLayerPicker: false,
        timeline: true,
        homeButton: true,
        fullscreenButton: true,
        infoBox: true,
        animation: true,
        shouldAnimate: true
    });
通过修改ion.js文件,重新打包后,在运行,此时Hello World.html访问正常了。

4、可以将自己的测试页面放到Apps下,进行调试:

代码通过使用WebMapServiceImageryProvider、ArcGisMapServerImageryProvider加载ArcGIS全球影像和中国矢量数据,效果如下:

cesiumlayer.html代码:
<!DOCTYPE html>
<html lang="en">
<head>
    <!-- Use correct character set. -->
    <meta charset="utf-8"/>
    <!-- Tell IE to use the latest, best version. -->
    <meta http-equiv="X-UA-Compatible" content="IE=edge"/>
    <!-- Make the application on mobile take up the full browser screen and disable user scaling. -->
    <meta
            name="viewport"
            content="width=device-width, initial-scale=1, maximum-scale=1, minimum-scale=1, user-scalable=no"
    />
    <title>cesium加载影像和矢量数据</title>
    <script src="../Build/CesiumUnminified/Cesium.js"></script>
    <style>
        @import url(../Build/CesiumUnminified/Widgets/widgets.css);

        html,
        body,
        #cesiumContainer {
            width: 100%;
            height: 100%;
            margin: 0;
            padding: 0;
            overflow: hidden;
        }
    </style>
</head>
<body>
<div id="cesiumContainer"></div>
<script>
    //天地图token
    let TDT_tk = "通过天地图官网申请token";
    //Cesium token
    let cesium_tk = "通过cesium官网申请获取token";
    //天地图影像
    let TDT_IMG_C = "http://{s}.tianditu.gov.cn/img_c/wmts?service=wmts&request=GetTile&version=1.0.0" +
        "&LAYER=img&tileMatrixSet=c&TileMatrix={TileMatrix}&TileRow={TileRow}&TileCol={TileCol}" +
        "&style=default&format=tiles&tk=" + TDT_tk;

    //标注
    let TDT_CIA_C = "http://{s}.tianditu.gov.cn/cia_c/wmts?service=wmts&request=GetTile&version=1.0.0" +
        "&LAYER=cia&tileMatrixSet=c&TileMatrix={TileMatrix}&TileRow={TileRow}&TileCol={TileCol}" +
        "&style=default&format=tiles&tk=" + TDT_tk;

    //初始页面加载
    //Cesium.Ion.defaultAccessToken = cesium_tk;
    let viewer = new Cesium.Viewer('cesiumContainer', {
        // baseLayerPicker: false,
        timeline: true,
        homeButton: true,
        fullscreenButton: true,
        infoBox: true,
        animation: true,
        shouldAnimate: true,
        //imageryProvider: layer, //设置默认底图
    });
    let rightTilt = true;
    if (rightTilt) {
      viewer.scene.screenSpaceCameraController.tiltEventTypes = [
        Cesium.CameraEventType.RIGHT_DRAG,
        Cesium.CameraEventType.PINCH,
        {
          eventType: Cesium.CameraEventType.LEFT_DRAG,
          modifier: Cesium.KeyboardEventModifier.CTRL
        },
        {
          eventType: Cesium.CameraEventType.RIGHT_DRAG,
          modifier: Cesium.KeyboardEventModifier.CTRL
        }
      ]
      viewer.scene.screenSpaceCameraController.zoomEventTypes = [
        Cesium.CameraEventType.MIDDLE_DRAG,
        Cesium.CameraEventType.WHEEL,
        Cesium.CameraEventType.PINCH
      ]
    }

    viewer.imageryLayers.remove(viewer.imageryLayers.get(0))
    //添加tms
    let tms = {};
    tms.url =  "http://10.0.7.16:81/tms";
    if (tms) {
      const layerInfo = {
        url: tms.url,
        fileExtension: tms.fileExtension || 'jpg',
        maximumLevel: tms.maxZoom || 7,
        name: 'tms'
      }
      const tmsService = new Cesium.TileMapServiceImageryProvider(layerInfo)
      tmsService.layerInfo = layerInfo
    }
    //添加地形
    let terrain = {};
    terrain.url =  "http://data.marsgis.cn/terrain";
    if (terrain) {
        const terrainLayer = new Cesium.CesiumTerrainProvider({
            url: terrain.url
            })
        viewer.terrainProvider = terrainLayer
    }

    _matrixIds = ["1", "2", "3", "4", "5", "6", "7", "8", "9", "10", "11", "12", "13", "14", "15", "16", "17", "18"]
    //调用影响中文注记服务
    /*viewer.imageryLayers.addImageryProvider(new Cesium.WebMapTileServiceImageryProvider({
        url: TDT_CIA_C,
        layer: "tdtImg_c",
        style: "default",
        format: "tiles",
        tileMatrixSetID: "c",
        subdomains: ["t0", "t1", "t2", "t3", "t4", "t5", "t6", "t7"],
        tilingScheme: new Cesium.GeographicTilingScheme(),
        tileMatrixLabels: ["1", "2", "3", "4", "5", "6", "7", "8", "9", "10", "11", "12", "13", "14", "15", "16", "17", "18", "19"],
        maximumLevel: 50,
        show: false
    }))*/

    //使用ArcGisMapServerImageryProvider加载影像没成功,改用WebMapServiceImageryProvider
    //var world = new Cesium.ArcGisMapServerImageryProvider({
        //url:'http://10.1.88.200:6080/arcgis/rest/services/test/globaltdt5/MapServer',
    //});
    //viewer.imageryLayers.addImageryProvider(world);
    var arcgisyx = new Cesium.WebMapServiceImageryProvider({
    url:'http://10.1.88.200:6080/arcgis/rest/services/test/globaltdt5/MapServer/tile/{z}/{y}/{x}',
    layers:[0]
    });
    viewer.imageryLayers.addImageryProvider(arcgisyx);
    var china = new Cesium.ArcGisMapServerImageryProvider({
        url:'http://10.1.88.200:6080/arcgis/rest/services/test/china4490/MapServer'
    });
    viewer.imageryLayers.addImageryProvider(china);
</script>
</body>
</html>
此时可以调试cesium源码了,如调试cesium中的ArcGisMapServerImageryProvider.js文件,通过搜索查看源码:

Recommend
About Joyk
Aggregate valuable and interesting links.
Joyk means Joy of geeK