

CS144 计算机网络 Lab1:Stream Reassembler - 之一Yo
source link: https://www.cnblogs.com/zhiyiYo/p/17338730.html
Go to the source link to view the article. You can view the picture content, updated content and better typesetting reading experience. If the link is broken, please click the button below to view the snapshot at that time.

CS144 计算机网络 Lab1:Stream Reassembler
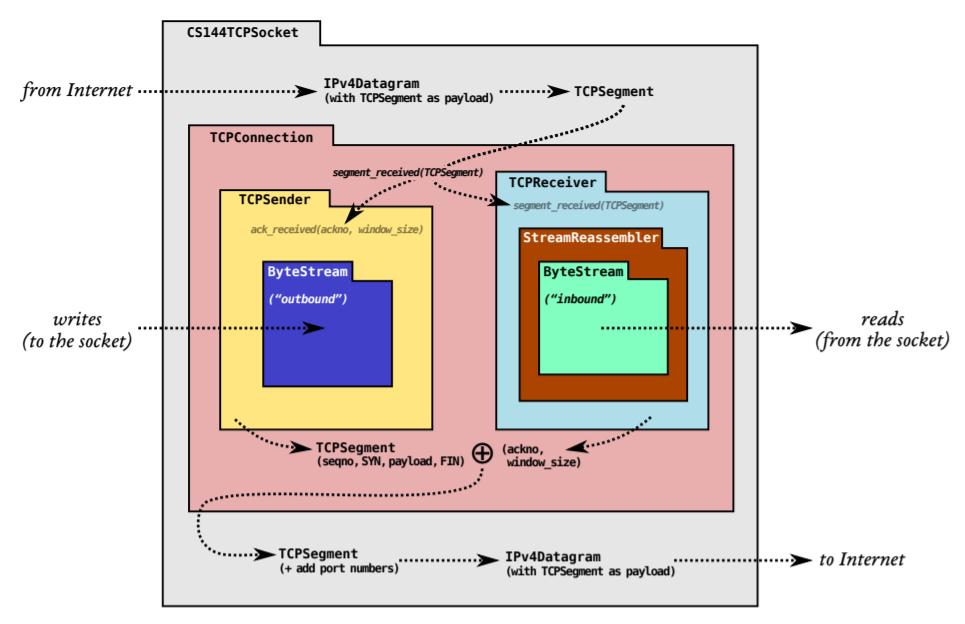
上一篇博客中我们完成了 Lab0,使用双端队列实现了一个字节流类 ByteStream,可以向字节流中写入数据并按写入顺序读出数据。由于网络环境的变化,发送端滑动窗口内的数据包到达接收端时可能失序,所以接收端收到数据之后不能直接写入 ByteStream 中,而是应该缓存下来并按照序号重组成正确的数据。这篇博客所介绍的 Lab1 将实现一个字节流重组器 StreamReassambler 来完成上述任务。
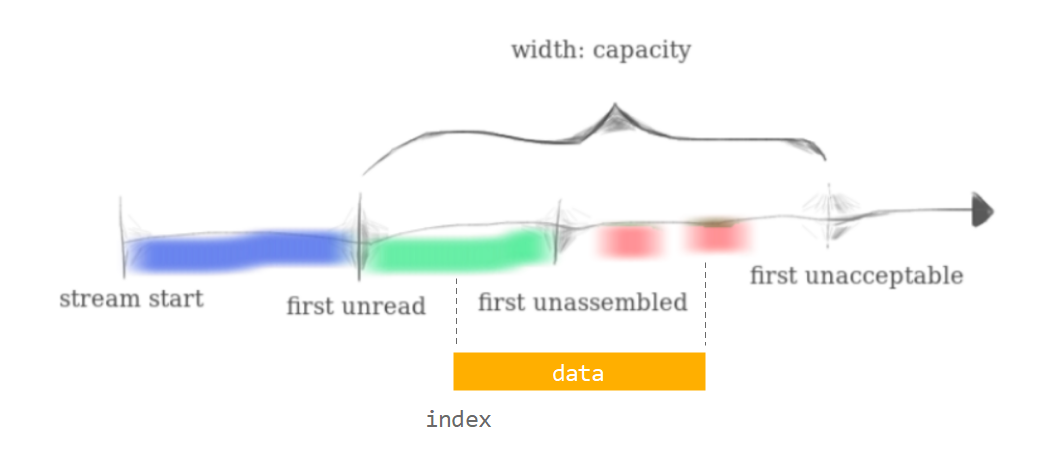
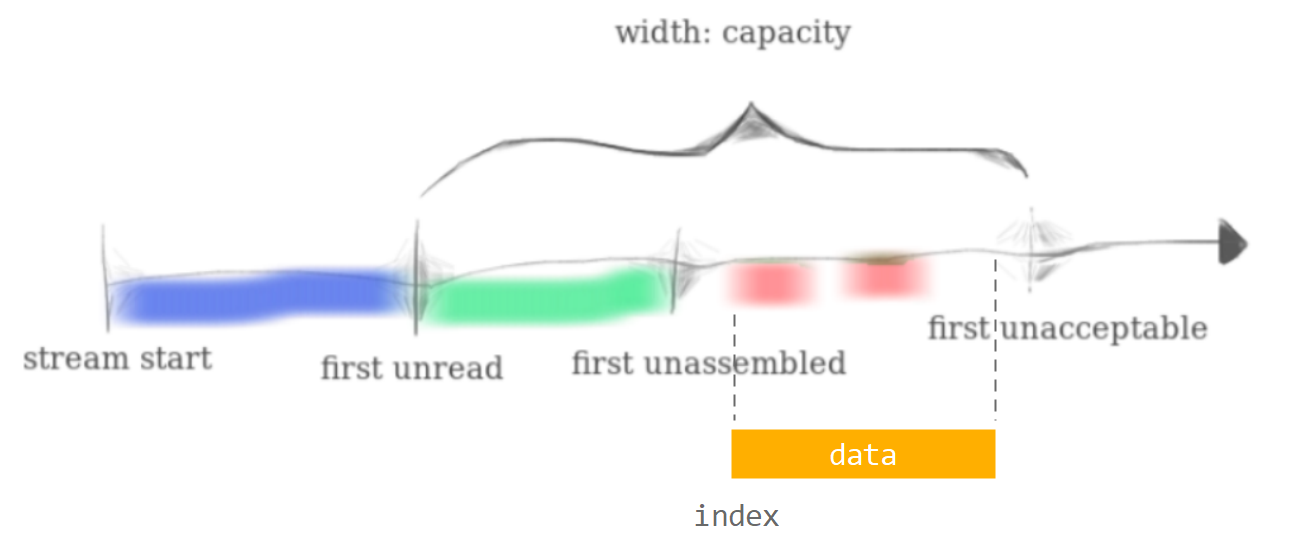
接收方的数据情况如下图所示,蓝色部分表示已消费的数据,绿色表示已正确重组但是还没消费的数据,红色则是失序到达且还没重组的数据:

由于接收端缓冲区大小 capacity 有限,超出容量的数据(first unacceptable 之后的数据)将被丢弃,这些被丢弃的数据包将起到流量控制的作用,可以限制发送端滑动窗口的大小。
流重组器的接口如下所示:
复制StreamReassembler(const size_t capacity);

//! \brief Receives a substring and writes any newly contiguous bytes into the stream.
//!
//! If accepting all the data would overflow the `capacity` of this
//! `StreamReassembler`, then only the part of the data that fits will be
//! accepted. If the substring is only partially accepted, then the `eof`
//! will be disregarded.
//!
//! \param data the string being added
//! \param index the index of the first byte in `data`
//! \param eof whether or not this segment ends with the end of the stream
void push_substring(const std::string &data, const uint64_t index, const bool eof);

//! Access the reassembled byte stream
const ByteStream &stream_out() const { return _output; }
ByteStream &stream_out() { return _output; }

//! The number of bytes in the substrings stored but not yet reassembled
size_t unassembled_bytes() const;

//! Is the internal state empty (other than the output stream)?
bool empty() const;
其中最重要的函数就是 StreamReassambler::push_substring(),接收方收到数据之后就会调用此函数将数据保存起来。此函数接受三个参数:
data: 接收到的数据index: 数据的第一个字节的索引,由于原始数据可能很大,超过了 TCPSegment 的容量,所以会将原始数据切分成多个片段,每个片段的第一个字节的索引就是index,最小值为 0eof:是不是最后一个数据包
三个参数中,最耐人寻味的就是 index 参数,如果只是单纯的失序到达,数据之间没有发生重叠,Lab1 就比较好做了,但是实验指导书中明确指出
May substrings overlap? Yes
这就比较难搞了,因为重叠分成两种:
实际上由于 data 的末尾可能超出 first unacceptable,需要对超出部分进行截断,这可能导致 eof 标志失效,但是问题不大,发送方之后会重新发送这个数据包。
为了处理上述重叠情况,需要一个 _next_index 成员代表 first unassembled 索引,一个 _unassembles 双端队列代表 first unassembled 到 first unacceptable 之间的数据,由于里面可能只有一部分数据是有效的,所以用一个遮罩 _unassembled_mask 指出哪些数据是有效但是还没重组的。
复制class StreamReassembler {
  private:
    ByteStream _output;  //!< The reassembled in-order byte stream
    size_t _capacity;    //!< The maximum number of bytes
    std::deque<char> _unassembles{};
    std::deque<bool> _unassemble_mask{};
    size_t _unassambled_bytes{0};
    uint64_t _next_index{0};
    bool _is_eof{false};

    /** @brief 将数据写入未重组队列中
     * @param data 将被写入的字符串
     * @param dstart 字符串开始写入的位置
     * @param len 写入的长度
     * @param astart 队列中开始写入的位置
     */
    void write_unassamble(const std::string &data, size_t dstart, size_t len, size_t astart);

    /** @brief 重组数据
     */
    void assemble();

  public:
    StreamReassembler(const size_t capacity);

    //! \brief Receives a substring and writes any newly contiguous bytes into the stream.
    void push_substring(const std::string &data, const uint64_t index, const bool eof);

    //! \name Access the reassembled byte stream
    const ByteStream &stream_out() const { return _output; }
    ByteStream &stream_out() { return _output; }

    //! The number of bytes in the substrings stored but not yet reassembled
    size_t unassembled_bytes() const;

    bool empty() const;
};
收到数据时,先将不重叠的数据写入 _unassembles 队列中,之后调用 StreamReassabler::assemble() 函数重组队列中的连续数据,并更新 _next_index:
复制StreamReassembler::StreamReassembler(const size_t capacity)
    : _output(capacity), _capacity(capacity), _unassembles(capacity, '\0'), _unassemble_mask(capacity, false) {}

//! \details This function accepts a substring (aka a segment) of bytes,
//! possibly out-of-order, from the logical stream, and assembles any newly
//! contiguous substrings and writes them into the output stream in order.
void StreamReassembler::push_substring(const string &data, const size_t index, const bool eof) {
    if (index > _next_index + _capacity)
        return;

    if (eof)
        _is_eof = true;

    if (eof && empty() && data.empty()) {
        _output.end_input();
        return;
    }

    auto end_index = data.size() + index;

    // 新数据在后面
    if (index >= _next_index) {
        auto astart = index - _next_index;
        auto len = min(_output.remaining_capacity() - astart, data.size());
        if (len < data.size())
            _is_eof = false;

        write_unassamble(data, 0, len, astart);
    }
    // 新数据与已重组的数据部分重叠
    else if (end_index > _next_index) {
        auto dstart = _next_index - index;
        auto len = min(_output.remaining_capacity(), data.size() - dstart);
        if (len < data.size() - dstart)
            _is_eof = false;

        write_unassamble(data, dstart, len, 0);
    }

    // 最后合并数据
    assemble();
    if (_is_eof && empty())
        _output.end_input();
}

void StreamReassembler::write_unassamble(const string &data, size_t dstart, size_t len, size_t astart) {
    for (size_t i = 0; i < len; ++i) {
        if (_unassemble_mask[i + astart])
            continue;

        _unassembles[i + astart] = data[dstart + i];
        _unassemble_mask[i + astart] = true;
        _unassambled_bytes++;
    }
}

void StreamReassembler::assemble() {
    string s;
    while (_unassemble_mask.front()) {
        s.push_back(_unassembles.front());
        _unassembles.pop_front();
        _unassemble_mask.pop_front();
        _unassembles.push_back('\0');
        _unassemble_mask.push_back(false);
    }

    if (s.empty())
        return;

    _output.write(s);
    _next_index += s.size();
    _unassambled_bytes -= s.size();
}

size_t StreamReassembler::unassembled_bytes() const { return _unassambled_bytes; }

bool StreamReassembler::empty() const { return _unassambled_bytes == 0; }
在命令行中输入:
复制cd build
make -j8
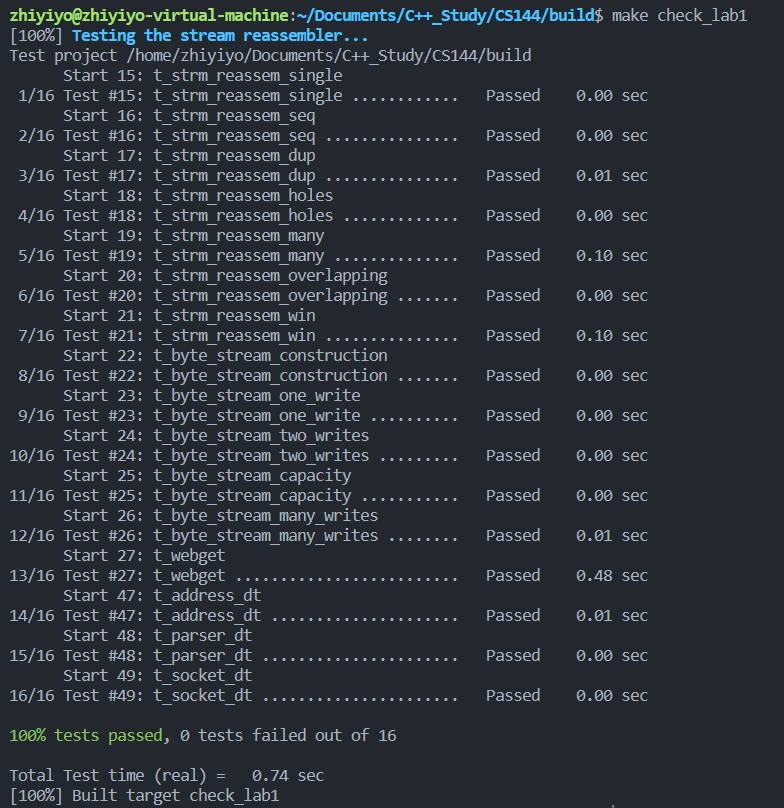
make check_lab1
可以看到测试用例也全部通过了:
由于使用代码编辑器的是 VSCode,所以这里给出在 VSCode 中调试项目代码的方式。
tasks.json
首先在项目目录下创建 .vscode 文件夹,并新建一个 tasks.json 文件,在里面写入下述内容:
复制{
    "tasks": [
        {
            "type": "shell",
            "label": "cmake",
            "command": "cd build && cmake .. -DCMAKE_BUILD_TYPE=Debug",
            "detail": "CMake 生成 Makefile",
            "args": [],
            "problemMatcher": "$gcc"
        },
        {
            "type": "shell",
            "label": "build",
            "command": "cd build && make -j8",
            "detail": "编译项目",
            "args": [],
            "problemMatcher": "$gcc"
        },
    ],
    "version": "2.0.0"
}
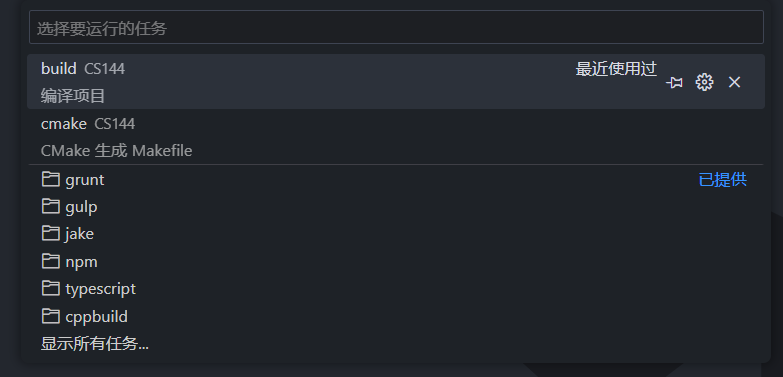
这里主要配置了两个任务,一个调用 CMake 生成 Makefile,一个编译 Makefile。在 VSCode 中按下 Alt + T + R,就能在任务列表中看到这两个任务,点击之后就能执行。
launch.json
在 .vscode 文件夹中新建 launch.json,并写入下述内容:
复制{
    // Use IntelliSense to learn about possible attributes.
    // Hover to view descriptions of existing attributes.
    // For more information, visit: https://go.microsoft.com/fwlink/?linkid=830387
    "version": "0.2.0",
    "configurations": [
        {
            "name": "debug lab test",
            "type": "cppdbg",
            "request": "launch",
            "program": "${workspaceFolder}/build/tests/${fileBasenameNoExtension}",
            "args": [],
            "stopAtEntry": false,
            "cwd": "${workspaceFolder}",
            "environment": [],
            "externalConsole": false,
            "MIMode": "gdb",
            "setupCommands": [
                {
                    "description": "Enable pretty-printing for gdb",
                    "text": "-enable-pretty-printing",
                    "ignoreFailures": true
                }
            ],
            "miDebuggerPath": "/usr/bin/gdb"
        },
        {
            "name": "debug current file",
            "type": "cppdbg",
            "request": "launch",
            "program": "${fileDirname}/${fileBasenameNoExtension}",
            "args": [],
            "stopAtEntry": false,
            "cwd": "${workspaceFolder}",
            "environment": [],
            "externalConsole": false,
            "MIMode": "gdb",
            "setupCommands": [
                {
                    "description": "Enable pretty-printing for gdb",
                    "text": "-enable-pretty-printing",
                    "ignoreFailures": true
                }
            ],
            "preLaunchTask": "C/C++: g++ build active file",
            "miDebuggerPath": "/usr/bin/gdb"
        }
    ]
}
之后打开一个测试用例,比如 tests/fsm_stream_reassembler_seq.cc,转到 debug 标签页,在代码中打下断点, 点击绿色按钮就能开始调试了:
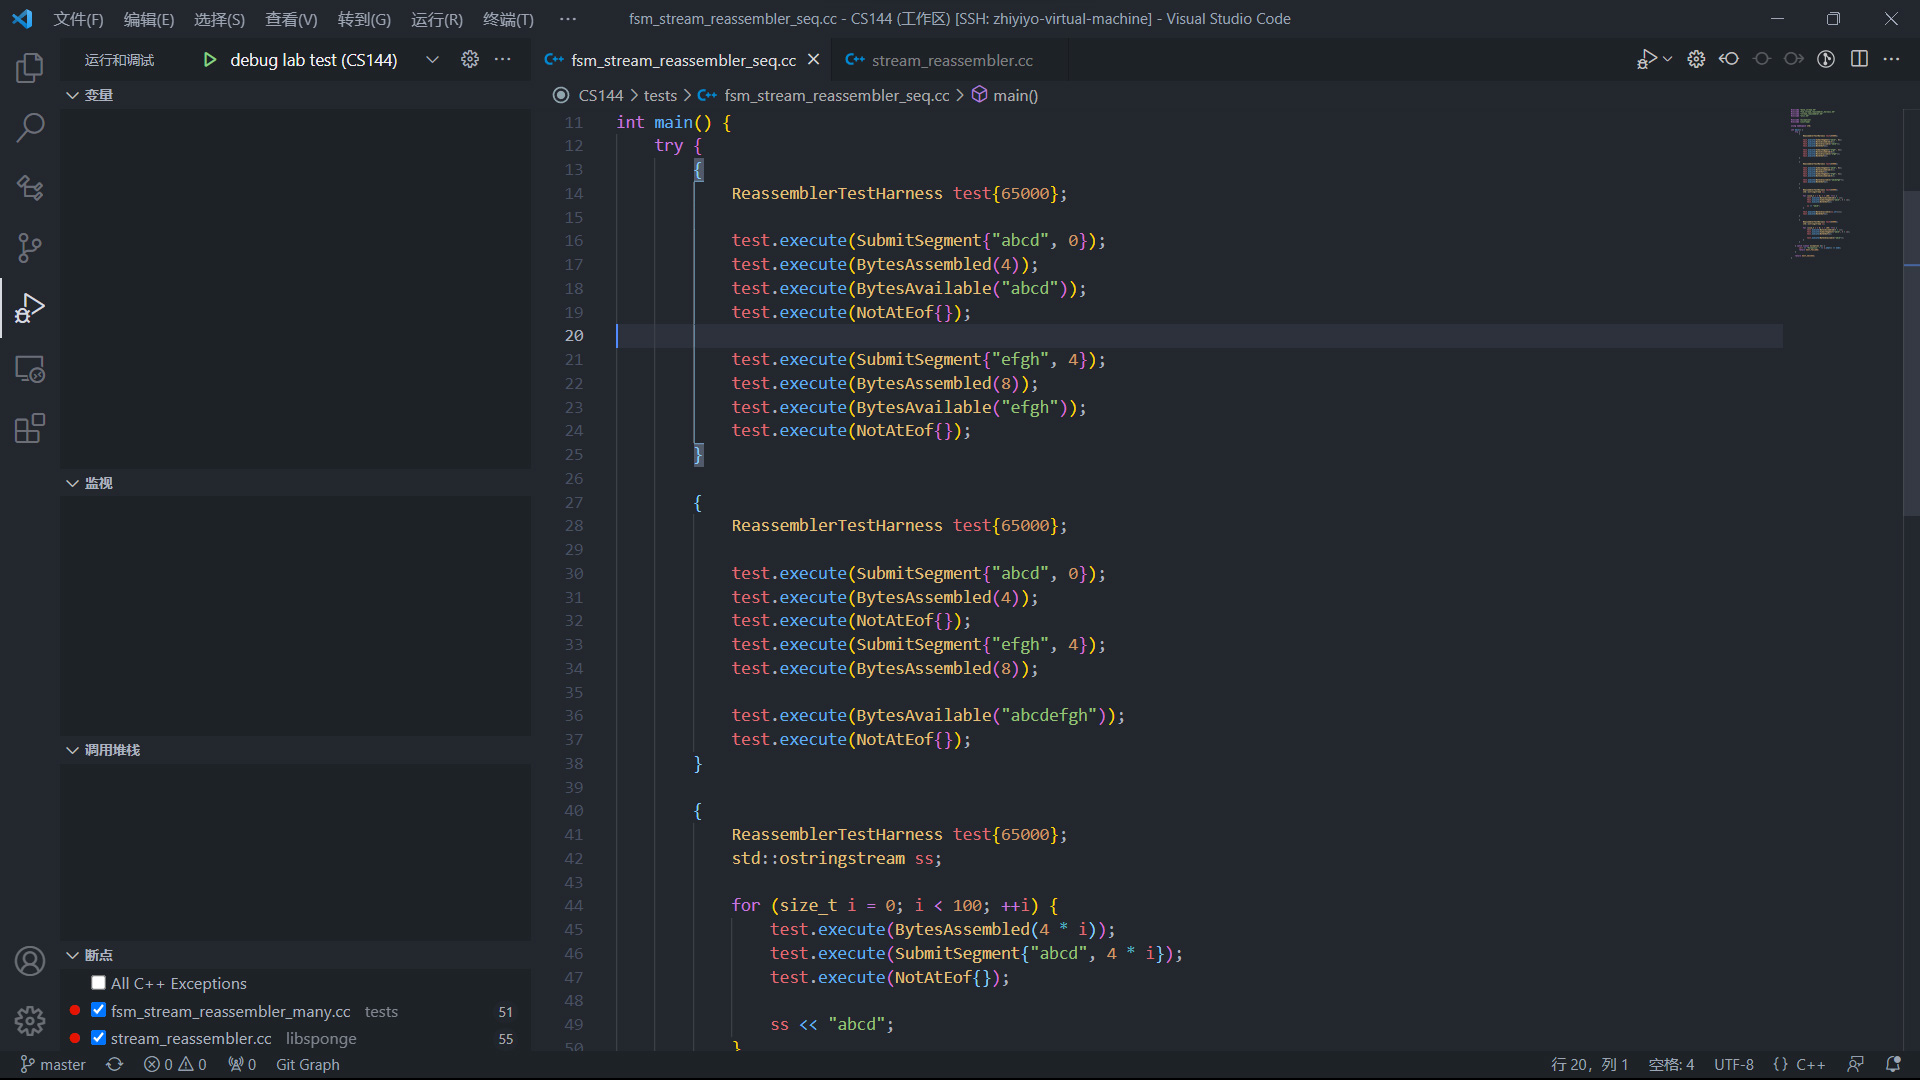
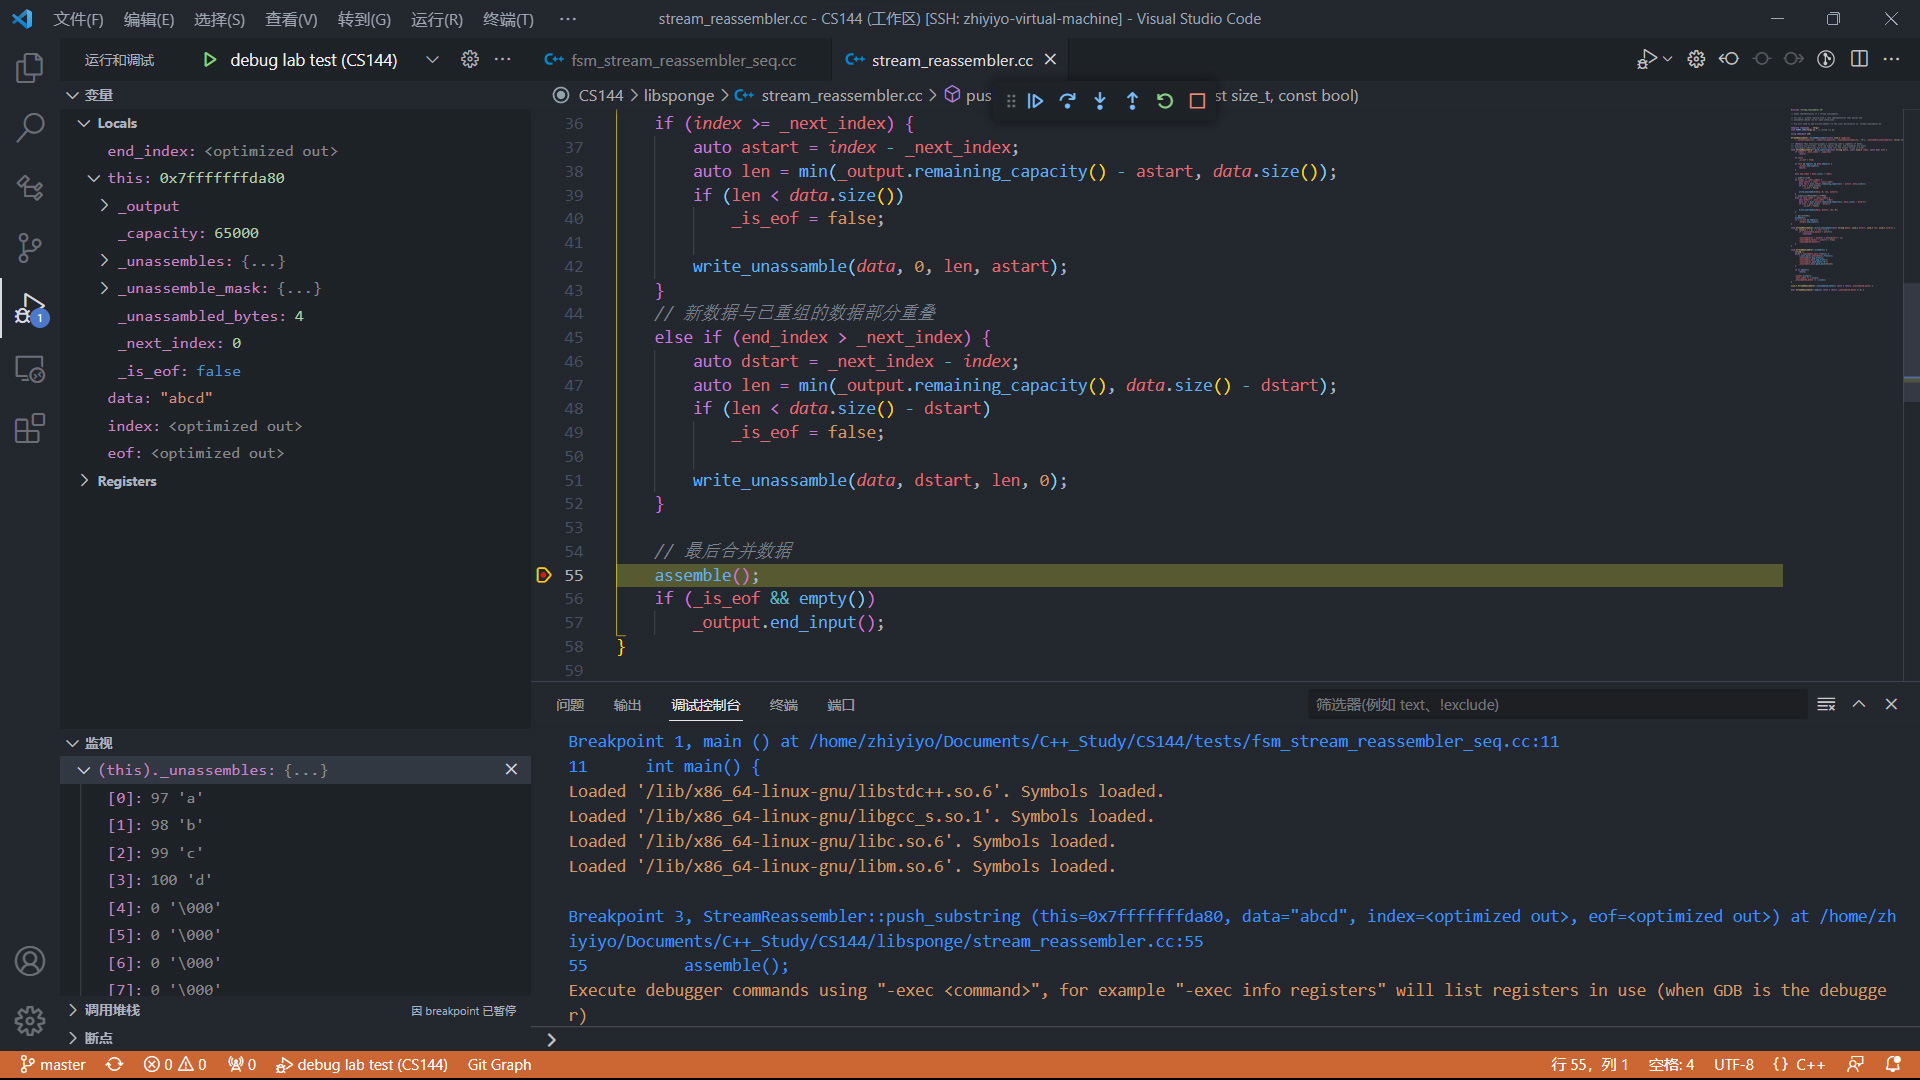
调试效果如下图所示:
通过这次实验,可以加深对接收端数据重组和分组序号的了解,期待后面的几个实验,以上~~
Recommend
About Joyk
Aggregate valuable and interesting links.
Joyk means Joy of geeK