

docker-compose安装屌机家的ALS – Another Looking-glass Server
source link: https://vpsxb.net/4295/
Go to the source link to view the article. You can view the picture content, updated content and better typesetting reading experience. If the link is broken, please click the button below to view the snapshot at that time.

docker-compose安装屌机家的ALS – Another Looking-glass Server

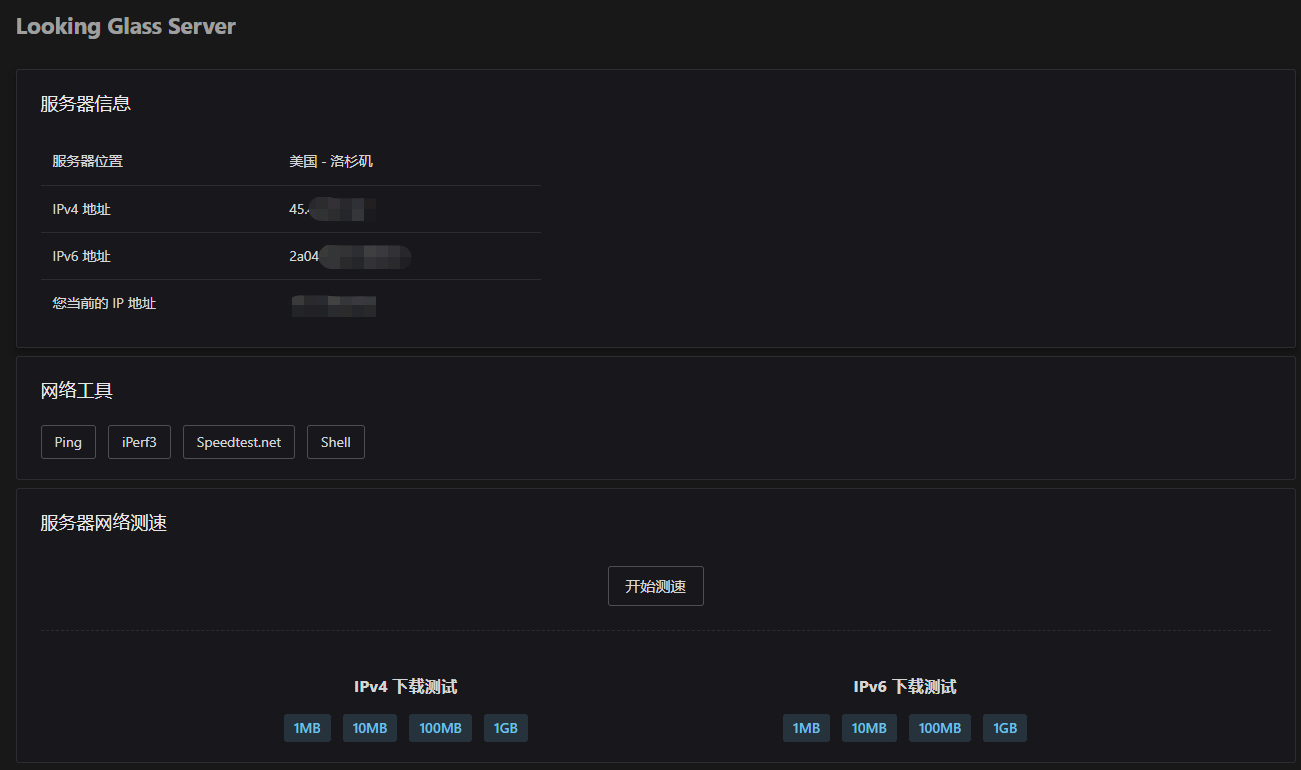
玩服务器最关心的莫过于网络状况,这其中包括服务器的网络延时、线路和速度等,按照正常操作每种情况都需要分开检测,那么有没有一个工具可以把这几项检测都包含进去呢?答案肯定是有的,那就是LookingGlass,一般服务器商家都会有提供这个页面以供测试,当然也有很多商家没有,这种时候就需要我们自己搭建LookingGlass了。
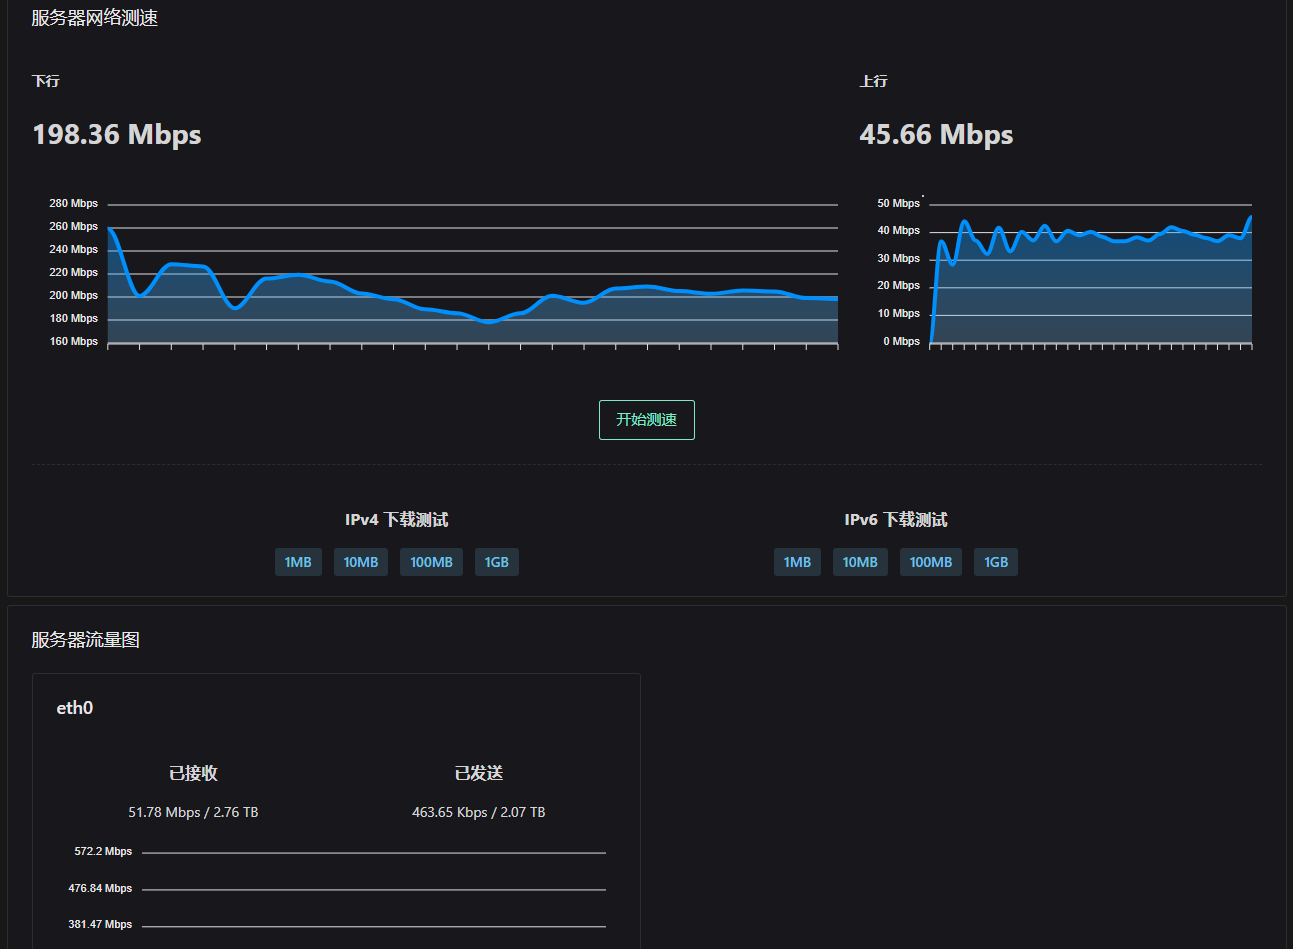
LookingGlass项目有好几种,这里推荐wiki家的开源项目:ALS – Another Looking-glass Server,项目包含ping测试、回程线路测试、iperf3测试、HTML 5 在线测速、下载文件测速、网卡流量监控等功能。
以上来自:https://jishubai.com/546.html
GitHub地址:
https://github.com/wikihost-opensource/als
屌机家的这个Another Looking-glass Server还是很不错的,ALS。
安装docker和docker-compose
- curl -L "https://github.com/docker/compose/releases/latest/download/docker-compose-$(uname -s)-$(uname -m)" -o /usr/local/bin/docker-compose && chmod +x /usr/local/bin/docker-compose
- wget -qO- https://get.docker.com/ | sh
部署ALS – Another Looking-glass Server
官方README给出了快速安装命令:
- docker run -d --name looking-glass --restart always --network host wikihostinc/looking-glass-server
官方并没有给出详细的自定义端口,自定义网络类型的安装类型,网上给出的大部分教程也是直接docker run运行,那小弟就献丑了。我们还是采取官方的网络类型为host的模式,因为小白发现桥接类型网络,对于ipv6貌似支持不是很好,当然也不是不可以解决,我懒……直接host一把梭。
我们在root目录新建一个目录并进入:
- mkdir als && cd als
新建一个docker-compose.yml文件:
- touch docker-compose.yml
官方默认是监听80端口。
如果你的80端口空闲,那我们写入以下内容:
- version: "3"
- services:
- looking-glass-server:
- image: wikihostinc/looking-glass-server:latest
- container_name: lookingglass
- network_mode: host
- restart: unless-stopped
如果你的80端口不空闲,想自定义其他端口,那我们写入以下内容:
- version: "3"
- services:
- looking-glass-server:
- image: wikihostinc/looking-glass-server:latest
- container_name: lookingglass
- environment:
- - HTTP_PORT=8800
- network_mode: host
- restart: unless-stopped
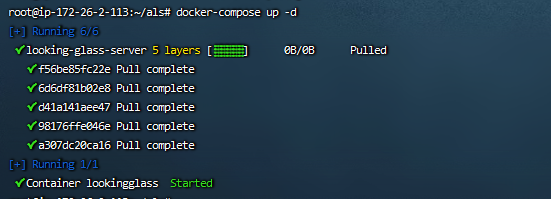
然后,我们直接运行:
- docker-compose up -d
大功告成。
转载请注明原文链接
Recommend
About Joyk
Aggregate valuable and interesting links.
Joyk means Joy of geeK