

Introduction to GDScript in Godot 4 Part 2 [FREE]
source link: https://www.kodeco.com/38564941-introduction-to-gdscript-in-godot-4-part-2
Go to the source link to view the article. You can view the picture content, updated content and better typesetting reading experience. If the link is broken, please click the button below to view the snapshot at that time.

Before starting with this part of the tutorial, make sure you finished the first part as this part will build upon the fundamentals laid down there.
In this second part of the tutorial, you’re going to learn about the following:
- The basics of state machines.
- Adding and removing nodes with code.
- Creating a camera that follows a node.
- Using UI elements to inform the player.
Without further ado, it’s time to get back to scripting!
Getting Started
Download the projects by clicking Download Materials at the top or bottom of the tutorial. Next, unzip the file and import the starter folder into Godot. Alternatively, you can continue with the project you used in the previous part.
At the end of the previous part of this tutorial, gravity was constantly being applied on the player avatar, allowing it to jump and fall back down. This had the side effect of the avatar never being able to stand on the ground below, so you have to continuously jump now.
Ideally, the avatar should stay on the ground and should only fall down once he’s in the air. One way of keeping track of these states is using a finite state machine.
Finite State Machines
A finite state machine (FSM) is a way to break down a game or application into different states. Take a simple adventure game for instance: you might have a game state for walking around, a state for fighting and a state for when the game menu is open. While the player is exploring, you might hide the UI for full immersion, while in battle you want to show health bars, skills and so on. Meanwhile, you want to pause the game in the background when the menu is open so the player can manage his inventory and change settings.
Programming what should happen in each scenario without a FSM leads to messy code with a lot of if-statements strewn about. It’s also prone to mistakes and harder to debug. With a FSM, you create three states:
- Walking
- Fighting
The current state is stored in a variable and depending on the active state, a different code path is followed. You can even add transitions between states where UI elements fade in or out for example.
For this game, there are two possible states: on the ground and in the air. The game starts with the avatar on the ground, where it can do a manual jump and isn’t effected by gravity. Once the avatar has jumped up, it’s in the air and gravity gets applied to it. To add this to the script, start by adding the following line at the top of the script, below var velocity : Vector2 = Vector2.ZERO:
enum AvatarState {ON_GROUND, IN_AIR}
AvatarState isn’t a variable, but an enum, which is a set of constants. Enums are useful as you can access their value by their key, which are ON_GROUND and IN_AIR in this case. Behind the scenes, the values of these keys are integers starting from 0. You can use an enum as a type as you’ll see below.
To keep track of the active state, add this variable declaration right above the enum you added:
var state : AvatarState = AvatarState.ON_GROUND
The state variable uses AvatarState as its type and sets its default value to AvatarState.ON_GROUND. This variable will come in use to keep track of the avatar’s state and react accordingly. To apply the finite state machine concept to the rest of the script, you’ll need to make several changes to its structure. To start with, add these two functions below the _process function:
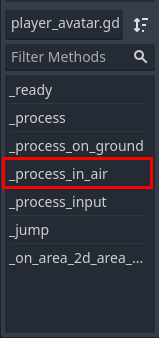
func _process_on_ground() -> void:
    pass

func _process_in_air(delta) -> void:
    pass
Depending on the state, the corresponding function will be called every frame. This splits up the logic according to the state, which is the basis of every FSM.
Now add this block of code to _process, right below var cursor_right:
match state: # 1
    AvatarState.ON_GROUND: # 2
        _process_on_ground()
    AvatarState.IN_AIR: # 3
        _process_in_air(delta)
Here’s what this code does:
- This
matchstatement reads the value ofstateand branches the further execution flow depending on its value. This can replace if-statements where the only difference is a single value and results in a cleaner, more readable result. If you’re familiar with other programming languages, thematchstatement is similar to aswitchstatement, albeit with some extra features. - In case the value of
stateisAvatarState.ON_GROUND, call_process_on_ground. - In case the value of
stateisAvatarState.IN_AIR, call_process_in_air.
Note that the match statement, its branches and the logic for each branch needs its own indentation.
With the finite state machine in place, it’s time to move the process code to their appropriate functions. To start off, move the call to _process_input from _process to _process_on_ground, replacing the pass keyword. This ensures the avatar can’t manually jump if it’s not on the ground. The _process_on_ground function should look like this now:
func _process_on_ground() -> void:
    _process_input()
Next, the gravity should only be applied when the avatar is in the air, so move the line velocity.y += delta * gravity from _process to _process_in_air, replacing the pass keyword. The _process_in_air function now looks like this:
func _process_in_air(delta) -> void:
    velocity.y += delta * gravity
If you run the project now and make the avatar jump, you’ll notice the avatar is back to his space rocket ways as gravity isn’t being applied. This makes sense, as gravity is now only applied in the IN_AIR state, while the avatar never switches to that state. To fix that, add the following line to _jump function:
state = AvatarState.IN_AIR
This changes the state to IN_AIR after a jump, so gravity will start getting applied. Run the project again and try jumping, the avatar will now jump and fall down and… keeps falling down. Hey, it’s progress!
As with all the other issues you’ve faced throughout the tutorial, this too can be fixed with some code. The current problem is the avatar has no idea where the ground is, and as a result, has no way to react to falling on the ground. Luckily, it’s easy to figure out where the ground is, as that’s the avatar’s starting position. You just need to save that position somewhere, if only there was some sort of container to store values into. :]
Yes, you need another variable! Add this line to the top of the script, right below var state:
var start_height : float
This will store the Y position of the avatar at the start of its lifetime, its starting height. You don’t have to give it a default value in this case, as its value will be set in the _ready function. Speaking of which, add this line to _ready, replacing the print statement that’s in there:
start_height = global_position.y
This sets start_height to the initial Y position of the avatar. To use this starting height to detect the ground when falling, add the following to the _process_in_air function:
if velocity.y > 0: # 1 (falling)
    if global_position.y >= start_height: # 2
        var _result = get_tree().reload_current_scene() # 3
else:  # 4 (going up)
    pass
For simplicity’s sake, the scene gets reloaded if the avatar hits the ground after falling. This resets the game state without having to reset any variables. Here’s a breakdown of the different parts:
- If the avatar’s vertical velocity is positive, that means it’s falling down.
- If the Y position of the avatar is equal to the start height or moves past it while falling…
- Restart the current scene using
get_tree().reload_current_scene(). Theget_tree()call returns an instance ofSceneTree, which is a node manager class that contains useful methods for working with scenes and nodes. One of those methods isreload_current_scene(), which reloads the active scene and returns a result code. The result code is ignored for this example. - If the avatar is moving up, do nothing for now.
Run the project again, this time the scene will reset once the avatar hits the ground, allowing you to keep “playing” indefinitely. There’s now a game loop, even if it’s not the most exciting one.
Now is a good time to make the avatar jump up when hitting jumpers, after all, that’s what they’re for!
To do so, you just need to connect the Area2D‘s area_entered signal to the player_avatar script like you did with the jumpers. To recap, select Area2D in the Scene dock, open the Node tab on the right side of the editor and double click the area_entered signal. Finally, click the Connect button to create the new _on_area_2d_area_entered function.
Add this line to the newly created _on_area_2d_area_entered function, replacing its pass keyword:
_jump()
This makes the avatar automatically jump when hitting jumpers. Guess what? It’s time for another test run! Run the project and see if you can hit all three jumpers before hitting the ground again.

I hope you agree that this starts to feel like a game now. It might even already fit in with WarioWare‘s microgames. :]
Avatar Finishing Touches
As a final addition to the avatar script, the animation and direction of the sprite should change depending on the state and movement direction. The first step to do that is getting a reference to the child node AnimatedSprite2D. Remember the drag-and-drop trick to add node references: drag AnimatedSprite2D onto the player_avatar script and hold CTRL/CMD before releasing.
This will add the following code:
@onready var animated_sprite_2d: AnimatedSprite2D = $AnimatedSprite2D
Rename animated_sprite_2d to sprite as the original name is a bit wordy. Next, add the following if-statement to the _process_on_ground function:
if velocity.x == 0:
    sprite.animation = "idle"
else:
    sprite.animation = "run"
This will change the avatar’s animation when it’s on the ground. If there’s no horizontal velocity, the idle animation is played, while run is played if the avatar is moving. As with the jumpers, you can find these animations by clicking the AnimatedSprite2D node and taking a look at the bottom of the editor.
Test the game again to see the results. Notice the avatar isn’t switching to his idle animation, why is that?
To investigate the problem, add this print call right above the if-statement you added in _process_on_ground:
print(velocity)
This will print out the avatar’s current velocity, which should be (0, 0) when the avatar is on the same horizontal position as the cursor. Run the project once again and keep an eye on the console in the editor.
Notice how the avatar’s X velocity is never zero. This is because there are only two ways the avatar can move at the moment: left or right. This is due to the way the movement code is set up in _process:
var cursor_right : bool = (mouse_pos.x - global_position.x) > 0

...

if cursor_right:
    if global_position.x < viewport_size.x - viewport_border:
        velocity.x = move_speed
else:
    if global_position.x > viewport_border:
        velocity.x = -move_speed
Basically, the avatar will have a positive X velocity if the cursor is right and in all other cases it will have a negative X velocity. You can add a case where the X velocity will be zero if the cursor is already close to the avatar. For this, you need to keep track of the distance to the cursor, which is already done by the cursor_right variable with mouse_pos.x - global_position.x.
To store this calculation in a variable, replace the cursor_right variable declaration with the following two lines:
var cursor_x_pos_relative_to_avatar : float = mouse_pos.x - global_position.x
var cursor_right : bool = cursor_x_pos_relative_to_avatar > 0
This adds a descriptive variable named cursor_x_pos_relative_to_avatar that replaces the relative position calculation cursor_right was using. As before, the value of this calculation is the distance between the avatar and the cursor, with a positive value meaning the cursor is to the right of the avatar.
Now you need a variable that sets the minimum distance to the cursor before the avatar moves horizontally, so add this at the top of the script, below var gravity:
@export var min_distance_before_move : float = 10.0
This sets the distance in pixels to the cursor before the avatar will move. To use the variables you added, replace the if-statement in _process with the following:
if abs(cursor_x_pos_relative_to_avatar) > min_distance_before_move: # Added this line
    if cursor_right:
        if global_position.x < viewport_size.x - viewport_border:
            velocity.x = move_speed
    else:
        if global_position.x > viewport_border:
            velocity.x = -move_speed
Only the first line is new code here, which does the following:
-
absis short for absolute and returns the absolute value of any given parameter, which means the value becomes positive. -1 becomes 1 for example. -
cursor_x_pos_relative_to_avatar, the distance to the avatar, is now always positive. If this distance is bigger than the minimum move distance, continue with the movement logic.
Now run the project again and you’ll see the avatar finally stands idle when the cursor is near.
Go ahead and remove the print line from _process_on_ground now, as that’s not needed anymore.
To make the avatar turn in the right direction, add this one-liner to _process, right below var cursor_right:
sprite.flip_h = !cursor_right
This sets the flip_h property on the avatar’s Sprite2D node to true if the cursor is to the right, and false if it’s to the left. The exclamation point inverts the value of cursor_right, changing true into false and vice-versa.
Test out the changes by pressing F5 and making the avatar move around, it should now rotate as expected.
As a final cherry on top, the animations for jumping and falling should be set as well. To do this, add the following line to the _process_in_air function, inside the if velocity.y > 0 case:
sprite.animation = "falling"
Next, add this line to the else case of the same if-statement, replacing the pass:
sprite.animation = "jump"
These two lines change the active animation like they did for the idle and run animations.
The full _process_in_air function should look like this now:
func _process_in_air(delta) -> void:
    velocity.y += delta * gravity

    if velocity.y > 0:
        sprite.animation = "falling"
        if global_position.y >= start_height:
            var _result = get_tree().reload_current_scene()
    else:
        sprite.animation = "jump"
Run the project once more to test the jump and fall animations.
That completes the player avatar for now!
With the jumpers and avatar fully working, it’s time to add a whole bunch more jumpers so the avatar can get to new heights.
Instantiating Scenes With Code
The next step in this little game is automatically spawning a bunch of jumpers via code. To start off, delete all Jumper nodes from the game scene by selecting them all and hitting Delete on your keyboard.

Next, create a new child node for the Game node by right-clicking it and selecting Add Child Node. In the Create New Node window, select Node2D for its type and click the Create button at the bottom.
This new node will act as a parent node for the jumpers you’ll be generating, so name it Jumpers. You can do this by pressing F2, or by right-clicking the node and selecting Rename in the context menu. Now that you prepared the game scene, it’s time to add another script! Select the Game node and click the Add Script button to add a new script, leave it at its default name and make sure to create it in the scripts folder.
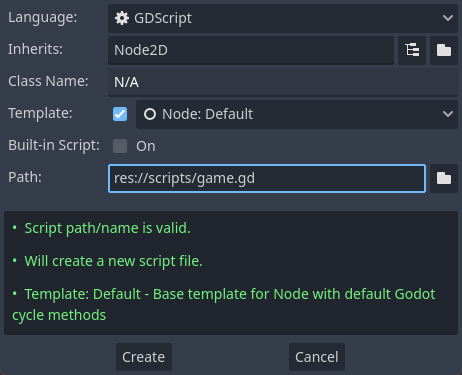
Godot will now open the new game script in the script editor, ready for you to add logic. Firstly, you’ll need a reference to the jumper scene to be able to create new instances of it. The most flexible way to do this is by exporting a PackedScene variable, so you can change what scene to spawn via the editor. To do that, add the following line below extends Node2D:
@export var jumper_scene : PackedScene
PackedScene is an interface to a scene file which allows you to instantiate nodes in your scene later on. Save the script and reselect the Game node in the Scene dock. You’ll now see a new property appearing in the Inspector named Jumper Scene.

To assign a scene, drag the jumper.tscn scene file from the FileSystem dock onto the property or click the property and select Quick Load ▸ scenes/jumper.tscn.
Next, you need a reference to the Jumpers node, so drag that node onto the script editor while holding CTRL/CMD to add this line:
@onready var jumpers: Node2D = $Jumpers
Rename this variable to jumpers_parent to avoid confusion later on. With both references in place, you can now create new jumpers. For a quick test, add the following to the _ready function, replacing the pass keyword:
var new_jumper = jumper_scene.instantiate() # 1
jumpers_parent.add_child(new_jumper) # 2
This will instantiate a new jumper and add it as a child of the Jumpers node:
- Instantiate an instance of the jumper scene and store its reference in a
new_jumpervariable. - Make the new jumper a child of
jumpers_parent, the Jumpers node in the Scene dock.
Now run the project by pressing F5 and take a look around. Can you spot the jumper?
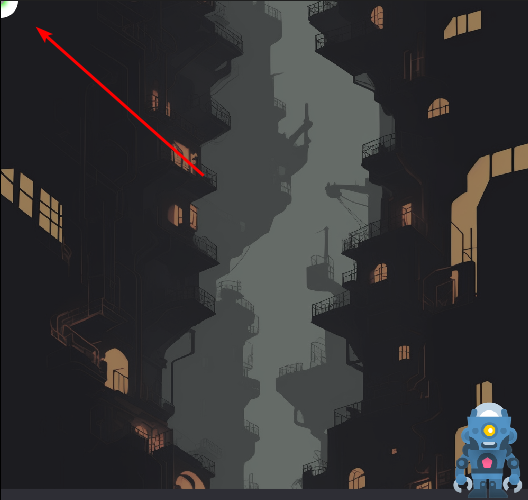
It’s at the top left of the window, mostly hidden. This isn’t because it’s shy, but because its default position is at (X:0, Y:0), which happens to be the top left of the window.
The code works though, which is the important part! To randomly spawn the jumpers, you’ll need to think about how many and where to spawn them first. Consider the following parameters:
- Amount of jumpers
- Height of first jumper
- Y-spacing between jumpers
- Random X-position range
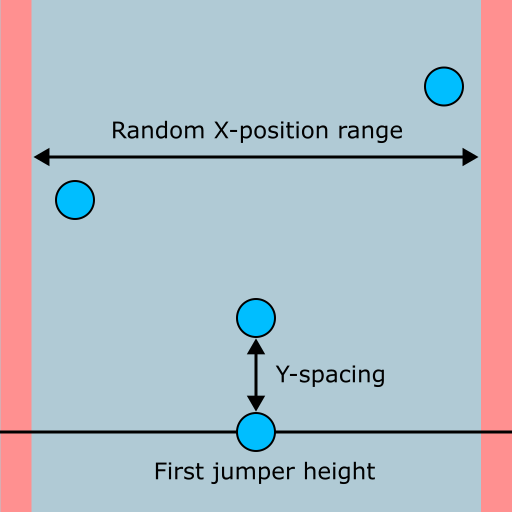
The illustration above is a visual representation of most of these parameters. With this in mind, add the following variables right below @export var jumper_scene:
@export var jumpers_to_spawn : int = 50 # 1
@export var first_jumper_height : float = 400.0 # 2
@export var spacing_between_jumpers : float = 350.0 # 3
@export var jumper_x_pos_spawn_range : Vector2 = Vector2(80, 930) # 4
These will allow you to tweak the parameters in the editor until the gameplay feels good. The defaults I provide here felt right to me, but feel free to change them later on.
Here’s a quick rundown:
- I think this one speaks for itself, it’s the amount of jumpers to spawn.
- This is the Y-position of the first jumper.
- The vertical amount of pixels between each jumper. Smaller values make the game easier, while bigger values provide more challenge.
- The minimum and maximum X-position of each jumper, represented with a
Vector2. Every new jumper will have a random position within this range.
Now for the fun part: coding the logic that will use these parameters to generate a load of jumpers. Create this new function below _ready:
func _create_jumpers(start_pos : float) -> void: # 1
    for y in range(0, jumpers_to_spawn): # 2
        var new_jumper = jumper_scene.instantiate() # 3
        jumpers_parent.add_child(new_jumper) # 4
        var jumper_x_pos = randf_range(jumper_x_pos_spawn_range.x, jumper_x_pos_spawn_range.y) # 5
        var jumper_y_pos = -y * spacing_between_jumpers + start_pos # 6
        new_jumper.global_position = Vector2(jumper_x_pos, jumper_y_pos) # 7
At first glance, this might look a bit daunting. By looking at the separate pieces though, you’ll see it’s not too complicated:
- The
_create_jumpersfunction takes a single parameter:start_pos, which is the position of the first jumper. - This is a
for-loop, it will execute the code below it a certain amount of times and keep track of the times it has ran. In this case,rangeis used to make it run from 0 to the amount of jumpers to spawn. The amount of times it has looped is stored in theyvariable. - Instantiate a new jumper and store a reference to it in
new_jumper. - Make the new jumper a child of
jumpers_parent. - The
randf_rangemethod accepts two numbers and returns a random number between the two. TheXandYvalues ofjumper_x_pos_spawn_rangeare passed into it, as these are the minimum and maximum X-positions for the jumpers. The output is stored injumper_x_pos. - Here, the
yvariable from the loop is negated and multiplied with the spacing between the jumpers. Remember, negativeYis up in Godot, which is why the value is negated. The starting position is used as an offset, so it’s added as well. The result is the Y-position for the jumper, which is stored injumper_y_pos. - Set the position of the new jumper to the X and Y-position calculated in the previous two steps.
I hope that cleared up how this function works. It uses some of the most commonly utilized methods like range and randf_range, which are invaluable tools when creating your own games.
Now you just need to call it to actually create the jumpers, so replace everything in _ready with this line:
_create_jumpers(first_jumper_height)
This calls the function you created and passes the height of the first jumper it should create. Time for another test run! Play the project and check if the jumpers are created. If all went well, you should be seeing two jumpers on the screen.
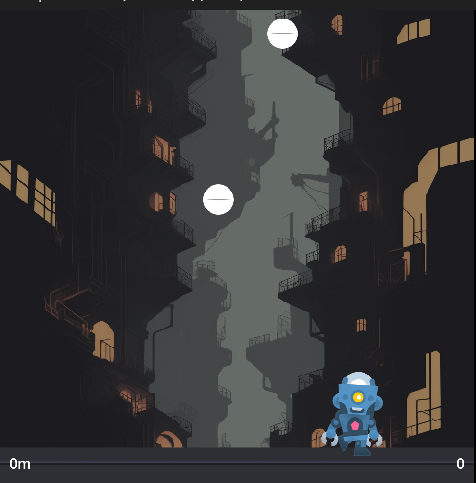
If you jump on them, you can get the avatar to tremendous heights and… Oh right, the camera is stationary so the avatar vanishes in the air when you hit the jumpers.
Camera Follow and Background Scrolling
Up until now this wasn’t an issue as the avatar couldn’t jump high. Now though, it’s clear the camera needs to follow the avatar. For this you’ll need to create another script.
Select Camera2D and create a new script named follow_cam.gd in the scripts folder. Remove its _ready function and add these variables in its place:
@export var node_to_follow : Node2D # 1
@export var follow_speed : float = 10.0 # 2
@export var y_offset : float = -650.0 # 3
These are all variables you need for a camera to follow a node around:
- The
Node2Dto follow. You’ll assign the avatar node to this. - The speed in pixels per second at which the camera will move towards its target.
- An offset of camera’s Y-position relative to the target. This move the camera up vertically so the avatar at the bottom of the view.
Now save the script and reselect Camera2D in the Scene dock. Drag the PlayerAvatar node from the Scene dock onto the Node to Follow property in the Inspector to set it as the camera’s target.
Next, add this to the _process function, replacing the pass:
var target_position = Vector2(global_position.x, # 1
    node_to_follow.global_position.y + y_offset)
global_position = global_position.lerp(target_position, delta * follow_speed) # 2
This makes the camera follow its target smoothly:
- Calculate the position the camera should be. It’s X-position will always stay the same, but its desired Y-position is equal to that of the node it’s following plus the Y-offset. Store this value in
target_position. - This changes the camera’s position by using the
lerpmethod, which stands for linear interpolation.lerpallows you to smoothly transition from one position to another. Its first parameter is the final position and the second parameter is the amount of pixels to move in a frame to reach that position. The camera will move closer to its goal a tiny bit every frame.
Play the project to test the camera out. It should now follow the avatar around when jumping and falling.
Awesome! The basic gameplay is now complete, if you wanted this game to last less than a minute anyway. Here’s a challenge for you if you feel like it: try to reach the top of the jumpers. This will give you a feel for the balance of the game, so you can tweak the distance between jumpers, the avatar’s jump height, gravity and so on.
While playing around, you might have noticed the background doesn’t move. This isn’t a huge issue, but if you want to add that extra splash of polish, follow along the next optional steps to make it scroll. Alternatively, you can skip to the Creating Infinite Jumpers section to finish up the game.
The background is a Sprite2D with a seamless background as its texture. This means it can be scrolled along its Y-axis without any gaps or noticeable changes. You can make it scroll along based on the camera’s position with a few lines of code.
Select Background and create a new script named scrolling_background.gd in the scripts folder. Add the following variables below extends Sprite2D:
@export var starting_position_offset : Vector2 = Vector2(0, 1024) # 1
@export var texture_size : Vector2 = Vector2(1024, 2048) # 2
@export var scroll_multiplier : float = 0.25  # 3
Here’s what these are used for:
- This is an offset that will be applied to the background’s position at the start. This is needed to move the sprite up a bit, so it fills the window.
- The size of the final texture. The background texture’s size is 1024×1024 pixels, but you need more vertical space so no gaps will appear at the edges. For normal textures, this would stretch the texture and make it look horrendous. The background texture is set to repeat though, so it simply adds more of the same texture vertically.
- This value gets multiplied with the camera’s position for a parallax-like effect as the background moves slower than the camera.
Next, add this to _ready to set the initial position for the background:
global_position = get_parent().global_position - starting_position_offset
This changes the background’s position to that of its parent, Camera2D and subtracts the position offset from it.
Finally, add this to _process to complete the script:
region_rect = Rect2(0, global_position.y * scroll_multiplier, texture_size.x, texture_size.y)
A Rect2 represents a rectangle using four parameters: X-position, Y-position, width and height. By adjusting the background’s region_rect, the rectangle that sets what part of the texture should be displayed, the texture gets scrolled. More specifically, by moving the Y-position up and down along with the camera’s position, you get a nice scrolling effect.
Now run the project to see what effect this has on the game.
Now that looks cool! It’s a small touch, but it adds a lot to the feel of the game, don’t you think?
Next up is spawning and removing jumpers infinitely to keep the game going as long as the player can keep up, or gives up. :]
Creating Infinite Jumpers
The plan is to keep spawning new jumpers in whenever the avatar gets to a certain height. To achieve this, you need to keep track of the highest point the avatar reached and the position of the last spawned jumper. You can save the latter as you know the position of all spawned jumpers while instantiating them. To store the Y-position of the last jumper spawned, add the following variable below the others in the game script:
var last_jumper_y_position : float
You can assign this value by adding this to the _create_jumpers function, at the end of the for-loop:
last_jumper_y_position = new_jumper.global_position.y
This set the value of last_jumper_y_position to the Y-position of every new jumper. Each time the for-loop finishes running, this value will be set to the highest jumper.
Cool, but how is the game script supposed to know what the avatar’s highest jump is? Why, with signals of course!
The player avatar needs to keep track of its current height and highest achieved height. Then, whenever it reaches a new high point, it should emit a signal which can be connected to the game script. To store the highest point reached, open the player_avatar script and add this variable above the _ready function:
var highest_point_reached : float
This will store the highest Y-position that the avatar has reached.
Next is the signal that needs to be emitted whenever a new height is reached. Add it by adding this line below the variable you just added:
signal new_height(height : float)
Unlike the signals you’ve seen up, this signal accepts a parameter: the new height that was reached. This is super useful as this way you can notify the game script of the new height and pass the value in one go.
To update highest_point_reached and emit this signal, add the following at the end of the _process_in_air function:
if global_position.y < highest_point_reached: # 1
    highest_point_reached = global_position.y # 2
    new_height.emit(highest_point_reached - start_height) # 3
This checks if the current position is higher than the one recorded, then updates the variable and emits a signal if that’s the case:
- Check if the current Y-position is lower than the one stored in
highest_point_reached. Remember, negative Y is up in Godot, so the lower the negative value in the Y-position, the higher up the avatar is. - Set the value of
highest_point_reachedto the current Y-position. - Emit the
new_heightsignal and pass the highest point reached minus the starting height. By subtractingstart_height, the emitted height will start at 0.
You can now connect the new_height signal to the game script by opening the game scene, selecting PlayerAvatar and double-clicking the new_height signal in the Node menu on the right.
Make sure Game is selected and click the Connect button in the signal connection window.

This will add a new _on_player_avatar_new_height function to the game script. Now the game script is aware of the avatar’s top height, it can react to it by spawning in more jumpers. Replace the pass in the function that was just added with the following:
if height < last_jumper_y_position: # 1
    _create_jumpers(height) # 2
Here’s what this does:
- If the height passed by the avatar is lower than the last created jumper…
- Create a batch of jumpers, starting at the passed height.
Time to take the game for another spin! Lower the amount of jumpers to spawn at once from 50 to 10 by changing the Jumpers to Spawn property of the Game node and pressing Enter. This will make it easier to test if everything is working. Now run the project, keep jumping up and see if the jumpers keep appearing.
The game is getting close to being done now, with just a few tidbits remaining. In the final section below, you’ll learn how to update UI elements using scripting.
Keeping Score
To make it easy for the player to track how high the avatar has gotten and how many points were earned, you’ll need to update the labels at the bottom of the window to reflect these values. The user interface has its own scene to which you can add logic, so open the ui scene and add a new script to its root element, UI. Name this new script ui.gd and save it to the scripts folder. As usual, this opens the script in the script editor.
The scene contains two labels you’ll need references to in your script: HeightLabel and ScoreLabel. I’ll share a quick tip with you, select both Label nodes in the Scene dock, right-click and select Access as Unique Name in the context menu.

This will add a percent sign next to their names. By marking nodes as having unique names, you don’t need to provide a full path for them when creating references. More importantly, you can freely move the nodes anywhere in the node tree without having to change any paths in your scripts! When creating your own games and projects, you should use this liberally as it can save a huge amount of time.
Now drag the nodes to your ui script while holding CTRL/CMD to add the references. This will add these two lines:
@onready var height_label : Label = $"%HeightLabel"
@onready var score_label : Label = $"%ScoreLabel"
Notice how the path contains a percent sign at the start, that’s how you reference nodes with an unique name.
To update the labels, add these two functions:
func update_height(height : float) -> void: # 1
    height_label.text = str(round(height)) + "m" # 2

func update_score(score : int) -> void: # 3
    score_label.text = str(score) # 4
Here’s a summary of the lines:
- The
update_heightfunction accepts aheightparameter, which is the highest point the avatar reached. - Round
heightto the nearest integer using theroundmethod and convert the result to astringusingstr. Update the text of theheight_labelwith this new value. - This function takes a
scoreparameter. I’ll explain how the scoring works below. - Convert the
scoreto a string and update thescore_labeltext.
There’s one final important line to add to the script: its class name. Up until now, the communication between different scripts happened via signals, which emit an update up the node tree. In this case though, the game script will call the ui script, which is lower down the node tree. In scenarios like this, it’s best to assign the script that’s going to be called a class name to make autocompletion work.
A popular line to remember when to use a signal versus a function call among the Godot community is: “Signal up, call down”.
To add a class name, add this line right below extends CanvasLayer:
class_name UserInterface
This makes it so the ui script can be accessed as a type by the name UserInterface.
With the ui script done, it’s time to move on to the game script again, as it needs a reference to the UI node and its UserInterface class. This time, you won’t be able to rely on the drag-and-drop method as Godot won’t automatically add the correct type you created. Instead, add this line below @onready var jumpers_parent in the game script:
@onready var ui := $"UI" as UserInterface
There are a few things this node reference does different than the ones you’ve seen up to now:
- The
:=operator, also called the “walrus operator”, is used to let Godot guess the type of the UI node, which isCanvasLayer. -
as UserInterfacecasts the node as theUserInterfacetype. This makesuithe correct type and enables autocompletion.
@onready var ui: UserInterface = $UI is because of a bug in Godot involving custom classes which prevents autocompletion from working with the usual syntax. This might not be a problem for this tutorial as you can copy the code without relying on autocompletion, but beware of this in your own projects if you find that the autocompletion isn’t working as expected.
Next, to update the height label, add this to the end of _on_player_avatar_new_height:
var height_in_metres = -height/100.0 # 1
ui.update_height(height_in_metres) # 2
This converts the height in pixels to an arbitrary lower number and calls the ui script to update its height label:
-
Negate the height so it’s a positive number and divide it by 100. This is purely to have a lower number instead of using the pixel value. The calculated value is stored in
height_in_metres. - Call the ui script’s
update_heightfunction and pass the new height number.
With that, the height label should now update automatically to reflect the height of the avatar. Run the project and jump up to test if this works.
Great! That leaves just the score label to hook up.
Whenever the avatar hits a jumper, the score should go up by 100 points. To make this work, the avatar should let the game script know when it hit a jumper, which in turn can call the ui script to update the score label.
In order to inform the game script of the avatar’s jumper hits you’ll need to create a new signal. Add this to the player_avatar script below signal new_height:
signal hit_jumper
To make the avatar emit that signal whenever it hit a jumper, add this line to the _on_area_2d_area_entered function:
hit_jumper.emit()
Nice, now you just need to connect the hit_jumper signal to the game script. As usual, you do this by opening the game scene, selecting PlayerAvatar and double-clicking the hit_jumper signal in the Node menu on the right. Leave the receiver method at its default value and click Connect, this will create the _on_player_avatar_hit_jumper function in the game script.
To keep track of the score, add this variable just above the _ready function in the game script:
var score : int
The last code to add in this tutorial is updating the score and making the ui script update the relevant label. To do that, add this to the _on_player_avatar_hit_jumper function:
score += 100
ui.update_score(score)
The += operator takes the current value of score and adds 100 to it. The score then gets passed to the ui script via the update_score function to update the score label.
Alright, time for a final run of the project to see it all come together! Play the game and check if the score label is updating.
That finishes up this tutorial and the small game you built up along the way. I hope you enjoyed this journey through the land of scripts, signals and nodes.
Where to Go From Here?
Thanks for reading this tutorial to the end! You can download the project files using the link at the top and bottom of this page.
You’ve learned everything you need to know to get started with GDScript 2.0 in this tutorial:
- The different kinds of variables declaration and various types
- Referencing nodes in various ways
- How and when to use signals and functions
- Reading player input
- Creating and using state machines
- Node manipulation
To learn even more about Godot, take a look at its official documentation.
If you want a fun challenge, here are some suggestions to improve the game further to make it a more complete experience:
- End the game if the avatar is falling for a long time
- Show an end game screen with the achieved height and score
- Keep track of high scores and show them in the UI
- Add a title screen
- Add obstacles to avoid while jumping
- Add moving objects that award extra points when hit
- Change the background when certain heights are reached
- Add juicy effects like screen shake and light effects when a jumper is hit
We hope you enjoyed this tutorial. Leave a comment below or join the forum discussion to share your thoughts and ask any questions you might have!

Contributors
Over 300 content creators. Join our team.
Recommend
About Joyk
Aggregate valuable and interesting links.
Joyk means Joy of geeK