

我的第一个项目(十一) :飞机大战分包完成(简单阐述分包思路以及过程) - 养肥胖虎
source link: https://www.cnblogs.com/FatTiger4399/p/17322997.html
Go to the source link to view the article. You can view the picture content, updated content and better typesetting reading experience. If the link is broken, please click the button below to view the snapshot at that time.
好家伙,

代码已开源
Git:
https://gitee.com/tang-and-han-dynasties/panghu-planebattle-esm.git
NPM:
panghu-planebattle-esm - npm (npmjs.com)
现在,比如说,我用Vue写好了个人博客主页的前端
我想在这个主页里面加点东西,让我的博客更缤纷多彩一点
我想在他的主页里面塞个小游戏,他会怎么做
1.思考步骤
如下:
第一步:去网上找个小游戏的资源,将这个包下载到本地,
诶,正好发现有个飞机大战 panghu-planebattle-modular 小游戏开发好了
我可以直接下载,或者通过npm安装
npm install panghu-planebattle-modular
第二步:导入到某个.vue文件或html文件
通过import导入
第三步:划一个区域<div>给这个包去渲染游戏
剩下的他就不用管了
大概是这么个过程,然后我们按着这个思路,反向去分我们这个包
先来看看原先的完整代码:
完整代码


Helloworld.vue
一看,738行,这,没人想维护的,复制粘贴都嫌累
(再看一眼就要爆炸)
我们要实现一个这样的效果(事实上也实现了)
<template>
  <div>
    <div ref="stage"></div>
  </div>
</template>

<script>
import { canvas, main_1 } from "panghu-planebattle-modular"

export default {
  mounted() {
    this.$refs.stage.appendChild(canvas);
    main_1.maingame();
  }
}
</script>

<style>
#stage {
  width: 480px;
  height: 650px;
  margin: 0 auto;
}
</style>
而事实上,就是三行代码:
//从包中导入canvas,main_1
import { canvas, main_1 } from "panghu-planebattle-modular"

//dom操作添加canvas
this.$refs.stage.appendChild(canvas);

//调用main_1的maingame方法
main_1.maingame();
让使用者操作的部分由738行代码变成3行代码
2.开始分包
将程序主要分成下面几个需要处理的部分
1、静态的:图片,图片地址,配置项
2、六个小类:Enemy、Hero、Loading、Sky、Award、Bullet
3、主启动类:Main
4、全局方法,全局变量
5、入口(对外导出的对象)
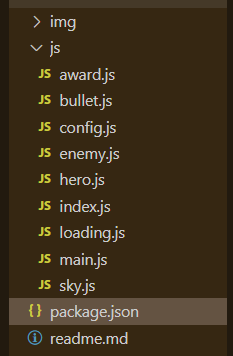
项目目录结构如下:
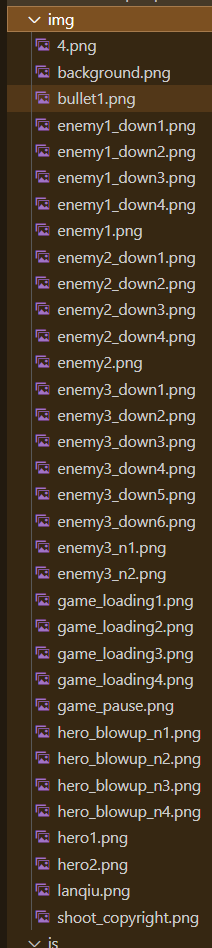
1.图片
2.配置项
首先是配置项config.js
我们将所有的配置项文件都放在这里,全局变量也放在这里
3.其中六个小类,我把他们"独立"分开
比如Bullet(子弹类)
//初始化一个子弹类
class Bullet {
  constructor(config, x, y) {
    this.img = config.img;
    this.width = config.width;
    this.height = config.height;
    this.x = x;
    this.y = y;
    this.destory = false;
  }
  //子弹绘制方法
  paint(context) {
    context.drawImage(this.img, this.x, this.y);
  }
  //移动子弹 this.y--
  move() {
    this.y -= 8;
  }
  outOfBounds() {
    //如果返回的是真的话 那么我们应该销毁掉这个子弹
    return this.y < -this.height;
  }
  collide() {
    //让这颗子弹变成可销毁状态
    this.destory = true;
  }
}

export default Bullet
这里需要提一嘴的是,类的导出必须带 default,否则会报错
export default Bullet
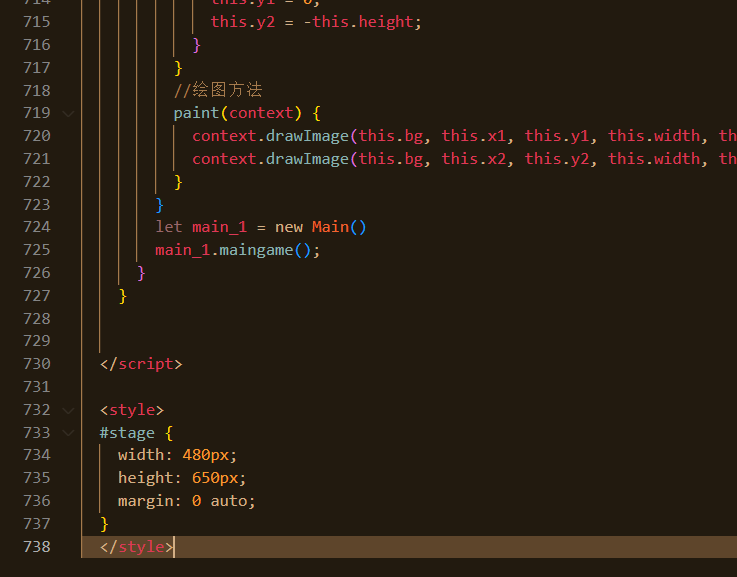
4.主启动类main
我们将所有曾经的全局方法,还有定时器都封装到这个类中
最后新建一个实例,并导出
main.js
5.包的入口
首先看一眼package.json
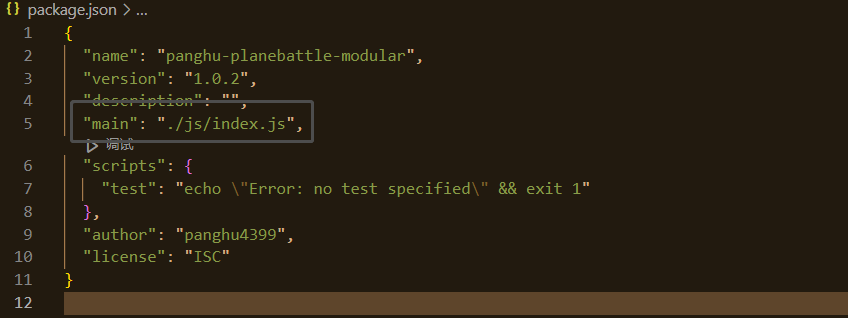
看main,(这个可以自己调的)
由上图可知,这个包的入口就是index.js了
//index.js
export { canvas } from "./config"
export { main_1 } from "./main"
config.js中的canvas
export let canvas = document.createElement('canvas');
canvas.width = 480;
canvas.height = 650;
canvas.ref = canvas;
canvas.style = "border: 1px solid red;"
main.js中的main
export let main_1 = new Main()
在这里,用上我们前几天学的语法(嘿嘿)
分包完成
Recommend
About Joyk
Aggregate valuable and interesting links.
Joyk means Joy of geeK