

Spring源码系列:初探底层,手写Spring - 努力的小雨
source link: https://www.cnblogs.com/guoxiaoyu/p/17306353.html
Go to the source link to view the article. You can view the picture content, updated content and better typesetting reading experience. If the link is broken, please click the button below to view the snapshot at that time.

Spring源码系列:初探底层,手写Spring
在学习Spring框架源码时,记住一句话:源码并不难,只需要给你各种业务场景或者项目经理,你也能实现自己的Spring。虽然你的实现可能无法与开源团队相媲美,但是你肯定可以实现一个0.0.1版本。因此,初次阅读源码时,不要陷入太深的细节中。先了解大体逻辑,再仔细研读。
本文将带领大家实现一个简易版的Spring框架,并介绍以下功能点:
- 了解Spring的底层源码启动过程
- 了解BeanDefinition的概念
- 了解Spring解析配置类等底层源码工作流程
- 了解依赖注入,Aware回调等底层源码工作流程
- 了解Spring AOP的底层源码工作流程
以上功能点将使我们对Spring框架的实现有所了解,但我们并不会一下子实现整个Spring框架的业务。我们将从上述功能点入手,通过手写模拟Spring框架来实现这些功能。
首先,我们像使用Spring一样,传入配置类获取applicationContext,再通过getBean方法获取具体对象。最后,我们调用方法并打印日志。如果你对这些基本流程不熟悉,可以查看我的入门系列文章:Spring入门系列:浅析知识点
详细流程如下:
- 解析配置类上的ComponentScan注解,获取扫描的基本路径
- 开始解析各个被扫描到的文件,是否是需要被Spring管理,如果是则暂存到list集合中
- 开始遍历被Spring管理list集合,解析各个类上的注解,比如是否是懒加载,然后将这些属性都封装到applicationContext中的以beanName为key的BeanDefineMap中
- 针对已经解析好的bean定义进行创建对象并实例化,并将其放入以beanName为key的singletonMap实例化缓存池中。
- 在实例化时,如果发现有依赖注入的对象,则将实例化缓存池中的对象存入。如果缓存池中没有该对象,则进行创建后再注入。
- 判断对象是否实现了各个Aware接口,如果实现,则进行回调。
- 判断对象是否属于增强类。在这里,我们模拟了事务注解。如果有事务注解,则创建一个代理对象,并为所有方法增加拦截器。然后将该代理对象存入单例缓存池中。
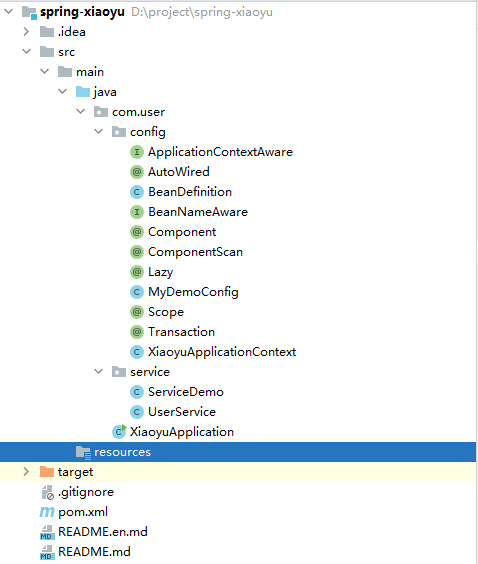
基本路径:com.user目录
各个注解及上下文类:config目录
需要被管理的Bean:service目录
启动类:com.user根目录
@Component
public class UserService implements ApplicationContextAware, BeanNameAware {

    @AutoWired
    ServiceDemo serviceDemo;

    private XiaoyuApplicationContext applicationContext;
    private String beanName;

    public void test() {
        serviceDemo.say();
//        System.out.println(serviceDemo);
        System.out.println("userService:"+applicationContext.getBean("userService"));
        System.out.println("beanName:"+beanName);
    }

    @Override
    public void setApplicationContext(XiaoyuApplicationContext applicationContext) {
        this.applicationContext = applicationContext;
    }

    @Override
    public void setBeanName(String beanName) {
        this.beanName = beanName;
    }
}
UserService类主要用于测试是否Spring已经管理了相关对象并生成了代理对象,是我们的日常业务类,我们仔细看下XiaoyuApplicationContext类,主要的流程在这边:
public class XiaoyuApplicationContext {


    //配置类
    private Class config;
    //初始的bean定义
    private Map<String,BeanDefinition> beanDefineMap = new HashMap<>();
    //单例缓存池
    private Map<String,Object> singleBean = new HashMap<>();

    public XiaoyuApplicationContext(Class myDemoConfigClass) {
        config = myDemoConfigClass;
        //解析配置类
        scan();

    }

    public void scan(){
        ComponentScan declaredAnnotation = (ComponentScan) config.getDeclaredAnnotation(ComponentScan.class);
        String value = declaredAnnotation.basePackages();
        doScan(value);
        //将bean定义Map生成具体的Bean对象
        beanDefineMap.entrySet().stream().forEach(item->{
            String beanName = item.getKey();
            BeanDefinition beanDefinition = item.getValue();
            if (!beanDefinition.isLazy() && "singleton".equals(beanDefinition.getScope())) {
                Object bean = createBean(beanName);
                singleBean.put(beanName,bean);
            }
        });
    }

    /**
     *     解析配置类
     */
    private void doScan(String value) {
        String path = value.replace(".","/");
        //正常走文件解析
        ClassLoader classLoader = this.getClass().getClassLoader();
        URL resource = classLoader.getResource(path);
        File file = new File(resource.getFile());

        List<File> classFile = new ArrayList<>();
        //简单点直接双层解析即可
        if (file.isDirectory()) {
            for (File f : file.listFiles()) {
                if (f.isDirectory()) {
                    for (File f1 : f.listFiles()) {
                        if (!f1.isDirectory()) {
                            classFile.add(f1);
                        }
                    }
                } else {
                    classFile.add(f);
                }
            }
        }
        //遍历所有解析文件
        for (File cFile : classFile) {
            String absolutePath = cFile.getAbsolutePath();
            String className = absolutePath.substring(absolutePath.indexOf("com"), absolutePath.indexOf(".class"))
                    .replace("\\", ".");

            try {
                Class<?> clazz = classLoader.loadClass(className);
                //是否需要被Spring管理
                if (clazz.isAnnotationPresent(Component.class)) {
                    //将bean上的注解封装到bean定义中
                    BeanDefinition beanDefinition = new BeanDefinition();
                    beanDefinition.setType(clazz);
                    beanDefinition.setLazy(clazz.isAnnotationPresent(Lazy.class));
                    if (clazz.isAnnotationPresent(Scope.class)) {
                        beanDefinition.setScope(clazz.getAnnotation(Scope.class).value());
                    } else {
                        beanDefinition.setScope("singleton");
                    }

                    String beanName = clazz.getAnnotation(Component.class).value();
                    if (beanName.isEmpty()) {
                        //如果不设置beanName会默认生产唯一一个name,Spring底层也是这样做的
                        beanName = Introspector.decapitalize(clazz.getSimpleName());
                    }

                    beanDefineMap.put(beanName, beanDefinition);

                }
            } catch (ClassNotFoundException e) {
                e.printStackTrace();
            }

        }
    }

    public Object createBean(String beanName){

        BeanDefinition beanDefinition = beanDefineMap.get(beanName);
        Class type = beanDefinition.getType();

        try {
            Object instance = type.newInstance();
            //属性填充,依赖注入
            populateBean(instance);

            if (instance instanceof ApplicationContextAware){
                ((ApplicationContextAware) instance).setApplicationContext(this);
            }
            if (instance instanceof BeanNameAware) {
                ((BeanNameAware) instance).setBeanName(beanName);
            }
            //是否需要AOP增强
            if (type.isAnnotationPresent(Transaction.class)) {
                Enhancer enhancer = new Enhancer();
                enhancer.setSuperclass(type);
                //简单的方法切面
                enhancer.setCallback(new MethodInterceptor() {
                    @Override
                    public Object intercept(Object proxy, Method method, Object[] objects, MethodProxy methodProxy) throws Throwable {
                        //开启事务,关闭自动提交
                        System.out.println("事务已开启");
                        Object res = method.invoke(instance, objects);
                        //提交事务
                        System.out.println("事务已提交");
                        return res;
                    }
                });
                return enhancer.create();
            }
            return instance;
        } catch (InstantiationException e) {
            e.printStackTrace();
        } catch (IllegalAccessException e) {
            e.printStackTrace();
        }

        return null;
    }

    private void populateBean(Object instance) {
        Field[] declaredFields = instance.getClass().getDeclaredFields();

        Arrays.stream(declaredFields).forEach(item->{
            //寻找注入点
            if (item.isAnnotationPresent(AutoWired.class)) {
                Object bean = getBean(item.getName());
                item.setAccessible(true);
                try {
                    item.set(instance,bean);
                } catch (IllegalAccessException e) {
                    e.printStackTrace();
                }
            }
        });

    }


    public Object getBean(String beanName){
        if (!beanDefineMap.containsKey(beanName)) {
           throw new NullPointerException();
        }
        if ("singleton".equals(beanDefineMap.get(beanName).getScope())) {
            if (singleBean.containsKey(beanName)) {
                return singleBean.get(beanName);
            } else {
                Object bean = createBean(beanName);
                singleBean.put(beanName,bean);
                return bean;
            }
        }
        return createBean(beanName);
    }
}
以上即为整个流程的基本梳理。我们在实现过程中没有涉及Bean循环依赖以及其他各种创建缓存,但Spring在实现Bean的创建过程中确实用到了各种本地缓存和同步锁(synchronized)。在学习源码时,不要太关注这些细节。首先要理解整个流程,再深入研究。
最后,我们在gitee上提供了项目源码。如果需要,可以查看spring-xiaoyu。虽然我认为写一遍自己的代码更好,因为这是最简单的流程,有助于理解Spring源码。

Recommend
About Joyk
Aggregate valuable and interesting links.
Joyk means Joy of geeK