

The Zero-API Approach with Blitz.js
source link: https://blog.bitsrc.io/the-zero-api-approach-with-blitz-js-a2fa069c1a9d
Go to the source link to view the article. You can view the picture content, updated content and better typesetting reading experience. If the link is broken, please click the button below to view the snapshot at that time.

The Zero-API Approach with Blitz.js
What is Blitz.js?

Blitz.js is a full-stack JavaScript framework based on Next.js. It is designed to provide a performant, scalable, and developer-friendly environment for building web applications. With its unique features, it has attracted developers and has garnered over 12,000 GitHub stars since its introduction in 2020.
Since Blitz.js is built on top of Next.js, developers can access all the tools necessary to create a full-stack application. Additionally, they can leverage features like automatic code splitting, server-side rendering, built-in authorization and authentication, and a query builder that are provided by Next.js.
However, the most compelling feature of Blitz.js is its Zero-API Approach, which eliminates the need to create a separate API layer in the front end. Therefore, in this article, I will delve into the Zero-API Approach in detail, including its benefits and the steps required to implement it with Blitz.js.
What is the Zero-API Approach?

Source: https://blitzjs.com/
The Zero-API Approach is a method to build full-stack web applications by eliminating the need for a separate API layer. Instead, it uses server-side queries, auto-generated by the framework based on the schema, to handle server-side functionality. This RPC-based approach integrates server-side functionality directly into the Next.js codebase, allowing developers to build the entire application in a single codebase and enjoy a unified, type-safe development experience for both client and server-side code.
Blitz.js is specifically designed for the Zero-API Approach, offering an intuitive and opinionated development environment. With Blitz.js, developers can streamline their workflow and optimize efficiency, simplifying the process of building and maintaining full-stack web applications.
Benefits of the Zero-API Approach
The Zero-API Approach has several benefits for building full-stack web applications.
1. Simplified Development
Zero-API Approach simplifies the software development process by eliminating the need for a separate API layer. The entire application can be deployed as a single unit rather than requiring separate deployments for the client-side and server-side code.
2. Reduced Code Complexity:
By integrating server-side functionality directly into the client-side codebase, the Zero-API Approach reduces overall code complexity, making it easier for developers to comprehend and work with the codebase. This enhances code quality, minimizes the likelihood of errors, and simplifies the process of fixing bugs.
3. Improved Performance
The Zero-API Approach improves application performance by reducing the number of HTTP requests needed to fetch data, as requests are made directly to the server-side code without going through an additional API layer. This can result in faster load times and a better user experience.
4. Security
The Zero-API Approach enhances security compared to traditional API approaches. In traditional API setups, many endpoints are exposed to the public, which increases the risk of an attacker finding and exploiting a vulnerability. However, with the Zero-API Approach, the server-side logic is only accessible to authenticated users and is not exposed as separate endpoints.
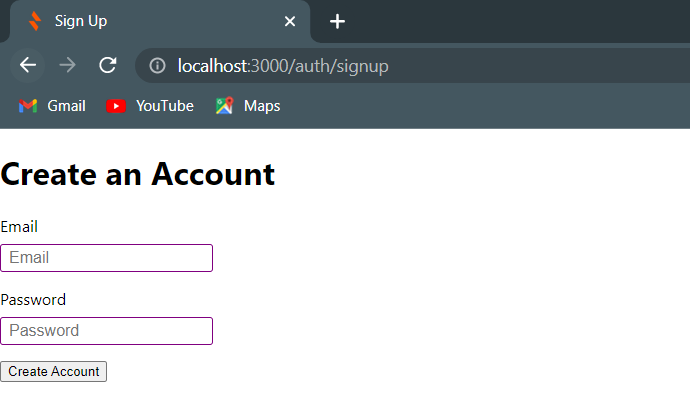
Moreover, Blitz.js includes a built-in authentication solution that seamlessly integrates OAuth into the development process. By default, Blitz.js creates sign-up, log-in, and password reset components and mutations for login, signup, log out and reset password. These components are located in the src/pages/articles directory, and you can load these page components renders when the URL /auth/{page-name} is loaded in the browser.
5. Flexibility
The Zero-API Approach provides a flexible approach to building full-stack web applications. Depending on their needs, developers can choose to integrate server-side functionality directly into the codebase or use a separate API layer.
Implementing the Zero API Approach with Blitz.js
Now, let’s see how we can implement the Zero API Approach with Blitz.js
Step 1 — Creating a Blitz.js project
First, you need to install Blitz.js using NPM or Yarn.
// NPM
npm install -g blitz

// Yarn
yarn global add blitz
Then, run the following command in the CMD to create a Bitz.js app:
blitz new my-blitz-app
Once the app creation wizard completes, navigate to the project folder, run the blitz dev command, open your web browser, and go to localhost:3000. The Blitz logo will appear on the welcome page.

If you take a look at the code base, you will see a bunch of folders and files compared to a traditional React or Angular project. Here are the most important folders and files in your Blitz.js project you need to know:
src/- Contains Blitz setup files (blitz-client.tsandblitz-server.ts), queries, mutations, and some of your components.src/pages/- The primary pages folder includes all your pages and API routes.src/core/- The main place to put components, hooks, etc.db/- Contains database configuration, models, and migrations.public/- Contains static assets.next.config.js- Advanced custom configuration of Blitz and Next.js.
You can find more about file structure here.
Step 2 — Configuring the Database Connection
In Blitz.js, the default database used by Prisma is SQLite, and the database models are defined in theschema.prisma file. To configure the database connection, open the schema.prisma file and update the provider and url properties. If you wish to use a database like MongoDB, you just need to change the provider.
...
datasource db {
  provider = "sqlite"
  url      = env("DATABASE_URL")
}

generator client {
  provider = "prisma-client-js"
}
...
The generator client property specifies the client library that Prisma will use to connect to the database and execute queries. Prisma comes with its default client library, prisma-client-jsfor all major databases.
By default, there are 3 models defined in the schema.prisma file, representing tables in the database. After configuring the database connection, Prisma will provide Prisma objects for each defined model, such as prisma.user, prisma.session, and prisma.token. These objects have methods like find(), findFirst(), update(), and delete() that allow accessing and modifying corresponding tables.
Step 3 — Creating a New Model
You can define new models for your application within the schema.prisma file. For example, the below code will define a new model named Article.
model Article {
id Int @id @default(autoincrement())
name String
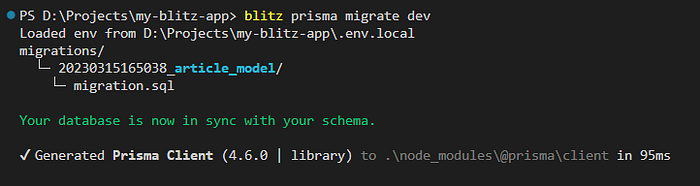
}Then, run blitz prisma migrate dev command to sync the database with the new model.
You can use the new article model by importing the db/index.js file. The db object in that file will include the article model, and you can access the create, edit, get, and delete methods of the article object like below:
// Create new article
db.article.create({data: {name: 'Blitz.js'}}).

// Edit article
db.article.update(id, data).

// Get articles
db.article.find({}).

// Delete a article
db.article.delete().
Step 4 — Creating Pages
Now, you need to create pages for the Article model. You can use the below Blitz.js CLI command for that.
blitz g all article
The above command will create a set of new files under the src\pages\articles and src\articles folders.
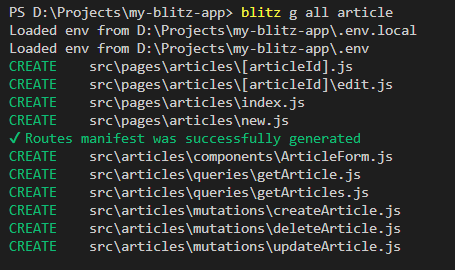
As you can see, Blitz.js automatically generates all the files you need to perform basic CRUD operations on the Article model.
src/pages/articles- This folder contains the page routes for the article model.src/pages/articles/index.js- This page component renders when the URL/articlesis loaded in the browser. It includes the functions to fetch articles from the database.
src/pages/articles/new.js- This page component renders when the URL/articles/newis loaded in the browser. It includes the functions to create a new article in the database.src/articles/components/ArticleForm.js- This form is rendered within thearticles/new.jsfile. It includes an input field to enter the article name and a submit button.

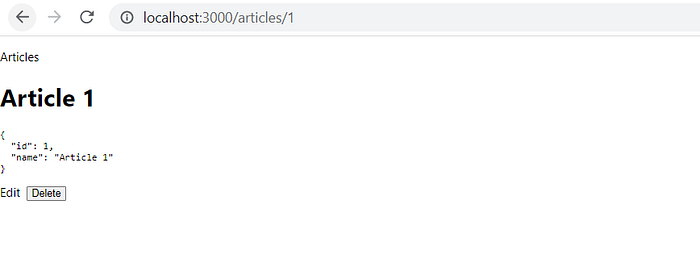
pages/articles/[articleId].js- This page component renders when the URL/articles/[articleId]is loaded in the browser. It will display the details of a single article.
pages/articles/[articleId]/edit.js- This page component renders when the URL/articles/[articleId]/editis loaded in the browser. It will allow editing details of a single article.

At the end of each page, you will see a code line like this:
NewArticlePage.authenticate = true
The authenticate property is used to authenticate page routes. If it is set to true, users need to be authenticated before accessing the page.
Step 4 — Understanding the Mutations and Queries
src/articles/mutations folder contains all the article model mutations. For example, src/articles/mutations/createArticle.js file contains functions to create a new article.
export default resolver.pipe(resolver.zod(CreateArticle), resolver.authorize(), async (input) => {
 // TODO: in multi-tenant app, you must add validation to ensure correct tenant
 const article = await db.article.create({
  data: input,
 })
 return article
})
src/articles/querie folder contains all the query resolver files for the articles model. For example, src/articles/queries/getArticle.js file contains a query to return a single article.
export default resolver.pipe(
 resolver.zod(GetArticle),
 resolver.authorize(),
 async ({ id }) => {
  // TODO: in multi-tenant app, you must add validation to ensure correct tenant
  const article = await db.article.findFirst({
   where: {
    id,
   },
  })
  if (!article) throw new NotFoundError()
  return article
 }
)
Similar to pages, mutations, and query resolvers also includes authorization by default. resolver.authorize() function ensures that users without proper authorization can't perform any mutations or queries on your model. So, if you are just making an application without authorization, you need to remove that function.
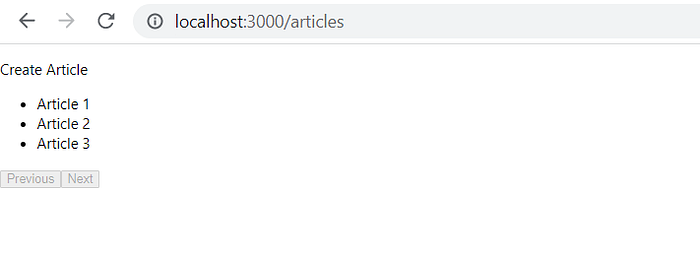
Step 5 — Run the application
Finally, run the application with blitz dev command and navigate to localhost:3000/articles to to see the application in action.
You can find the complete code example of this application in this GitHub repository.
Conclusion
The Zero-API approach with Blitz.js simplifies web development by providing a comprehensive and easy-to-use framework that automates many tedious tasks developers encounter. With Blitz.js, developers can quickly scaffold a project and generate pages, models, mutations, and query resolvers using the CLI. In addition, we have explored the files and folders within a Blitz.js project and gained an understanding of their functions. Overall, the Zero-API approach with Blitz.js is a powerful tool for quickly building robust web applications.
Build React Apps with reusable components, just like Lego
Bit’s open-source tool help 250,000+ devs to build apps with components.
Turn any UI, feature, or page into a reusable component — and share it across your applications. It’s easier to collaborate and build faster.
Split apps into components to make app development easier, and enjoy the best experience for the workflows you want:
→ Micro-Frontends
→ Design System
→ Code-Sharing and reuse
→ Monorepo
Recommend
About Joyk
Aggregate valuable and interesting links.
Joyk means Joy of geeK