
3

springboot 接入 ChatGPT - Kindear
source link: https://www.cnblogs.com/masterchd/p/17233297.html
Go to the source link to view the article. You can view the picture content, updated content and better typesetting reading experience. If the link is broken, please click the button below to view the snapshot at that time.

https://gitee.com/Kindear/lucy-chat
lucy-chat是接入OpenAI-ChatGPT大模型人工智能的Java解决方案,大模型人工智能的发展是不可阻挡的趋势,我们环境无法创造工具,但是也要更好的使用工具,该包简化了接入流程,可以非常方便的引入并使用ChatGPT相关功能。
lucy-chat提供了两种形式接入服务,完成集成或者独立部署后可以访问[部署地址]/doc.html调用相关接口。
1. Jar引入
在引入任何 Lucy系列依赖之前,需要完成jitpack镜像仓库的配置。
<repositories>
        <repository>
            <id>jitpack.io</id>
            <url>https://www.jitpack.io</url>
        </repository>
</repositories>
根据版本号引入
当前默认1.0.0-r4
		<dependency>
			<groupId>com.gitee.kindear</groupId>
			<artifactId>lucy-chat</artifactId>
			<version>${version}</version>
		</dependency>
启用 knife4j 文档,需要在启动类上配置 @EnableKnife4j
@EnableKnife4j
@SpringBootApplication
public class DemoApplication {

    public static void main(String[] args) {

        SpringApplication.run(LucyAdminApplication.class, args);
    }

}
使用 lucy-chat需要配置如下文件信息
spring.application.name=lucy-chat
# 运行端口
server.port=8080
# swagger 匹配
spring.mvc.pathmatch.matching-strategy=ant_path_matcher

# chat-gpt api-key
# 申请地址 https://platform.openai.com/account/api-keys
openai.chat.key=

# chat-gpt proxy host
# 配置代理地址 请参阅 https://www.v2ex.com/t/921689
openai.chat.host=

# 连接池最大连接数
forest.max-connections=1000
# 连接超时时间,单位为毫秒
forest.connect-timeout=30000
# 数据读取超时时间,单位为毫秒
forest.read-timeout=30000
2. 独立服务
- 从开源地址下载项目
git clone https://gitee.com/Kindear/lucy-chat
- 修改
POM文件中打包方式,即恢复<build>相关注释掉的内容
<build>
        <plugins>
            <plugin>
                <groupId>org.apache.maven.plugins</groupId>
                <artifactId>maven-compiler-plugin</artifactId>
                <version>3.8.1</version>
                <configuration>
                    <source>1.8</source>
                    <target>1.8</target>
                    <encoding>UTF-8</encoding>
                </configuration>

            </plugin>
            <plugin>
                <groupId>org.springframework.boot</groupId>
                <artifactId>spring-boot-maven-plugin</artifactId>
                <version>${spring-boot.version}</version>
                <executions>
                    <execution>
                        <goals>
                            <goal>repackage</goal>
                        </goals>
                    </execution>
                </executions>
            </plugin>
        </plugins>
    </build>
- 修改相关配置文件, 参考上文的配置文件相关内容,项目中提供的
key为私人key,随时会被替换。 - 打包项目并部署
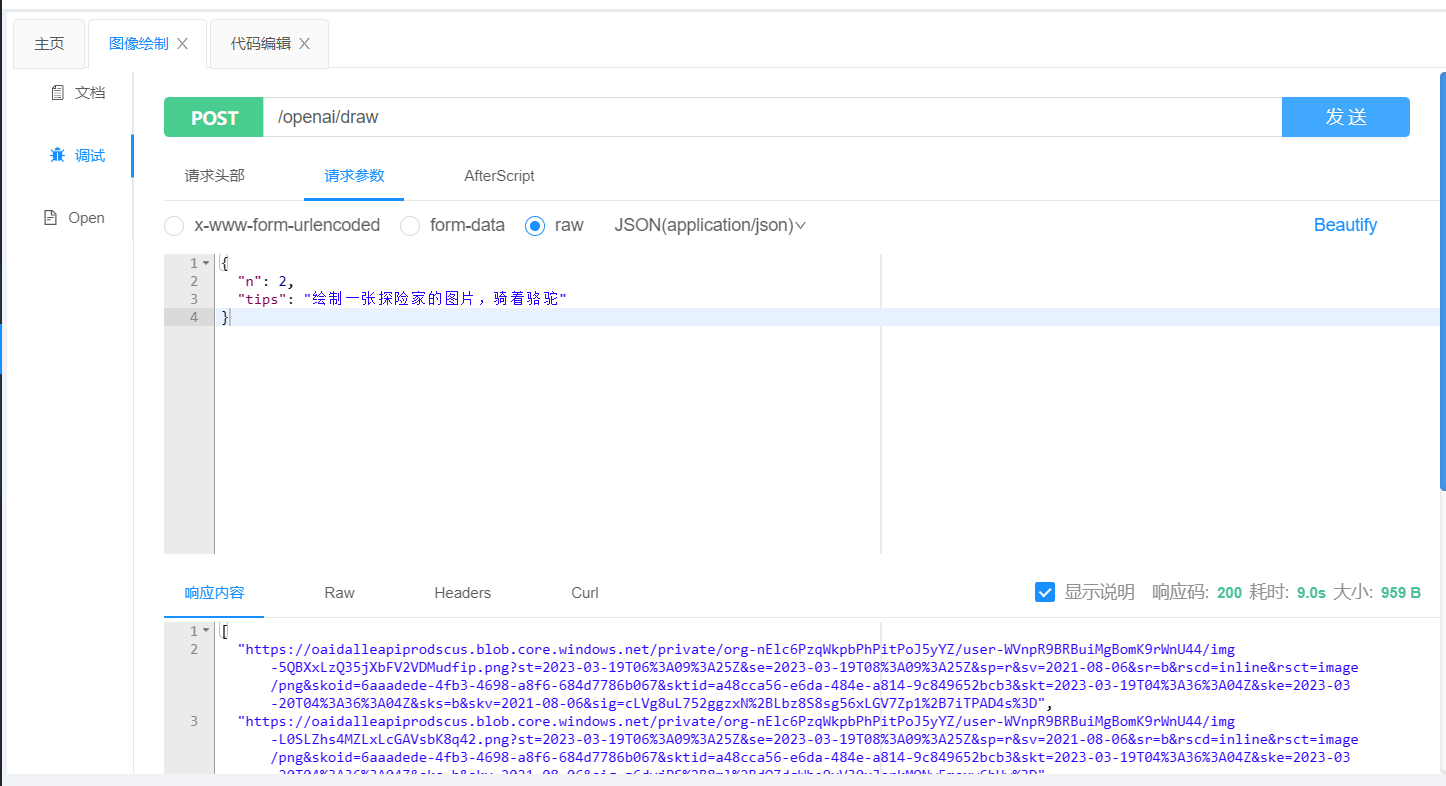
2. 图像绘制
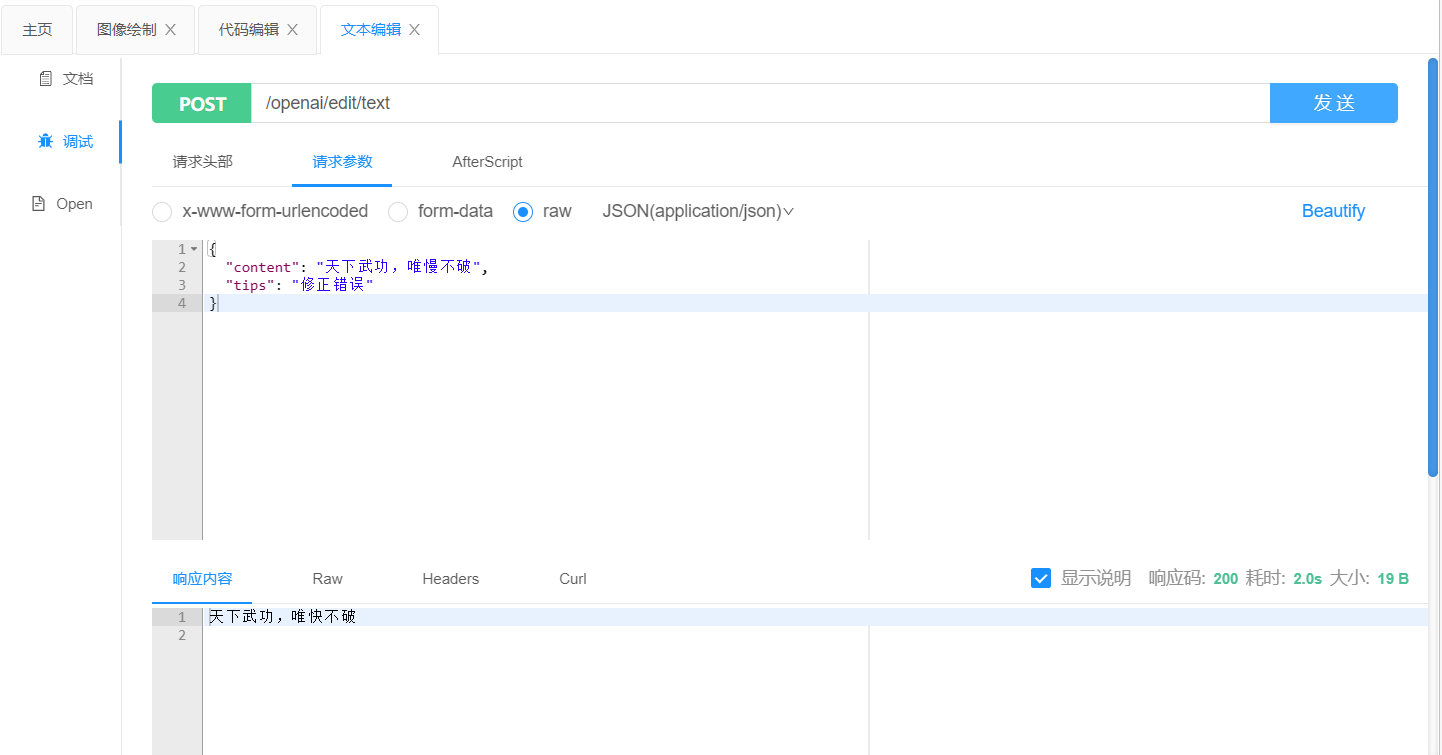
3. 文本编辑
Recommend
About Joyk
Aggregate valuable and interesting links.
Joyk means Joy of geeK