

Linking User Stories to a Data Model - DZone
source link: https://dzone.com/articles/linking-user-stories-to-a-data-model-a-tutorial-fo
Go to the source link to view the article. You can view the picture content, updated content and better typesetting reading experience. If the link is broken, please click the button below to view the snapshot at that time.

Linking User Stories to a Data Model: A Tutorial for Agile Development With Jira and ERBuilder
In the following tutorial, we'll walk you through the process of creating user stories on Jira, exporting them as a CSV file, and importing them into ERBuilder.
User stories are an effective tool for capturing requirements and defining features in a way that is easy to understand, test, and verify. They are written in natural language, without any technical jargon, and are typically structured in a format that describes the user's identity, what they want to achieve, and why. For example, a user story might be something like, "As a customer, I want to be able to pay for my order online so that I can complete my purchase more quickly and easily."
User stories are typically captured in a tool like Jira, which is a popular project management tool used by many Agile development teams. Jira allows teams to create and track user stories, assign them to team members, set priorities, and track progress. However, user stories are often just the starting point for software development. To turn a user story into a fully functional feature, you need to link it to the database objects in your data model.
A data model is a graphical representation of the entities, attributes, and relationships that make up a system or application. It defines how data is stored, organized, and accessed by the software. Linking user stories to data model entities helps ensure that the software meets the needs of the end users. Also, linking user stories to data model elements can help in impact analysis. This allows for easier identification of potential impacts of changes to one part of the system on other parts of the system that depend on that data. This can help make more informed decisions about how to implement changes and minimize the risk of unintended consequences.
In the following tutorial, we'll walk you through the process of creating user stories on Jira, exporting them as a CSV file, importing them into ERBuilder (a data modeling tool and documentation tool we will use in this tutorial), and then linking those user stories with data model entities such as tables, columns, relationships, procedures, and other entities.
Step 1: Create Salesforce User Stories in Jira
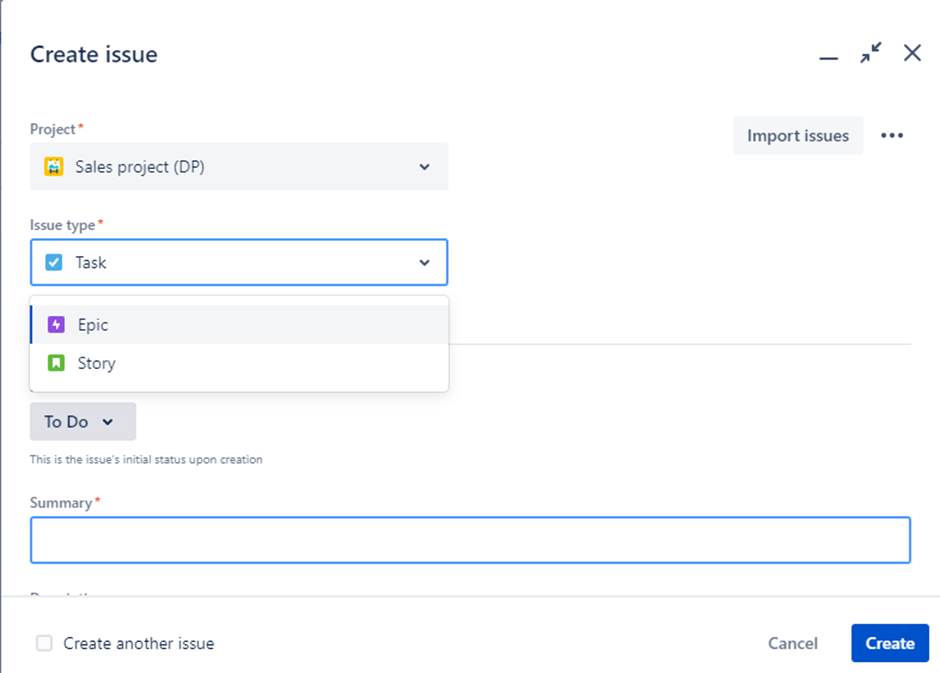
- To start creating user stories in Jira, go to the desired Jira project and click on the "Create" button to initiate a new issue.

- Select the "Story" issue type or the type that is appropriate for the project you are working on.
- Fill in the necessary information for the user story, such as the summary, description, and any relevant details.
 Step 2: Export the User Stories to a CSV File
To proceed with exporting user stories to a CSV file, access Jira's built-in export feature.
- Click on the "Filter" option located at the top of the screen.
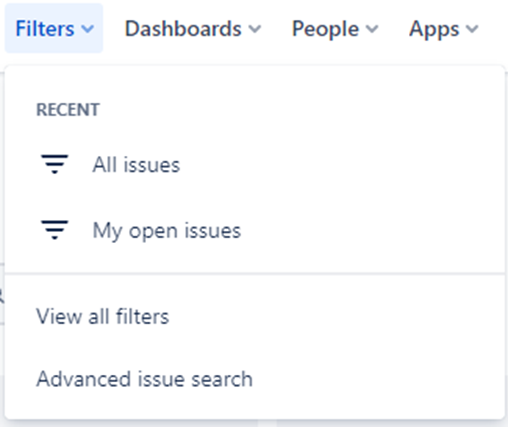
- Next, choose "Advanced Issue Search" and apply the appropriate filters by selecting "Story" as the type or by directly selecting the relevant issues.
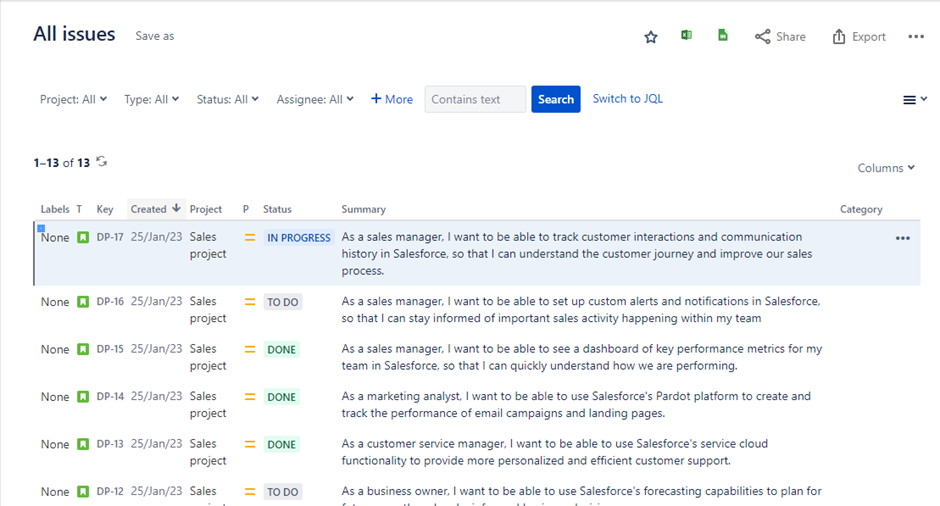
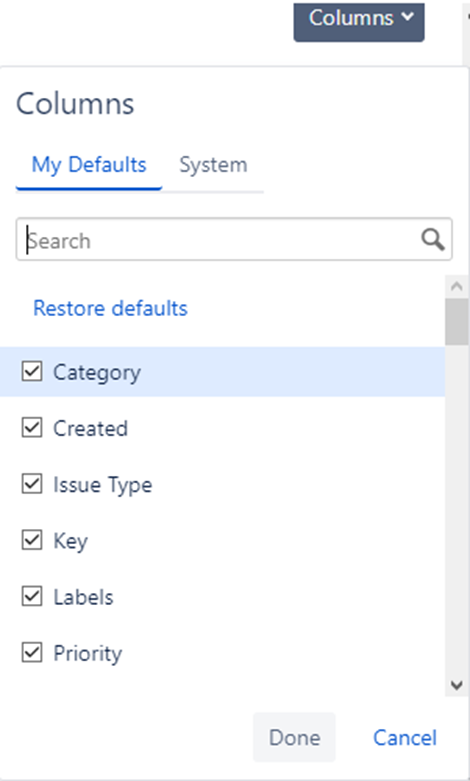
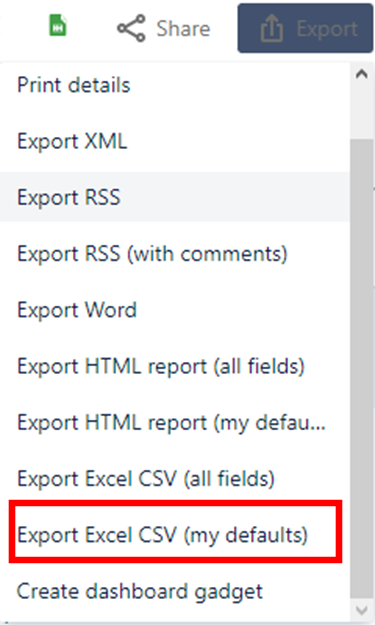
- You can now choose which columns to include in your exported CSV file by using the "columns" button and then clicking on “Done.” Columns you must have in your CSV export are Issue ID, Issue Type, Summary, Created date, Project name, Priority, Status category, and Description.
- Once you've applied the filters, look for the "Export" option located in the upper right-hand corner of the screen, and select the CSV file format to export the data.
Step 3: Import the CSV File Into ERBuilder
After downloading and installing ERBuilder, create a new ER diagram project in ERBuilder.
Give the diagram a meaningful name that reflects its purpose. Otherwise, you can reverse an existing database and get the ER diagram.
The next step would be to import the exported user stories from Jira. To do this, you can follow these steps:
- Navigate to “project” within ERBuilder.
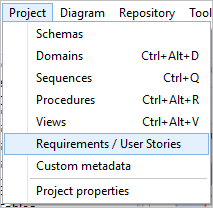
- Open Requirements / User stories.
- Click on the "Import" button, which is typically located on the bottom left side of the screen.
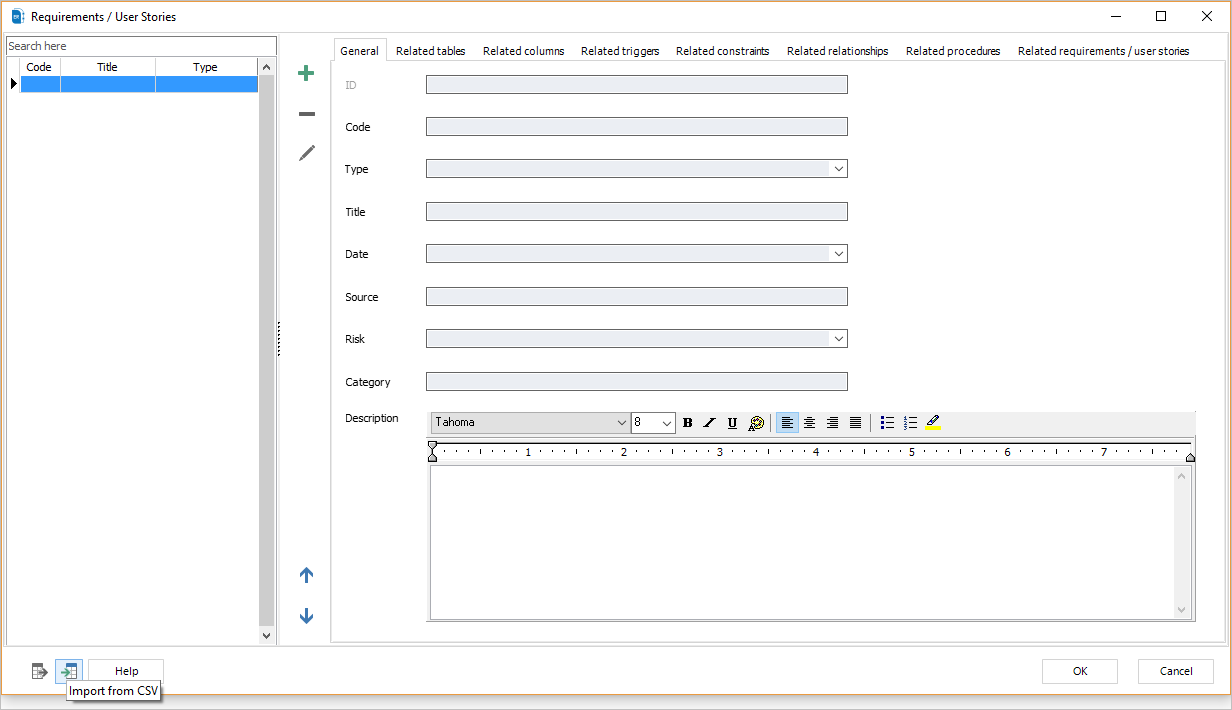
- Browse and select the exported CSV file that contains the Jira user stories you want to import.
- Click on the "Open" button to complete the process.

Step 4: Link the User Stories to Data Model Entities
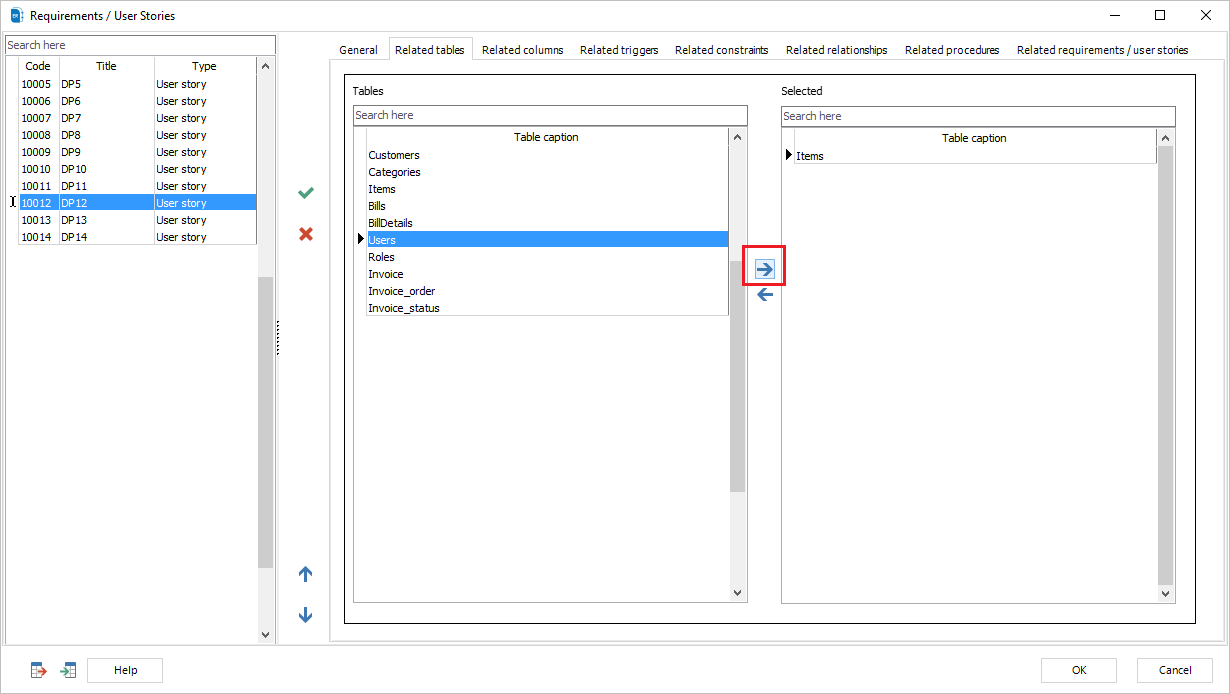
Now you can link a user story to the corresponding entity or attribute in ERBuilder. For example, if you want to link a user story to a table, proceed as follow:
- Select the user story that you want to link to your table.
- Go to the "Related tables" tab within ERBuilder.
- Use the search box to find and select your table.
- Once the table is selected, click the forward arrow to link it to the selected user story.
An alternative way to link user stories to data model entities in ERBuilder is by using the Treeview, Browser, or Diagram navigation options. To do this, you can use the Treeview, Browser, or Diagram navigation options to find and open the entity you want.
- Open the entity by double-clicking on it.
- Navigate to the "Requirements/User Stories" section.
- Select the user story you want to link from the list on the left side.
- Click on the forward arrow to link the user story to the object.

The same process applies to other data-model entities such as columns, relationships, constraints, triggers, procedures, and requirements.
Once you have linked your user stories with your data model entities, you will be able to generate comprehensive data model documentation that can be used by your team to gain a better understanding of the project's requirements and the corresponding entity elements.
Recommend
About Joyk
Aggregate valuable and interesting links.
Joyk means Joy of geeK