

上穷碧落下凡尘:Win10系统下基于Docker配置Elasticsearch7配合Python3进行全文检索交...
source link: https://v3u.cn/a_id_166
Go to the source link to view the article. You can view the picture content, updated content and better typesetting reading experience. If the link is broken, please click the button below to view the snapshot at that time.

上穷碧落下凡尘:Win10系统下基于Docker配置Elasticsearch7配合Python3进行全文检索交互

基于文档式的全文检索引擎大家都不陌生,之前一篇文章:使用Redisearch实现的全文检索功能服务,曾经使用Rediseach来小试牛刀了一把,文中戏谑的称Rediseach已经替代了Elasticsearch,其实不然,Elasticsearch作为老牌的全文检索引擎还并没有退出历史舞台,依旧占据主流市场,桃花依旧笑春风,阿里也在其ecs服务中推出了云端Elasticsearch引擎,所以本次我们在Win10系统中依托Docker来感受一下Elasticsearch的魅力。
首先安装Docker,具体流程请参照:win10系统下把玩折腾DockerToolBox以及更换国内镜像源(各种神坑),这里不再赘述。
拉取Elasticsearch镜像,这里我们使用7.0以上的版本,该版本从性能和效率上都得到了优化。
docker pull elasticsearch:7.2.0随后运行Elasticsearch镜像
docker run --name es -p 9200:9200 -p 9300:9300 -e "discovery.type=single-node" -d elasticsearch:7.2.0容器别名我们就用缩写es来替代,通过 9200 端口并使用 Elasticsearch 的原生 传输 协议和集群交互。集群中的节点通过端口 9300 彼此通信。如果这个端口没有打开,节点将无法形成一个集群,运行模式先走单节点模式。
启动容器成功后,可以访问一下浏览器: http://localhost:9200

OK,没有任何问题,Elasticsearch 采用 YAML 文件对系统进行配置,原理很简单,就像Django的settings或者Flask的Config,只要通知Elasticsearch服务在运行过程中一些你想要的功能,而Elasticsearch会找到elasticsearch.yml,之后按你指定的参数运行服务。
此时,我们需要将容器内部Elasticsearch的配置文件拷贝出来,这样以后启动容器就可以按照我们自己指定的配置来修改了。
docker cp 容器id:/usr/share/elasticsearch/config/elasticsearch.yml ./elasticsearch.yml老规矩,前面的是容器内地址,后面的是宿主机地址,这里我就拷贝到当前目录下,当然了,你也可以指定绝对路径。
打开elasticsearch.yml,可以自己加一些配置,比如允许跨域访问,这样你这台Elasticsearch就可以被别的服务器访问了,这是微服务全文检索系统架构的第一步。
cluster.name: "docker-cluster"
network.host: 0.0.0.0
http.cors.enabled: true
http.cors.allow-origin: "*"
然后停止正在运行的Elasticsearch容器,并且删除它。
docker stop 容器id
docker rm $(docker ps -a -q)
再次启动Elasticsearch容器,这一次不同的是,我们需要通过-v挂载命令把我们刚刚修改好的elasticsearch.yml挂载到容器内部去,这样容器就根据我们自己修改的配置文件来运行Elasticsearch服务。
docker run --name es -v /es/elasticsearch.yml:/usr/share/elasticsearch/config/elasticsearch.yml -p 9200:9200 -p 9300:9300 -e "discovery.type=single-node" -d elasticsearch:7.2.0这里需要注意一点,就是在Win10宿主机里需要单独设置一下共享文件夹,这里我设置的共享文件夹叫做es,如果是Centos或者Mac os就直接写真实物理路径即可。
这里再简单介绍一下Win10如何设置共享文件夹用来配合Docker的挂载,打开virtualBox设置,新建一个共享文件夹es

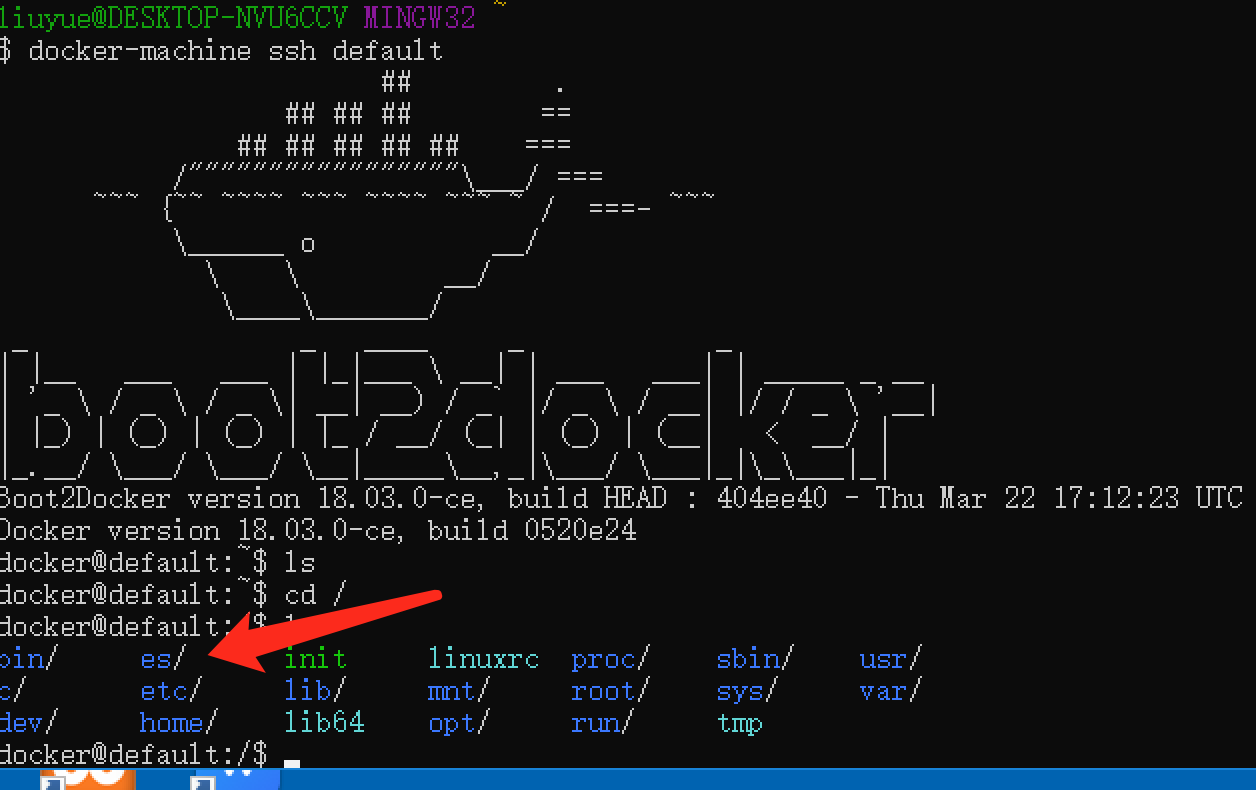
随后,重启Docker,输入命令进入默认容器:docker-machine ssh default
在容器根目录能够看到刚刚设置的共享文件夹,就说明设置成功了。
另外还有一个需要注意的点,就是Elasticsearch存储数据也可以通过-v命令挂载出来,如果不对数据进行挂载,当容器被停止或者删除,数据也会不复存在,所以挂载后存储在宿主机会比较好一点,命令是:
docker run --name es -v /es/elasticsearch.yml:/usr/share/elasticsearch/config/elasticsearch.yml -v /es/data:/usr/share/elasticsearch/data -p 9200:9200 -p 9300:9300 -e "discovery.type=single-node" -d elasticsearch:7.2.0再次启动容器成功之后,我们就可以利用Python3来和全文检索引擎Elasticsearch进行交互了,安装依赖的库。
pip3 install elasticsearch新建es_test.py测试脚本
建立Elasticsearch的检索实例
from elasticsearch import Elasticsearch

es = Elasticsearch(hosts=[{"host":'Docker容器所在的ip', "port": 9200}])
这里的host指容器ip,因为可以扩展集群,所以是一个list,需要注意一点,如果是Win10就是系统分配的那个ip,Centos或者Mac os直接写127.0.0.1即可。
建立索引(Index),这里我们创建一个名为 article 的索引
result = es.indices.create(index='article', ignore=400)
print(result)
{'acknowledged': True, 'shards_acknowledged': True, 'index': 'article'}
其中的 acknowledged 字段表示创建操作执行成功。
删除索引也是类似的,代码如下:
result = es.indices.delete(index='article', ignore=[400, 404])
print(result)

{'acknowledged': True}
插入数据,Elasticsearch 就像 MongoDB 一样,在插入数据的时候可以直接插入结构化字典数据,插入数据可以调用 index() 方法,这里索引和数据是强关联的,所以插入时需要指定之前建立好的索引。
data = {'title': '我在北京学习人工智能', 'url': 'http://123.com','content':"在北京学习"}
result = es.index(index='article',body=data)
print(result)
{'_index': 'article', '_type': '_doc', '_id': 'GyJgb3MBuQaE6wYOApTh', '_version': 1, 'result': 'created', '_shards': {'total': 2, 'successful': 1, 'failed': 0}, '_seq_no': 5, '_primary_term': 1}
可以看到index()方法会自动生成一个唯一id,当然我们也可以使用create()方法创建数据,不同的是create()需要手动指定一个id。
修改数据也非常简单,我们同样需要指定数据的 id 和内容,调用 index() 方法即可,代码如下:
data = {'content':"在北京学习python"}

#修改
result = es.index(index='article',body=data, id='GyJgb3MBuQaE6wYOApTh')
{'_index': 'article', '_type': '_doc', '_id': 'GyJgb3MBuQaE6wYOApTh', '_version': 2, 'result': 'updated', '_shards': {'total': 2, 'successful': 1, 'failed': 0}, '_seq_no': 6, '_primary_term': 1}
删除数据,可以调用 delete() 方法,指定需要删除的数据 id 即可
#删除
result = es.delete(index='article',id='GyJgb3MBuQaE6wYOApTh')
print(result)
{'_index': 'article', '_type': '_doc', '_id': 'GyJgb3MBuQaE6wYOApTh', '_version': 3, 'result': 'deleted', '_shards': {'total': 2, 'successful': 1, 'failed': 0}, '_seq_no': 7, '_primary_term': 1}
查询数据,这里可以简单的查询全量数据:
#查询
result = es.search(index='article')
print(result)
{'took': 1079, 'timed_out': False, '_shards': {'total': 1, 'successful': 1, 'skipped': 0, 'failed': 0}, 'hits': {'total': {'value': 5, 'relation': 'eq'}, 'max_score': 1.0, 'hits': [{'_index': 'article', '_type': 'blog', '_id': '1', '_score': 1.0, '_source': {'title': '我在北京学习人工智能', 'url': 'http://123.com', 'content': '在北京学习'}}, {'_index': 'article', '_type': 'blog', '_id': 'FyIdb3MBuQaE6wYO8JQR', '_score': 1.0, '_source': {'title': '你好', 'content': '你好123'}}, {'_index': 'article', '_type': 'blog', '_id': 'GCIeb3MBuQaE6wYOnpSv', '_score': 1.0, '_source': {'title': '你好', 'url': 'http://123.com', 'content': '你好123'}}, {'_index': 'article', '_type': 'blog', '_id': 'GSJfb3MBuQaE6wYOu5RD', '_score': 1.0, '_source': {'title': '你好', 'url': 'http://123.com', 'content': '你好123'}}, {'_index': 'article', '_type': 'blog', '_id': 'GiJfb3MBuQaE6wYO5pR4', '_score': 1.0, '_source': {'title': '你好', 'url': 'http://123.com', 'content': '你好123'}}]}}
还可以进行全文检索,这才是体现 Elasticsearch 搜索引擎特性的地方。
mapping = {
    'query': {
        'match': {
            'content': '学习 北京'
        }
    }
}

result = es.search(index='article',body=mapping)
print(result)
{'took': 4, 'timed_out': False, '_shards': {'total': 1, 'successful': 1, 'skipped': 0, 'failed': 0}, 'hits': {'total': {'value': 1, 'relation': 'eq'}, 'max_score': 4.075481, 'hits': [{'_index': 'article', '_type': 'blog', '_id': '1', '_score': 4.075481, '_source': {'title': '我在北京学习人工智能', 'url': 'http://123.com', 'content': '在北京学习'}}]}}
可以看出,检索时会对对应的字段全文检索,结果还会按照检索关键词的相关性进行排序,这就是一个基本的搜索引擎雏形。
除了这些最基本的操作,Elasticsearch还支持很多复杂的查询,可以参照最新的7.2版本文档:https://www.elastic.co/guide/en/elasticsearch/reference/7.2/query-dsl.html
结语:体验了之后,有人说,Elasticsearch这玩意还真不错,能不能把Mysql或者Mongo全都扔了,就拿它当数据库不就完事了吗?答案当然是不可能的,因为Elasticsearch没有事务,而且是查询是近实时,写入速度很慢,只是读取数据快,成本也比数据库高,几乎就在靠吃内存提高性能,它目前只是作为搜索引擎的存在,如果你的业务涉及全文检索,那么它就是你的首选方案之一。
Recommend
-
70
-
55
使用Elasticsearch7 java api实现pdf全文检索 ...
-
4
最近想写一篇es的索引的一个设计,由于设计的东西特别多,当然,elasticsearch的模板和动态映射也是其中的一个设计点,所以干脆先来聊聊索引的模板和动态映射,模板,听这个名字就相当于一些公共可用的东西可以作为所有索引的一个设置, ...
-
8
Elasticsearch 打开历史版本下载地址,点击7.9.3版本后面的Download,点击LINUX X86_64下载即可 为啥不用rpm包?因为rpm包安装好之后文件散落在...
-
9
示例代码:GitHub:https://github.com/Max-Qiu/demo-SpringBootGitee:https://gitee.com/Max-Qiu/demo-SpringBoot...
-
3
尚硅谷2021年最新 Elasticsearch7.8X 入门到精通视频教程...
-
3
1、默认的分词器 关于分词器,前面的博客已经有介绍了,链接:ElasticSearch7.3 学习之倒排索引揭秘及初识分词器(Analyzer)。这里就只介绍默认的分词器standard analyzer 2、...
-
7
1、实时重建索引 在实际的生产环境中,一个field的设置是不能被修改的,如果要修改一个Field,那么应该重新按照新的mapping,建立一个index,然后将数据批量查询出来,重新用bulk api
-
2
使用python3和高性能全文检索引擎Redisearch进行交互首页 - Python/2019-08-30 上一篇介绍了一款
-
4
支持工单内容全文检索的灵活工单系统 兰玉磊 • 4小时前 • 其他 • 阅读 5
About Joyk
Aggregate valuable and interesting links.
Joyk means Joy of geeK