
封装avalonia指定组件允许拖动的工具类 - tokengo
source link: https://www.cnblogs.com/hejiale010426/p/17165737.html
Go to the source link to view the article. You can view the picture content, updated content and better typesetting reading experience. If the link is broken, please click the button below to view the snapshot at that time.

封装avalonia指定组件允许拖动的工具类
创建Avalonia的MVVM项目,命名DragDemo ,然后将项目的Nuget包更新到预览版
    <ItemGroup>
        <PackageReference Include="Avalonia" Version="11.0.0-preview5" />
        <PackageReference Include="Avalonia.Desktop" Version="11.0.0-preview5" />
        <!--Condition below is needed to remove Avalonia.Diagnostics package from build output in Release configuration.-->
        <PackageReference Condition="'$(Configuration)' == 'Debug'" Include="Avalonia.Diagnostics" Version="11.0.0-preview5" />
        <PackageReference Include="Avalonia.ReactiveUI" Version="11.0.0-preview5" />
        <PackageReference Include="XamlNameReferenceGenerator" Version="1.5.1" />
    </ItemGroup>
更新完成以后ViewLocator和App.axaml会报错,
修改ViewLocator.cs为下面的代码
using System;
using Avalonia.Controls;
using Avalonia.Controls.Templates;
using DragDemo.ViewModels;

namespace DragDemo;

public class ViewLocator : IDataTemplate
{
    /// <summary>
    /// 将IControl修改成Control
    /// </summary>
    /// <param name="data"></param>
    /// <returns></returns>
    public Control Build(object data)
    {
        var name = data.GetType().FullName!.Replace("ViewModel", "View");
        var type = Type.GetType(name);

        if (type != null)
        {
            return (Control)Activator.CreateInstance(type)!;
        }

        return new TextBlock { Text = "Not Found: " + name };
    }

    public bool Match(object data)
    {
        return data is ViewModelBase;
    }
}
添加Avalonia.Themes.Fluent,因为预览版本的包已经独立需要单独安装
<PackageReference Include="Avalonia.Themes.Fluent" Version="11.0.0-preview5" />
打开App.axaml文件,修改为以下代码
<Application xmlns="https://github.com/avaloniaui"
             xmlns:x="http://schemas.microsoft.com/winfx/2006/xaml"
             xmlns:local="using:DragDemo"
             RequestedThemeVariant="Light"
             x:Class="DragDemo.App">
    <Application.DataTemplates>
        <local:ViewLocator/>
    </Application.DataTemplates>

    <Application.Styles>
        <FluentTheme DensityStyle="Compact"/>
    </Application.Styles>

</Application>
打开Views/MainWindow.axaml
在头部添加以下代码,让窗口无边框,设置指定窗口Height="38" Width="471",参数让其不要占用整个屏幕,
<Window xmlns="https://github.com/avaloniaui"
        xmlns:x="http://schemas.microsoft.com/winfx/2006/xaml"
        xmlns:vm="using:DragDemo.ViewModels"
        xmlns:d="http://schemas.microsoft.com/expression/blend/2008"
        xmlns:mc="http://schemas.openxmlformats.org/markup-compatibility/2006"
        mc:Ignorable="d" d:DesignWidth="800" d:DesignHeight="450"
        x:Class="DragDemo.Views.MainWindow"
        Icon="/Assets/avalonia-logo.ico"
        ExtendClientAreaToDecorationsHint="True"
        ExtendClientAreaChromeHints="NoChrome"
        ExtendClientAreaTitleBarHeightHint="-1"
        MaxHeight="38" MaxWidth="471"
        Title="DragDemo">
    <Window.Styles>
        <Style Selector="Window">
            <Setter Property="BorderThickness" Value="0"/>
            <Setter Property="Padding" Value="0"/>
            <Setter Property="Background" Value="Transparent"/>
            <Setter Property="BorderBrush" Value="Transparent"/>
        </Style>
    </Window.Styles>
    <Design.DataContext>
        <vm:MainWindowViewModel/>
    </Design.DataContext>

    <StackPanel>
        <StackPanel Opacity="0.1" Height="38" Width="471">
        </StackPanel>
        <Border Name="Border" Width="471" CornerRadius="10" Opacity="1" Background="#FFFFFF">
            <Button>按钮</Button>
        </Border>
    </StackPanel>
</Window>
以下代码在上面窗口用于设置窗口无边框
    <Window.Styles>
        <Style Selector="Window">
            <Setter Property="BorderThickness" Value="0"/>
            <Setter Property="Padding" Value="0"/>
            <Setter Property="Background" Value="Transparent"/>
            <Setter Property="BorderBrush" Value="Transparent"/>
        </Style>
    </Window.Styles>
然后打开/Views/MainWindow.axaml.cs文件,将边框设置成无边框,并且设置窗体透明为WindowTransparencyLevel.Transparent
using Avalonia;
using Avalonia.Controls;

namespace DragDemo.Views;

public partial class MainWindow : Window
{
    public MainWindow()
    {
        InitializeComponent();
        this.TransparencyLevelHint = WindowTransparencyLevel.Transparent;
        ExtendClientAreaToDecorationsHint = true;
        WindowState = WindowState.Maximized;
    }
}
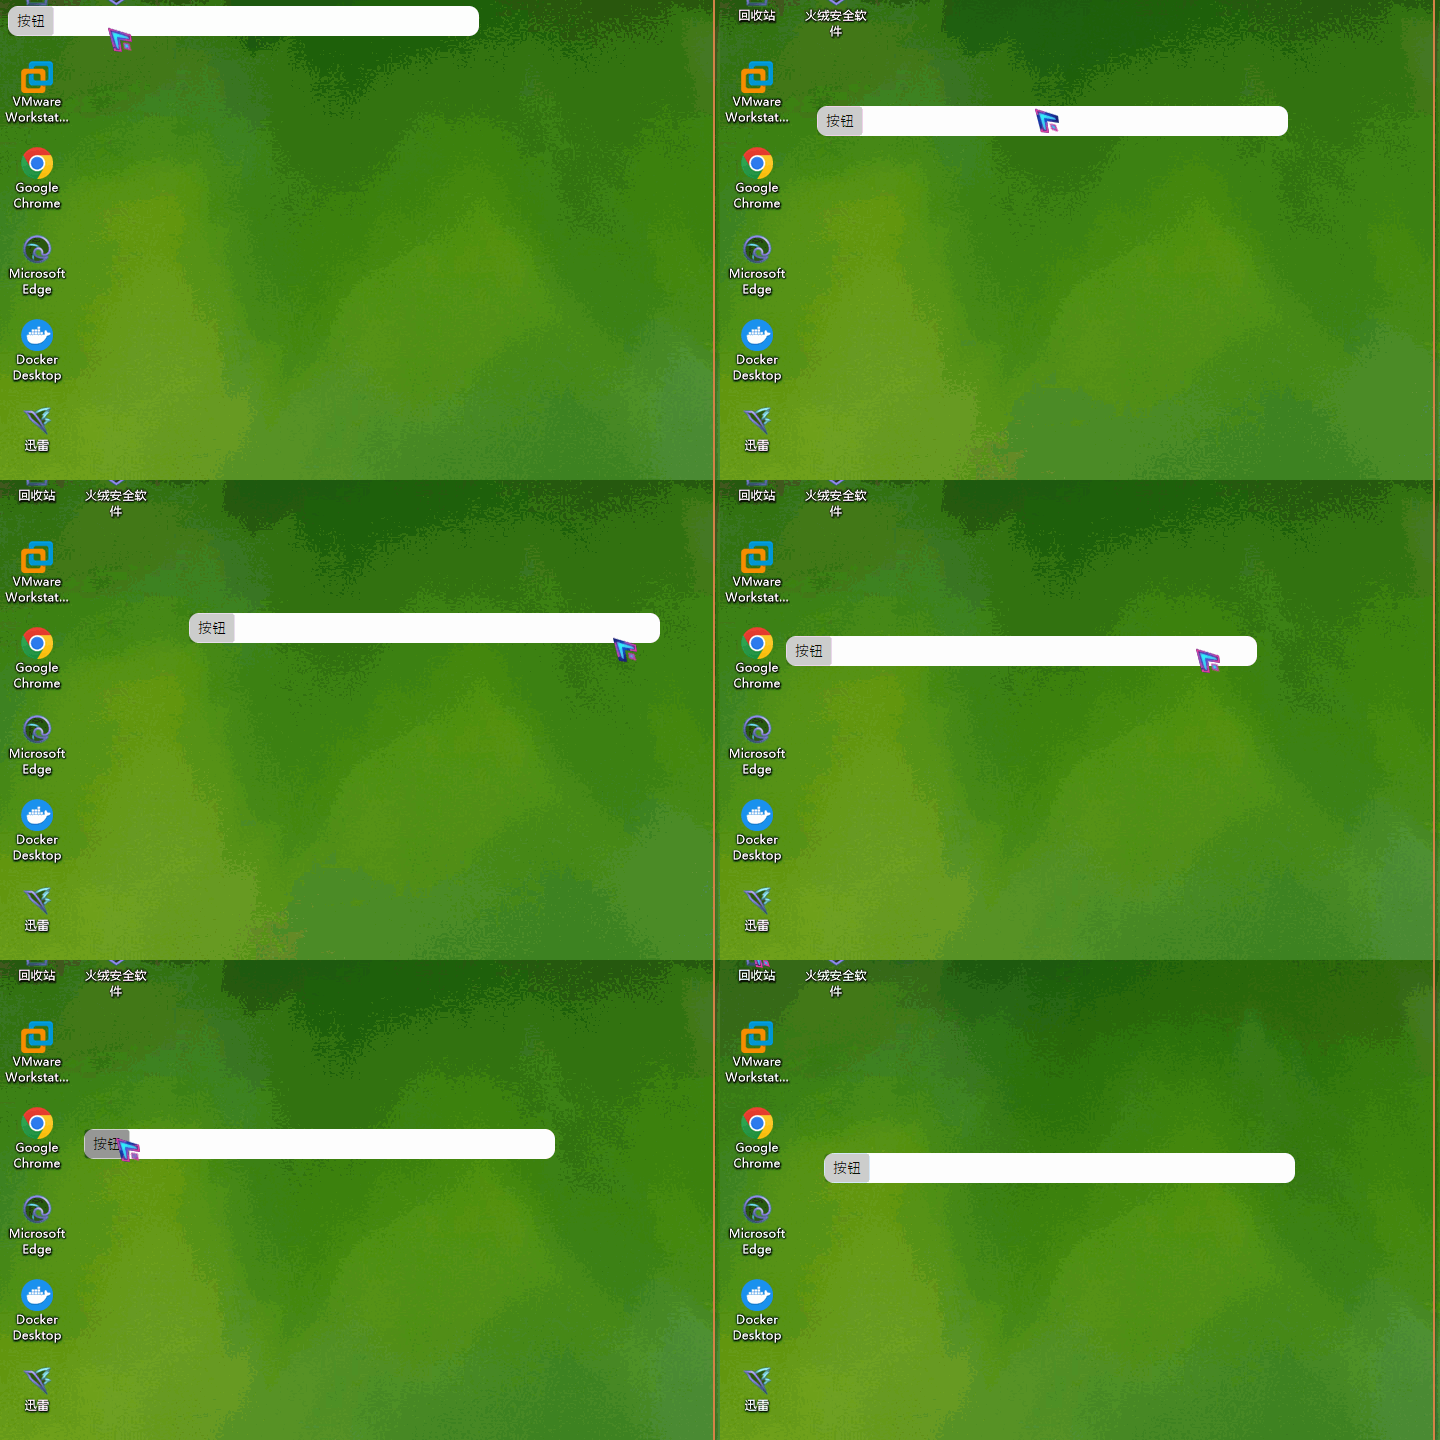
效果图如下,因为限制了窗体最大大小,并且在按钮上面添加了透明区块,这样看起来就像是悬浮了
然后我们开始写指定组件拖动工具类,创建DragControlHelper.cs 以下就是封装的工具类 定义了一个ConcurrentDictionary静态参数,指定组件为Key ,Value为DragModule ,DragModule模型中定义了拖动的逻辑在调用StartDrag的时候传递需要拖动的组件,他会创建一个DragModule对象,创建的时候会创建定时器,当鼠标被按下时启动定时器,当鼠标被释放时定时器被停止,定时器用于平滑更新窗体移动,如果直接移动窗体会抖动。
using System;
using System.Collections.Concurrent;
using Avalonia;
using Avalonia.Controls;
using Avalonia.Input;
using Avalonia.Threading;
using Avalonia.VisualTree;

namespace DragDemo;


public class DragControlHelper
{
    private static ConcurrentDictionary<Control, DragModule> _dragModules = new();

    public static void StartDrag(Control userControl)
    {
        _dragModules.TryAdd(userControl, new DragModule(userControl));
    }

    public static void StopDrag(Control userControl)
    {
        if (_dragModules.TryRemove(userControl, out var dragModule))
        {
            dragModule.Dispose();
        }
    }
}

class DragModule : IDisposable
{
    /// <summary>
    /// 记录上一次鼠标位置
    /// </summary>
    private Point? lastMousePosition;

    /// <summary>
    /// 用于平滑更新坐标的计时器
    /// </summary>
    private DispatcherTimer _timer;

    /// <summary>
    /// 标记是否先启动了拖动
    /// </summary>
    private bool isDragging = false;

    /// <summary>
    /// 需要更新的坐标点
    /// </summary>
    private PixelPoint? _targetPosition;

    public Control UserControl { get; set; }

    public DragModule(Control userControl)
    {
        UserControl = userControl;
        // 添加当前控件的事件监听
        UserControl.PointerPressed += OnPointerPressed;
        UserControl.PointerMoved += OnPointerMoved;
        UserControl.PointerReleased += OnPointerReleased;

        // 初始化计时器
        _timer = new DispatcherTimer
        {
            Interval = TimeSpan.FromMilliseconds(10)
        };
        _timer.Tick += OnTimerTick;
    }


    /// <summary>
    /// 计时器事件
    /// </summary>
    /// <param name="sender"></param>
    /// <param name="e"></param>
    private void OnTimerTick(object sender, EventArgs e)
    {
        var window = UserControl.FindAncestorOfType<Window>();
        if (window != null && window.Position != _targetPosition)
        {
            // 更新坐标
            window.Position = (PixelPoint)_targetPosition;
        }
    }

    private void OnPointerPressed(object sender, PointerPressedEventArgs e)
    {
        if (!e.GetCurrentPoint(UserControl).Properties.IsLeftButtonPressed) return;
        // 启动拖动
        isDragging = true;
        // 记录当前坐标
        lastMousePosition = e.GetPosition(UserControl);
        e.Handled = true;
        // 启动计时器
        _timer.Start();
    }

    private void OnPointerReleased(object sender, PointerReleasedEventArgs e)
    {
        if (!isDragging) return;
        // 停止拖动
        isDragging = false;
        e.Handled = true;
        // 停止计时器
        _timer.Stop();
    }

    private void OnPointerMoved(object sender, PointerEventArgs e)
    {
        if (!e.GetCurrentPoint(UserControl).Properties.IsLeftButtonPressed) return;

        // 如果没有启动拖动,则不执行
        if (!isDragging) return;

        var currentMousePosition = e.GetPosition(UserControl);
        var offset =currentMousePosition - lastMousePosition.Value;
        var window = UserControl.FindAncestorOfType<Window>();
        if (window != null)
        {
            // 记录当前坐标
            _targetPosition = new PixelPoint(window.Position.X + (int)offset.X,
                window.Position.Y + (int)offset.Y);
        }
    }

    public void Dispose()
    {
        _timer.Stop();
        _targetPosition = null;
        lastMousePosition = null;
    }
}
打开MainWindow.axaml.cs,修改成以下代码 ,在渲染成功以后拿到Border(需要移动的组件),添加到DragControlHelper.StartDrag(border);中,然后再OnUnloaded的时候将Border再卸载掉
using Avalonia;
using Avalonia.Controls;
using Avalonia.Media;
using Avalonia.Threading;

namespace DragDemo.Views;

public partial class MainWindow : Window
{
    public MainWindow()
    {
        InitializeComponent();
        this.TransparencyLevelHint = WindowTransparencyLevel.Transparent;
        ExtendClientAreaToDecorationsHint = true;
        WindowState = WindowState.Maximized;
    }

    public override void Render(DrawingContext context)
    {
        base.Render(context);
        Dispatcher.UIThread.Post(() =>
        {
            var border = this.Find<Border>("Border");
            DragControlHelper.StartDrag(border);
        });
    }

    protected override void OnUnloaded()
    {
        var border = this.Find<Border>("Border");
        DragControlHelper.StopDrag(border);
        base.OnUnloaded();
    }
}
效果展示:

来着token的分享
技术交流群:737776595
本文作者:tokengo
本文链接:https://www.cnblogs.com/hejiale010426/p/17165737.html
版权声明:本作品采用知识共享署名-非商业性使用-禁止演绎 2.5 中国大陆许可协议进行许可。
Recommend
About Joyk
Aggregate valuable and interesting links.
Joyk means Joy of geeK