

Display your Gumroad products on your Next.js website
source link: https://scastiel.dev/gumroad-pages-nextjs
Go to the source link to view the article. You can view the picture content, updated content and better typesetting reading experience. If the link is broken, please click the button below to view the snapshot at that time.

Display your Gumroad products on your Next.js website
Posted on February 26, 2023

If you sell some products on Gumroad and also have a personal website, maybe you’d like to automatically list your products on this website. At least I do, and this is how I generate pages for my books.
And if your website is based on Next.js, you can do it pretty easilly using Gumroad API. This API is not very well documented, but it is enough for what I want to show you:
- How to display a list of your products on a page,
- How to generate a page for each of your products.

But first, to be able to query the Gumroad API, you’ll need to get credentials. It only takes a few seconds.
- When signed in to your Gumroad account, go to Settings, then the Advanced tab.
- Create a new Application (that only you will use): give it a name (e.g.
My website) and a redirect URL (put any valid URL here likehttp://localhost:3000, we won’t use it), and click Create application. - On the next screen, you should see a button Generate access token. Click it, copy the generated access token, and paste in into your
.env.localfile (create one if you don’t have one already):
# .env.local
GUMROAD_API_TOKEN=Your_API_token_here
Now we can start querying the API to get our products. In this post I’ll start from Next.js blog starter, so it is as easy as possible for you to adapt examples to your website.
Let’s start with creating a new file lib/gumroad.ts where we’ll put all the logic related to calling the Gumroad API. In this file we can define a GumroadProduct type to contain everything related to a product:
// lib/gumroad.ts
export interface GumroadProduct {
  id: string
  name: string
  preview_url?: string
  description: string
  short_url: string
  formatted_price: string
  published: boolean
}
export type GumroadProductSummary = Pick<GumroadProduct, 'id' | 'name'>
Note that we also define a GumroadProductSummary that will contain only product information that we’ll display in the products list, not on each product page.
Then, we can write a first function getProducts, responsible of calling the /products endpoint, returning the product list. We filter this list to return only the published products, and keep only the fields we need: id and name:
// lib/gumroad.ts
const API_BASE_URL = 'https://api.gumroad.com/v2'
const API_TOKEN = process.env.GUMROAD_API_TOKEN

export const getProducts = async (): Promise<GumroadProductSummary[]> => {
  const url = `${API_BASE_URL}/products?access_token=${API_TOKEN}`
  const result = await fetch(url)
  const { products } = await result.json()
  return products
    .filter(({ published }) => published)
    .map(({ id, name }) => ({ id, name }))
}
We can now use this function on a new page, pages/products/index.tsx, to list the existing products. To do this, let’s call it in getStaticProps, so we fetch the products at build time using Static Site Generation (SSG):
// pages/products/index.tsx
import { GetStaticProps } from 'next'
import { getProducts, GumroadProductSummary } from '../../lib/gumroad'

interface Props {
  products: GumroadProductSummary[]
}

export const getStaticProps: GetStaticProps<Props> = async () => {
  const products = await getProducts()
  return { props: { products } }
}
Then we can create the page component, that will get the product list as props:
// pages/products/index.tsx
import Link from 'next/link'
// ...

export default function ProductsPage({ products }: Props) {
  return (
    <div className="p-4 prose">
      <h1>My Products</h1>
      <ul>
        {products.map((product) => (
          <li key={product.id}>
            <Link href={`/products/${product.id}`}>{product.name}</Link>
          </li>
        ))}
      </ul>
    </div>
  )
}
Note that to keep the example as minimal as possible, the page contains only the product list (no header, no footer). The Next.js blog starter includes TailwindCSS; to make the page a bit better I added the typography plugin (yarn add @tailwindcss/typography) that I enabled by adding it in tailwind.config.js:
module.exports = {
  // ...
  plugins: [require('@tailwindcss/typography')],
}
Here is what our product list page looks like:

As you can see, we created links to pages like /products/<theProductId>, so now we need to create these pages 😊.
As we’ll still use Static Site Generation for these pages, let’s create a file pages/products/[id].tsx, with the functions:
getStaticPathsto tell Next.js which pages to create (one for each product) at build time,getStaticPropsto get the information about one page’s product, still at build time.
// pages/products/[id].tsx
import { GetStaticPaths, GetStaticProps } from 'next'
import { ParsedUrlQuery } from 'querystring'
import { getProduct, getProducts, GumroadProduct } from '../../lib/gumroad'

interface Props { product: GumroadProduct }
interface Params extends ParsedUrlQuery { id: string }

export const getStaticPaths: GetStaticPaths<Params> = async () => {
  const products = await getProducts()
  return {
    paths: products.map((product) => ({
      params: { id: product.id },
    })),
    fallback: false,
  }
}

export const getStaticProps: GetStaticProps<Props, Params> = async (
  context
) => {
  const product = await getProduct(context.params.id)
  return { props: { product } }
}
The getStaticProps function uses the getProduct function, that we can create in our file lib/gumroad.ts:
export const getProduct = async (
  productId: string
): Promise<GumroadProduct> => {
  const url = `${API_BASE_URL}/products/${productId}?access_token=${API_TOKEN}`
  const result = await fetch(url)
  const {
    product: { id, name, preview_url, description, short_url, formatted_price, published },
  } = await result.json()
  return { id, name, preview_url, description, short_url, formatted_price, published }
}
Note that, again, we keep only certain fields from the product returned by the API. This is pretty important here to ensure we don’t send to the frontend private product data. For instance, the number of sales or the total profit is returned by the API; maybe you don’t want your users to know this information 😉.
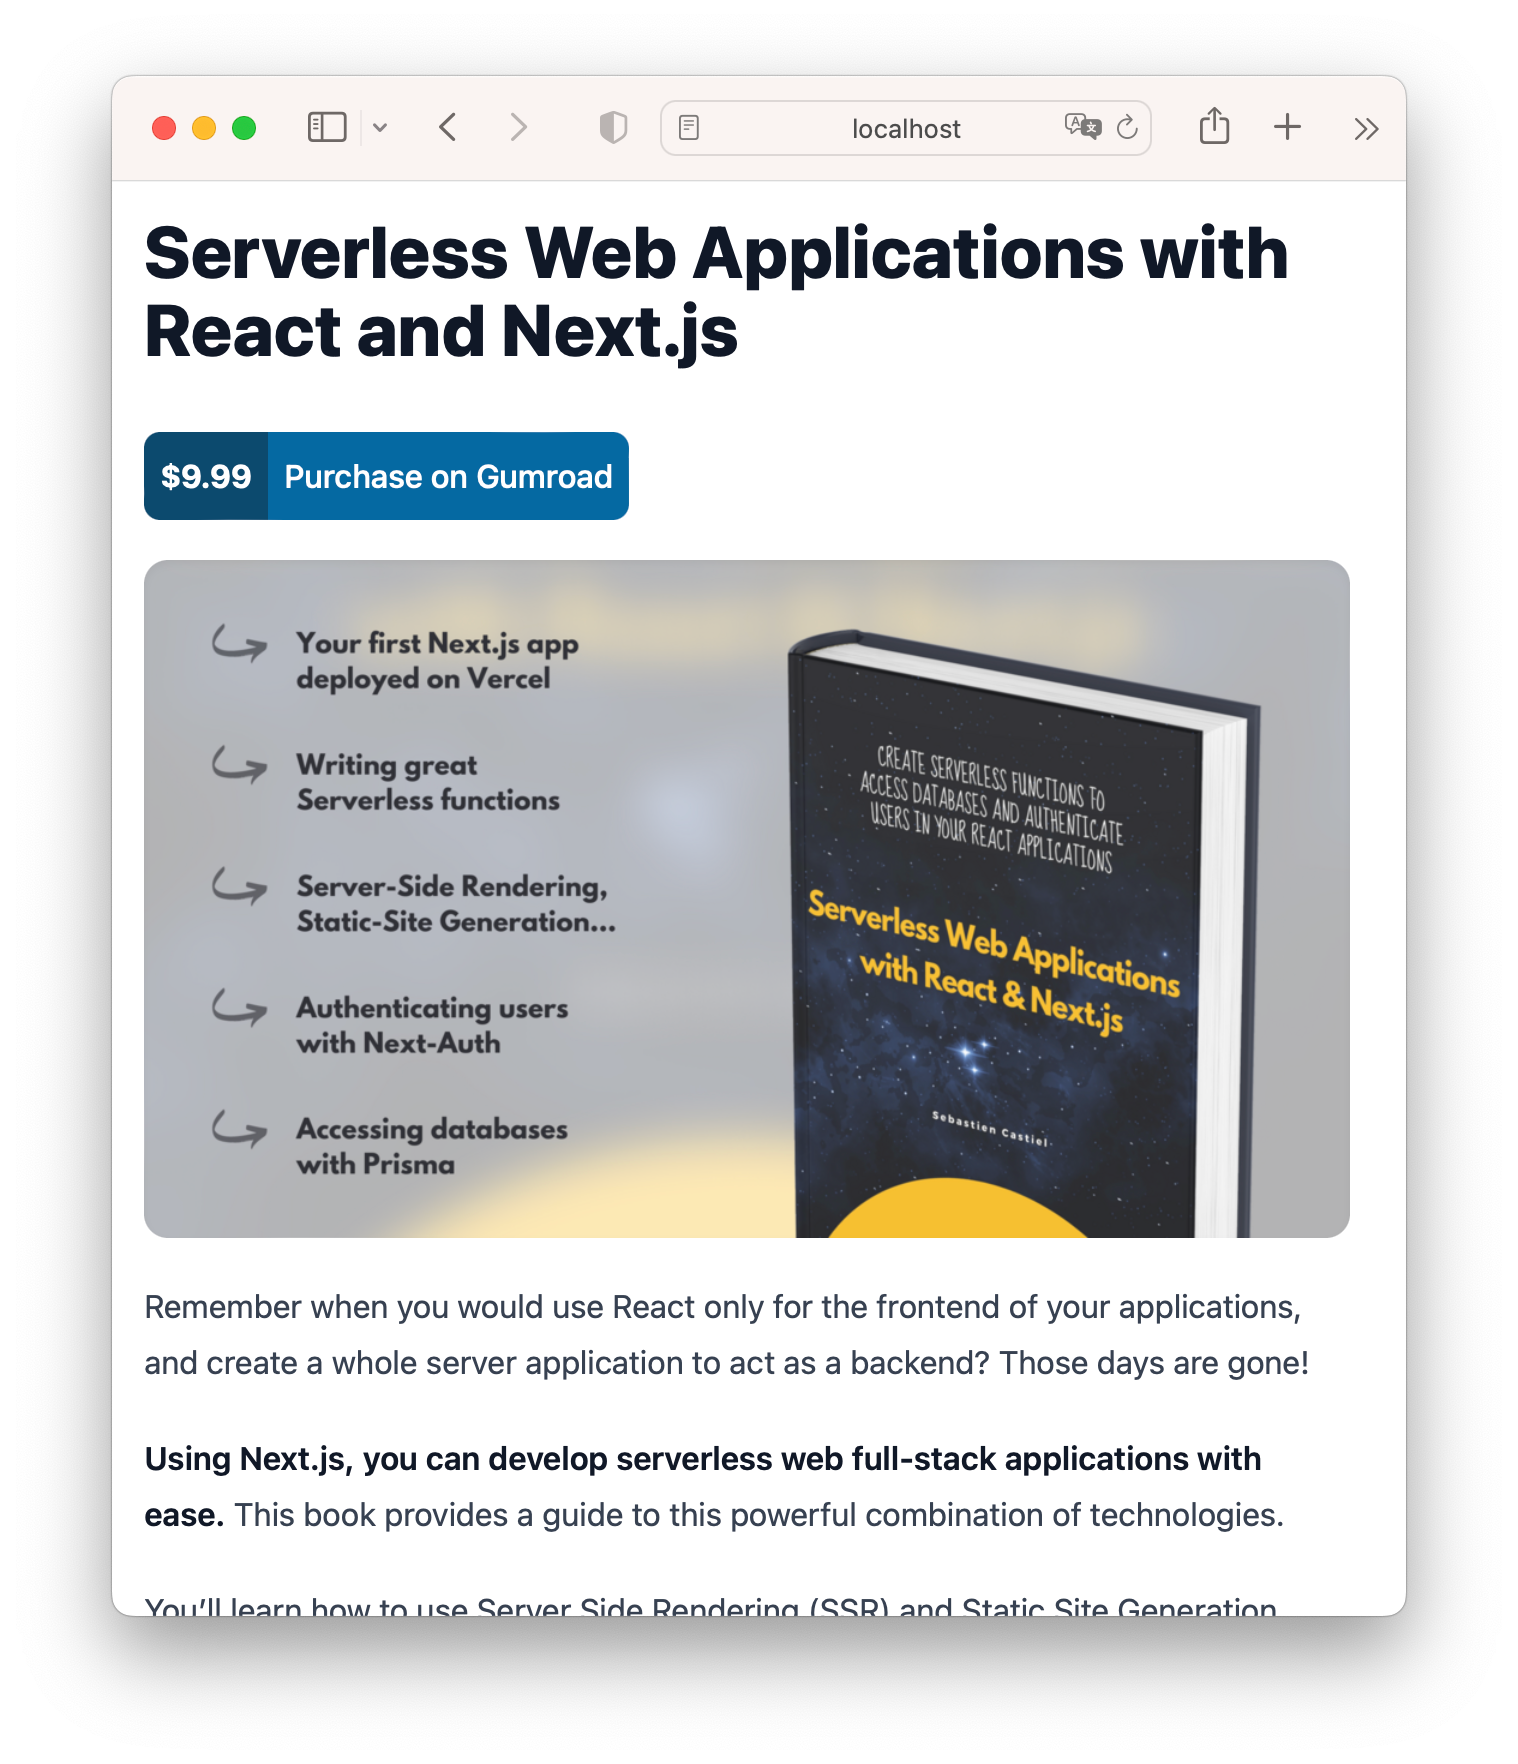
All we have to do now is create the page component in pages/products/[id].tsx to display information about our product: its name, cover picture, description as formatted text (it’s returned as HTML) and a button to purchase it on Gumroad, with its price.
// pages/products/[id].tsx
import Link from 'next/link'
// ...

export default function ProductPage({ product }: Props) {
  // Gumroad doesn’t offer much style customization, so I tend to include
  // some empty lines in my product descriptions. This line removes them:
  const description = product.description.replaceAll('<p><br></p>', '')
  return (
    <div className="p-4 prose">
      {/* The product name */}
      <h1>{product.name}</h1>

      {/* The button with price */}
      <p>
        <Link
          href={product.short_url}
          className="overflow-hidden rounded-lg inline-flex no-underline"
        >
          <span className="bg-sky-900 text-white font-bold p-2">
            {product.formatted_price}
          </span>
          <span className="bg-sky-700 text-white p-2">Purchase on Gumroad</span>
        </Link>
      </p>

      {/* The cover URL */}
      {product.preview_url && (
        <div
          className="w-full aspect-video bg-cover rounded-xl shadow-inner mb-4"
          style={{ backgroundImage: `url(${product.preview_url})` }}
        />
      )}

      {/* The description */}
      <div dangerouslySetInnerHTML={{ __html: description }}></div>
    </div>
  )
}
Here is what our product page now looks like:
Our pages are now complete 🎉
Of course, you noticed that this example is very minimal, and there are many improvements we could make:
- displaying more info in the product list, for instance the thumbnail picture you can find in
thumbnail_url, - in each product page URL, using something else than the product ID (which is pretty ugly:
lDBb-sPyphSI5TYMlLfjzw==), such as thecustom_permalink(which looks likeserverless-apps-react-nextjs),
Feel free to use this example as a base and customize it to your needs 😊. On this blog (in the books section), I don’t list all my products; I prefer keeping a list of the IDs of products I want to display and create a dedicated page for, which makes the process a bit lighter.
That’s all folks! I hope you learned some useful tips with this post.
If you want to know more about Next.js features, check out my book Serverless Web Applications with React and Next.js (this page’s content is extracted from Gumroad 😉).
Cover photo by Ashley Byrd
Recommend
About Joyk
Aggregate valuable and interesting links.
Joyk means Joy of geeK