
1

Java开发环境配置 - 晚秋的风
source link: https://www.cnblogs.com/alan1995/p/17157236.html
Go to the source link to view the article. You can view the picture content, updated content and better typesetting reading experience. If the link is broken, please click the button below to view the snapshot at that time.

- 本文主要以OS为Mac Apple芯片版本为主进行记录,其他OS均可在提供的官网链接中找到相应的配置说明;
- 本文暂时记录了Homebrew、JDK8、Maven3.9.0、MySQL8.0、Redis、Jmeter这些程序的环境配置,其他程序待后续使用时再补充。
Homebrew
官网下载地址:https://brew.sh/index_zh-cn
- 下载步骤
- 打开终端》输入
/bin/zsh -c "$(curl -fsSL https://gitee.com/cunkai/HomebrewCN/raw/master/Homebrew.sh)" - 选择镜像,如中科院
- 等待下载完成,如果提示需要安装git,则先安装git,再执行shell安装脚本
- 安装完成后,“brew -v”查看版本
- 安装目录/opt/homebrew
- 卸载
/bin/zsh -c "$(curl -fsSL https://gitee.com/cunkai/HomebrewCN/raw/master/HomebrewUninstall.sh)"
- 打开终端》输入
- 使用
# 搜索包brew search 包# 安装包brew install 包# 查看包信息brew info 包# 卸载包brew uninstall 包# 显示已安装的包brew list# 显示已安装包的路径brew list 包# 查看brew的帮助brew –help# 更新brew update# 检查过时(是否有新版本),这会列出所有安装的包里,哪些可以升级brew outdatedbrew outdated 包# 升级所有可以升级的软件们brew upgradebrew upgrade 包# 清理不需要的版本极其安装包缓存brew cleanupbrew cleanup 包
官网下载地址:https://www.oracle.com/java/technologies/javase/javase8-archive-downloads.html
-
windows:https://www.runoob.com/java/java-environment-setup.html
-
- 官网下载:下载“JDK-8U202-macOSX-X64.dmg”或其他macOS版本,一步步点击即可【X64和Apple芯片均兼容】
- 安装路径:/Library/Java/JavaVirtualMachines/jdk1.8.0_351.jdk/Contents/Home
- 环境变量配置:/Library/Internet Plug-Ins/JavaAppletPlugin.plugin/Contents/Home/bin/java
- 完全卸载:
- 删除jdk
sudo rm -rf /Library/Java/JavaVirtualMachines/jdk1.8.0_351.jdk - 删除运行路径和环境
sudo rm -rf /Library/Internet\ Plug-Ins/JavaAppletPlugin.pluginsudo rm -rf /Library/PreferencesPanes/JavaControlPanel.prefPanesudo rm -rf /Library/Application\ Support/Java
- 删除jdk
-
linux
- 官网下载:下载"jdk-8u202-linux-x64.tar.gz"或者其他linux版本
- 解压:
tar -zxvf jdk-8u202-linux-x64.tar.gz -C /usr/local - 配置环境变量
# 环境变量配置存放在/etc/profile,改变前先复制一份备用cp /etc/profile /etc/profile-init# 打开编辑文件vim /etc/profile# 在最前面或最后面添加JDK环境变量export JAVA_HOME=/download/jdk1.8.0_202export PATH=$JAVA_HOME/bin:$PATHexport CLASSPATH=.:$JAVA_HOME/lib/dt.jar:$JAVA_HOME/lib/tools.jar
Maven
官网下载地址:https://maven.apache.org/download.cgi
- 配置参考:https://www.runoob.com/maven/maven-setup.html【菜鸟教程】
- setting.xml文件配置:https://maven.apache.org/settings.html【官网说明】
- 自用setting.xml
<?xml version="1.0" encoding="UTF-8"?><settings xmlns="http://maven.apache.org/SETTINGS/1.2.0" xmlns:xsi="http://www.w3.org/2001/XMLSchema-instance" xsi:schemaLocation="http://maven.apache.org/SETTINGS/1.2.0 https://maven.apache.org/xsd/settings-1.2.0.xsd"> <!-- 本地仓库 --> <localRepository>/Users/mybook/DevelopTools/apache-maven-3.9.0/Repository</localRepository> <pluginGroups></pluginGroups> <proxies></proxies> <!--私服用户配置,没用私服不需要配置了--> <servers></servers> <!--镜像中央仓库--> <mirrors> <mirror> <id>alimaven</id> <name>aliyun maven</name> <url>http://maven.aliyun.com/nexus/content/groups/public/</url> <mirrorOf>central</mirrorOf> </mirror> <mirror> <id>central</id> <name>Maven Repository Switchboard</name> <url>https://repo1.maven.org/maven2/</url> <mirrorOf>central</mirrorOf> </mirror> <mirror> <id>jboss-public-repository-group</id> <mirrorOf>central</mirrorOf> <name>JBoss Public Repository Group</name> <url>http://repository.jboss.org/nexus/content/groups/public</url> </mirror> </mirrors> <!--私服用户配置,没用私服不需要配置了--> <profiles></profiles> <activeProfiles></activeProfiles></settings>
MySQL
官网下载地址:https://dev.mysql.com/downloads/mysql/
- mac
-
下载:直接下载"macOS 13 (ARM, 64-bit), DMG Archive ",一路点击,密码选择"use legacy password encryption",设置root用户的登录密码
-
配置环境变量
# 编辑,设置如下内容sudo vim /etc/profile# 配置生效source /etc/profile# 查看版本mysql --version#mysqlexport PATH=$PATH:/usr/local/mysql/binexport PATH=$PATH:/usr/local/mysql/support-files -
启动、安装/卸载、配置
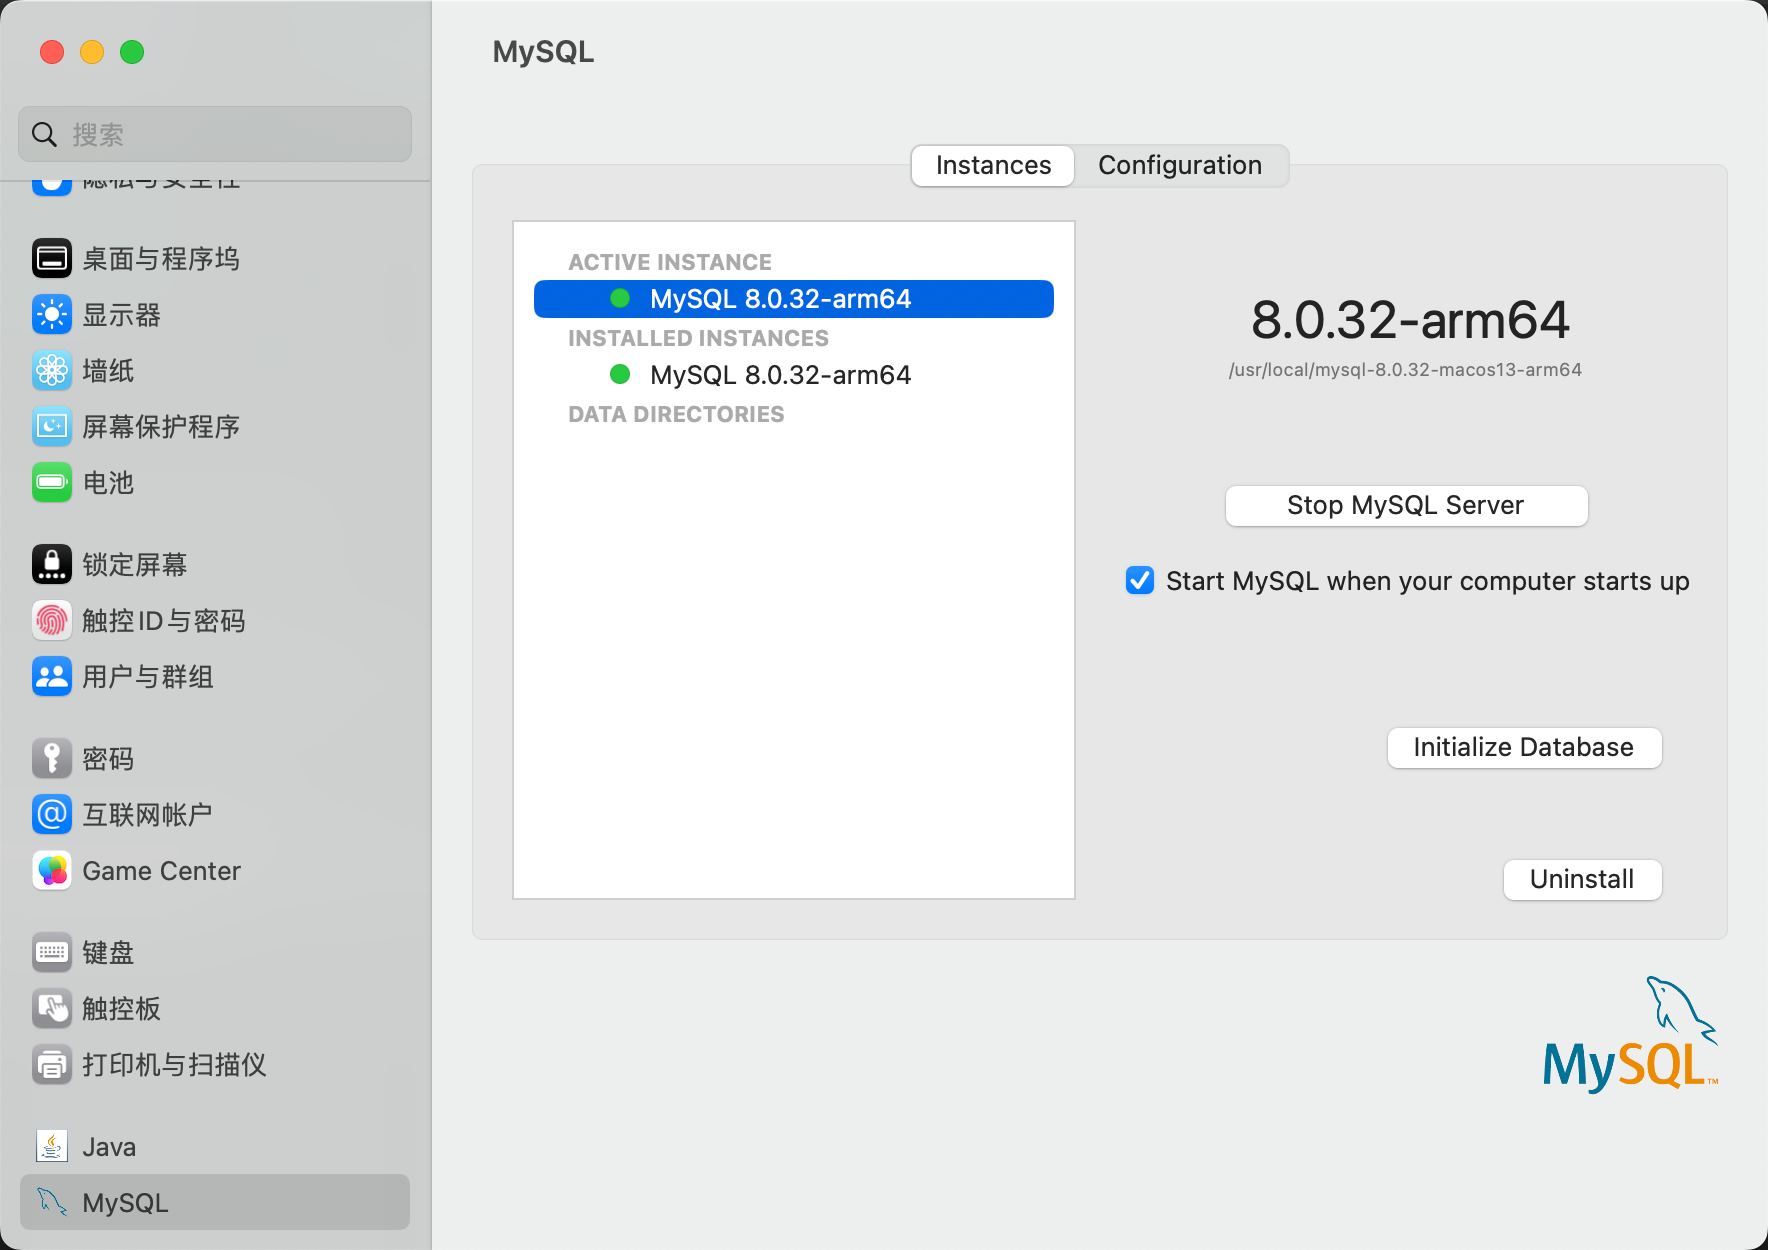
-
- linux
- 下载:https://dev.mysql.com/downloads/mysql/
- 解压:tar -xvJf mysql-8.0.21-linux-glibc2.12-x86_64.tar.xz
- 重命名:mv mysql-8.0.21-linux-glibc2.12-x86_64 mysql8.0
- 创建数据存储目录:mkdir /../mysql8.0/data
- 创建mysql用户和用户组,并设置权限
# 创建mysql用户和用户组groupadd mysqluseradd -g mysql mysql# 给mysql用户赋予权限chown -R mysql.mysql /usr/local/mysql/ - 初始化mysql信息
cd /usr/local/mysql/bin# 初始化基本信息./mysqld --user=mysql --basedir=/usr/local/mysql --datadir=/usr/local/mysql/data/ --initialize# 获取临时密码:最后一行 root@localhost: lxkqDibw2?Yn - 添加mysql服务到系统
cd /usr/local/mysql/mysql8.0# 将mysqld服务添加到系统cp -a ./support-files/mysql.server /etc/init.d/mysql# 授权以及添加服务chmod +x /etc/init.d/mysqlchkconfig --add mysql# 创建my.cnf文件sudo vim /etc/my.cnf# 设置权限sudo chmod 664 /etc/my.cnf# Example MySQL config file for small systems. # # This is for a system with little memory (<= 64M) where MySQL is only used # from time to time and it's important that the mysqld daemon # doesn't use much resources. # # MySQL programs look for option files in a set of # locations which depend on the deployment platform. # You can copy this option file to one of those # locations. For information about these locations, see: # http://dev.mysql.com/doc/mysql/en/option-files.html # # In this file, you can use all long options that a program supports. # If you want to know which options a program supports, run the program # with the "--help" option. # The following options will be passed to all MySQL clients [client] default-character-set=utf8 #password = k0Ui&wV(Z3ytport = 3306 socket = /tmp/mysql.sock # Here follows entries for some specific programs # The MySQL server [mysqld] #配置mysql的文件夹 和 mysql data目录basedir=/usr/local/mysql/mysql8.0datadir=/usr/local/mysql/mysql8.0/datadefault-storage-engine=INNODB character-set-server=utf8 collation-server=utf8_general_ci port = 3306 socket = /tmp/mysql.sock skip-external-locking key_buffer_size = 16K max_allowed_packet = 1M table_open_cache = 4 sort_buffer_size = 64K read_buffer_size = 256K read_rnd_buffer_size = 256K net_buffer_length = 2K thread_stack = 128K # Don't listen on a TCP/IP port at all. This can be a security enhancement, # if all processes that need to connect to mysqld run on the same host. # All interaction with mysqld must be made via Unix sockets or named pipes. # Note that using this option without enabling named pipes on Windows # (using the "enable-named-pipe" option) will render mysqld useless! # #skip-networking server-id = 1 # Uncomment the following if you want to log updates #log-bin=mysql-bin # binary logging format - mixed recommended #binlog_format=mixed # Causes updates to non-transactional engines using statement format to be # written directly to binary log. Before using this option make sure that # there are no dependencies between transactional and non-transactional # tables such as in the statement INSERT INTO t_myisam SELECT * FROM # t_innodb; otherwise, slaves may diverge from the master. #binlog_direct_non_transactional_updates=TRUE # Uncomment the following if you are using InnoDB tables #innodb_data_home_dir = /usr/local/mysql/data #innodb_data_file_path = ibdata1:10M:autoextend #innodb_log_group_home_dir = /usr/local/mysql/data # You can set .._buffer_pool_size up to 50 - 80 % # of RAM but beware of setting memory usage too high #innodb_buffer_pool_size = 16M #innodb_additional_mem_pool_size = 2M # Set .._log_file_size to 25 % of buffer pool size #innodb_log_file_size = 5M #innodb_log_buffer_size = 8M #innodb_flush_log_at_trx_commit = 1 #innodb_lock_wait_timeout = 50 [mysqldump] quick max_allowed_packet = 16M [mysql] no-auto-rehash # Remove the next comment character if you are not familiar with SQL #safe-updates [myisamchk] key_buffer_size = 8M sort_buffer_size = 8M [mysqlhotcopy] interactive-timeout
服务启动/关闭/登录/退出
- mysql服务启动/关闭
# 启动mysql服务service mysql start# 查看mysql运行状态service mysql status# 将mysql命令添加到服务ln -s /usr/local/mysql/mysql8.0/bin/mysql /usr/bin# 关闭mysql服务service mysql stop - mysql服务登录/退出
# 登录mysql mysql -uroot -p# 退出quit;# 修改root密码 mysql>ALTER USER 'root'@'localhost' IDENTIFIED WITH mysql_native_password BY '123456';# 刷新缓存flush privileges;
推荐两款使用下来体验很不错的客户端: Navicat(收费,或找破解版)、DBeaver(开源免费,但下载程序后还需要下载驱动才可使用)
Redis
官网下载:https://redis.io/docs/getting-started/
Jmeter
官网下载地址:https://jmeter.apache.org/download_jmeter.cgi
- 下载:官网下载太慢,选择阿里云镜像下载,下载地址 https://mirrors.aliyun.com/apache/jmeter/binaries/?spm=a2c6h.25603864.0.0.436f69a5u1Mo7X
- 解压:
sudo tar -zxvf apache-jmeter-5.5.tgz -C DevelopTools - 启动配置修改:/bin/jmeter.properties
# 修改语言language=zh_en改成language=zh_CN# 修改编码sampleresult.default.encoding=ISO-8859-1 改为 UTF-8 - 启动:
sh /bin/jmeter.sh - 使用(参考文章:https://www.jianshu.com/p/20fac18f478f)
-
添加线程组
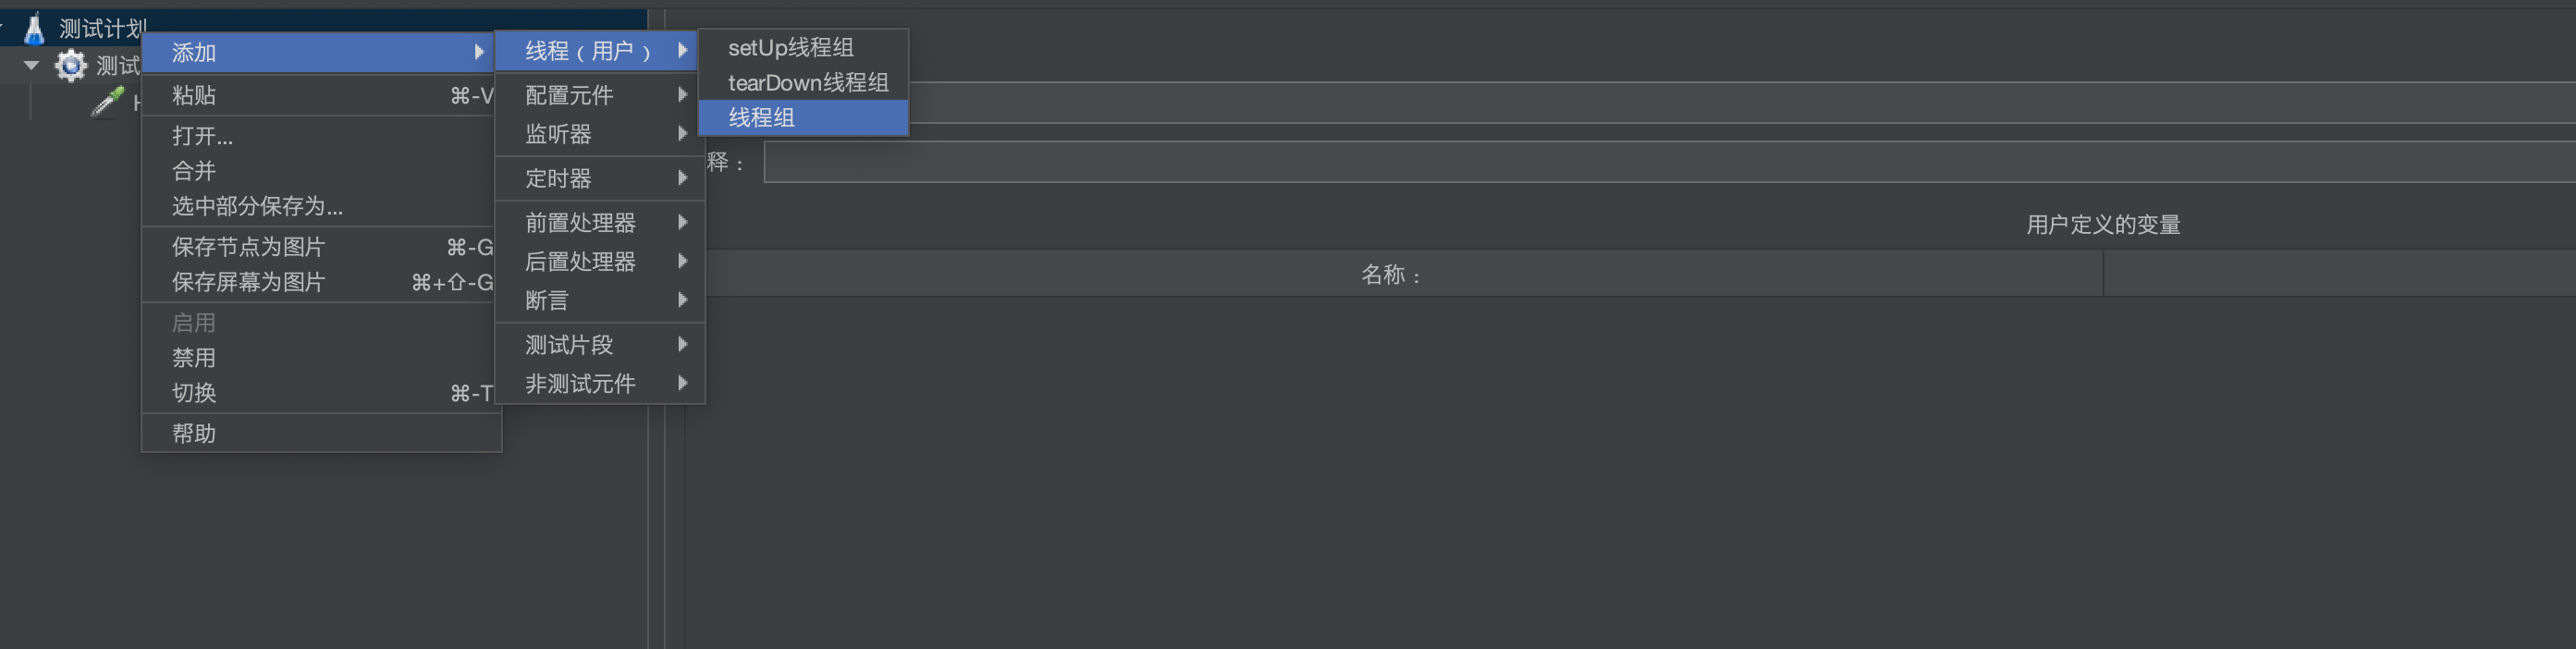
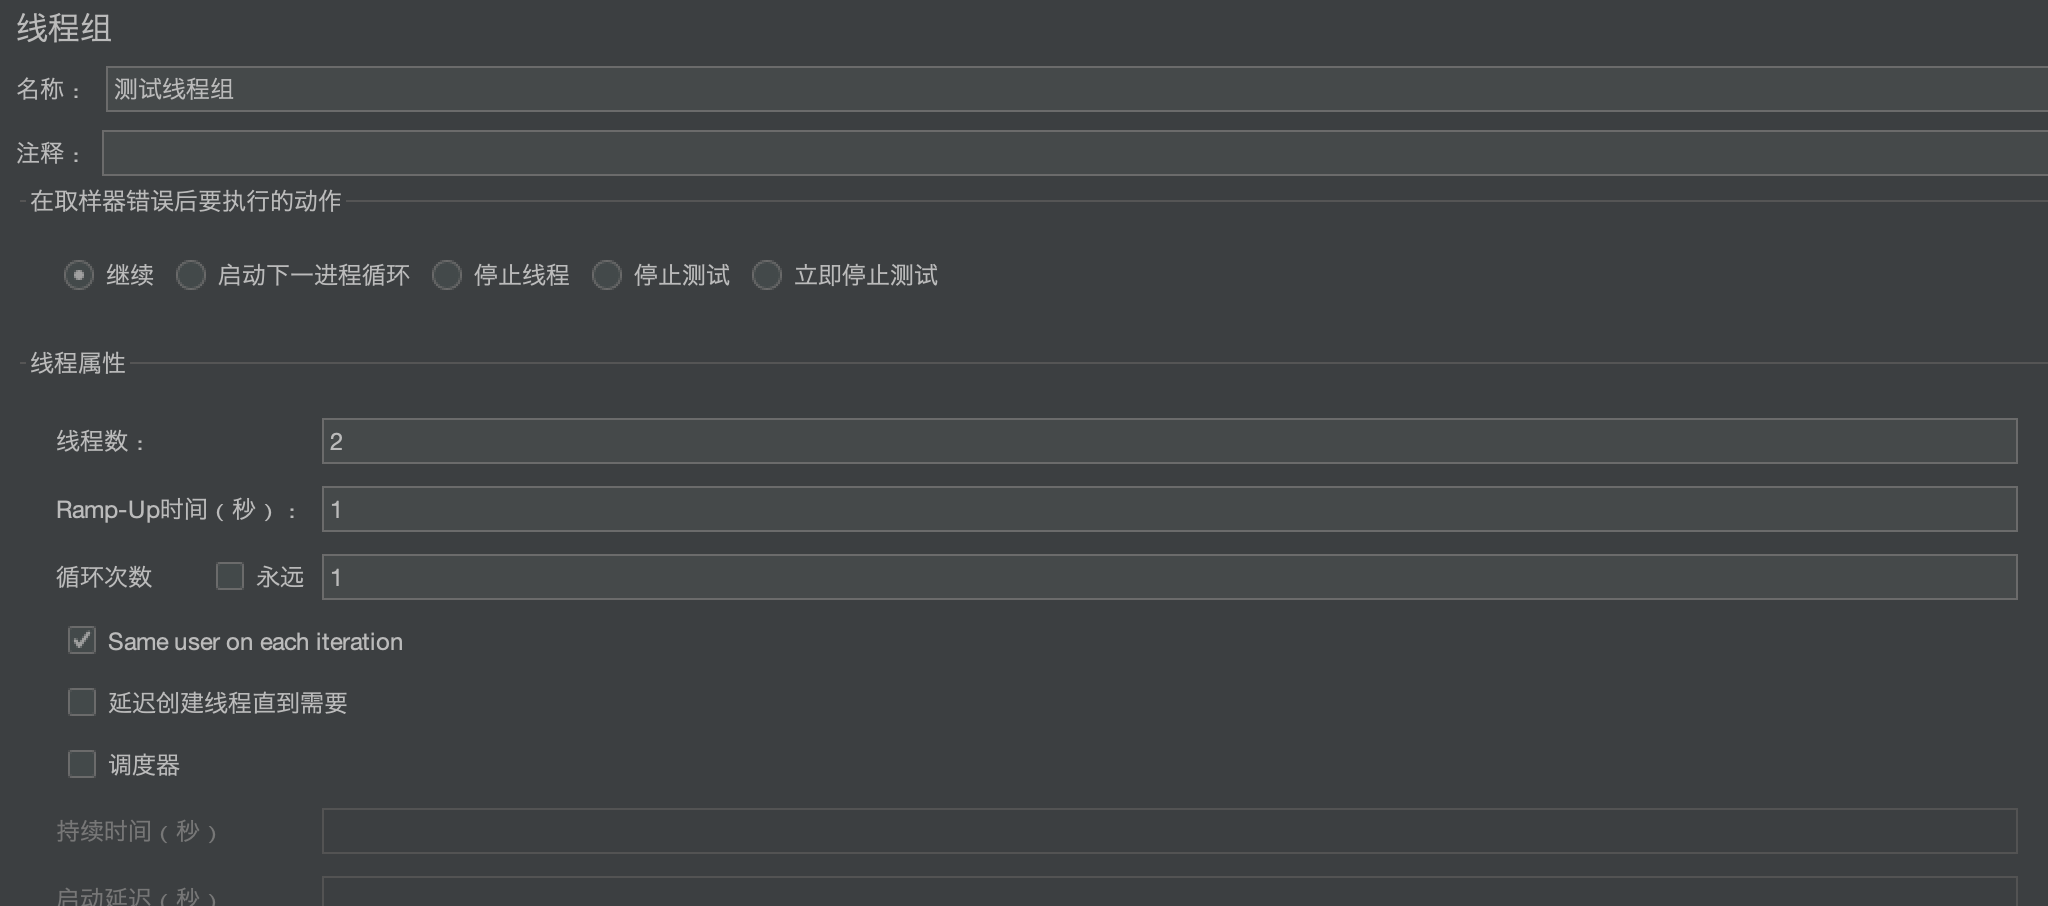
-
添加Http请求

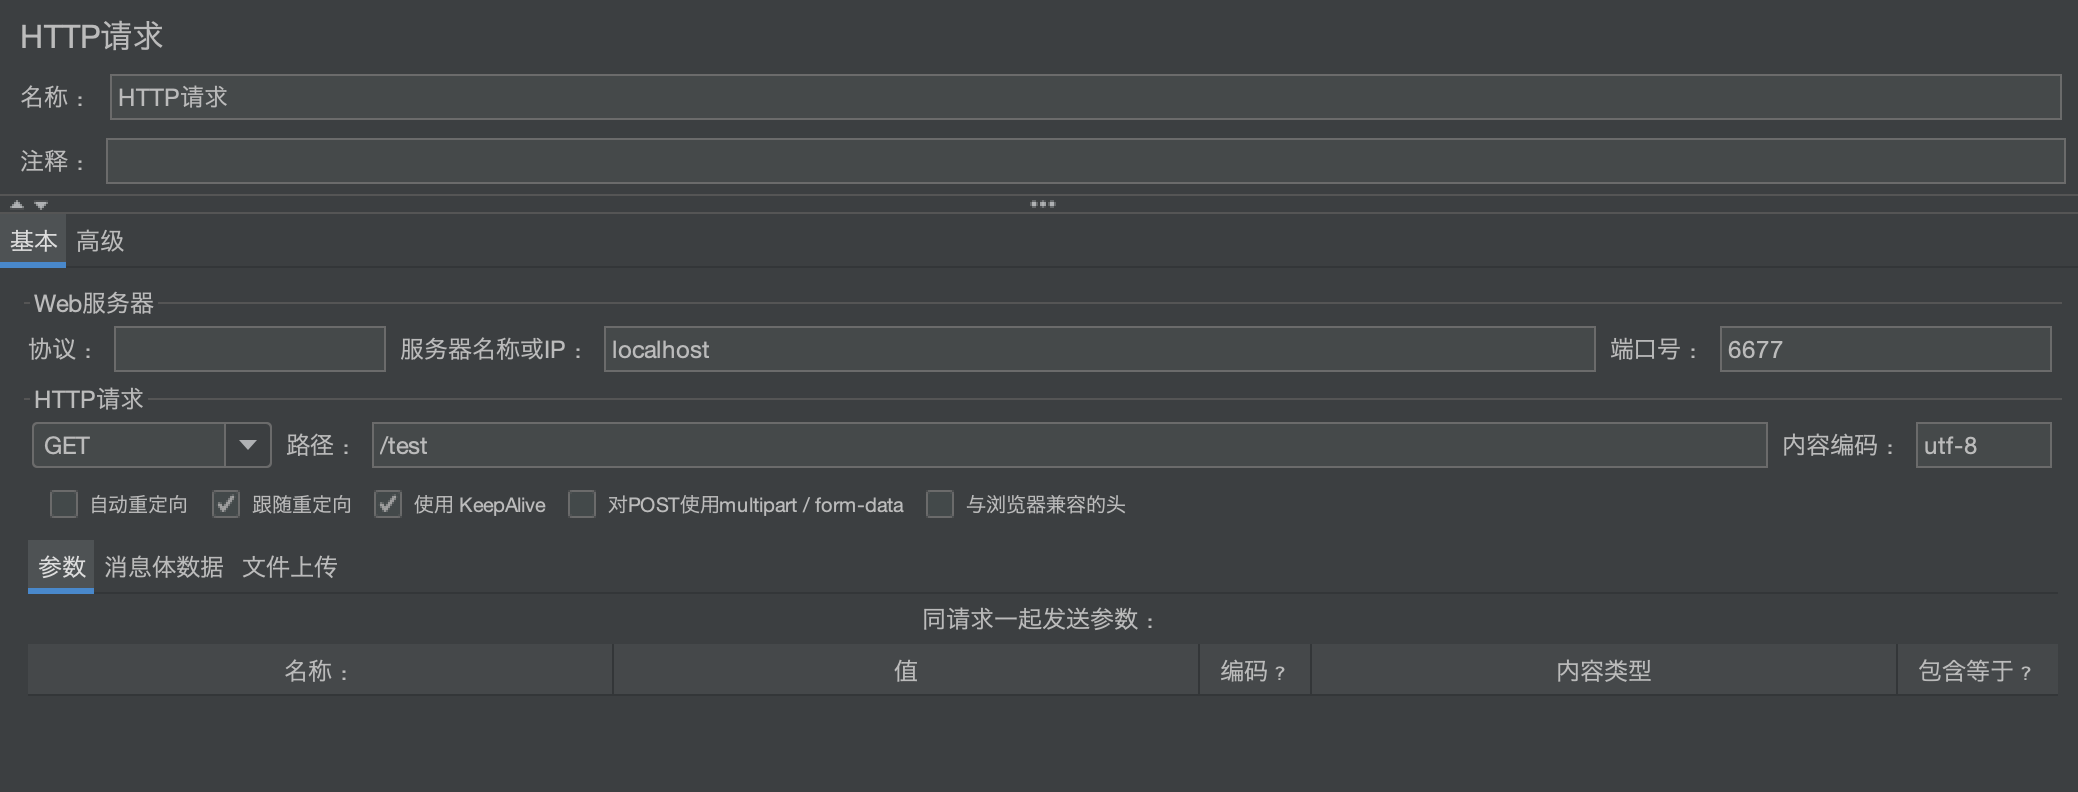
-
启动测试即可
-
Recommend
About Joyk
Aggregate valuable and interesting links.
Joyk means Joy of geeK