

You Don't Need Rails to Start Using Hotwire
source link: https://www.akshaykhot.com/using-hotwire-without-rails/
Go to the source link to view the article. You can view the picture content, updated content and better typesetting reading experience. If the link is broken, please click the button below to view the snapshot at that time.
You Don't Need Rails to Start Using Hotwire
Although Hotwire is closely tied to Ruby on Rails, you might be surprised to know that you don't really need Rails to learn, play, and experiment with Hotwire. In this article, I will show you how a simple static website can use Turbo Drive and Frames to make it more dynamic and responsive.

So far on this blog, we've learned about Hotwire and built a hotwired to-do list powered by Rails. However, you don't really have to use Rails to get most of the benefits of Hotwire. Most static websites can just drop-in the Turbo library to behave like responsive single-page applications, without incurring any of the costs and complexities associated with the SPA frameworks.
This post shows how you can set up a simple sandbox to learn and understand how various features of Turbo Drive and Frames work. Once you have a good grasp on the fundamentals, you can always pair it with a backend framework such as Rails or Laravel for more complex scenarios, such as handling form submissions.
Here're the topics we'll cover in this article.
npm run launch, and you're good to go.Prerequisites: If you don't know what Hotwire is, I suggest you check out the following article, written by yours truly. It briefly introduces Hotwire and explains the problems it solves. I also assume you've got a recent version of Node.js and NPM installed on your computer.
 Akshay's BlogAkshay Khot
Set up a Simple Website
Create a brand new directory for your website and cd into it. I'll call mine wireframe.
➜ mkdir wireframe
➜ cd wireframe
Run the npm init command to set up a new project. It will ask you a bunch of questions and then create a package.json in the current directory.
➜ wireframe npm init

package name: (wireframe)
version: (1.0.0)
description: Using Hotwire without Ruby on Rails
entry point: (index.js)
test command:
git repository:
keywords: hotwire, turbo
author: AK
license: (ISC) MIT
Here's the resulting package.json file
{
  "name": "wireframe",
  "version": "1.0.0",
  "description": "Using Hotwire without Ruby on Rails",
  "main": "index.js",
  "scripts": {
    "test": "echo \"Error: no test specified\" && exit 1"
  },
  "keywords": [
    "hotwire",
    "turbo"
  ],
  "author": "AK",
  "license": "MIT"
}
Now open the directory in your favorite editor. We're ready to start coding.
➜ code .Add a simple HTML file
Let's create a new folder named public with an index.html HTML file in it. The HTML file will have the following content. Feel free to copy and paste.
<!DOCTYPE html>
<html lang="en">
<head>
  <meta charset="UTF-8">
  <meta http-equiv="X-UA-Compatible" content="IE=edge">
  <meta name="viewport" content="width=device-width, initial-scale=1.0">
  <link rel="stylesheet" href="https://cdn.simplecss.org/simple.min.css">
  <title>Wireframe</title>
</head>
<body>
  <header>
    <nav>
      <a href="/">Home</a>
      <a href="/contact">Contact</a>
      <a href="/about">About</a>
    </nav>

    <h1>Learn Hotwire</h1>

    <p>Yes, you can really use Hotwire without Rails. Give it a try!</p>
  </header>
  <main>
  </main>
</body>
</html>
To make our website look a bit nice, I am using SimpleCSS, a simple, classless CSS framework. It's so simple that I don't even have to explain it. Basically, it makes semantic HTML look good, that's it. No classes required.
If you open the index.html file directly in the browser, it should look like this. Pretty neat, right?

index.html in browser
Notice that the nav bar says File , instead of HTTP, because chrome is directly serving the file. To make it look like a real website served with the HTTP protocol, we'll need an HTTP server that will serve the HTML.
But why? If you're curious to learn more about the difference between opening a HTML file directly in browser vs. serving it with an HTTP server, check out this StackOverflow question.
Using an HTTP Server to Serve Static Pages
I am going to use a simple static HTTP server called http-server which is more than sufficient for our needs.
http-server is a simple, zero-configuration command-line static HTTP server. It is powerful enough for production usage, but it's simple and hackable enough to be used for testing, local development and learning.A nice thing about using Node.js and NPM is that you can run the package without installing it first, using the npx command. Run the following command from the wireframe directory.
➜ npx http-server

Starting up http-server, serving ./public

http-server version: 14.1.0

Available on:
  http://127.0.0.1:8080
  http://10.0.0.182:8080
Hit CTRL-C to stop the server
Without any arguments, the above command serves the index.html file in the public directory. This is the reason I asked you to create a public/index.html file for your project.
You can also add the above command as a script in the package.json file. This will allow you to launch the website using the npm run launch command.
// package.json

"scripts": {
  "launch": "npx http-server"
},
Now that your server is up and running, visit the http://127.0.0.1:8080 or http://localhost:8080 URL in the browser.

HTTP Browser
Now that our website is up and running, we're ready to install Turbo.
How to Install Turbo
We are going to use the pre-compiled, optimized NPM package from skypack.dev using the <script> tag, just like it's 2007. For other installation methods, check out the Installing Turbo documentation.
Step 1: Add the following script tag just above the <title> tag in your HTML.
<script type="module">
  import * as Turbo from 'https://cdn.skypack.dev/@hotwired/turbo';
</script>

<title>Wireframe</title>
Step 2: There's no step 2. ;)
If you're curious about how the above snippet works, I highly recommend you read the MDN documentation on JavaScript Modules.
That's it. Our little website is using Turbo.
To verify, reload the browser, open the DevTools window, go to the Console tab, and type Turbo in it. If it doesn't throw an error, you're good to go.

Installing Turbo
Now that we've successfully installed Turbo, we're ready to use it. We'll start with the first big component in Turbo, called Turbo Drive.
Faster Navigation with Turbo Drive
It just works out-of-box.
The best thing about Turbo Drive is that you get it for free. Yes, you heard that right. You don't have to do anything to get the benefits of Turbo Drive.
But how does it work?
When you click a link or submit a form (to the same domain), Turbo Drive does the following:
- Prevent the browser from following the link,
- Change the browser URL using the History API,
- Request the new page using a
fetchrequest - Render the response HTML by replacing the current
<body>element with the response and merging the<head>element’s content.
The JavaScript window and document objects as well as the <html> element persist from one rendering to the next.
The same goes for an HTML form. Turbo Drive converts Form submissions into fetch requests. Then it follows the redirect and renders the HTML response.
As a result, your browser doesn’t have to reload, and the website feels much faster and more responsive, just like a single-page application.
Let's set up another page to navigate to
To see how Turbo Drive works, we need to set up another page on our website that we'll add a link to.
Luckily, we've already added the links to the Contact and About pages when we wrote the initial HTML, so let's go ahead and add a Contact page. To keep it really simple, I'll just copy and paste the index.html page, changing the filename and a little content to make it unique.
<!DOCTYPE html>
<html lang="en">
<head>
  <meta charset="UTF-8">
  <meta http-equiv="X-UA-Compatible" content="IE=edge">
  <meta name="viewport" content="width=device-width, initial-scale=1.0">
  <link rel="stylesheet" href="https://cdn.simplecss.org/simple.min.css">
  <script type="module">
    import * as Turbo from 'https://cdn.skypack.dev/@hotwired/turbo';
  </script>
  <title>Wireframe - Contact</title>
</head>
<body>
  <header>
    <nav>
      <a href="/">Home</a>
      <a href="/contact">Contact</a>
      <a href="/about">About</a>
    </nav>

    <h1>Contact</h1>
  </header>
  <main>
    <p>You can reach me at [email protected]</p>
  </main>
</body>
</html>
You should see the following page when you go to /contact page.
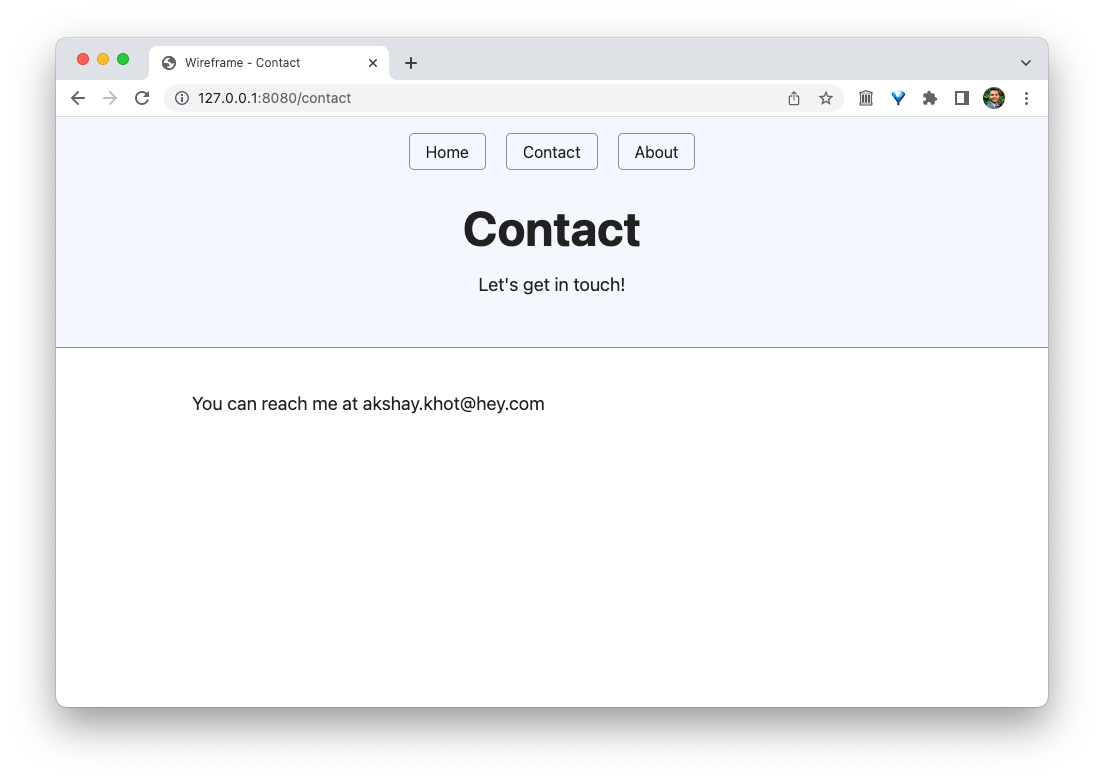
contact page
Now go ahead and click back and forth between the Home and Contact links. Can you spot something different that you won't see on a traditional website with a bunch of HTML pages linking to each other?
No? let me give you a hint. Comment out the <script> tags that load the Turbo library on both pages.
<!-- <script type="module">
  import * as Turbo from 'https://cdn.skypack.dev/@hotwired/turbo';
</script> -->
Don't forget to comment it on both pages, okay?
Now clear the cache and hard reload the browser by pressing and holding the reload button while the DevTools window is open. This removes the Turbo library you loaded earlier from the website.
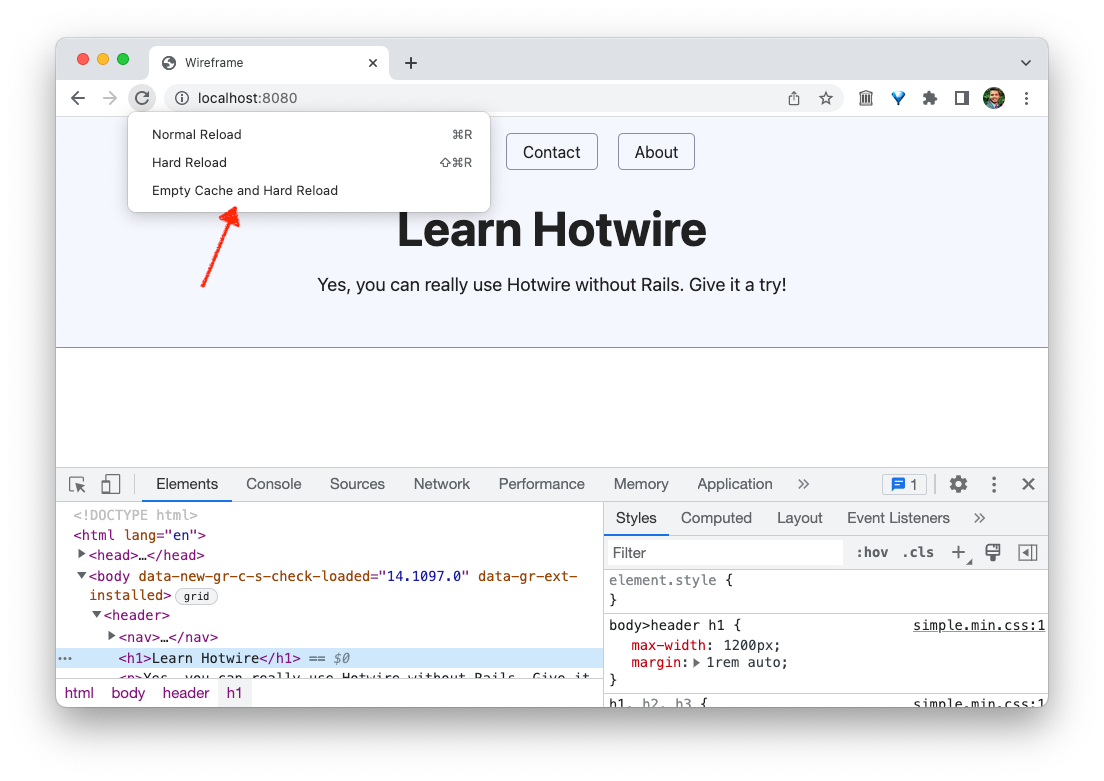
clear cache and hard reload
Now click between Home and Contact links.
See something different?
I'm sure you must have figured it out by now. When you navigate between multiple pages, the browser is doing a full reload. You can see this by noticing the earth icon in the tab, which spins for a quick second when you go to a different page.
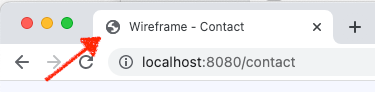
full reload
Now uncomment the script from both pages and reload the browser again. No need to clear the cache this time. The website should fetch the Turbo library without any issues.
Go ahead, and click between the pages.
Get it?
The earth is not spinning anymore! The pages are updating without a full browser reload. How cool is that?
This is the power of Turbo Drive. Without any extra effort on your part, your website has instantly become more responsive and dynamic.
To recap, here's what happened when you clicked on the Contact link. Turbo intercepted that click, prevented the browser from following it, made a fetch request to get the content of the Contact page, and then replaced the current body of the web page with the body of the result. Additionally, it merges the contents of the <head> tag if there's new stuff here, like new <meta> tags or new JavaScript.
Turbo.visit(location). Displaying a Progress Bar
You can improve the perceived responsiveness of your website by displaying a progress bar while Turbo fetches the new page. Simply add the following CSS that targets the .turbo-progress-bar element.
<style>
  .turbo-progress-bar {
    height: 10px;
    background-color: green;
  }
</style>
It might be hard to see it, as the navigation is so fast. You can throttle the network to Slow 3G to see the progress bar.
That's the essence of how Turbo Drive works. You get a bulk of the benefits of modern single-page applications, with a fraction of the complexity associated with the complicated SPA frameworks.
You can check out the documentation to learn more about the advanced features of Turbo Drive. But for now, let's move on to Turbo Frames.
Dynamic Page Updates with Turbo Frames
We've seen how Turbo Drive can make your website responsive by replacing the current body element with the response body. For most websites (that are not web applications), this is absolutely enough to get the majority of performance boost and to give that SPA-like feel without any added complexity.
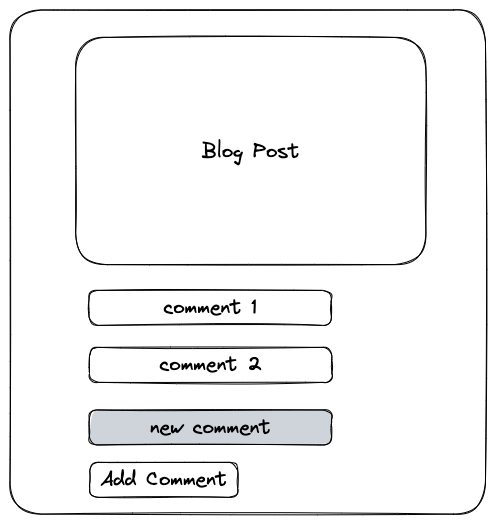
However, sometimes you have a website that only needs to update a small section on the page while leaving the whole page intact. Maybe you have a blog post with comments enabled. When someone replies to your post, you only want to update the comments section, without updating the whole blog post. Replacing the whole body doesn't make sense here.
This is the appeal behind single-page applications, where most of the page remains as it is, and only sections on the page are updated independently.
What if you could just send the specific HTML that changed, i.e. the comments section, without touching the rest of the page, i.e. the blog post? The response would be much smaller, and the rest of the HTML could be easily cached, making the application even more responsive.
For this, we need to bring out the next weapon in our arsenal: Turbo Frames. Turbo Frames allows us to do the exactly same thing. The only difference is, the part of the page that's updated is retrieved from the response HTML, instead of making an API call to retrieve the JSON response.
What are Turbo Frames?
Turbo Frames allow you to dynamically update sections on the page in response to some action, such as clicking a link or submitting a form. In contrast to Turbo Drive, Turbo Frames let you contain the scope of the change, reducing the size of the HTML your server has to send.
I will demonstrate Turbo Frames by building a simple gallery on our home page. Here's how the resulting page will look.

Clicking on the Next link dynamically updates the image without reloading the browser.
Let's get started. First, update the index.html page's <main> tag with the following HTML. Just copy and paste it, I'll explain what's going on soon.
<main style="text-align: center;">
  <h1>Gallery</h1>
  <turbo-frame id="gallery">
    <img src="images/ocean.jpeg" alt="Ocean" width="500" height="400">

    <div>
      <a href="/gallery/forest">Next (forest)</a>
    </div>
  </turbo-frame>
</main>
Then create a new folder named gallery in the public directory. It contains three HTML files named forest.html, mountains.html, and ocean.html. Here's their content.
<!-- forest.html -->

<turbo-frame id="gallery">
  <img src="images/forest.jpeg" alt="forest" width="500" height="400">

  <div>
    <a href="/gallery/mountains">Next (mountains)</a>
  </div>
</turbo-frame>

<!-- mountains.html -->

<turbo-frame id="gallery">
  <img src="images/mountains.jpeg" alt="Mountains" width="500" height="400">

  <div>
    <a href="/gallery/ocean">Next (ocean)</a>
  </div>
</turbo-frame>

<!-- ocean.html -->

<turbo-frame id="gallery">
  <img src="images/ocean.jpeg" alt="Ocean" width="500" height="400">

  <div>
    <a href="/gallery/forest">Next (forest)</a>
  </div>
</turbo-frame>
I've also added three new images in the public/images directory that I grabbed from the w3schools website.
That's all needed for our image gallery. Clicking on the Next link updates the picture without reloading the page.
Wait, what just happened?
How Turbo Frames Work?
You may have noticed a new HTML element named <turbo-frame>. It's a custom HTML element provided by Turbo. This element allows you to divide your website into independent components that need to be changed independently.
You wrap the section on the page that you want to update in response to link clicks or form submissions inside a <turbo-frame> element and give it a sensible id. When the response from the server arrives, Turbo finds the <turbo-frame> element with the matching id, and replaces the current <turbo-frame> element with the one from the response.
In the above example, when you click the Next button, the <turbo-frame id="gallery"> element on the index.html page is replaced with the matching turbo frame element that arrives from the response. That's how the image is replaced with a new image.
You can have multiple <turbo-frame> elements on the page. Each one should have its own, unique id. That's how Turbo knows which frame to replace when the response arrives from the server.
Where to go from here
This wraps up our exploration into using Hotwire (without Rails) on a static website. We haven't looked into more advanced scenarios such as handling form submissions, yet. This is because it's a static website and we don't have a backend yet.
In the next article in this series, we'll take a look into using a simple PHP script to handle form submissions. We'll investigate how Turbo Frames can update the page dynamically when the user submits a form and even target elements outside the frames. Having a backend will also allow us to play with Turbo Streams.
I hope you found this article useful and that you learned something new.
If you have any questions or feedback, didn't understand something, or found a mistake, please leave a comment below or send me an email. I look forward to hearing from you.
Please subscribe to my blog if you'd like to receive future articles directly in your email. If you're already a subscriber, thank you.
Recommend
About Joyk
Aggregate valuable and interesting links.
Joyk means Joy of geeK