

A script to fix EDID problems on external monitors in macOS
source link: https://gist.github.com/ejdyksen/8302862
Go to the source link to view the article. You can view the picture content, updated content and better typesetting reading experience. If the link is broken, please click the button below to view the snapshot at that time.
patch-edid.rb
A script to fix EDID problems on external monitors in macOS.
Instructions
-
Connect only the problem display.
-
Create this directory structure (if it doesn't already exist):
sudo mkdir -p /Library/Displays/Contents/Resources/Overrides -
Download this ruby script in that directory:
cd /Library/Displays/Contents/Resources/Overrides
sudo curl -O https://gist.githubusercontent.com/ejdyksen/8302862/raw/patch-edid.rb
Note: You may want to use adaugherity's version of the script instead.
-
Run the script we just downloaded (as root again). This creates a new display override plist file.
cd /Library/Displays/Contents/Resources/Overrides sudo ruby patch-edid.rb -
Unplug and replug in the problem display.
Additional reading/acknowledgements
- The original forum thread
- An improved version of the script by adaugherity
- An explaination of the problem from Atomic Object's blog
- Thanks so much to @stackrainbow for pointing out that this can be done without disabling SIP.
- This version appears to work in Catalina and Big Sur. See earlier revisions for what worked (with disabling SIP) in earlier versions of macOS, which require the override plist to be in a different directory.
Holy.... After hours of searching the internet to make my pink tinted custom external display normal again, it's finally working with this script! Thank you so much.
I have some good news! Found a new workaround that should (potentially) work on every M1 Mac and force RGB color output via HDMI-to-HDMI
While doing a lot of testing on how the Dual-Cable workaround above makes RGB to work on M1, I've discovered what changes it makes to macOS, and managed to create a more streamlined workaround without the need to use a second cable.
To make things easier, I've created a step-by-step video tutorial of the whole procedure that should force RGB color output on your M1 Mac connected to an external monitor, and works on an HDMI-to-HDMI cable connection:
Here is the link to the video tutorial: https://www.youtube.com/watch?v=Z1EqH3fd0V4
The video also has Closed Captions (Subtitles) that you can enable, to make it easier to follow if needed.
Here are each of the Terminal commands mentioned in the tutorial, so that you can just copy and paste them:
open /Library/Preferences
plutil -convert xml1
plutil -convert binary1
plutil -lintThe end result is having your M1 mac output RGB color to your external monitor instead of YPbPr, potentially making the colors more accurate and the text a bit more crisp, even on older 1080p monitors.
Hopefully this tutorial would be useful to someone.
Please feel free to ask if you have any questions regarding this procedure.
Hey man, thank you for your participation and many responses.
I'm using M1 iMAC and using a 4K 15 inch DIY monitor as its external monitor, but it doesn't seem to be recognized correctly. iMAC recognizes it as a 61 inch TV. Fortunately, hidpi works normally, but because it is recognized as a TV, night shift and true tone can't work on the external display. Do you know any way to solve this problem?(Now I'm using Flux but it makes the color a little bit weird)
@will-huang9531 thank you so much for your comment and for the details.
That is a tricky setup, but there might be something you can do to make it not to be recognized by the M1 as a TV.
There is a lesser know option in the Displays Override that you might try:
<key>DisplayIsTV</key>
<false/>
The complicated part is that you will need to create a Display Override file specific for your monitor and place it in/Library/Displays/Contents/Resources/Overrides/DisplayVendorID-XXXX/DisplayProductID-XXXX
The xxxx needs to be replaced with the manufacturer ID and the product ID of the monitor. You can create these using the original script from this gist, but you might need an old x86 Mac in order to do it. After the file is created, you can add the DisplayIsTV key manually and transfer the file to your M1 based Mac.
Alternatively, you might be able to read the required IDs directly on the M1 Mac by going opening:
System Report > Logs > IORegistry contents and search for a string (CMD + F) called "DisplayAttributes".
You should notice something like "LegacyManufacturerID"=0x10ac,"ProductID"=0xa0b8 under it. Those are the values that you need to replace the xxxx above, only removing the starting 0x.
So, the Override folder name would become (for example):
DisplayVendorID-10ac
And the file itself would become (for example):
DisplayProductID-a0b8
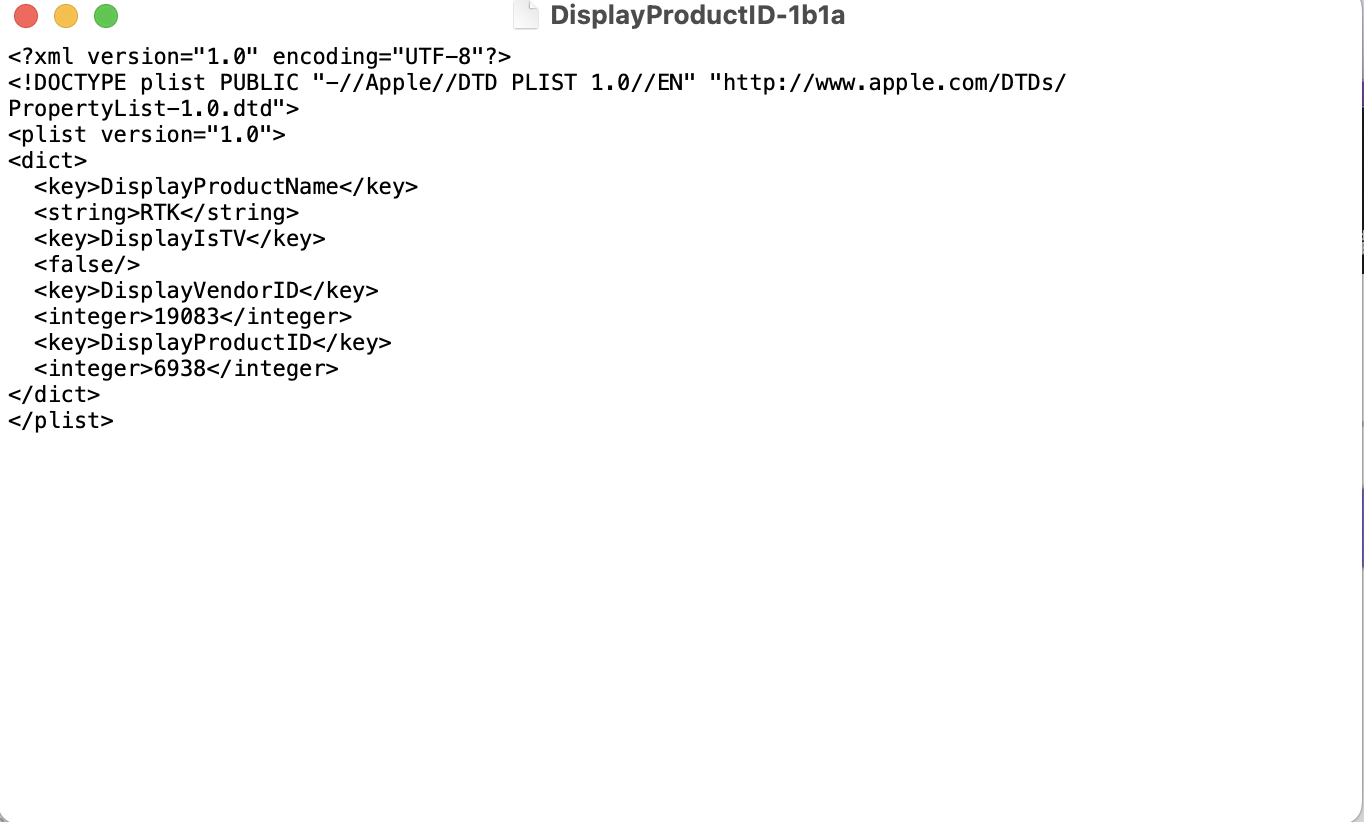
Here is an example of how the complete override file should look like:
<?xml version="1.0" encoding="UTF-8"?>
<!DOCTYPE plist PUBLIC "-//Apple//DTD PLIST 1.0//EN" "http://www.apple.com/DTDs/PropertyList-1.0.dtd">
<plist version="1.0">
<dict>
  <key>DisplayProductName</key>
  <string>DELL U2415</string>
  <key>DisplayIsTV</key>
  <false/>
  <key>DisplayVendorID</key>
  <integer>4268</integer>
  <key>DisplayProductID</key>
  <integer>41144</integer>
</dict>
</plist>
Of course, the DisplayVendorID and DisplayProductID need to match your own monitor here again, but in integer instead of hex. The name can be set to anything that you like.
You can convert the hex values like 10ac to decimals like 4268 by using an online calculator like this one:
https://www.rapidtables.com/convert/number/hex-to-decimal.html
If you have any additional questions, please feel free to contact me or comment here.
Thank you for your "DisplayIsTV", but unfortunately it still doesn't work.
My DisplayVendorID is "4a8b" ProductID is "1b1a"
By the convert:
DisplayVendorID
19083
DisplayProductID
6938
And the path is:
/Library/Displays/Contents/Resources/Overrides/DisplayVendorID-4a8b/DisplayProductID-1b1a

Maybe this is the limitation of Apple silicon, maybe this is the limitation of Mac OS 12. In short, it doesn't work, but thank you for your support! In my country, few people discuss these details, so I can only go to GitHub for help
@will-huang9531 Thank you for the reply and for checking this.
It looks like you did everything correctly.
Can you check if you change the ProductName from RTK to something else and see if the new monitor name shows in the Display Settings?
This is just to check whether macOS is actually reading the override file
Of course buddy,
macOS is actually reading the override file, and now macOS may recognize it as a 61inch TV that likes to jump in the mud, but still not as a monitor.


Now I created a low color temperature color description file for it in color synchronization and loaded it manually at night. This is the only compromise I can make.
Maybe I will use this year's scholarship to buy a real 24 inch monitor at the end of the year to work with IMAC to replace this 15 inch DIY monitor.
@will-huang9531 thanks for confirming.
You can try changing the to to test, but at this point it's seems not likely that it will show the Night Shift option.
@ejdyksen
My problem is when connect MacBook Pro M1 to LG TV, the color is washed out like very high contrast.
So this script would fix for it, is it?
And is there anyway or how to revert back after run script ?
Thanks
@GetVladimir Thanks so much for your instructions. I watched your YT video too. But undfortunately, the plist file doesn't contain the two keys that you mentioned: (encoding and range). Can I please ask your suggestion on this?
@ibehnam thank you for your comment.
If the LinkDescription is missing from the com.apple.windowserver.displays.plist file, you can also add it manually, and it should still work.
You might need to manually add this whole section though:
					<key>LinkDescription</key>
					<dict>
						<key>BitDepth</key>
						<integer>8</integer>
						<key>EOTF</key>
						<integer>0</integer>
						<key>PixelEncoding</key>
						<integer>0</integer>
						<key>Range</key>
						<integer>1</integer>
					</dict>
The section usually goes right under the CurrentInfo key, and it should look something like this:
Please note that if you use a Dock/Hub and the M1 assigns a new UUID for it on each reboot, this might not work. You'll need a direct USB-C to DisplayPort or USB-C to HDMI cable in that case (without using an adapter)
@GetVladimir Sorry for late reply. Thanks man! I'll give it another shot and will share the result here.
@GetVladimir Thanks so much man! I did what you said and the text is now somewhat better than before. I still have to use BetterDummy to provide HiDPI on my 2K monitor.
@ibehnam Thank you for the update.
Do you happen to use some kind of Dock or Hub? The M1 usually likes to create a new UUID on every reboot when using a Dock/Hub, which might explain the multiple CurrentInfo sections in the plist file.
You can either make a backup of the plist file, delete it, create a new clean one and then apply the modifications, or you can try applying the modifications under each of those CurrentInfo sections.
I'm not sure whether you can manually create new resolutions with it, but you can test it. They might get overwritten on reboot anyway.
Make sure to do a backup and please note that you're doing any changes at your own risk.
@ibehnam Awesome! Glad to hear that you got it working
This guide shows how to enable HiDPI on Mac. It's absurd that Apple doesn't support this natively.
https://contra.medium.com/how-to-turn-on-hidpi-mode-on-external-display-in-macos-5c1035dc42b5
I haven't been able to do what this guide says yet, but I think it'll fix the blurry text on external monitors.
@ibehnam I haven't tested that guide, but you usually need to place any Displays Override files in the /Library folder, and not in the /System/Library folder (which is read only and protected in recent versions of macOS).
However, please note that the Displays Override files work mostly on x86 Mac, and the M1 support seems to be somewhat limited
Oh thanks man for the heads-up. Yes, I think you're right, it won't work on M1.
Actually I tried following the tutorial but sudo mount -uw / throws an error on macOS Monterey. Apparently, one needs to disable FileVault to get around that, but then it won't be possible to re-enable FileVault again!!
I couldn't get this to work on an M1-based machine. Anyone able to and with what steps? I messed around for quite some time and used various EDID calculators to try different profiles.
@tsujp thank you for the comment.
You can try these steps to get RGB Color Output working on a M1 based Mac: https://www.youtube.com/watch?v=Z1EqH3fd0V4
Make sure to create a backup and remove any old display overrides and display plist file if you've modified them
I'm absolutely floored that this worked. LG32UD59 with Intel Macbook Pro 13"- 2020. Fonts look great now @ 60hz, before it was especially noticeable when looking at my iTerm fonts, and the only solution was to drop the refresh rate to 30Hz.
I think instead of converting to XML and then to PLIST again, we must be able to use a PLIST editor like this one.
How to enable HiDPI on M1 based Macs on any resolution
I have some interesting news: I found a solution to enable HiDPI on M1 based Macs on any resolution, even on 1080p screens, without the need to use mirroring or other workarounds.
Here is an example of HiDPI running on a Dell U2415 monitor that only supports a maximum resolution of 1920x1200:
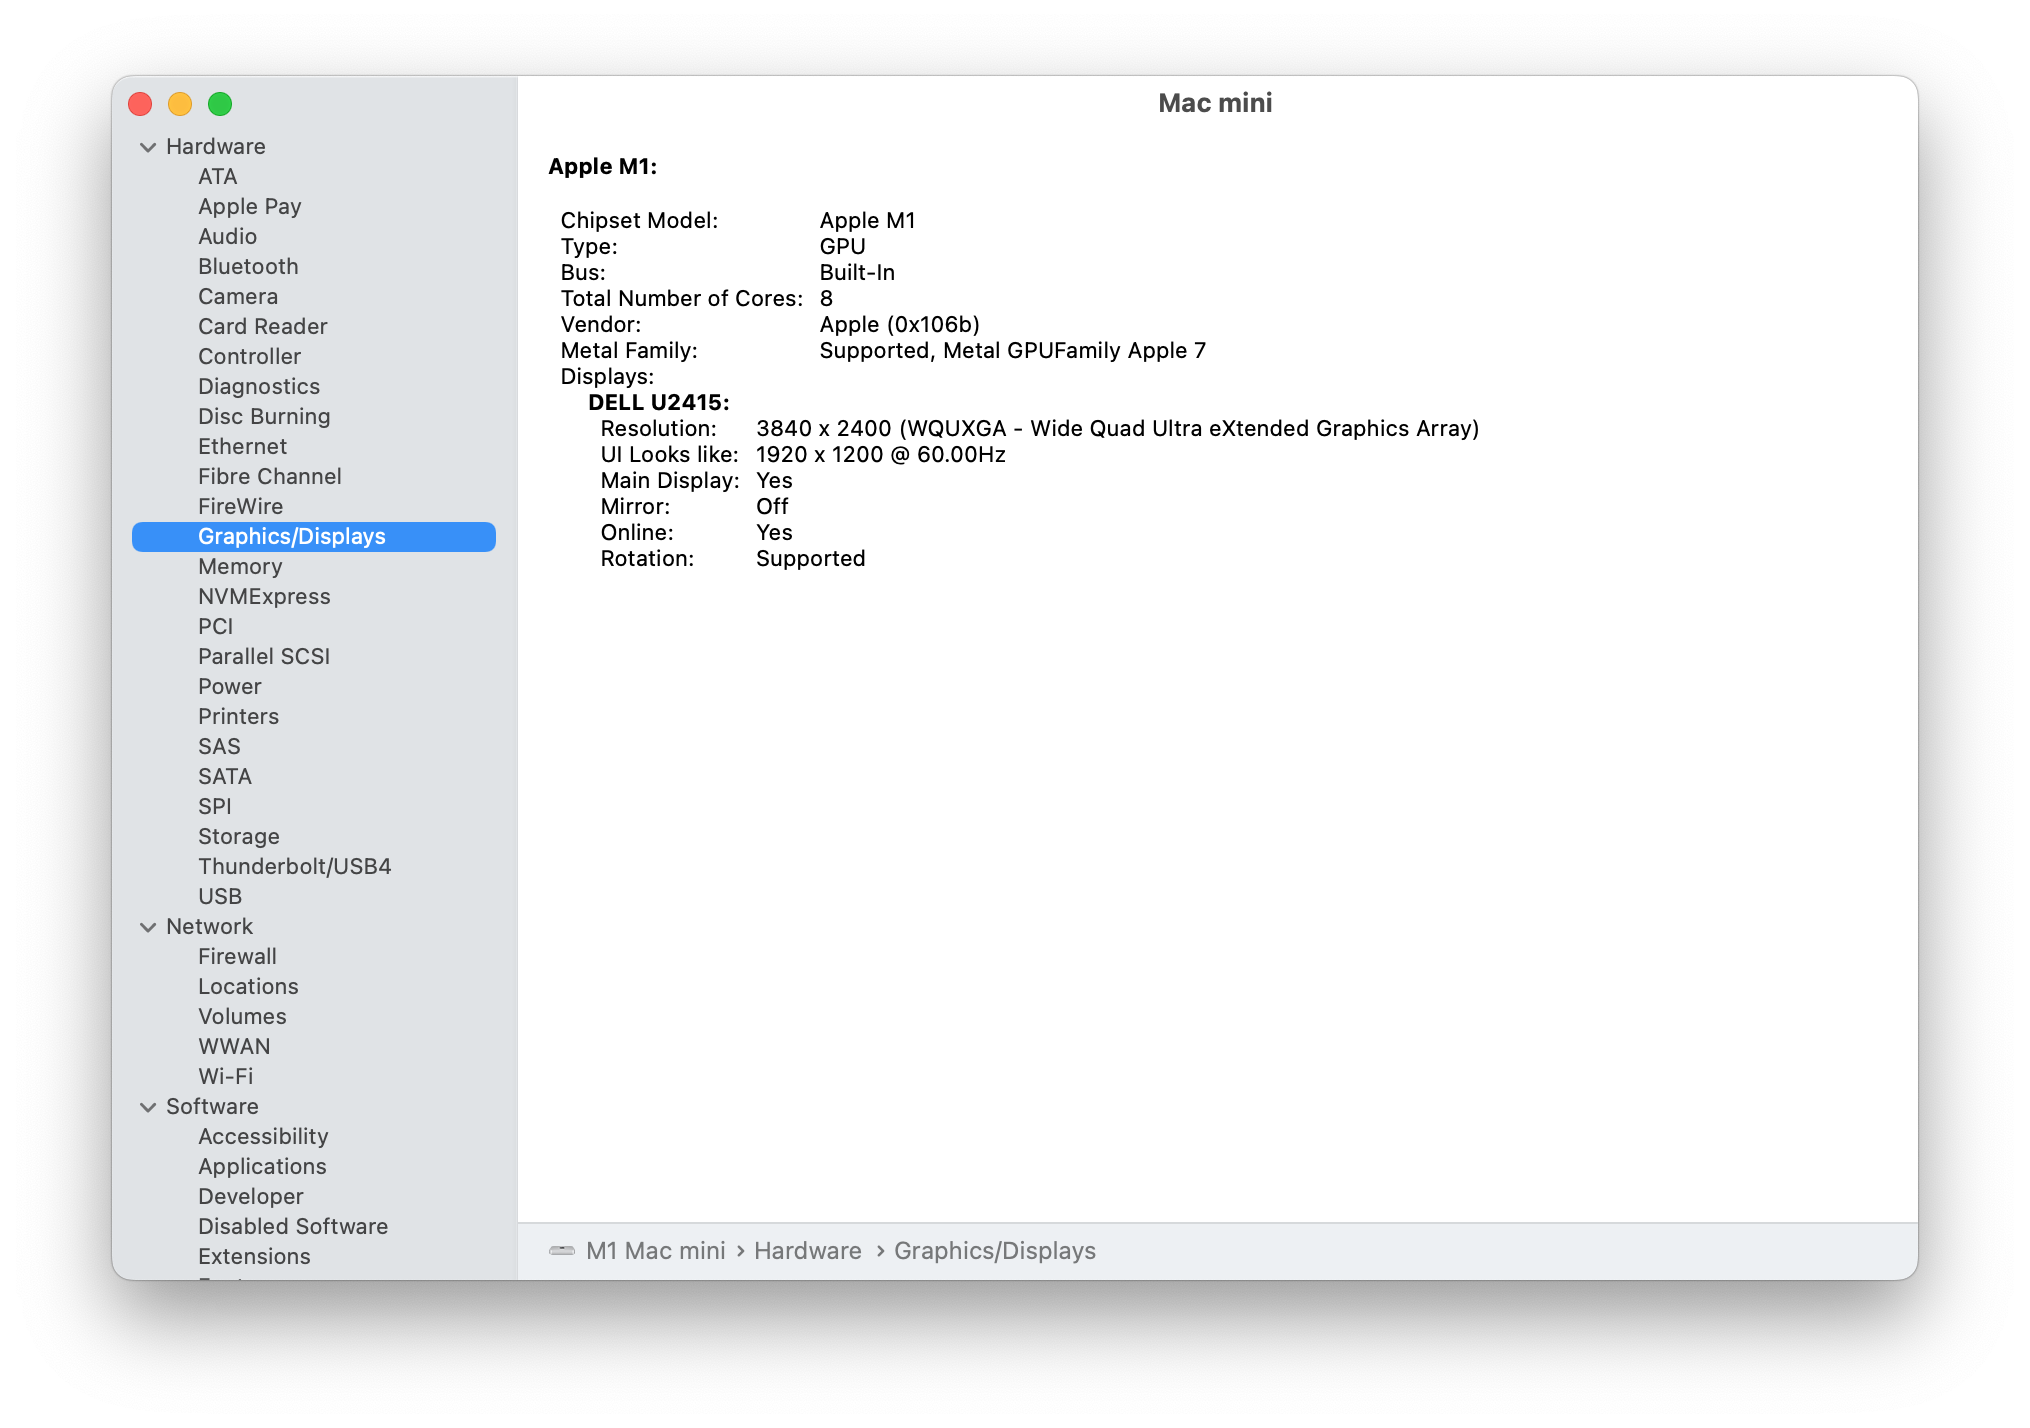
What you need to do is to edit the com.apple.windowserver.displays.plist file located in/Library/Preferences/com.apple.windowserver.displays.plist
and change the key <key>Scale</key> to have a value of 2.
This is an example of how the section in the displays plist file should look like after the change:
					<key>CurrentInfo</key>
					<dict>
						<key>Depth</key>
						<integer>8</integer>
						<key>High</key>
						<real>1200</real>
						<key>Hz</key>
						<real>60</real>
						<key>IsLink</key>
						<false/>
						<key>OriginX</key>
						<real>0.0</real>
						<key>OriginY</key>
						<real>0.0</real>
						<key>Rotation</key>
						<integer>0</integer>
						<key>Scale</key>
						<real>2</real>
						<key>Wide</key>
						<real>1920</real>
					</dict>
Make sure that you change only the Scale key for the monitor that you need, and nothing else.
You can follow the step-by-step video tutorial on how to make the changes in the displays plist file here:
https://www.youtube.com/watch?v=Z1EqH3fd0V4
After that, restart your Mac and you should get HiDPI and noticeably more crisp and anti-aliased text, and the high resolution macOS icons.
An easy way to confirm that the HiDPI changes work is by looking at the Safari icon on the dock. If the HiDPI version of the icon is enabled, it will have a lot more sections in the compass than the low resolution icon. It should look something like this:
Please note that while this might make the image look better even on 1080p screens, they will still be running at 1080p resolution, so the change might not be as drastic as running on a higher resolution screen.
If you have any questions about the procedure, please feel free to contact me or comment below.
How to enable HiDPI on M1 based Macs on any resolution
I have some interesting news: I found a solution to enable HiDPI on M1 based Macs on any resolution, even on 1080p screens, without the need to use mirroring or other workarounds.
Here is an example of HiDPI running on a Dell U2415 monitor that only supports a maximum resolution of 1920x1200:
What you need to do is to edit the com.apple.windowserver.displays.plist file located in
/Library/Preferences/com.apple.windowserver.displays.plistand change the key
<key>Scale</key>to have a value of 2.This is an example of how the section in the displays plist file should look like after the change:
					<key>CurrentInfo</key>
					<dict>
						<key>Depth</key>
						<integer>8</integer>
						<key>High</key>
						<real>1200</real>
						<key>Hz</key>
						<real>60</real>
						<key>IsLink</key>
						<false/>
						<key>OriginX</key>
						<real>0.0</real>
						<key>OriginY</key>
						<real>0.0</real>
						<key>Rotation</key>
						<integer>0</integer>
						<key>Scale</key>
						<real>2</real>
						<key>Wide</key>
						<real>1920</real>
					</dict>
Make sure that you change only the Scale key for the monitor that you need, and nothing else.
You can follow the step-by-step video tutorial on how to make the changes in the displays plist file here: youtube.com/watch?v=Z1EqH3fd0V4
After that, restart your Mac and you should get HiDPI and noticeably more crisp and anti-aliased text, and the high resolution macOS icons.
An easy way to confirm that the HiDPI changes work is by looking at the Safari icon on the dock. If the HiDPI version of the icon is enabled, it will have a lot more sections in the compass than the low resolution icon. It should look something like this:
Please note that while this might make the image look better even on 1080p screens, they will still be running at 1080p resolution, so the change might not be as drastic as running on a higher resolution screen.
If you have any questions about the procedure, please feel free to contact me or comment below.
Going to give this a shot when I get home from work. If this is indeed correct I'm going to be ecstatic because holy smokes without HiDPI macOS looks garbage.
@tsujp Thank you so much for the reply! Let us know how it goes
@tsujp Thank you so much for the reply! Let us know how it goes
Okay first attempt didn't work but I'm fairly sure this is because I've got some borked "display state". I had previously been messing around with RDM, BetterDummy, SwitchResX and what not and I have ~1000 lines in my com.apple.windowserver.displays.plist file. I did a fresh install of macOS in a VM from Apple's official IPSW and it has.. the single display in its com.apple.windowserver.displays.plist; oh boy. UUIDs don't save me here since my displays UUID is repeated multiple times and I am not sure where these definitions are coming from (the other UUIDs) so I can manually remove them.
Would you have any idea? I'll keep poking around. The alternative is a re-install but I really don't want to do that currently.
Update 1:
So in addition to deleting /Library/Preferences/com.apple.windowserver.displays.plist you also have to delete ~/Library/Preferences/ByHost/com.apple.windowserver.displays.UUID.plist. In place of UUID there will be an actual UUID.
That cleaned it up and now I have a single entry, very nice. Let's try again.
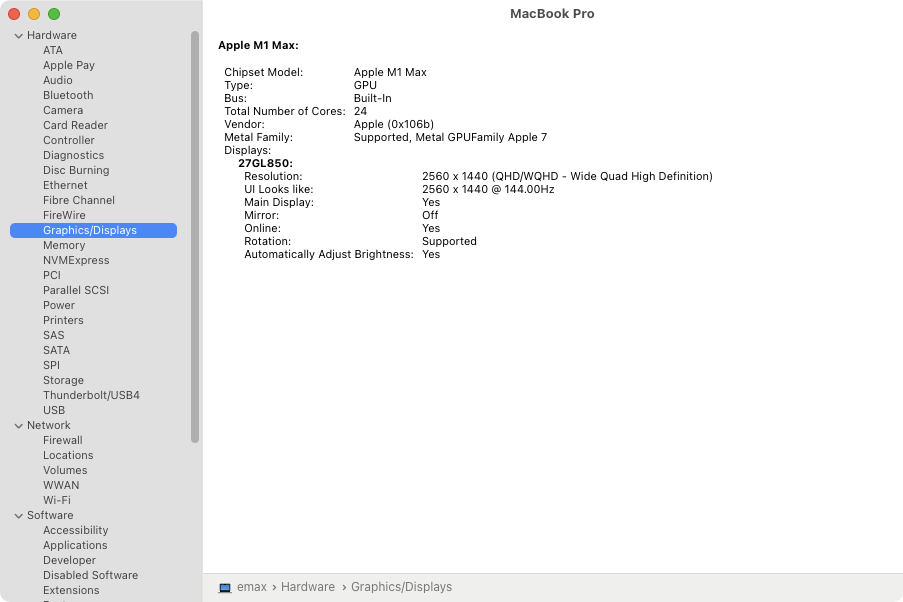
Update 2:
I cannot get it to work with an LG 27GL850. The change to the plist is staying in-place but there's no UI scaling nor any option to in System Preferences.
@tsujp Thank you for the update.
You can try making a backup of the displays plist file and deleting it completely. After a restart, macOS should recreate that file with only the UUID of your monitor.
If the CurrentInfo key is not in the newly created file, you can do the rotation trick (rotate your monitor to 180 in System Preferences > Displays and rotate it back to 0) and it should create it too.
If you use a VM or a Dock, it will not create the UUID of the monitor, so that might be the cause of the issue.
Please check to make sure that there is no duplicate displays plist file in /Users/[YourUsername]/Library/Preferences/ByHost
If there is, you can make a backup of it and delete it (or you'll need to modify that one as well)
Also, please note that the scaling slider doesn't appear in the System Preferences > Displays. It just works with the applied settings in the plist file (until you manually change the resolution again).
@tsujp Thank you for the update.
Hehe no worries mate thank you for the help.
You can try making a backup of the displays plist file and deleting it completely. After a restart, macOS should recreate that file with only the UUID of your monitor.
So in my prior message what I did was completely delete both the apple.com.windowserver.displays plist file in /Library/Preferences as well as in ~/Library/Preferences/ByHost. I then rebooted and it recreates only the plist file in /Library/Preferences which contains no CurrentInfo until I do the rotation trick; that gives me a new fresh plist.
If the CurrentInfo key is not in the newly created file, you can do the rotation trick (rotate your monitor to 180 in System Preferences > Displays and rotate it back to 0) and it should create it too.
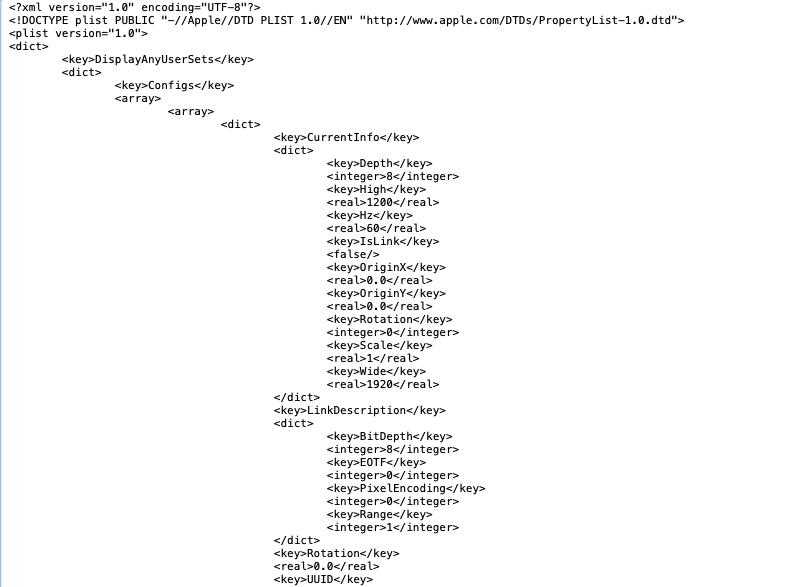
Yep, the resulting file (with the scale edited) looks like this: note it doesn't work even if I set the scale in the UnmirrorInfo too.
I'm sanity checking this UUID using the ColorSync Utility app which shows the displays UUID, you can see here they are the same:

<?xml version="1.0" encoding="UTF-8"?>
<!DOCTYPE plist PUBLIC "-//Apple//DTD PLIST 1.0//EN" "http://www.apple.com/DTDs/PropertyList-1.0.dtd">
<plist version="1.0">
<dict>
	<key>DisplayAnyUserSets</key>
	<dict>
		<key>Configs</key>
		<array>
			<array>
				<dict>
					<key>CurrentInfo</key>
					<dict>
						<key>Depth</key>
						<integer>8</integer>
						<key>High</key>
						<real>1440</real>
						<key>Hz</key>
						<real>144</real>
						<key>IsLink</key>
						<false/>
						<key>OriginX</key>
						<real>0.0</real>
						<key>OriginY</key>
						<real>0.0</real>
						<key>Rotation</key>
						<integer>0</integer>
						<key>Scale</key>
						<real>2</real>
						<key>Wide</key>
						<real>2560</real>
					</dict>
					<key>Rotation</key>
					<real>0.0</real>
					<key>UUID</key>
					<string>BE7805F6-7870-4FDB-8B01-434588225703</string>
					<key>UnmirrorInfo</key>
					<dict>
						<key>Depth</key>
						<integer>7</integer>
						<key>High</key>
						<real>1440</real>
						<key>Hz</key>
						<real>144</real>
						<key>IsLink</key>
						<false/>
						<key>OriginX</key>
						<real>0.0</real>
						<key>OriginY</key>
						<real>0.0</real>
						<key>Rotation</key>
						<integer>0</integer>
						<key>Scale</key>
						<real>1</real>
						<key>Wide</key>
						<real>2560</real>
					</dict>
				</dict>
			</array>
		</array>
		<key>Orientations</key>
		<dict>
			<key>BE7805F6-7870-4FDB-8B01-434588225703</key>
			<integer>0</integer>
		</dict>
		<key>Underscan</key>
		<dict>
			<key>BE7805F6-7870-4FDB-8B01-434588225703</key>
			<real>1</real>
		</dict>
		<key>Version</key>
		<integer>1</integer>
	</dict>
	<key>DisplayUUIDMappings</key>
	<dict>
		<key>045C36B3-C9E6-F147-0F93-5A69417CA049</key>
		<string>BE7805F6-7870-4FDB-8B01-434588225703</string>
	</dict>
</dict>
</plist>
If you use a VM or a Dock, it will not create the UUID of the monitor, so that might be the cause of the issue.
No laptop dock or VM is being used here; the VM from before was to see what a default /Library/Preferences/com.apple ... plist looked like. I'm using the HDMI port which is part of the laptop shell. I've also tried this at different refresh rates too (but that shouldn't matter I think since the scaling is local to the machine only, there are still only 2560x1440 pixels going over the wire).
Please check to make sure that there is no duplicate displays plist file in /Users/[YourUsername]/Library/Preferences/ByHost
There is none.
Also, please note that the scaling slider doesn't appear in the System Preferences > Displays. It just works with the applied settings in the plist file (until you manually change the resolution again).
Gotcha. Well after a fresh reboot there is no effect for me:
@tsujp Thank you so much for the detailed explanation and for checking this! I appreciate it a lot.
There must be something that we're missing.
Do you have any custom Display Override file created by an app in/Library/Displays/Contents/Resources/Overrides/DisplayVendorID-[xxxx]/DisplayProductID-[xxxx]
the [xxxx] is the hex of the Manufacturer and Model of your Monitor.
If nothing else works, the other thing that comes to mind is to check if setting the resolution to 1920x1080 at 60Hz before making the plist change would make any difference. This is just for reference, to make sure that the resolution or the high 144Hz refresh rate doesn't prevent the HiDPI.
There must be something that we're missing.
That's what I am hoping but it's not looking good.
Do you have any custom Display Override file created by an app in
/Library/Displays/Contents/Resources/Overrides/DisplayVendorID-[xxxx]/DisplayProductID-[xxxx]
None, that folder is empty and was empty in all prior runs.
If nothing else works, the other thing that comes to mind is to check if setting the resolution to 1920x1080 at 60Hz before making the plist change would make any difference. This is just for reference, to make sure that the resolution or the high 144Hz refresh rate doesn't prevent the HiDPI.
I tried on my Mac Mini M1 also to the same result. I cannot get it to work. I might try one more time this weekend; are you able to get this working on more than your specific setup? Is anyone else? We've got your data point where it works and mine where it doesn't. I'm sure it's something with my setup (because I'd love for it to work) but so far nothing :'(
@tsujp That's a good point. Let's see if there are any other users that can get this to work on their specific setup.
I do have an older Mac mini (Late 2014), but that one is not M1 based and has completely different plist file. This solution will not work on it.
For reference example, I'm attaching my working M1 display plist file here:
<?xml version="1.0" encoding="UTF-8"?>
<!DOCTYPE plist PUBLIC "-//Apple//DTD PLIST 1.0//EN" "http://www.apple.com/DTDs/PropertyList-1.0.dtd">
<plist version="1.0">
<dict>
	<key>DisplayAnyUserSets</key>
	<dict>
		<key>Configs</key>
		<array>
			<array>
				<dict>
					<key>CurrentInfo</key>
					<dict>
						<key>Depth</key>
						<integer>8</integer>
						<key>High</key>
						<real>1200</real>
						<key>Hz</key>
						<real>60</real>
						<key>IsLink</key>
						<false/>
						<key>OriginX</key>
						<real>0.0</real>
						<key>OriginY</key>
						<real>0.0</real>
						<key>Rotation</key>
						<integer>0</integer>
						<key>Scale</key>
						<real>2</real>
						<key>Wide</key>
						<real>1920</real>
					</dict>
					<key>LinkDescription</key>
					<dict>
						<key>BitDepth</key>
						<integer>8</integer>
						<key>EOTF</key>
						<integer>0</integer>
						<key>PixelEncoding</key>
						<integer>0</integer>
						<key>Range</key>
						<integer>1</integer>
					</dict>
					<key>Rotation</key>
					<real>0.0</real>
					<key>UUID</key>
					<string>4354AB62-F516-45E6-971F-19EFC3C6B5BB</string>
					<key>UnmirrorInfo</key>
					<dict>
						<key>Depth</key>
						<integer>8</integer>
						<key>High</key>
						<real>1200</real>
						<key>Hz</key>
						<real>60</real>
						<key>IsLink</key>
						<false/>
						<key>OriginX</key>
						<real>0.0</real>
						<key>OriginY</key>
						<real>0.0</real>
						<key>Rotation</key>
						<integer>0</integer>
						<key>Scale</key>
						<real>1</real>
						<key>Wide</key>
						<real>1920</real>
					</dict>
				</dict>
			</array>
		</array>
		<key>Orientations</key>
		<dict>
			<key>4354AB62-F516-45E6-971F-19EFC3C6B5BB</key>
			<integer>0</integer>
		</dict>
		<key>Underscan</key>
		<dict>
			<key>4354AB62-F516-45E6-971F-19EFC3C6B5BB</key>
			<real>0.0</real>
		</dict>
		<key>Version</key>
		<integer>1</integer>
	</dict>
	<key>DisplayUUIDMappings</key>
	<dict>
		<key>9B603E2E-98E1-E840-0F93-5A69417CA049</key>
		<string>533B0F79-281D-4197-A73E-F10466A7CF93</string>
		<key>C96C073C-1382-DB8E-0F93-5A69417CA049</key>
		<string>4354AB62-F516-45E6-971F-19EFC3C6B5BB</string>
	</dict>
</dict>
</plist>
As a last resort, you can replace the UUID's with your own and test it, but it's not something I can recommend. This is just for a reference example.
Thank you again for all your help for testing this workaround and for posting your detailed findings.
Sign up for free to join this conversation on GitHub. Already have an account? Sign in to comment
Recommend
About Joyk
Aggregate valuable and interesting links.
Joyk means Joy of geeK