

WPF 使用动画绘制一个点赞大拇指 - ARM830
source link: https://www.cnblogs.com/T-ARF/p/17115015.html
Go to the source link to view the article. You can view the picture content, updated content and better typesetting reading experience. If the link is broken, please click the button below to view the snapshot at that time.
WPF 使用动画绘制一个点赞大拇指
好久没有写wpf了。
最近看到飞书的点赞动画非常有意思,决定试试,虽然不及飞书那样的绚丽,但是练手还是可以的,希望自己的手艺还在!
那么如何写一个这样的动画呢?
首先需要刨析这个动画的构成:
大拇指-1竖着
大拇指-2握着
中心旋转动画
展开中心旋转动画
当我们分析这些东西剩下的就好办了。
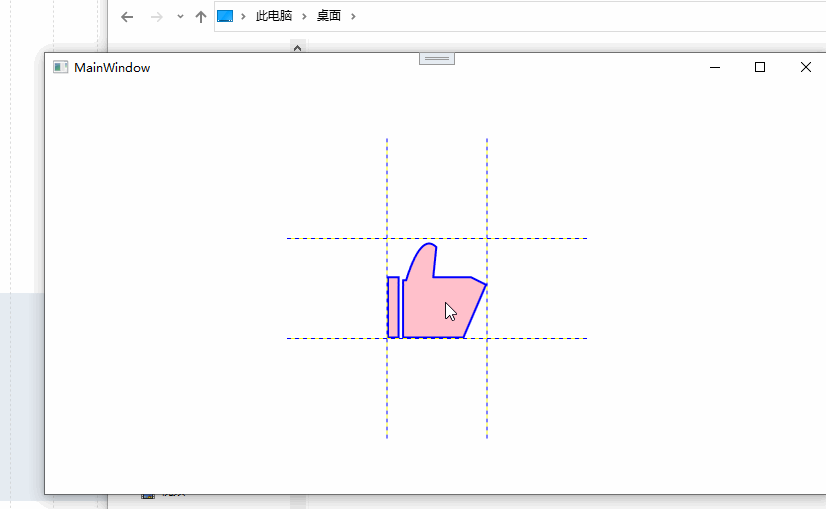
首先我们先办了这个最难的东西大拇指。

这个东西的构成,我们使用Path 直接去写。显然我们就会得到这样的代码
  <Geometry  x:Key="t1">
            M 20 40
                v 0 40
                h 0 7
                v 0 -40
                z
                M 30 42
                v 0  38
                h 40 0
                l 15 -35
                l -10 -5
                h -25 0
                l 2 -20
            <!--小褶皱-->
            q -10 -10, -20 22
               z
  </Geometry>
当我们在path 100*100的大小的时候使用脑补进行绘制就就可以了。
至于这个小褶皱我曾经不想要,但是看到了自己的猪爪...还是决定加上了。
这代码的原理非常简单,基本都是基本的直线绘制,最难的就是用了个贝塞尔来制造大拇指背部的弧度.
不管咋样还是弄出来个简单的赞。
剩下就是握着的状态了
那么我们只需要修改部分代码就可以达到了~
 <Geometry  x:Key="t2">
            M 20 40
                v 0 40
                h 0 7
                v 0 -40
                z
                M 30 42
                v 0  38
                h 40 0
                l 15 -35
                l -10 -5
                h -25 0
                l 2  0
            <!--小褶皱-->
            q -10 -10, -20 0
                z
        </Geometry>
我们修改了最后两行代码的 l 的y参数和q最后的end point参数的y的值都是降到0了 这样会形成一个简单的弧度

哈 这样子 我们就是得到了两个手掌的不同状态了。
剩下的事情就是来组装吧~~~~
首先是大拇指张开和大拇指握住的状态转换。
做到这事情最简单的动画就是使用eventtigger来做,我们使用简单的鼠标按下事件作为启动,当然了 想要丰富过程也是可以使用鼠标浮动事件作为启动事件之一。
          <Path.Triggers>
                    <EventTrigger  RoutedEvent="MouseLeftButtonDown">
                        <BeginStoryboard x:Name="Bs1">
                            <Storyboard>
                                <ObjectAnimationUsingKeyFrames BeginTime="0:0:0" Storyboard.TargetProperty="Data">
                                    <DiscreteObjectKeyFrame KeyTime="0:0:0.01">
                                        <DiscreteObjectKeyFrame.Value>
                                            <StaticResource ResourceKey="t2"/>
                                        </DiscreteObjectKeyFrame.Value>
                                    </DiscreteObjectKeyFrame>
                                </ObjectAnimationUsingKeyFrames>
                 </Storyboard>
                        </BeginStoryboard>
             </EventTrigger>
                </Path.Triggers>
为了做件事 ,我们把geometry作为window的资源 所以子啊写动画的时候 用离弦值就非常方便了。
观察代码,我们仅仅只是在点下的时候让path转换为握住的data,因为我们需要在松开左键的时候才让拇指竖起来。
所以还需要补上一个MouseLeftButtonUp的动画
这最终的代码就是
 <Path.Triggers>
                    <EventTrigger  RoutedEvent="MouseLeftButtonDown">
                        <BeginStoryboard x:Name="Bs1">
                            <Storyboard>
                                <ObjectAnimationUsingKeyFrames BeginTime="0:0:0" Storyboard.TargetProperty="Data">
                                    <DiscreteObjectKeyFrame KeyTime="0:0:0.01">
                                        <DiscreteObjectKeyFrame.Value>
                                            <StaticResource ResourceKey="t2"/>
                                        </DiscreteObjectKeyFrame.Value>
                                    </DiscreteObjectKeyFrame>
                                </ObjectAnimationUsingKeyFrames>
                 </Storyboard>
                        </BeginStoryboard>
             </EventTrigger>
             <EventTrigger RoutedEvent="MouseLeftButtonUp">
                        <RemoveStoryboard BeginStoryboardName="Bs1"/>
                    </EventTrigger>
                </Path.Triggers>
莫名的搞笑....
基础的东西我们构建好了,剩下就是补全了。
不全颤抖啊,补全中心旋转动画,也就是手指握住后有一个向下的动画。
首先这个颤动 我们可以简单的理解为位移,一个快速的上下左右的位移
正好WPF有这种动画 所以我们就可以得到如下的代码
                  <ThicknessAnimationUsingKeyFrames RepeatBehavior="Forever" Duration="0:0:0.4"  Storyboard.TargetProperty="Margin" >
                                    <SplineThicknessKeyFrame KeyTime="0:0:0.0" Value="4,3,0,0"/>
                                    <SplineThicknessKeyFrame KeyTime="0:0:0.2" Value="3,4,0,0"/>
                                    <SplineThicknessKeyFrame KeyTime="0:0:0.3" Value="0,0,4,0"/>
                                    <SplineThicknessKeyFrame KeyTime="0:0:0.35" Value="0,0,4,3"/>
                                    <SplineThicknessKeyFrame KeyTime="0:0:0.4" Value="4,3,0,0"/>
                                </ThicknessAnimationUsingKeyFrames>
我们可以直代码放到path的eventtriger中
看得出来 离散动画的值就是简单的marigin的位移,代码非常简单。
就是在这里颤抖...
虽然看上去不是很好看,但是我们结合下一个动画,也就是手掌向下就会好很多了
这个动画很明显是一个旋转动画,所以我们需要提前准备一个roteate的transofrom
 <Path.RenderTransform>
                    <RotateTransform x:Name="rote" Angle="0"/>
  </Path.RenderTransform>
动画代码如下
   <DoubleAnimation   Duration="0:0:0.1" To="30" Storyboard.TargetName="rote" Storyboard.TargetProperty="Angle">
                                    <DoubleAnimation.EasingFunction>
                                        <CubicEase/>
                                    </DoubleAnimation.EasingFunction>
       </DoubleAnimation>
我们简单的使用了一个函数,提升一下效果的动感...
但是感觉没啥用
效果图就是这样的了
虽然看上去已经非常不错了,但是还有些不做,想想 我们的手都朝下了 松开之后为啥没有一个向上的弹簧动作呢?
我们需要在抬起时加上一个角度的旋转。
 <EventTrigger RoutedEvent="MouseLeftButtonUp">
                        <BeginStoryboard x:Name="Bs2">
                            <Storyboard>
                                <DoubleAnimation  FillBehavior="Stop"  Duration="0:0:0.5" To="-30" Storyboard.TargetName="rote" Storyboard.TargetProperty="Angle">
                                    <DoubleAnimation.EasingFunction>
                                        <CubicEase EasingMode="EaseOut"/>
                                    </DoubleAnimation.EasingFunction>
                                </DoubleAnimation>
                            </Storyboard>
                        </BeginStoryboard>
                        <RemoveStoryboard BeginStoryboardName="Bs1"/>
                    </EventTrigger>
代码可以说手掌向下的反向操作。
顺便播放完把bs1动画解除掉。
剩下的就是圈的构造和动画。
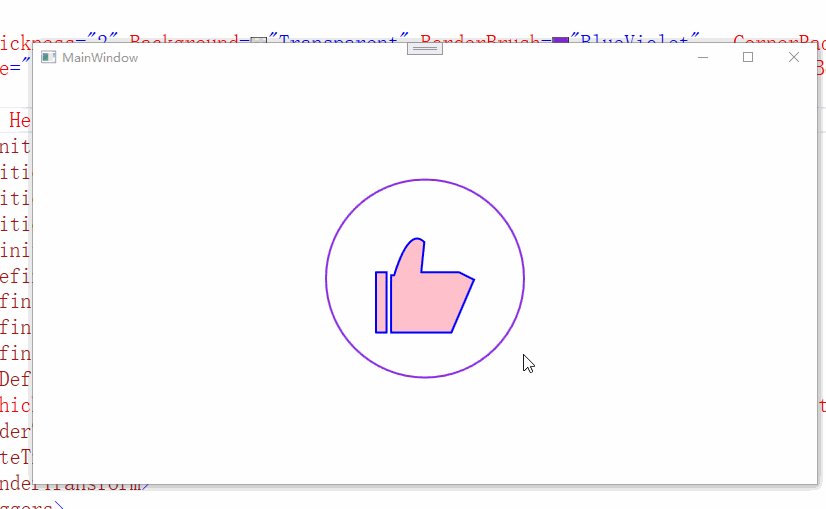
圆圈呢,我们可以是直接的圆圈,也可以是broder,看个人喜欢了。
我就不罗嗦直接上代码
  <Border  BorderThickness="2" Background="Transparent" BorderBrush="Transparent"   CornerRadius="100" Width="200" Height="{Binding  RelativeSource={RelativeSource Mode=Self}, Path=Width}" Grid.Column="1" Grid.Row="1">
            <Border x:Name="sor" Visibility="Hidden" BorderThickness="2" Background="Transparent" BorderBrush="Transparent"   CornerRadius="100" Width="200" Height="{Binding  RelativeSource={RelativeSource Mode=Self}, Path=Width}" Grid.Column="1" Grid.Row="1"/>
        </Border>
构造了两个嵌套的borderr,宽度其实可以随意,只是演示的时候放大的大小而已。
动画则是放到了path的启动动画之中
      <DoubleAnimation RepeatBehavior="Forever" SpeedRatio="1.2" Duration="0:0:1.5" To="0" Storyboard.TargetName="sor" Storyboard.TargetProperty="Width">
                                    <DoubleAnimation.EasingFunction>
                                        <CubicEase/>
                                    </DoubleAnimation.EasingFunction>
                                </DoubleAnimation>
                                <ObjectAnimationUsingKeyFrames BeginTime="0:0:0" Storyboard.TargetName="sor" Storyboard.TargetProperty="Visibility">
                                    <DiscreteObjectKeyFrame KeyTime="0:0:0.1">
                                        <DiscreteObjectKeyFrame.Value>
                                            <Visibility>
                                                Visible
                                            </Visibility>
                                        </DiscreteObjectKeyFrame.Value>
                                    </DiscreteObjectKeyFrame>
                                </ObjectAnimationUsingKeyFrames>
代码非常简单,控制下内圈的大小,还有是否隐藏而已。
这样子我们就最终得到了头图的效果了
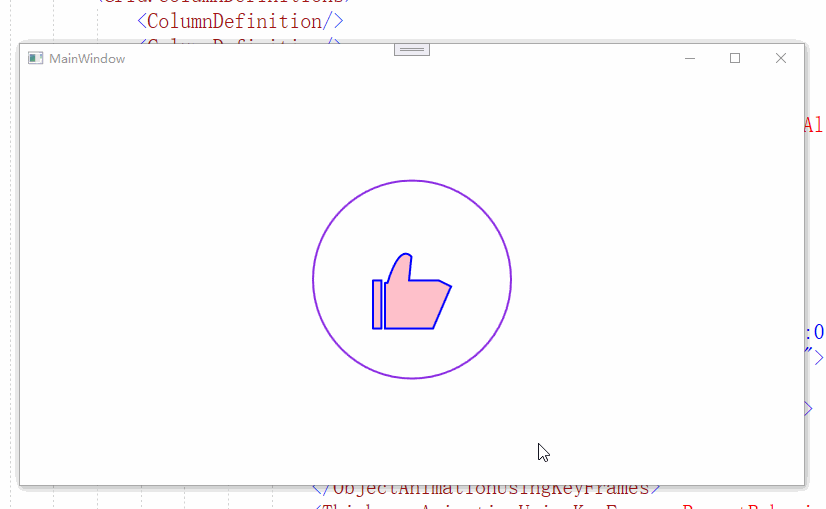
总的过程还是比较简单的。
下面是全部的代码
<Window.Resources>
<Geometry x:Key="t1">
M 20 40
v 0 40
h 0 7
v 0 -40
z
M 30 42
v 0 38
h 40 0
l 15 -35
l -10 -5
h -25 0
l 2 -20
<!--小褶皱-->
q -10 -10, -20 22
z
</Geometry>
<Geometry x:Key="t2">
M 20 40
v 0 40
h 0 7
v 0 -40
z
M 30 42
v 0 38
h 40 0
l 15 -35
l -10 -5
h -25 0
l 2 0
<!--小褶皱-->
q -10 -10, -20 0
z
</Geometry>
<PathGeometry Figures=" M 20 40 l 2 -5 v 0 5 h -2 0 z" x:Key="roue"/>
</Window.Resources>
<Grid>
<Border BorderThickness="2" Background="Transparent" BorderBrush="BlueViolet" CornerRadius="100" Width="200" Height="{Binding RelativeSource={RelativeSource Mode=Self}, Path=Width}" Grid.Column="1" Grid.Row="1">
<Border x:Name="sor" Visibility="Hidden" BorderThickness="2" Background="Transparent" BorderBrush="Salmon" CornerRadius="100" Width="200" Height="{Binding RelativeSource={RelativeSource Mode=Self}, Path=Width}" Grid.Column="1" Grid.Row="1"/>
</Border>
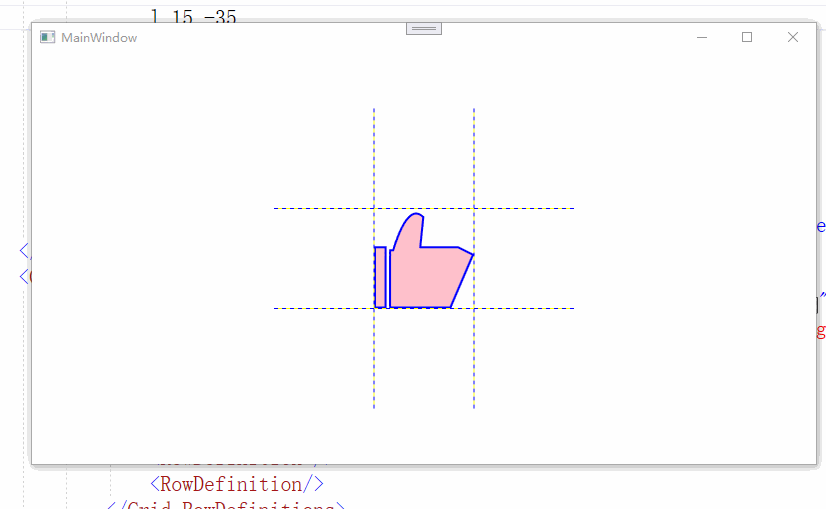
<Grid Width="300" Height="300" ShowGridLines="False">
<Grid.RowDefinitions>
<RowDefinition/>
<RowDefinition />
<RowDefinition/>
</Grid.RowDefinitions>
<Grid.ColumnDefinitions>
<ColumnDefinition/>
<ColumnDefinition/>
<ColumnDefinition/>
</Grid.ColumnDefinitions>
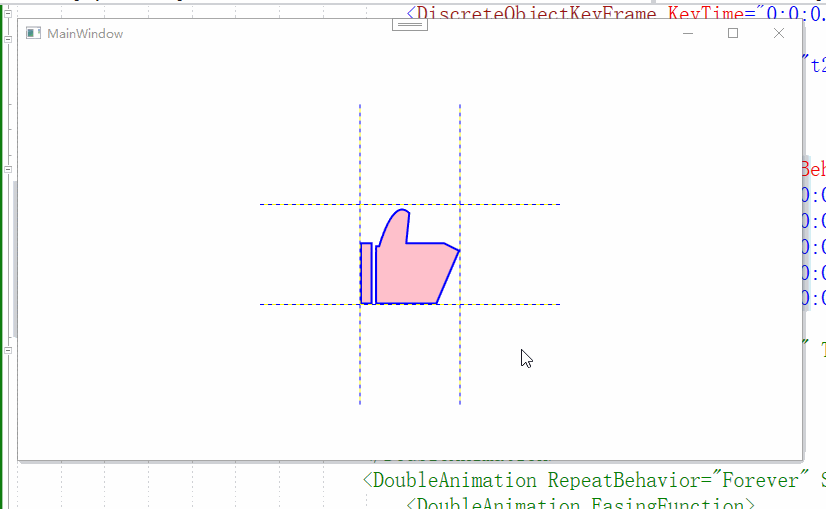
<Path StrokeThickness="2" Grid.Column="1" Grid.Row="1" VerticalAlignment="Bottom" Stretch="Uniform" Fill="Pink" Width="80" Height="80" Stroke="Blue" Data="{StaticResource t1}" RenderTransformOrigin="0.5,0.5">
<Path.RenderTransform>
<RotateTransform x:Name="rote" Angle="0"/>
</Path.RenderTransform>
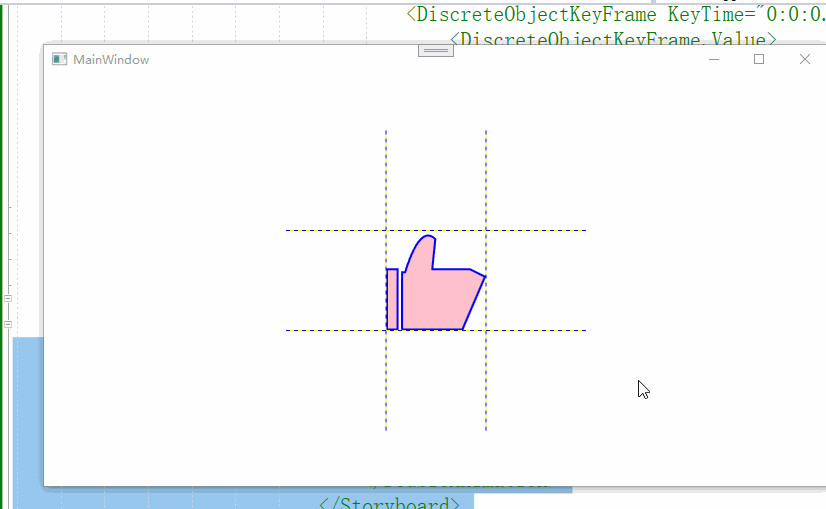
<Path.Triggers>
<EventTrigger RoutedEvent="MouseLeftButtonDown">
<BeginStoryboard x:Name="Bs1">
<Storyboard>
<ObjectAnimationUsingKeyFrames BeginTime="0:0:0" Storyboard.TargetProperty="Data">
<DiscreteObjectKeyFrame KeyTime="0:0:0.01">
<DiscreteObjectKeyFrame.Value>
<StaticResource ResourceKey="t2"/>
</DiscreteObjectKeyFrame.Value>
</DiscreteObjectKeyFrame>
</ObjectAnimationUsingKeyFrames>
<ThicknessAnimationUsingKeyFrames RepeatBehavior="Forever" Duration="0:0:0.4" Storyboard.TargetProperty="Margin" >
<SplineThicknessKeyFrame KeyTime="0:0:0.0" Value="4,3,0,0"/>
<SplineThicknessKeyFrame KeyTime="0:0:0.2" Value="3,4,0,0"/>
<SplineThicknessKeyFrame KeyTime="0:0:0.3" Value="0,0,4,0"/>
<SplineThicknessKeyFrame KeyTime="0:0:0.35" Value="0,0,4,3"/>
<SplineThicknessKeyFrame KeyTime="0:0:0.4" Value="4,3,0,0"/>
</ThicknessAnimationUsingKeyFrames>
<DoubleAnimation Duration="0:0:0.1" To="30" Storyboard.TargetName="rote" Storyboard.TargetProperty="Angle">
<DoubleAnimation.EasingFunction>
<CubicEase/>
</DoubleAnimation.EasingFunction>
</DoubleAnimation>
<DoubleAnimation RepeatBehavior="Forever" SpeedRatio="1.2" Duration="0:0:1.5" To="0" Storyboard.TargetName="sor" Storyboard.TargetProperty="Width">
<DoubleAnimation.EasingFunction>
<CubicEase/>
</DoubleAnimation.EasingFunction>
</DoubleAnimation>
<ObjectAnimationUsingKeyFrames BeginTime="0:0:0" Storyboard.TargetName="sor" Storyboard.TargetProperty="Visibility">
<DiscreteObjectKeyFrame KeyTime="0:0:0.1">
<DiscreteObjectKeyFrame.Value>
<Visibility>
Visible
</Visibility>
</DiscreteObjectKeyFrame.Value>
</DiscreteObjectKeyFrame>
</ObjectAnimationUsingKeyFrames>
</Storyboard>
</BeginStoryboard>
</EventTrigger>
<EventTrigger RoutedEvent="MouseLeftButtonUp">
<BeginStoryboard x:Name="Bs2">
<Storyboard>
<DoubleAnimation FillBehavior="Stop" Duration="0:0:0.5" To="-30" Storyboard.TargetName="rote" Storyboard.TargetProperty="Angle">
<DoubleAnimation.EasingFunction>
<CubicEase EasingMode="EaseOut"/>
</DoubleAnimation.EasingFunction>
</DoubleAnimation>
</Storyboard>
</BeginStoryboard>
<RemoveStoryboard BeginStoryboardName="Bs1"/>
</EventTrigger>
</Path.Triggers>
</Path>
</Grid>
Recommend
About Joyk
Aggregate valuable and interesting links.
Joyk means Joy of geeK