

How to run Camel on Spring Boot in Red Hat Developer Sandbox
source link: https://developers.redhat.com/articles/2023/02/10/how-run-camel-spring-boot-red-hat-developer-sandbox
Go to the source link to view the article. You can view the picture content, updated content and better typesetting reading experience. If the link is broken, please click the button below to view the snapshot at that time.

Article
How to run Camel on Spring Boot in Red Hat Developer Sandbox
Apache Camel is known as the Swiss knife of integration. Yet many developers building microservices and delivering platforms that connect apps with backends are still unaware of integration frameworks like Camel, which has been perfected over the years to provide efficient and economical building blocks. Apache Camel excels at simplifying and standardizing your landscape of platform integration services. Camel on Spring Boot is one of the various options for running Apache Camel. Although the latest evolution of Camel offers new runtimes, such as Quarkus or Camel K (also Quarkus-based), Spring Boot is still a popular option for development teams with strong Java know-how.
To learn more about the various Camel runtimes available, read the 3-part series article, Choose the best Camel for your integration ride.
Why you should try Camel in the Developer Sandbox
Why you should try Camel in the Developer Sandbox
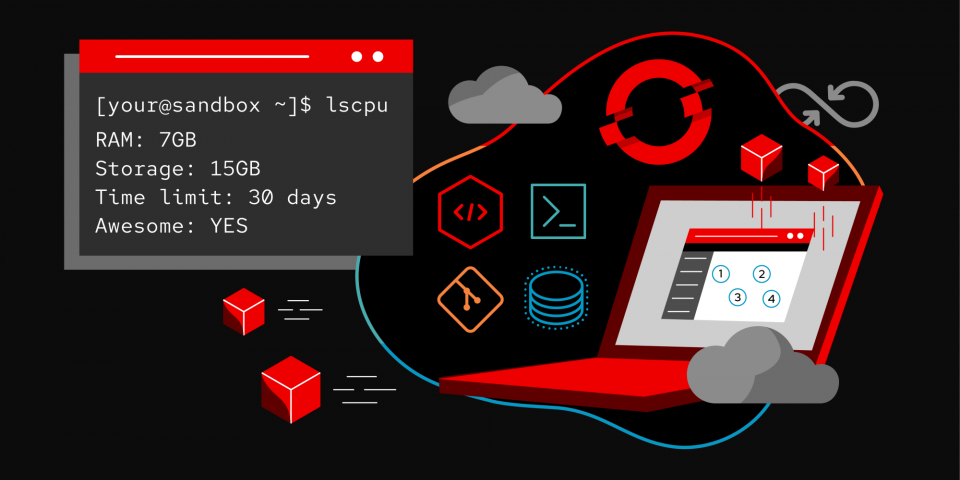
Experience Camel in the Developer Sandbox for Red Hat OpenShift, a hands-on, free environment. In this developer environment, you can play with Camel Spring Boot and try many other technologies.
You’ll be able to do the following without the hassle of setting up your local environment:
- Play for free in an OpenShift environment (Developer Sandbox).
- Use the web-based IDE (Red Hat OpenShift Dev Spaces, formerly Red Hat CodeReady Workspaces) to sample a demo Camel on the Spring Boot project.
- Run the Camel demo application as if you were developing it in your own IDE.
- Deploy your Camel application in the Developer Sandbox.
A demonstration of running Camel on Spring Boot
A demonstration of running Camel on Spring Boot
This demo includes an OpenAPI service called simple, including a stub serving XML data to simulate the backend service Camel integrates with. It’s a relatively simple use case but very common in the enterprise. It defines a REST API and hides a legacy service behind the scenes (Figure 1).
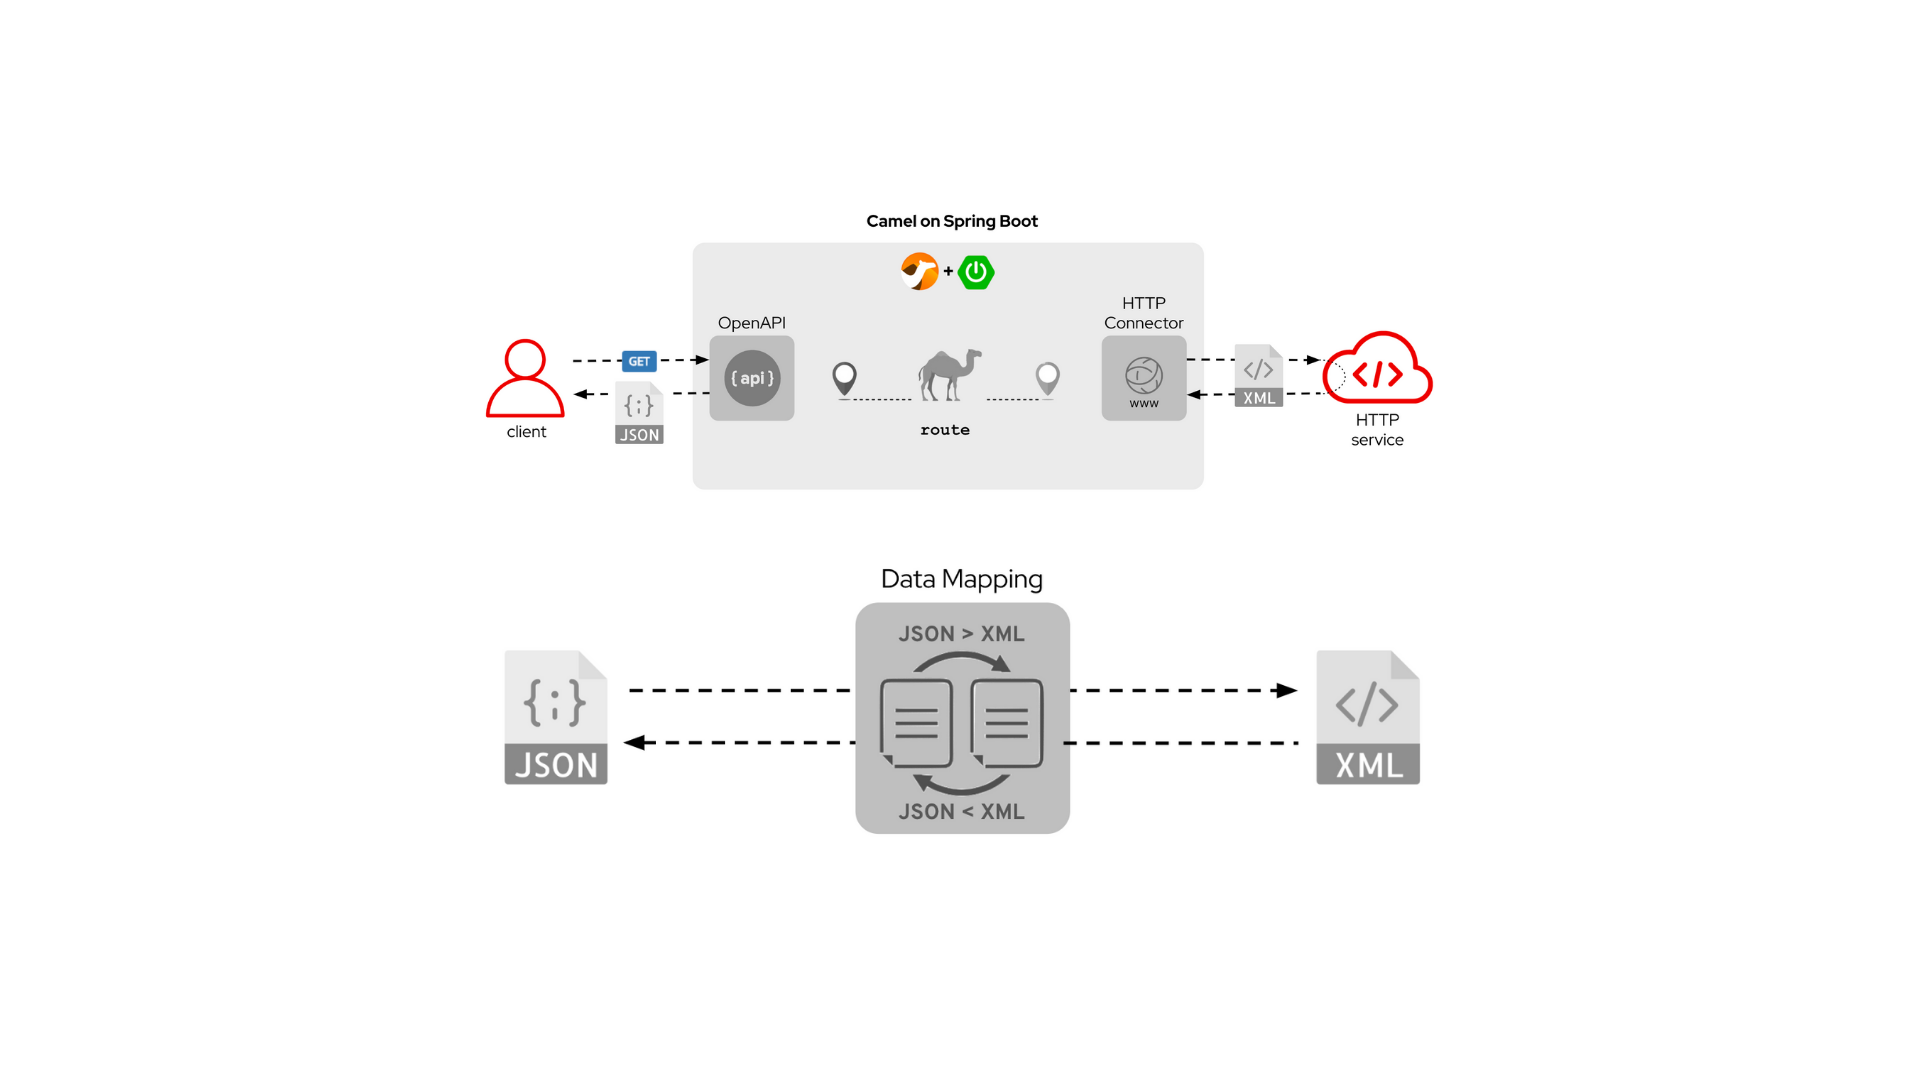
This example stands out from the data handling point of view, where the JSON input needs to be mapped to the outgoing XML during the request flow and performs the reverse format translation during the response flow, as in Figure 1.
What is unique about Camel running on Spring Boot, but also true for all runtimes, is how little code is required and how elegantly it is laid out. This simplicity guarantees economical, long-term, and sustainable support for your landscape of implemented Camel services.
If you would like to see how all of this is done, jump straight onto the Developer Sandbox to explore the code and execute it. The next section demonstrates how to access the Developer Sandbox.
How to access the Developer Sandbox
First things first, go to the Developer Sandbox to learn about what you can do. Then follow these steps:
- Click on the Start your sandbox for free button, as shown in the top image in Figure 2.
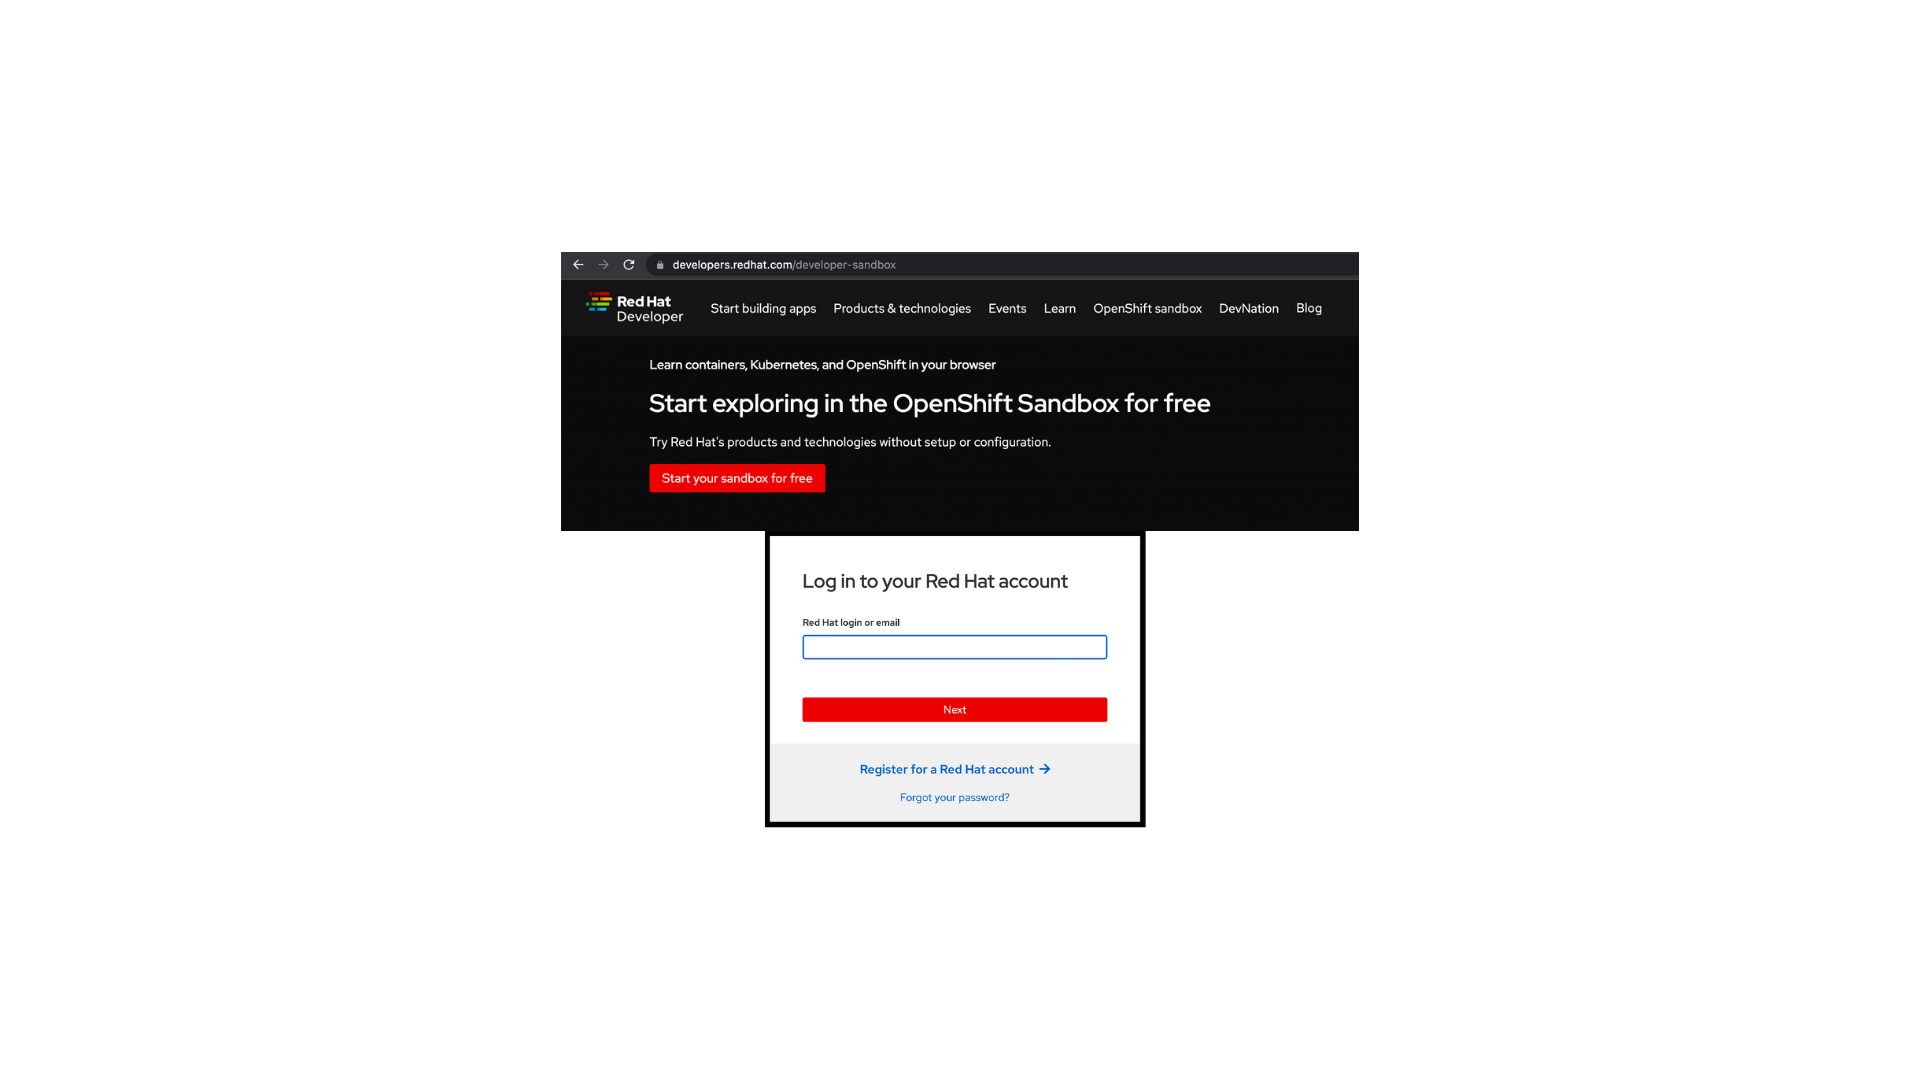
- After which, you will see a login window shown in the bottom image in Figure 2.
- If you don’t have a Red Hat account, click on Register for a Red Hat account.
- Enter the details requested and complete the registration process.
- Once you successfully log in, you will be presented with an option in Figure 3.
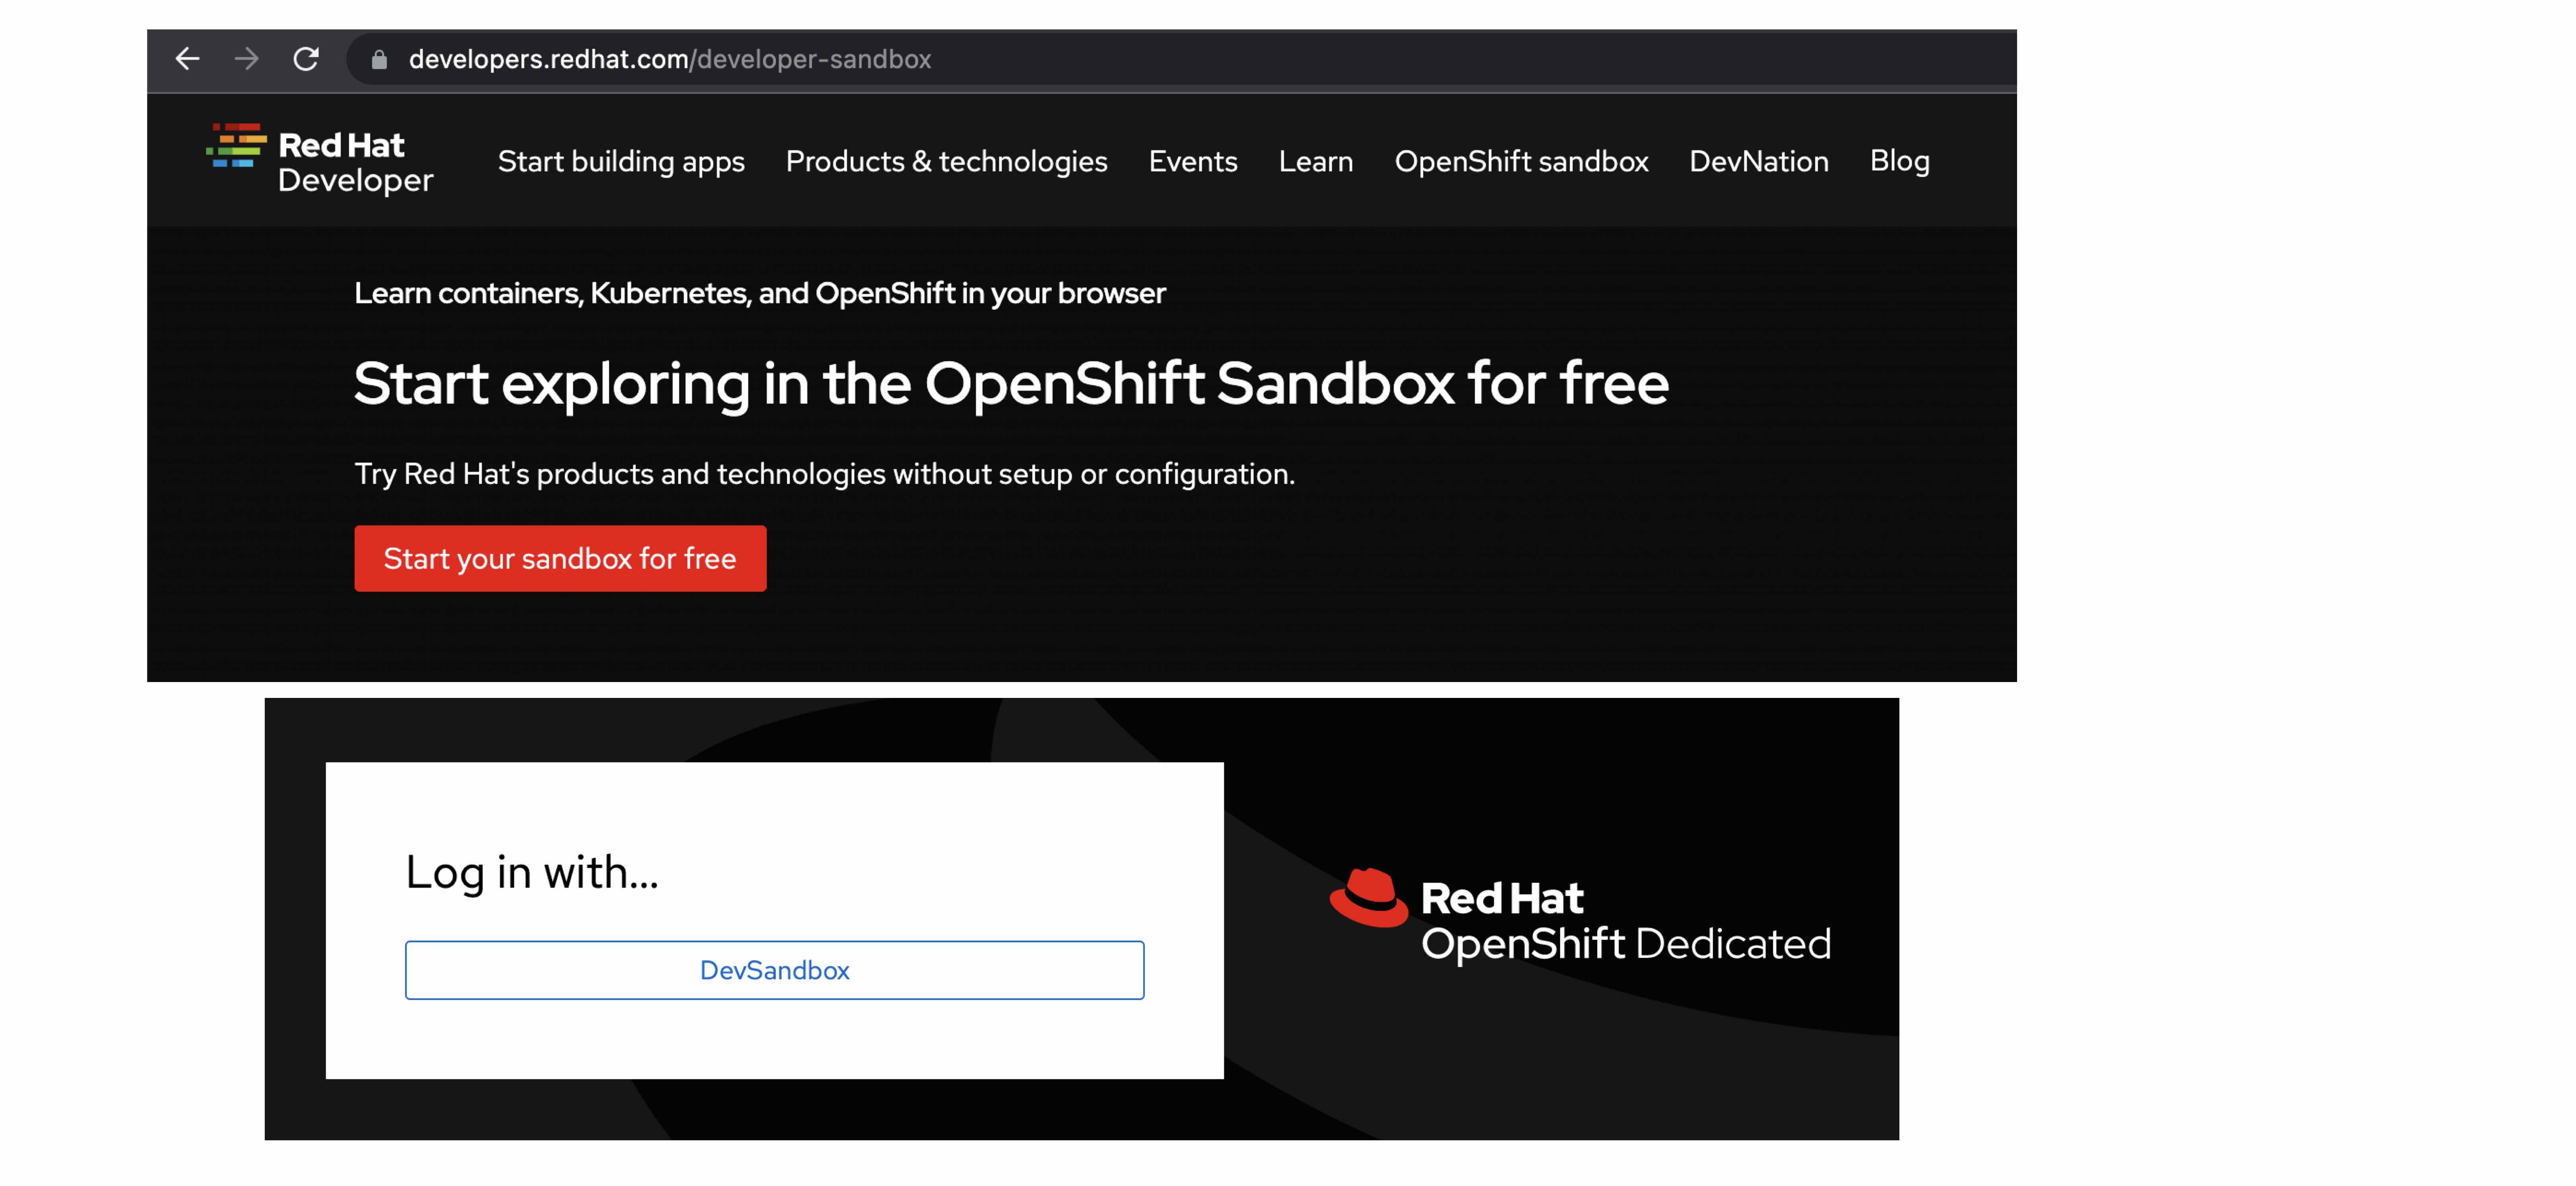
- Click on the red button, Start your sandbox for free. This action will take you to the OpenShift dedicated login page.
- Click on DevSandbox.
- Once you’re in, the environment will welcome you with the message, Welcome to the Developer Perspective! Feel free to start with a tour that explains the interface features.
The Developer sandbox ships with an entire web-based IDE entitled OpenShift Dev Spaces from which you can play with Camel on Spring Boot in a typical developer workflow using a code editor and a terminal.
How to prepare your dev environment
To open Dev Spaces:
- Click the applications icon as shown in Figure 4.
- Select Red Hat OpenShift Dev Spaces.
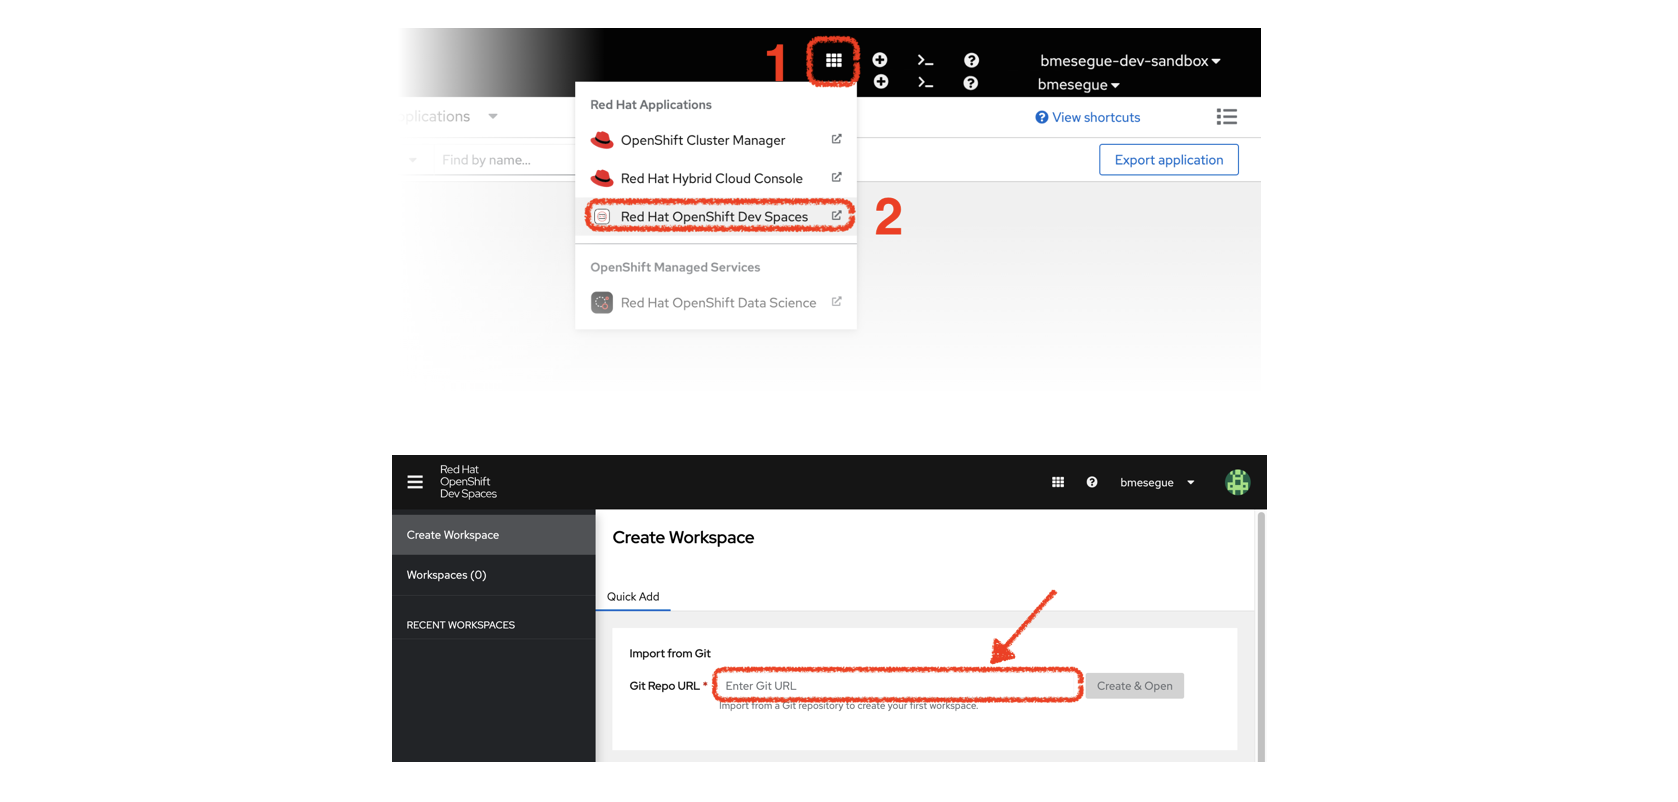
- When the Create Workspace dashboard in Dev Spaces opens, enter the Git Repo URL in the highlighted text box in the bottom picture (Figure 4): https://github.com/RedHat-Middleware-Workshops/devsandbox-camel.gi.
- Click the Create & Open button.
- While the workspace provisions, you should see a progress log similar to Figure 5.
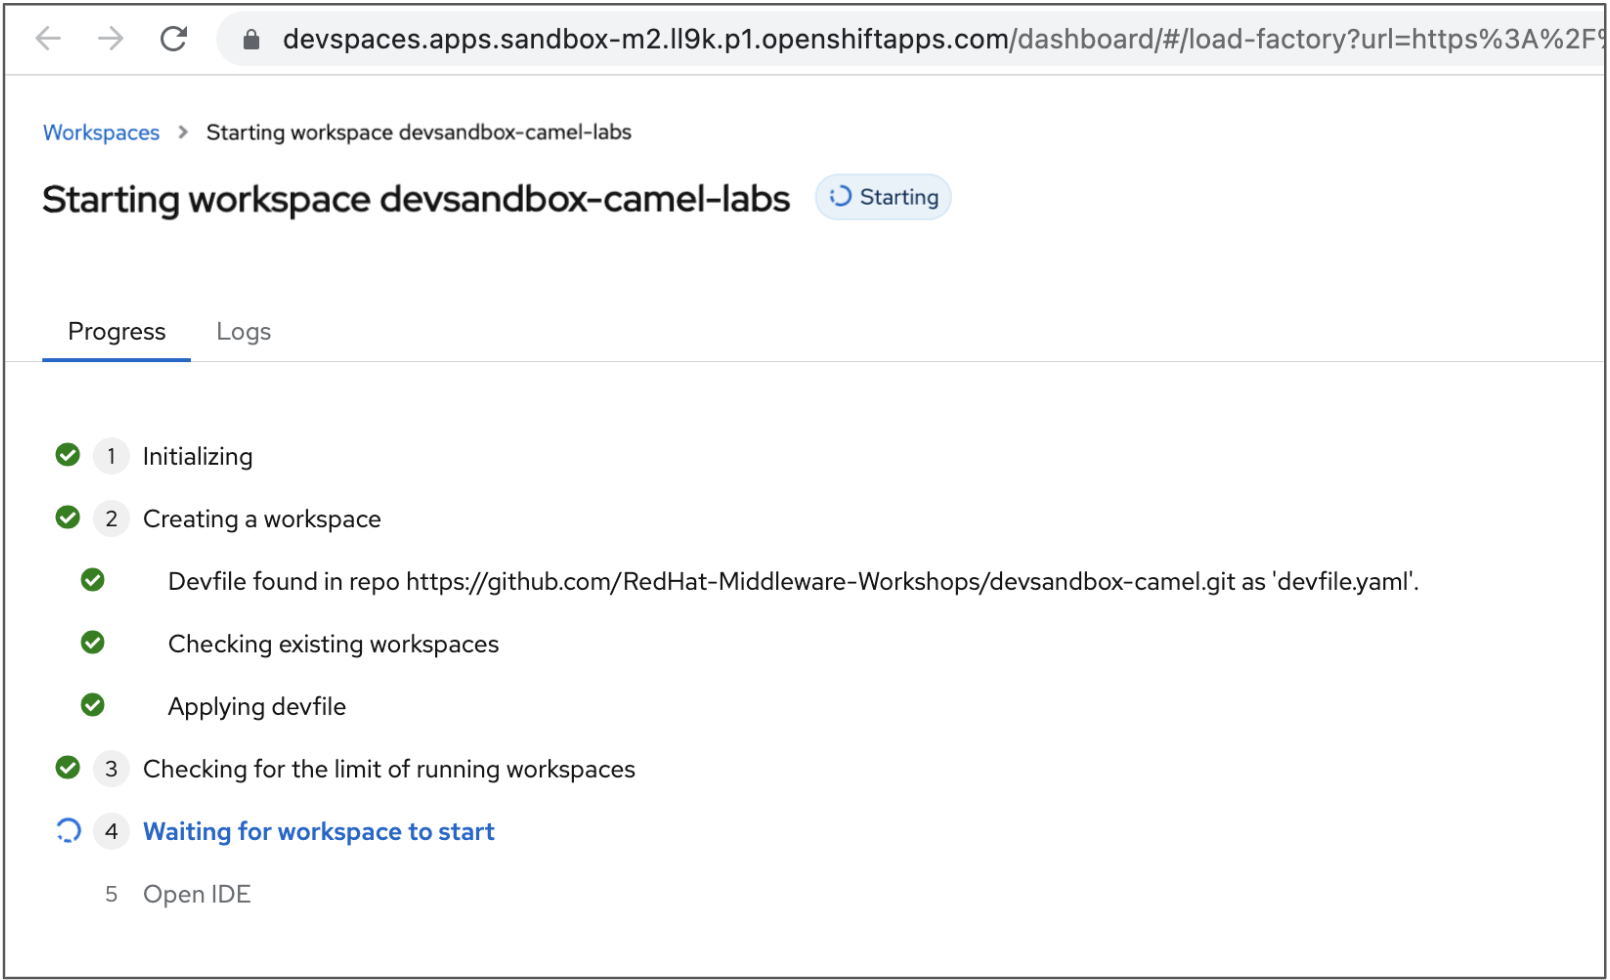
It will take some time to provision the workspace instance. When finished, it will present you with the IDE environment.
When the IDE shows up, you will open the tutorial that will guide you through the Camel demo project.
- Click the deployable Endpoints accordion marked 1 (Figure 6).
- Click on the tutorial (marked 2) which opens in a new browser tab.
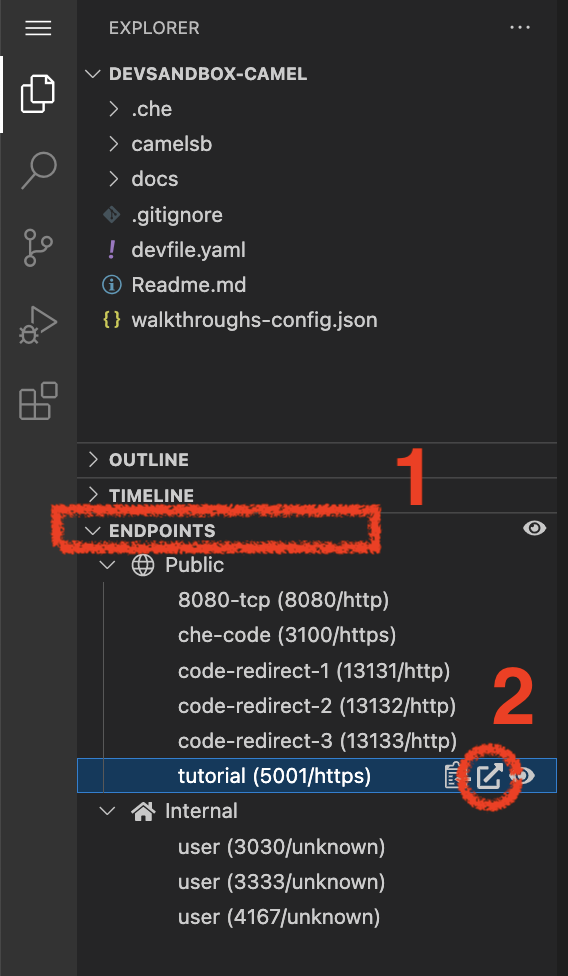
- You will be prompted to confirm you want to open an external website, so click Open.
- The new browser tab will display the Solution Explorer interface containing tiles for different labs (Figure 7). Select the highlighted tile, Camel Spring Boot - Simple.
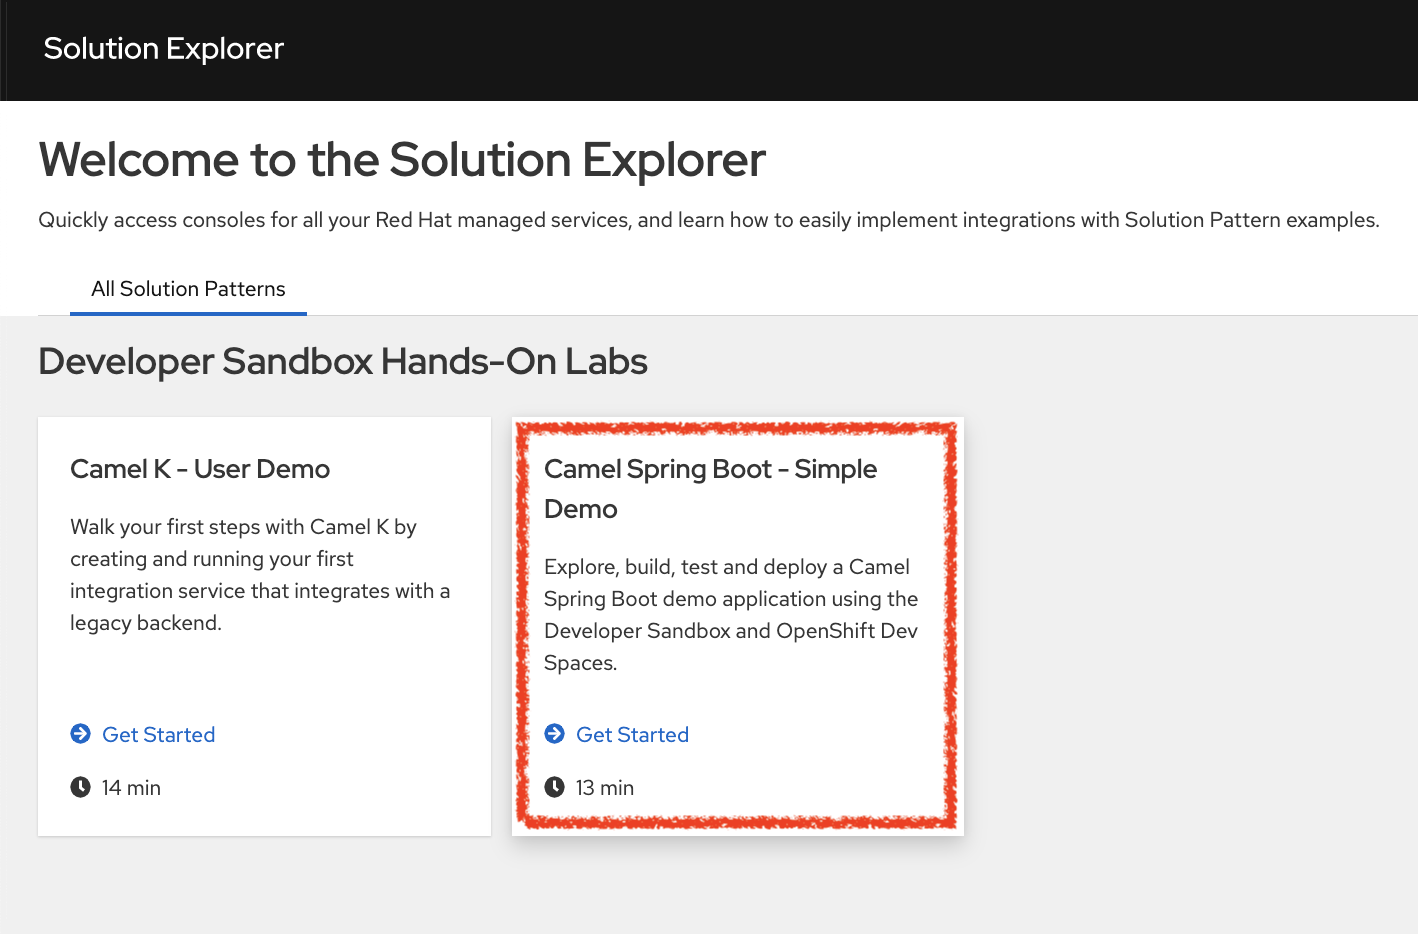
When you click on the tile, the Solution Explorer will show the lab introduction and the exercise chapters, which you can complete in around 15 minutes. The exercises involve easy copy/paste actions to provide a smooth experience, demonstrating the highlights of Camel Spring Boot.
Enjoy the Camel ride!
This is only the start
This is only the start
This article ends here, but this should only be the start of your journey with Apache Camel. The Developer Sandbox gives you the opportunity to play on a Kubernetes-based application platform with an integrated developer IDE (OpenShift Dev Spaces). Even for those unfamiliar with Kubernetes environments, this demo lab is great for sampling what it’s like to build applications with Camel.
With just your browser, you can quickly complete the Camel Spring Boot lab and see for yourself how simply Camel resolves a typical use case and how easy it is to test, containerize, and run in OpenShift. Camel on Spring Boot keeps the key benefits Spring Boot lovers seek with easier development, auto-configuration, straightforward setup, and management.
Camel has also evolved to run in container-tailored runtimes specifically designed to minimize memory footprint and maximize performance. If you want to learn more, check out these resources:
- Learn more about the different Camel runtimes available by reading Choose the best Camel for your integration ride.
- Explore Camel Quarkus in more detail by reading Boost Apache Camel performance with Quarkus.
- Red Hat Developer's Camel K topic page is a good place to start learning about Camel K.
- Visit Red Hat Integration page to discover Camel complementary capabilities.
Recommend
About Joyk
Aggregate valuable and interesting links.
Joyk means Joy of geeK