

API with NestJS #94. Deploying multiple instances on AWS with a load balancer
source link: https://wanago.io/2023/02/06/api-nestjs-aws-load-balancer/
Go to the source link to view the article. You can view the picture content, updated content and better typesetting reading experience. If the link is broken, please click the button below to view the snapshot at that time.


February 6, 2023
In the previous article, we learned how to use the Elastic Container Service (ECS) to deploy a single instance of our application. This time, we take a step further and deploy multiple instances with a load balancer distributing the traffic.
Our application might perform as expected on most days. However, there are times, such as Black Friday, when we might expect increased traffic. One way of dealing with that would be vertically scaling our resources by adding faster CPUs or memory to an existing server. Unfortunately, this is not easy to do without downtime.
Instead, we can scale horizontally by running additional instances of our application and splitting the workload between them. It’s easier to accomplish without downtime. Also, if one of our instances malfunctions, we can distribute the traffic to the other instances.
This article is a direct continuation of API with NestJS #93. Deploying a NestJS app with Amazon ECS and RDS
Creating the security groups
Security groups control the traffic allowed to reach and leave particular resources. In the previous article, we modified the default security groups to allow the instance of our application to accept incoming traffic. This time, we will create two security groups from scratch.
Security group for the load balancer
When we use a load balancer, the clients requesting our API don’t connect directly with an instance of our application. Instead, they request the load balancer. Its role is to forward the request to one of the application instances.
We need to define appropriate security group rules to allow the load balancer to accept incoming traffic. To create a new security group, we need to go to the EC2 panel and click on the “Security Groups” option on the left sidebar under the “Network & Security” category.

Above, the crucial part is adding an inbound rule that allows HTTP traffic on port 80 from the outside world.
Security group for the EC2 containers
Users send requests to our load balancer. Then, we expect the load balancer to forward the requests to our application running in the EC2 instances. For it to work, we need to allow the load balancer to communicate with our application explicitly. For that, let’s create a separate security group.

The crucial part of the above configuration is allowing the incoming traffic from the load balancer. We do that by selecting the security group we created before.
Preparing the ECS cluster
To perform the next steps, we need to have the ECS cluster. Let’s create it.

The crucial part of its configuration is specifying the number of instances bigger than one. To keep it simple, let’s use two instances.

Creating the task definition
Our ECS cluster can run various tasks. To do that, we need to create the task definition. It is very similar to the one we created in the previous article.

We again configure our task definition to use the URI of the Docker image we pushed to the Elastic Container Repository.

One more time, we expose port 3000, which our NestJS application uses.

In the previous part of this series, we configured our task definition to use static host port mapping. However, the Application Load Balancer that we want to use with multiple instances of our application uses dynamic port mapping. Because of that, we won’t modify our task definition to set up the static mapping.
We also need to provide the environment variables our Docker image needs.
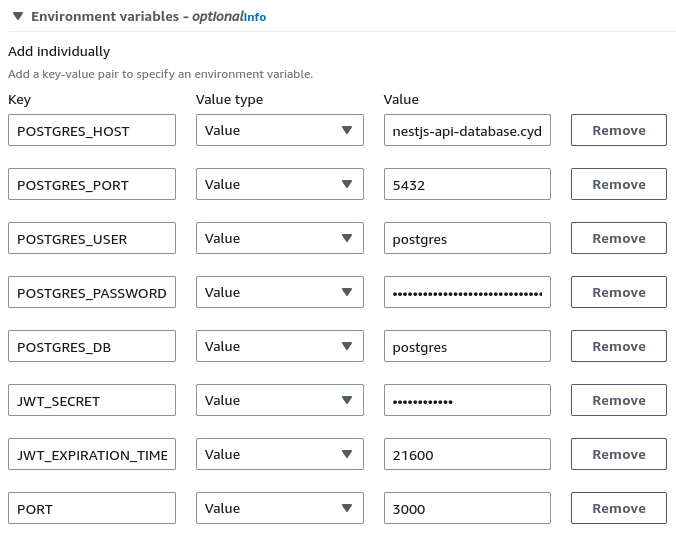
The part we need to configure is the environment.

Running multiple instances
Configuring the ECS cluster and the task definition is not that different from when we were using just one instance of our app. However, running the tasks is a bit different.
We need to open our new cluster and create a service that can run multiple tasks. We need to click on the “Create” button to do that.

Since we want to use EC2 instances with our cluster, we must select the appropriate launch type.

We also need to choose the correct application type. By selecting “Service”, we can launch a group of tasks that can be distributed across our ECS cluster.

Choosing the Daemon service type would mean deploying exactly one task on each active container in our ECS clsuter. Instead, we can use Replica to allow AWS to distribute the the tasks across the cluster.
The part crucial to us in this article is configuring the Load balancing. This is where we have the chance to create a new load balancer. One of the most essential parts of its configuration is the target group.

In AWS, target groups tell the load balancer where to direct the traffic. The load balancer periodically sends requests to the registered targets to test if they work as expected. These requests are called health checks.
Our NestJS application has the /posts endpoint that returns the list of posts from the database. In this simple example, it can serve as a health check.
If you want to know more about health checks in general, check out API with NestJS #51. Health checks with Terminus and Datadog
Using the configured security groups
Running the above service causes two EC2 instances to be created. First, we need to open each of them in the EC2 user interface and modify their security configuration. Then, we need to add the security group we created at the beginning of this article.

We must add the “EC2InstanceWithLoadBalancer” security group to both EC2 instances.

Now, we need to do a similar thing with our load balancer. We need to find our newly created load balancer on the list and modify its security configuration. This time, we need to add the “LoadBalancerGroup”.

Accessing our API
To find the URL of our API, we need to open the configuration page of our load balancer and look at the DNS name section.

We can now use it to make requests to our API.

Summary
In this article, we’ve deployed multiple instances of our NestJS application through AWS. To distribute the traffic, we’ve used a load balancer. In addition, we configured new security groups for the load balancer to communicate with the EC2 instances.
Scaling our application horizontally using multiple instances of our application can help us deal with the incoming traffic. However, there are a few things to watch out for. We need to consider that the instances of our apps run independently of each other. For example, if we implement an in-memory cache, we end up with multiple instances of the cache and break the integrity of our data.
If you want to know more about in-memory cache with NestJS, check out API with NestJS #23. Implementing in-memory cache to increase the performance
To solve the above issue, we need to create a cache shared between multiple instances. A common solution is Redis. To get more information, read API with NestJS #24. Cache with Redis. Running the app in a Node.js cluster.
There is still more to learn about deploying NestJS with AWS, so stay tuned!
Series Navigation<< API with NestJS #93. Deploying a NestJS app with Amazon ECS and RDS
Recommend
About Joyk
Aggregate valuable and interesting links.
Joyk means Joy of geeK