

SpringBootAdmin:轻量级的SpringBoot监控组件,用过的都说好
source link: https://www.51cto.com/article/745671.html
Go to the source link to view the article. You can view the picture content, updated content and better typesetting reading experience. If the link is broken, please click the button below to view the snapshot at that time.

SpringBootAdmin:轻量级的SpringBoot监控组件,用过的都说好

Springboot Admin是一个管理和监控Springboot项目的组件,分为服务端和客户端,两端通过http进行通信。由于其轻量级的特性,所以特别适合中小项目使用。
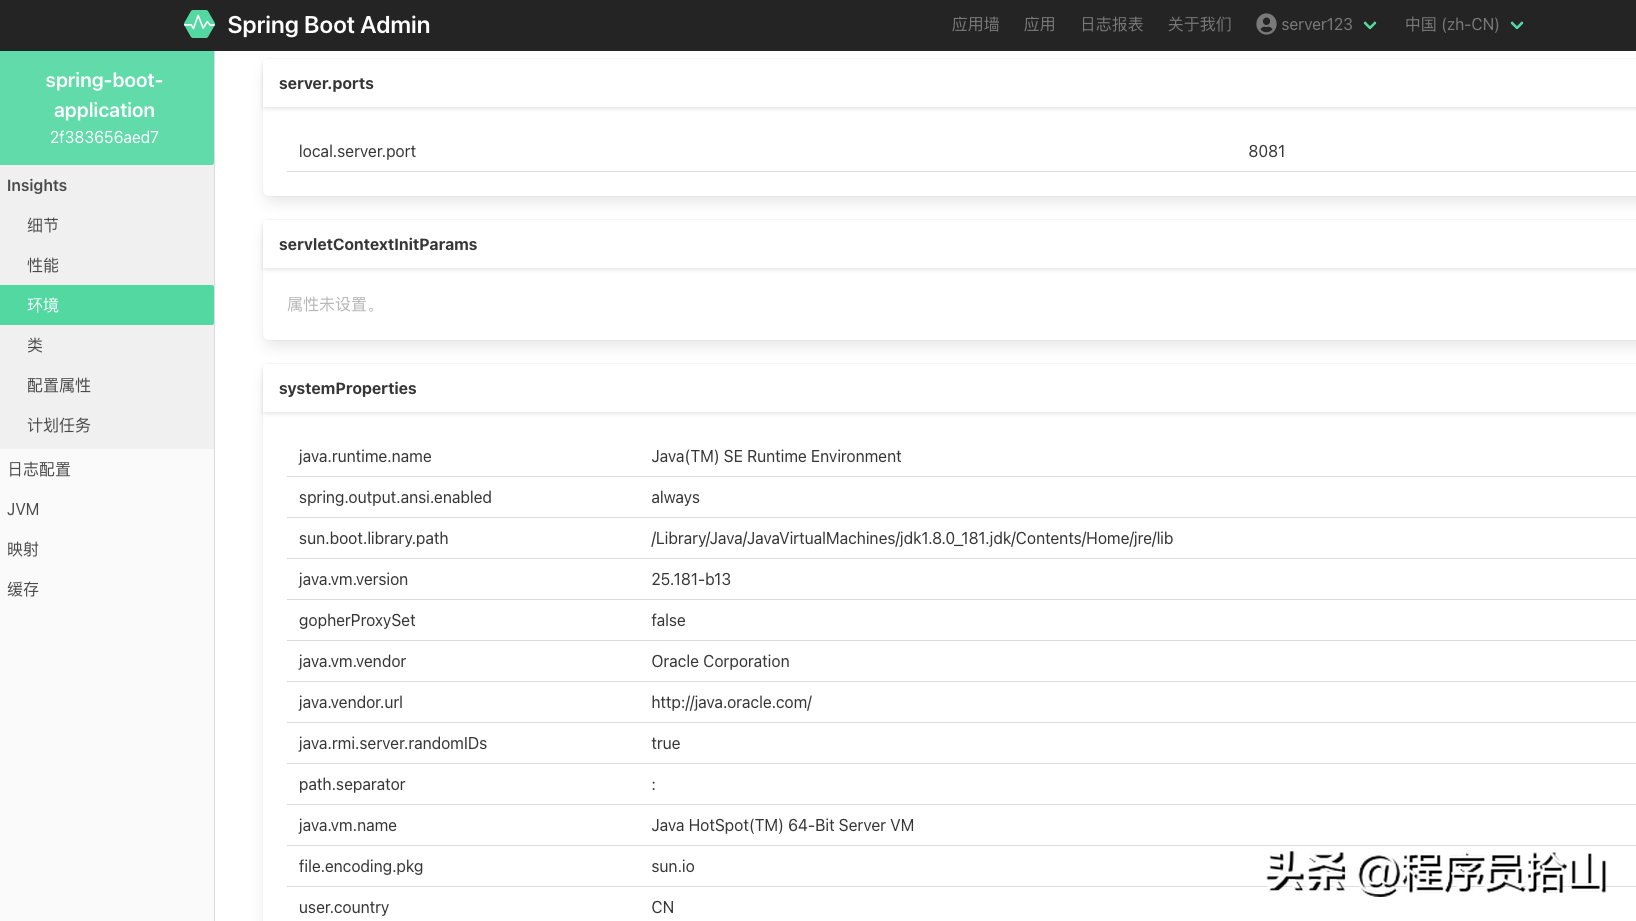
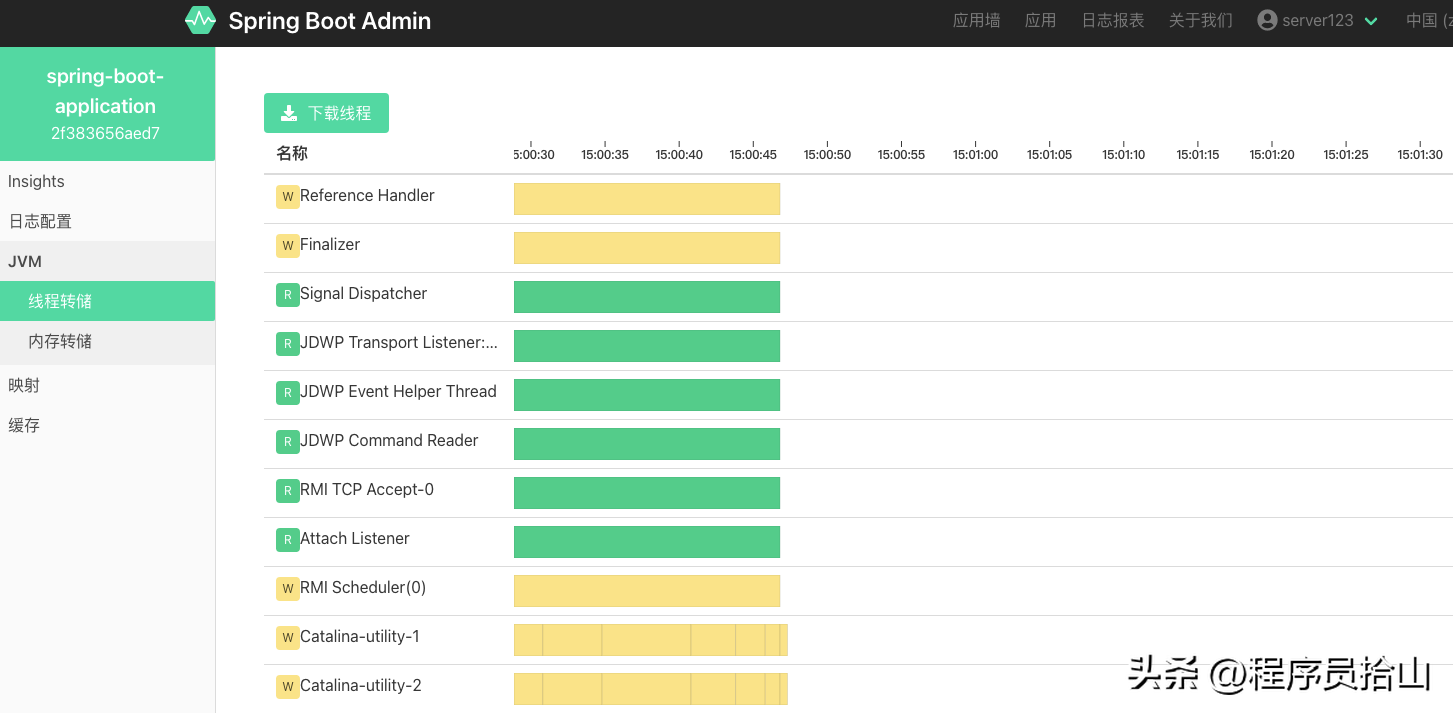
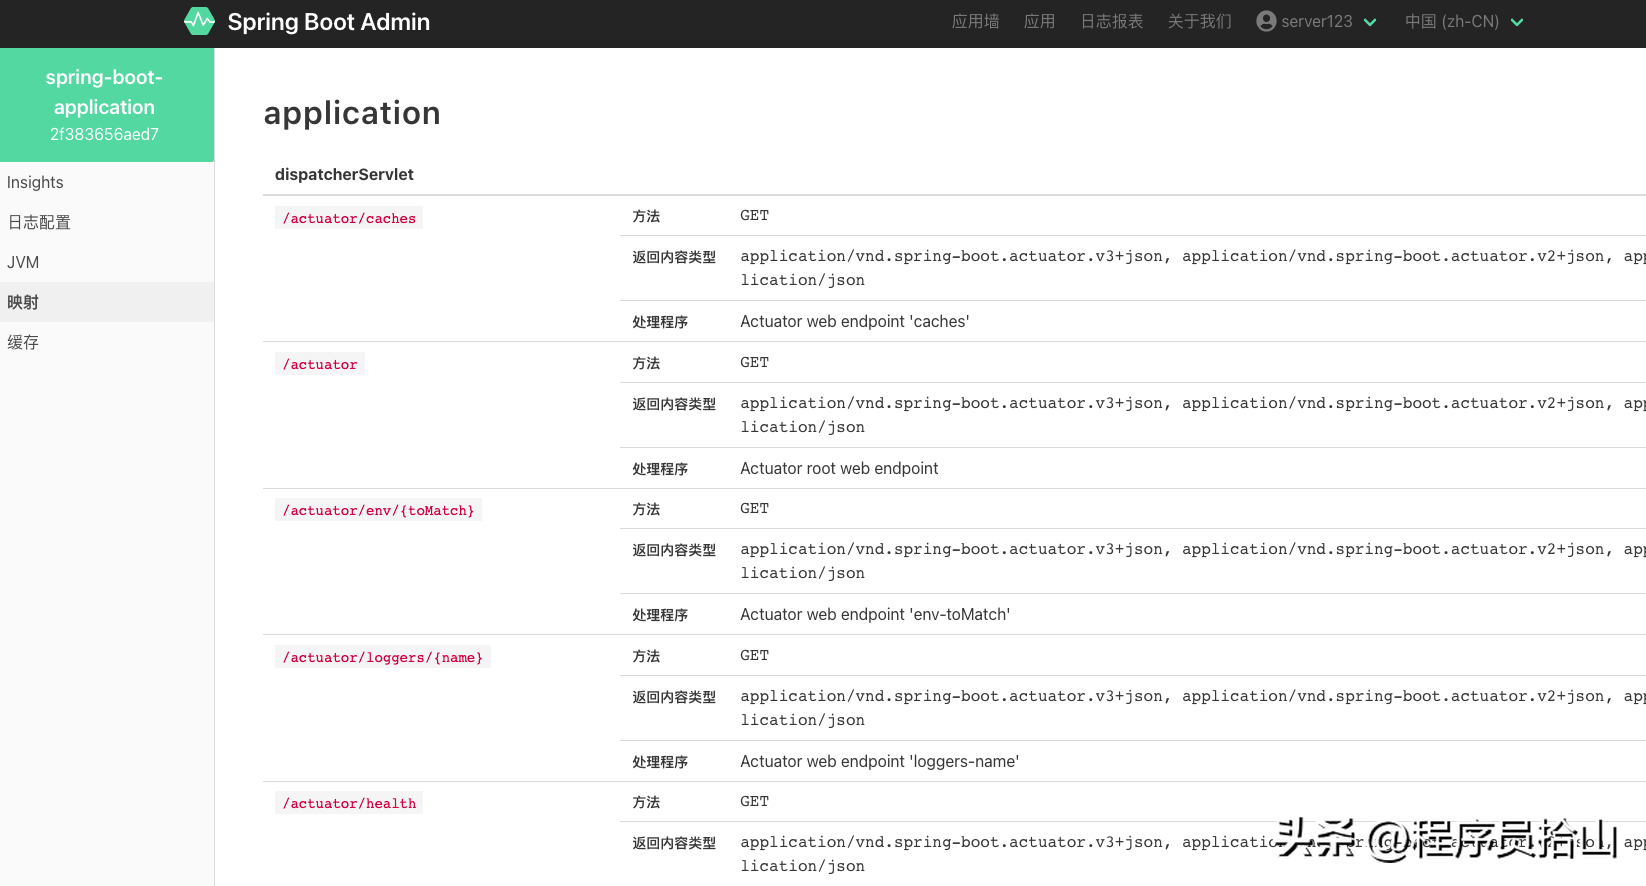
其效果图如下:
服务端配置
1、引入Springboot admin和Spring Security依赖。
<dependency>
    <groupId>de.codecentric</groupId>
    <artifactId>spring-boot-admin-starter-server</artifactId>
    <version>2.5.1</version>
</dependency>
<dependency>
      <groupId>org.springframework.boot</groupId>
            <artifactId>spring-boot-starter-security</artifactId>
</dependency>
2、配置相关属性。
server:
  port: 8080
  servlet:
    context-path: /server
spring:
  security:
    user:
      #admin Server端登录时用的账户密码
      name: server123
      password: 123456
  boot:
    admin:
      instance-auth:
        #启用header验证
        enabled: true
        #Server访问client接口时会使用下面的配置生成authorization
        default-user-name: "name_shishan"
        default-password: "pwd_shishan"
3、配置@EnableAdminServer注解。
@SpringBootApplication
@Configuration
@EnableAdminServer
public class ServerApplication {
    public static void main(String[] args) {
        SpringApplication.run(ServerApplication.class, args);
    }
}
经过以上3步,服务端就可以启动了。
访问http://localhost:8080/server/,就可以看到以下登录界面。
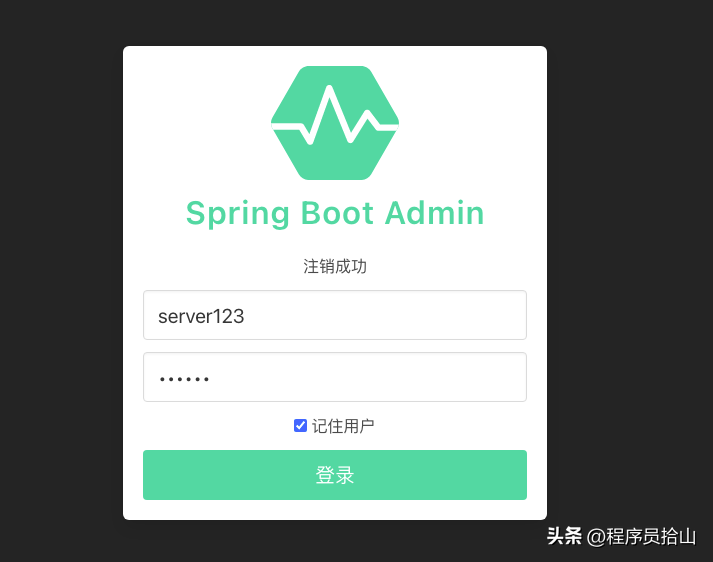
使用在yml文件中配置的账户密码就可以登录了。
客户端配置
1、在我们要监控的客户端中加入以下依赖。
<dependency>
    <groupId>de.codecentric</groupId>
    <artifactId>spring-boot-admin-starter-client</artifactId>
    <version>2.5.1</version>
</dependency>
2、暴露监控接口以及配置Server地址。
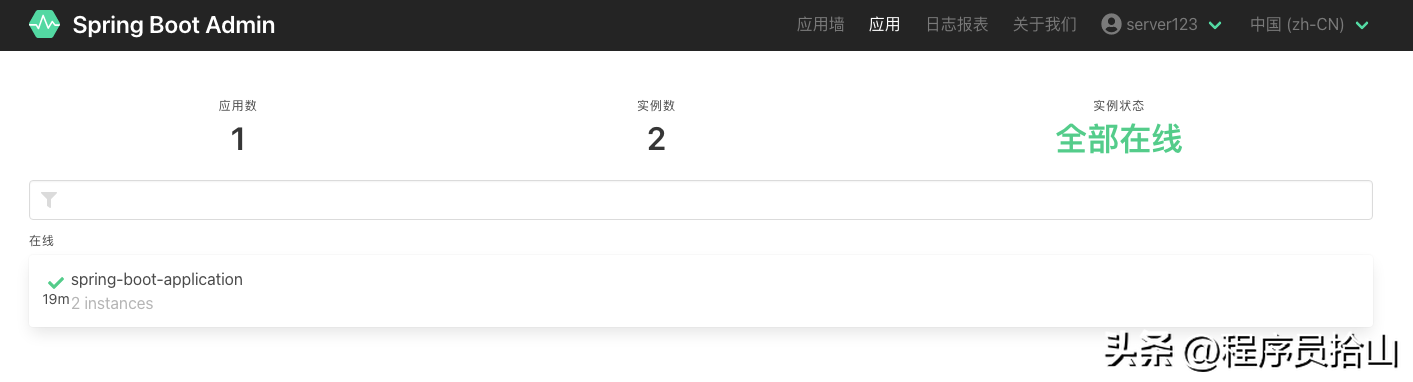
客户端在启动后会向配置的Server发起注册申请,此时为了安全性还需要Server端的账户密码进行校验。
spring:
  boot:
    admin:
      client:
        #admin注册地址
        url: http://localhost:8080/server
        #配置admin的账户
        username: server123
        password: 123456
admin:
  header:
    auth:
      name: "name_shishan"
      password: "pwd_shishan"
#暴露出端口
management:
  endpoints:
    web:
      exposure:
        include: "*"
3、对暴露的接口进行权限校验。
由于我们将监控接口进行了暴露,所以必须对相关的接口进行权限校验,否则就有可能泄露相关信息。
对接口进行权限过滤有很多种选择,比如设置IP访问的白名单,只允许admin Server所在的服务器访问,也可以配置相关的token等等。
下面我们以一个简单的接口过滤器实现对/actuator/**相关接口的权限校验。
@Component
public class PathFilter implements Filter {

    @Value("${admin.header.auth.name}")
    private String username;
    @Value("${admin.header.auth.password}")
    private String password;

    @Override
    public void doFilter(ServletRequest servletRequest, ServletResponse servletResponse, FilterChain filterChain) throws IOException, ServletException {
        HttpServletRequest request = (HttpServletRequest) servletRequest;
        HttpServletResponse response = (HttpServletResponse) servletResponse;
        AntPathMatcher antPathMatcher = new AntPathMatcher();
        if (antPathMatcher.match("/actuator/**", request.getServletPath())) {
            String authorization = request.getHeader("authorization");
            if (StringUtils.hasText(authorization)) {
                String token = Base64Utils.encodeToString((username + ":" + password).getBytes(StandardCharsets.UTF_8));
                if (authorization.equals("Basic " + token)) {
                    //token匹配才放行
                    filterChain.doFilter(request, servletResponse);
                    return;
                }
            }
            response.setContentType("application/json;charset=UTF-8");
            response.setStatus(HttpStatus.UNAUTHORIZED.value());
            response.getWriter().print("权限不足");
            return;
        }
        //其他接口直接放行
        filterChain.doFilter(request, servletResponse);
    }
}
在这个filter中,对actuator相关的接口进行了header参数的校验,只有通过校验才可以访问暴露出的actuator接口。
当然,如果我们使用了SpringSecurity或者SaToken这样的第三方权限框架,也可以去重写相关的配置完成权限的判断,原理都是一样的。
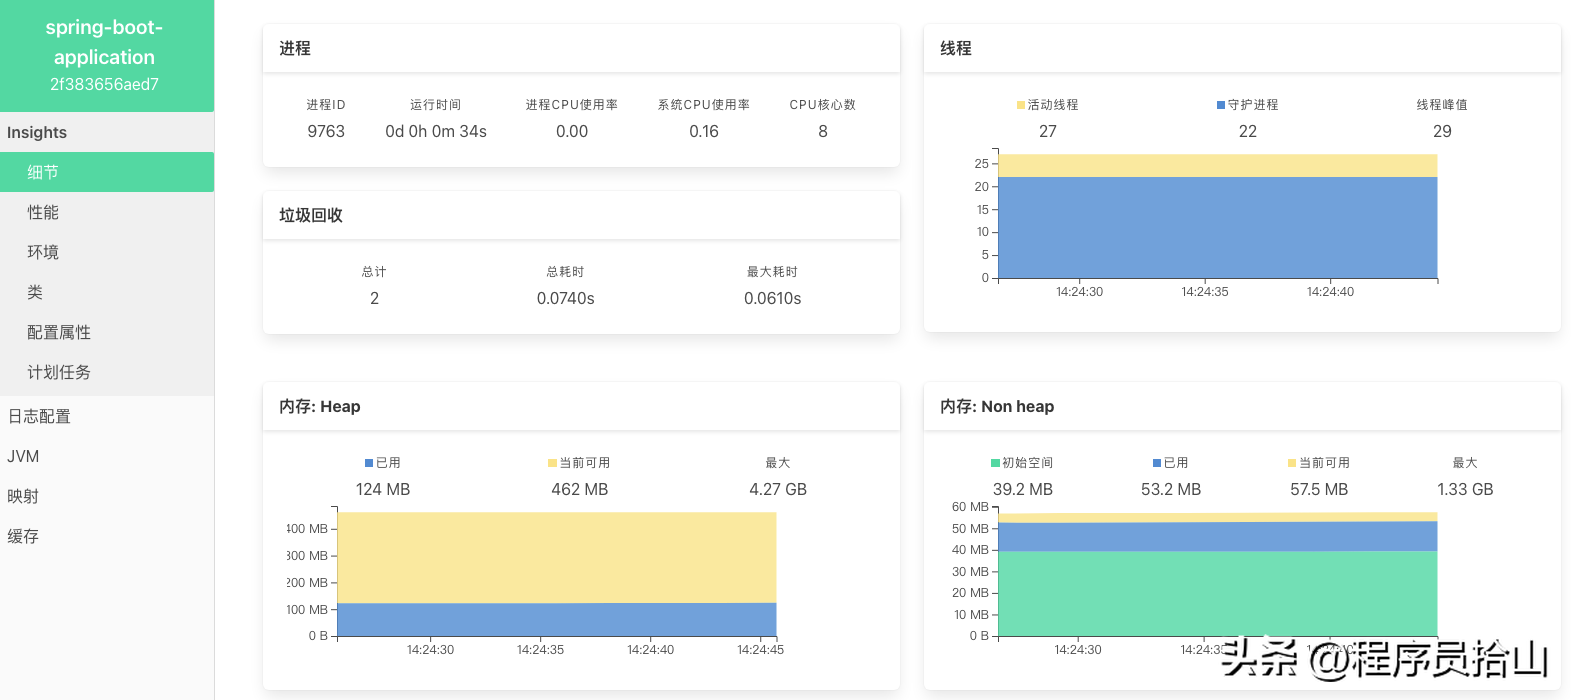
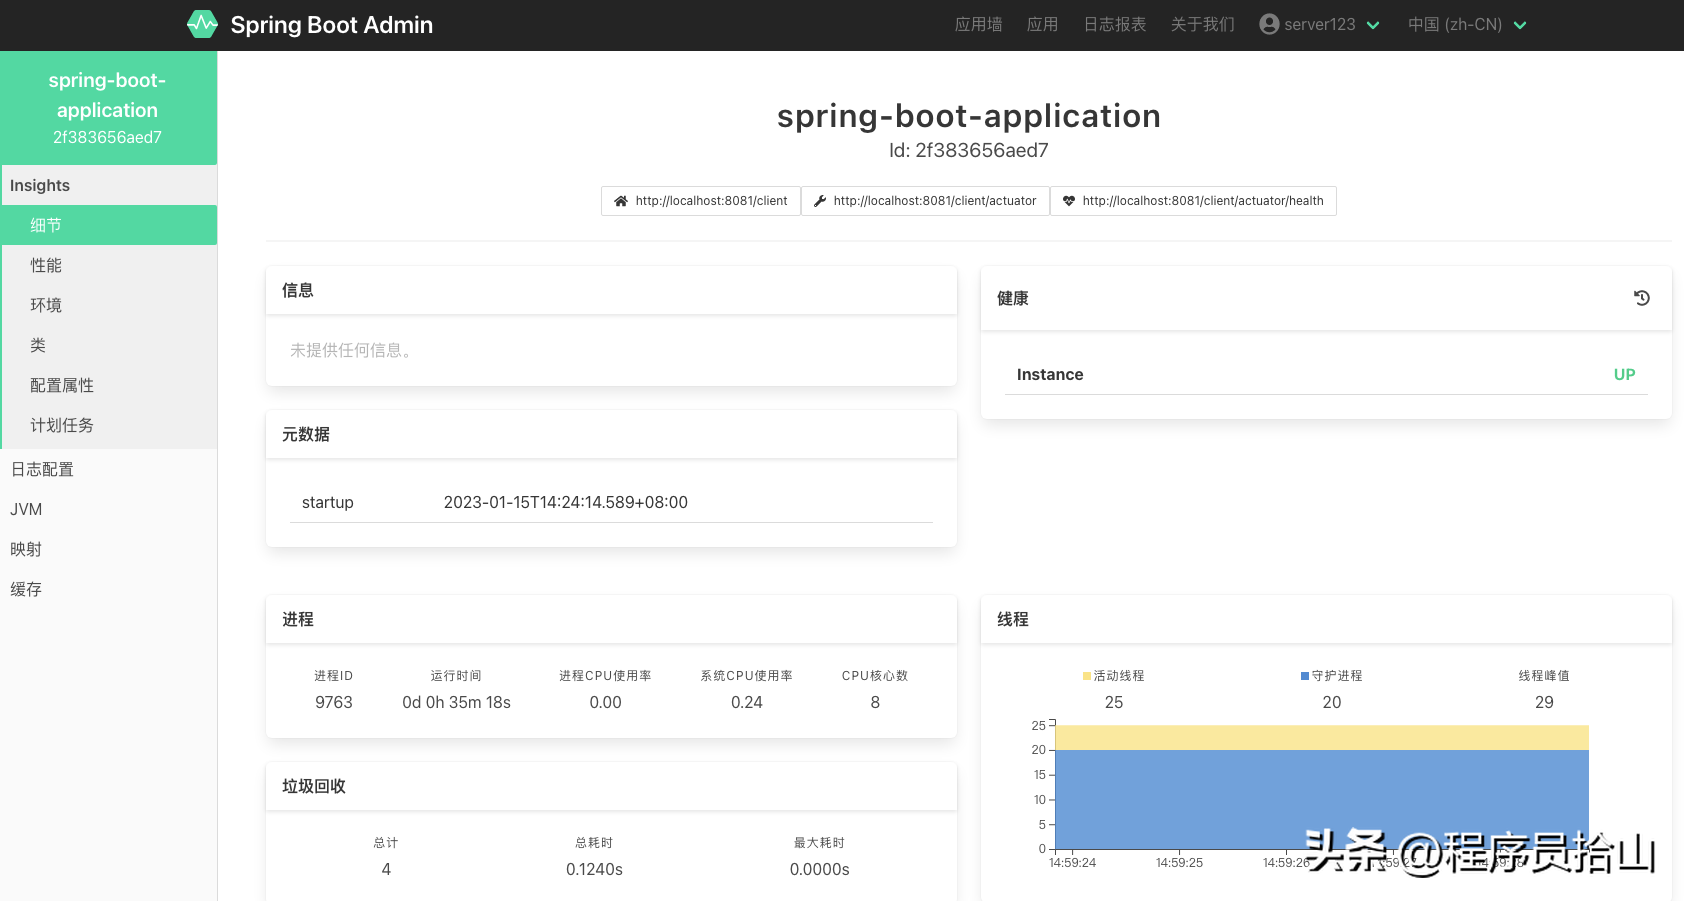
下面我们看一下最终的监控效果:
除了通过普通http请求方式获取监控信息以外,Springboot admin还支持通过注册中心的方式获取相关信息,在其官方文档大家也可以看到相关的配置。
Recommend
About Joyk
Aggregate valuable and interesting links.
Joyk means Joy of geeK