

API with NestJS #91. Dockerizing a NestJS API with Docker Compose
source link: https://wanago.io/2023/01/16/api-nestjs-docker-compose/
Go to the source link to view the article. You can view the picture content, updated content and better typesetting reading experience. If the link is broken, please click the button below to view the snapshot at that time.

January 16, 2023
So far, in this series of articles, we’ve been using Docker to run various services our NestJS application depends on. Some good examples are PostgreSQL and Redis. We can take it a step further and put our NestJS application into a Docker container as well. It can be very useful when looking into deploying our app.
You can find the code from this article in this repository.
Building the Docker image
We need to start by building a Docker image for our NestJS application. A Docker image acts as a template that describes everything our application needs to run. For example, it includes the source code and its JavaScript dependencies. Besides the above, it also contains information about the desired operating system and its components, such as the Node.js version.
There are a lot of Docker images ready to use and maintained by the community. We can find them on Docker Hub. A good example is node:alpine, based on the lightweight Alpine Linux distribution that comes with Node.js preinstalled.
To define a Docker image, we need to create the Dockerfile. It’s a text file containing all the information about the image. When building a Docker image for our application, we can base it on an existing one. To do that, we need to start our Dockerfile with the FROM keyword and specify the parent image from which we’re building our new image.
Dockerfile
FROM node:18-alpine |
We can now specify additional instructions to make sure our NestJS application will be able to run correctly. By default, Docker will run all of the following commands in the root directory. To keep our Docker container tidy, we can use the WORKSPACE instruction to define the working directory for all the following commands.
Dockerfile
FROM node:18-alpine WORKDIR /user/src/app |
So far, our Docker image does not contain the source code of our NestJS application. Let’s add it and install the dependencies.
Dockerfile
FROM node:18-alpine WORKDIR /user/src/app COPY . . RUN npm ci --omit=dev |
npm ci is an alternative for npm install meant for automated environments. By running it with the --omit=dev flag we avoid installing packages listed in the devDependencies to achieve a smaller Docker image. We need to make sure that we list all of the packages the image needs such as @nestjs/cli in the dependencies section.
By running COPY . ., we copy all of the files from our application to the /user/src/app directory in our Docker image. Then, we execute RUN npm ci to install the necessary JavaScript dependencies.
Once the above process is ready, we can build and start our NestJS application. Our complete Dockerfile looks like that:
Dockerfile
FROM node:18-alpine WORKDIR /user/src/app COPY . . RUN npm ci --omit=dev RUN npm run build USER node CMD ["npm", "run", "start:prod"] |
We run USER node to avoid running our application as root for security reasons. It might also be a good idea to change the owner of the files we’ve copied before.
It’s crucial to understand the difference between the RUN and CMD instructions. The RUN command defines the image build step and will be executed when building the image before starting the application. Therefore, we can have multiple RUN instructions in a single Dockerfile.
The CMD instruction does not run when building the image. Instead, Docker executes it once when running the Docker container created based on our image. Therefore, using more than one CMD instruction causes the last one to override the previous CMD commands.
Ignoring some of the files in our application
By default, COPY . . copies all of the files from the directory of our application into the Docker image. However, we need to remember that there are some files we shouldn’t put into our Docker image. To define them, we need to create the .dockerignore file.
.dockerignore
node_modules docker.env |
Building the Docker image
Once we’ve created our Dockerfile, we need to build our Docker image.
docker build --tag "nestjs-api" . |
Sending build context to Docker daemon 856.1kB
Step 1/7 : FROM node:18-alpine
—> 264f8646c2a6
Step 2/7 : WORKDIR /user/src/app
—> Running in a157ed686647
Removing intermediate container a157ed686647
—> 665415e6101e
Step 3/7 : COPY . .
—> 6ba70bc9f752
Step 4/7 : RUN npm ci –omit=dev
—> Running in 4206995663aaadded 565 packages, and audited 566 packages in 17s
59 packages are looking for funding
runnpm fundfor detailsfound 0 vulnerabilities
Removing intermediate container 4206995663aa
—> c98bfbb842ec
Step 5/7 : RUN npm run build
—> Running in af3ae30c58da> [email protected] prebuild
> rimraf dist> [email protected] build
> nest buildRemoving intermediate container af3ae30c58da
—> 26021dcbe202
Step 6/7 : USER node
—> Running in bbfe5d194ada
Removing intermediate container bbfe5d194ada
—> ad1331df0fa1
Step 7/7 : CMD [“npm”, “run”, “start:prod”]
—> Running in 1691c04e966b
Removing intermediate container 1691c04e966b
—> 1268ba0ec302
Successfully built 1268ba0ec302
Successfully tagged nestjs-api:latest
The crucial part of the above process is that Docker ran npm ci and npm run build but didn’t run npm run start:prod yet.
By adding --tag "nestjs-api" we’ve chosen a name for our Docker image. Thanks to that, we will be able to refer to it later.
Using Docker Compose to run multiple containers
Once we’ve built a Docker image, we can run a Docker container based on it. The container is a runtime instance of the image.
We could run our image with a single command:
docker run nestjs-api |
The above command creates a Docker container and executes npm run start:prod inside.
Often an application consists of multiple Docker containers, though. In our case, we want to run PostgreSQL and let our NestJS API connect with it. Maintaining multiple containers and ensuring they can communicate with each other can be challenging.
Fortunately, we can use the Docker Compose tool that helps us run multi-container Docker applications. When working with it, we need to definite the configuration of our application using YAML.
docker-compose.yml
version: "3" services: postgres: image: postgres:15.1 networks: - postgres volumes: - /data/postgres:/data/postgres env_file: - docker.env pgadmin: image: dpage/pgadmin4:6.18 networks: - postgres ports: - "8080:80" volumes: - /data/pgadmin:/root/.pgadmin env_file: - docker.env nestjs-api: image: nestjs-api env_file: - .env ports: - "3000:3000" depends_on: - postgres networks: - postgres networks: postgres: driver: bridge |
A few significant things are happening above, so let’s break the file down.
Creating a custom network
We create a custom network by adding the postgres entry in the networks section.
networks: postgres: driver: bridge |
Thanks to the above, we can easily specify which Docker containers can communicate with each other.
Setting up PostgreSQL
The first Docker container we specify in the services section uses the postgres:15.1 image.
It’s always a good idea to use a specific version instead of postgres:latest.
postgres: image: postgres:15.1 networks: - postgres volumes: - /data/postgres:/data/postgres env_file: - docker.env |
You can see above that we add it to the postgres network so that other Docker containers can communicate with it.
Thanks to configuring volumes, we allow the Docker container to persist data outside the container. Thanks to doing that, once we shut down the container and rerun it, we don’t end up with an empty database.
By specifying the env_file property, we can provide a set of environment variables the container will use, such as the credentials required to connect to the database.
docker.env
POSTGRES_USER=admin POSTGRES_PASSWORD=admin POSTGRES_DB=nestjs PGADMIN_DEFAULT_PASSWORD=admin |
Configuring pgAdmin
pgAdmin is a useful tool to help us manage our PostgreSQL database. Our pgAdmin container runs using the dpage/pgadmin4:6.18 image.
pgadmin: image: dpage/pgadmin4:6.18 networks: - postgres ports: - "8080:80" volumes: - /data/pgadmin:/root/.pgadmin env_file: - docker.env |
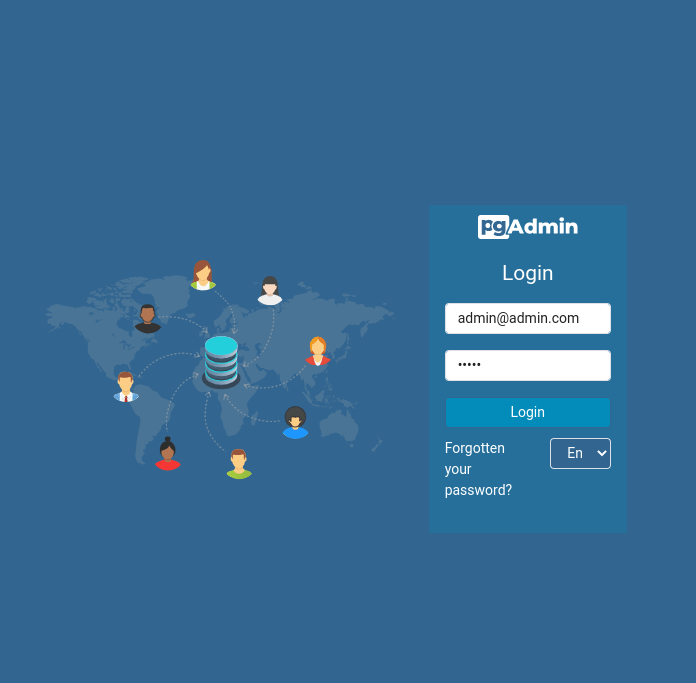
The new thing to grasp in the above code is the ports section. By default, pgAdmin runs on port 80. Thanks to adding 8080:80 to the ports section Docker exposes pgAdmin outside of the Docker container and allows us to access it through http://localhost:8080 on our machine.
To log in, we need to use the credentials provided in the docker.env file.
To connect to our PostgresSQL database, we also need to use the credentials provided in the docker.env file.
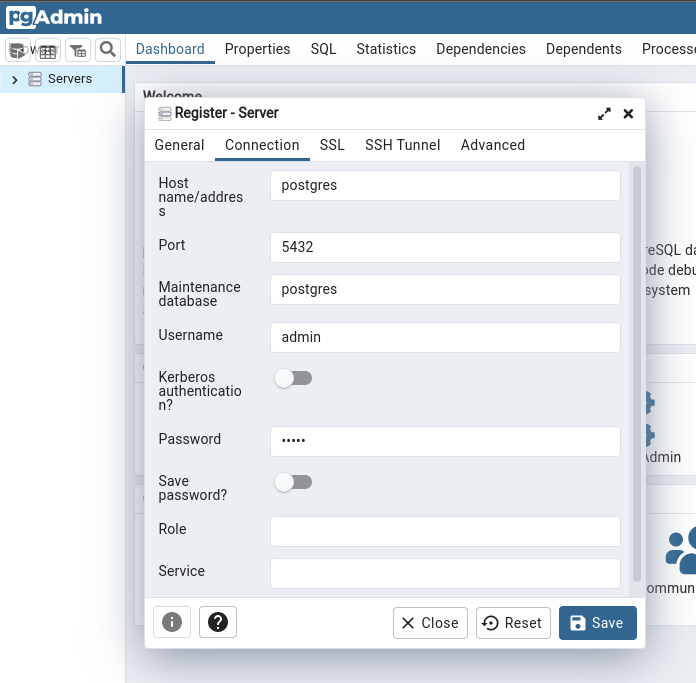
Since both pgAdmin and PostgreSQL run in the Docker containers, we need to provide postgres as the host name. It matches the name of the postgres service specified in the docker-compose.yml file.
Setting up our NestJS application
The last step is to add our NestJS application to our docker-compose configuration.
nestjs-api: image: nestjs-api env_file: - .env ports: - "3000:3000" depends_on: - postgres networks: - postgres |
The most crucial part of the above code is the image: nestjs-api. The name of the Docker image needs to match the docker build --tag "nestjs-api" . command we’ve used before.
By adding .env to the env_file section, we can provide a list of environment variables for our NestJS application.
POSTGRES_HOST=postgres POSTGRES_PORT=5432 POSTGRES_USER=admin POSTGRES_PASSWORD=admin POSTGRES_DB=nestjs JWT_SECRET=lum!SXwGL00Q JWT_EXPIRATION_TIME=21600 PORT=3000 |
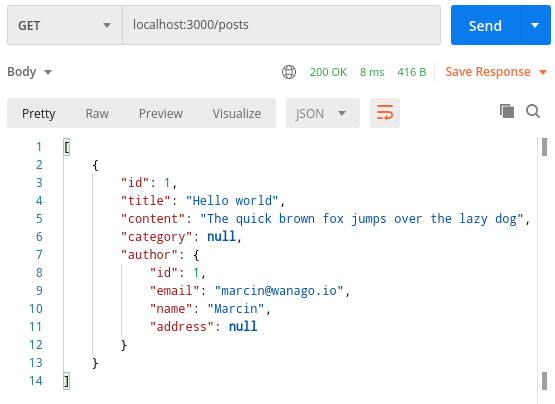
As you can see above, our NestJS application runs on port 3000 inside the Docker container. We also expect Docker to expose our NestJS API outside of the container. By adding "3000:3000" to the ports section, we specify that we want to be able to reach our NestJS API using http://localhost:3000.
By adding postgres to the depends_on array, we state that our NestJS API shouldn’t run before the PostgreSQL service was initialized.
Running all of the Docker containers
The last step is to run the above Docker Compose configuration.
docker-compose up |
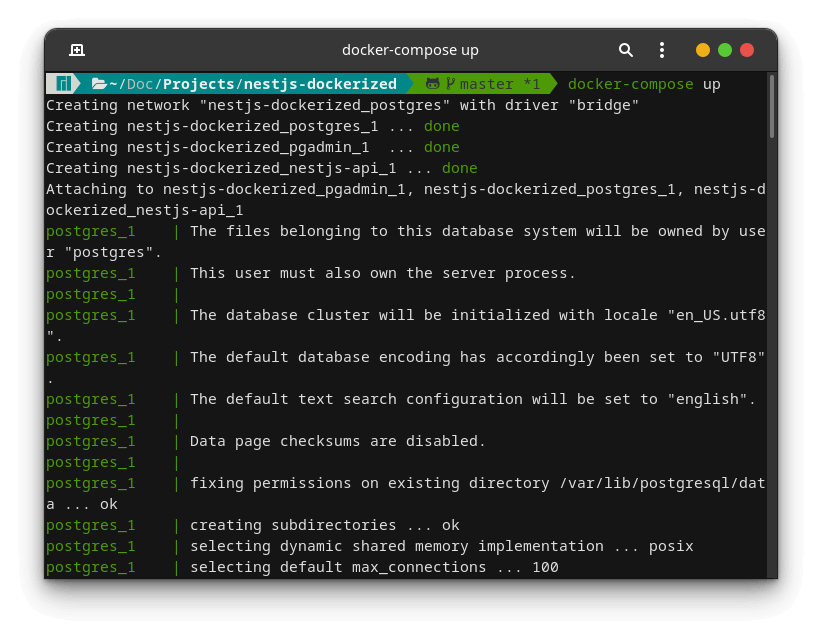
Once we run Docker Compose, it creates and runs all specified Docker containers. Now our application is up and running. It’s also accessible outside of Docker.
Summary
In this article, we went through the configuration required to run NestJS in a Docker container properly. To do that, we had to learn how to write the Dockerfile and build our Docker image. We also created the Docker Compose configuration that allowed us to run other services our NestJS API needs, such as PostgreSQL. Finally, we also made sure that all of our Docker containers could communicate with each other.
There is still more to learn when it comes to using NestJS with Docker, so stay tuned!
Series Navigation<< API with NestJS #90. Using various types of SQL joins
Recommend
About Joyk
Aggregate valuable and interesting links.
Joyk means Joy of geeK