

react 高效高质量搭建后台系统 系列 —— 登录 - 彭加李
source link: https://www.cnblogs.com/pengjiali/p/17048644.html
Go to the source link to view the article. You can view the picture content, updated content and better typesetting reading experience. If the link is broken, please click the button below to view the snapshot at that time.

其他章节请看:
本篇将完成登录模块。效果和 spug 相同:
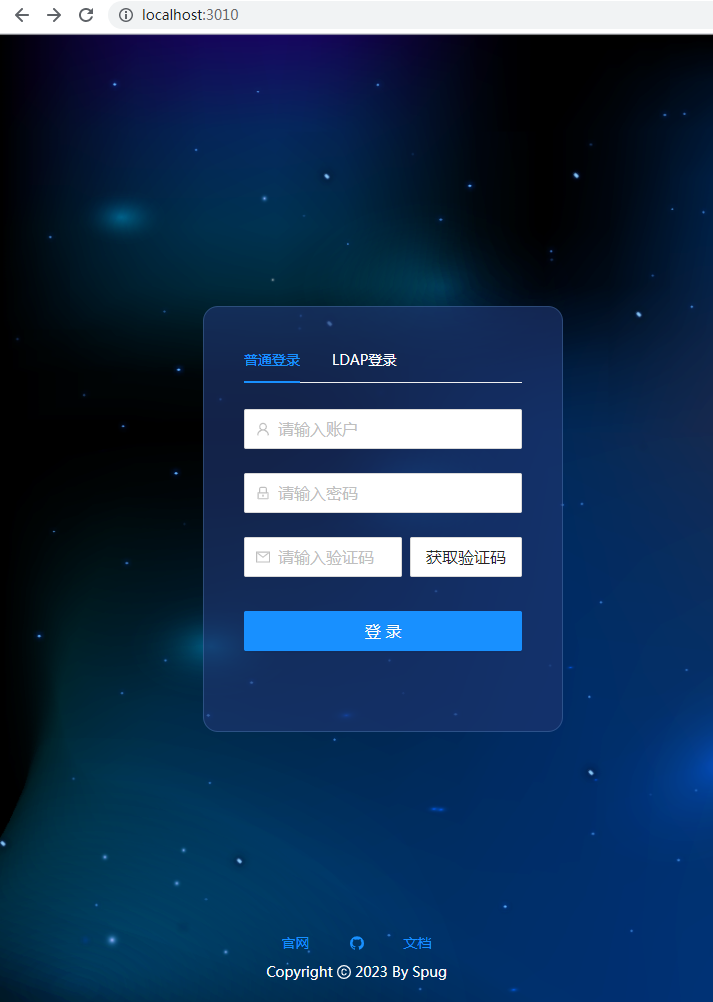
需求如下:
- 登录页的绘制
- 支持普通登录和LDAP登录
- 登录成功后跳转到
主页,没有登录的情况下访问系统会重定向到登录页,登录成功后再次回到之前的页面。系统会话过期后,请求会重定向到登录页。
Tip:退出登录在进入系统后进行,暂不不管。
路由和登录
登录页是进入系统的门户,登录页绘制逻辑比较简单(单个模块的开发比较简单)。
首先要解决:根据 url 不同,进入登录页还是系统主页。这里需要使用路由器。
spug 中的路由和登录
详情请看 react 路由、react 路由原理
Tip:实现的核心是 Router,以及 history 包。
需求:浏览器输入 /(http://localhost:3010/) 进入登录页,其他路径进入系统。
实现如下:
- 在入口页(index.js)中使用
<Router history={history}>管理路由:
// spug\src\index.js
import { history, updatePermissions } from 'libs';
// 权限、token 相关
updatePermissions();

ReactDOM.render(
  // Router 是路由器,用于管理路由
  // `history: object` 用来导航的 history 对象。
  <Router history={history}>
    <ConfigProvider locale={zhCN} getPopupContainer={() => document.fullscreenElement || document.body}>
      <App/>
    </ConfigProvider>
  </Router>,
  document.getElementById('root')
);
其中 history 用于导航 history 对象(此用法在路由官网中)。执行 history.push 时不仅会改变浏览器的 url,而且路由也会发生变化(请看本篇“history={history} 的作用”章节)
- libs 模块代码如下:
// spug\src\libs\index.js
import _http from './http';
// 仅对 history 包的导出
import _history from './history';

// 里面有 updatePermissions
export * from './functools';
export * from './router';
export const http = _http;
export const history = _history;
export const VERSION = 'v3.0.5';
history 仅对 history 包的导出,在 这里 中已介绍。
- 主页(App.js)中定义了两个路由,如果 url 精确匹配
/则进入登录页,否则进入系统( Layout 是 antd 中的 Layout 组件,对 404 的界面反馈也 Layout 模块中进行了处理)。
// spug\src\App.js

class App extends Component {
    render() {
        return (
        // 只渲染其中一个 Route
        // exact 精确匹配
        // component={Login} 路由组件(不同于一般组件,其 props 中有路由相关方法。)
        <Switch>
            <Route path="/" exact component={Login} />
            {/* 没有匹配则进入 Layout */}
            <Route component={Layout} />
        </Switch>
        );
    }
}

export default App;
myspug 添加路由和登录
- 入口页增加
<Router history={history}>。
Tip: StrictMode(一个用来突出显示应用程序中潜在问题的工具。与 Fragment 一样) 仍旧保留。
// myspug\src\index.js
 import React from 'react';
+import { Router } from 'react-router-dom';
+import { history } from '@/libs';

 const root = ReactDOM.createRoot(document.getElementById('root'));
 root.render(
+  // StrictMode 是一个用来突出显示应用程序中潜在问题的工具。与 Fragment 一样,StrictMode 不会渲染任何可见的 UI。它为其后代元素触发额外的检查和警告。
+  // 严格模式检查仅在开发模式下运行;它们不会影响生产构建。
   <React.StrictMode>
-    <ConfigProvider locale={zhCN}>
-      <App />
-    </ConfigProvider>
+    <Router history={history}>
+      <ConfigProvider locale={zhCN}>
+        <App />
+      </ConfigProvider>
+    </Router>

   </React.StrictMode>
 );
- 新建
libs/index.js,主要是导出 history:
// myspug\src\libs\index.js
import _http from './http';
import _history from './history';

export const http = _http;
export const history = _history;
export const VERSION = 'v1.0.0';
- 在主页中配置好 Switch,如果 url 是
/则进入登录页,如果是其他 url 则进入 HelloWorld(用来模拟 Layout)
// myspug\src\App.js

import { Component } from 'react';
// 登录组件
import Login from './pages/login';
// 模拟 Layout 组件
import HelloWorld from './HelloWord'
import { Switch, Route } from 'react-router-dom';

// 定义一个类组件
class App extends Component {
  render() {
    return (
      // 只渲染其中一个 Route
      // exact 精确匹配
      // component={Login} 路由组件(不同于一般组件,其 props 中有路由相关方法。)
      <Switch>
        <Route path="/" exact component={Login} />
        {/* 没有匹配则进入 Layout */}
        <Route component={HelloWorld} />
      </Switch>
    );
  }
}

export default App;
- 登录页和 HelloWorld 都是最简单的组件。代码如下:
// myspug\src\pages\login\index.js
export default function() {
    return <div>登录页</div>
}
// myspug\src\HelloWord.js
export default function HelloWorld() {
    return <div>hello world!</div>
}
测试结果如下:
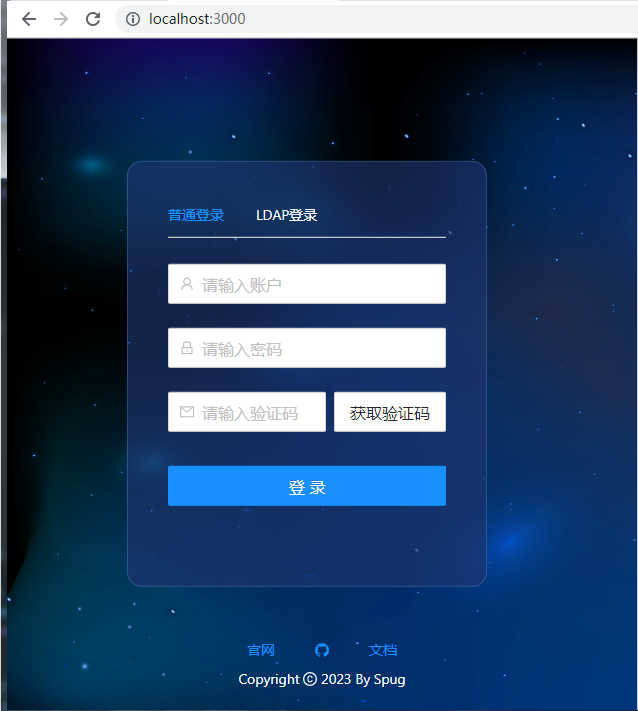
浏览器:http://localhost:3000/
显示:  登录页

浏览器:http://localhost:3000/home
显示:  hello world!
history={history} 的作用
在 请求数据 一文中我们曾有一个疑惑:spug 官网中执行 history.push 不仅可以切换url,而且路由也发生了变化。
笔者测试发现:是入口页 <Router history={history}> 中 history 的功劳。
验证步骤如下:
- 将 history 导出到 window(例如在 http.js 中进行):
// myspug\src\libs\http.js

import http from 'axios'
import history from './history'
// 将其导出
window._history = history;
- 浏览器访问
http://localhost:3000/并在控制台中输入:
执行:_history.push('/home')
url 变成 http://localhost:3000/home 浏览器显示:hello world!

执行:_history.push('/')
url 变成 http://localhost:3000/     浏览器显示:登录页
Tip:如果删除入口页的 history={history},浏览器控制台将报错如下,提示没有 location 属性,无法进行路由匹配:
Warning: Failed prop type: The prop `history` is marked as required in `Router`, but its value is `undefined`.

Uncaught TypeError: Cannot read property 'location' of undefined
spug 中登录模块的分析
我们初步解决了登录页和主页(或系统)之间的跳转(或路由)。
下面我们完整分析 spug 中登录模块的实现,比如登录绘制、普通登录和LDAP登录...
登录模块代码都在 spug/src/pages/login 目录下,一个 js 文件,一个样式文件:
Administrator@-WK-10 MINGW /e/spug/src/pages/login
$ ls
bg.png  index.js  login.module.css
login.module.css 是登录模块的样式文件,前文 已分析过样式,这里不再冗余。
登录的核心全在 index.js 中。
我们参照登录界面说一下 index.js 的结构:
- 这是一个
函数式的组件,返回的 div 包括两部分:登录信息输入区、网站底部统一信息区 - Tabs 仅做样式,默认显示“普通登录”
- 表单与 Tabs 是独立的。表单使用
Form.useForm创建表单数据域进行控制 - 验证码默认是关闭的,笔者这里将其开启
- useEffect、useState是函数式组件中生命周期和状态的使用
语法 - 组件挂载后的一系列
store的初始化用于对应模块的使用 - 里面的 setTimeout 用于重新获取
验证码倒计时
// spug\src\pages\login\index.js

/**
 * Copyright (c) OpenSpug Organization. https://github.com/openspug/spug
 * Copyright (c) <[email protected]>
 * Released under the AGPL-3.0 License.
 */
import React, { useState, useEffect } from 'react';
import { Form, Input, Button, Tabs, Modal, message } from 'antd';
import { UserOutlined, LockOutlined, CopyrightOutlined, GithubOutlined, MailOutlined } from '@ant-design/icons';
import styles from './login.module.css';
import history from 'libs/history';
import { http, updatePermissions } from 'libs';
// store 是 mobx 中的状态集中器。这里是初始化 pages 下的 config、deploy、exec、host等模块中的某字段
import envStore from 'pages/config/environment/store';
import appStore from 'pages/config/app/store';
import requestStore from 'pages/deploy/request/store';
import execStore from 'pages/exec/task/store';
import hostStore from 'pages/host/store';

// 函数组件
export default function () {
  // FormInstance 经 Form.useForm() 创建的 form 控制实例。FormInstance 有一系列方法,例如
  // 注:useForm 是 React Hooks 的实现,只能用于函数组件,class 组件请查看下面的例子(https://ant.design/components/form-cn#components-form-demo-control-hooks)
  // Tip:我们推荐使用 Form.useForm 创建表单数据域进行控制。如果是在 class component 下,你也可以通过 ref 获取数据域。(https://ant.design/components/form-cn#components-form-demo-control-ref)
  const [form] = Form.useForm();
  // 验证码倒计时
  const [counter, setCounter] = useState(0);
  // 控制登录按钮
  const [loading, setLoading] = useState(false);
  // 登录类型默认是 default
  const [loginType, setLoginType] = useState('default');
  // 验证码。默认关闭
  const [codeVisible, setCodeVisible] = useState(!false);
  const [codeLoading, setCodeLoading] = useState(false);

  // 组件挂载后执行。相当于 componentDidMount()
  useEffect(() => {
    envStore.records = [];
    appStore.records = [];
    requestStore.records = [];
    requestStore.deploys = [];
    hostStore.records = null;
    hostStore.groups = {};
    hostStore.treeData = [];
    execStore.hosts = [];
  }, [])

  // 相当于 componentDidMount() 和 componentDidUpdate()(counter 变化时会执行)
  // 定时器,重新获取验证码倒计时。
  useEffect(() => {
    setTimeout(() => {
      // 默认是 0,故不会执行。当设置有效值时会执行,例如 30
      if (counter > 0) {
        setCounter(counter - 1)
      }
    }, 1000)
  }, [counter])

  // 登录
  function handleSubmit() {
    // form 是 FormInstance。
    // getFieldsValue - 获取一组字段名对应的值,会按照对应结构返回
    const formData = form.getFieldsValue();
    // 如果显示了“验证码”却没有输入,提示
    if (codeVisible && !formData.captcha) return message.error('请输入验证码');

    // 登录中...
    setLoading(true);
    // 设置登录类型:default 或 ldap
    formData['type'] = loginType;
    // formData2 {username: '1', password: '2', captcha: '3', type: 'default'}
    console.log('formData2', formData)
    http.post('/api/account/login/', formData)
      // 官网返回: {"data": {"id": 1, "access_token": "4b6f1a9b8d824908abb9613695de57f8", "nickname": "\u7ba1\u7406\u5458", "is_supper": true, "has_real_ip": true, "permissions": []}, "error": ""}
      .then(data => {
        // 某种处理逻辑
        if (data['required_mfa']) {
          setCodeVisible(true);
          setCounter(30);
          setLoading(false)
        // 用户请求时没有真实ip则安全警告
        } else if (!data['has_real_ip']) {
          Modal.warning({
            title: '安全警告',
            className: styles.tips,
            content: <div>
              未能获取到访问者的真实IP,无法提供基于请求来源IP的合法性验证,详细信息请参考
              <a target="_blank"
                href="https://spug.cc/docs/practice/"
                rel="noopener noreferrer">官方文档</a>。
            </div>,
            onOk: () => doLogin(data)
          })
        } else {
          doLogin(data)
        }
      }, () => setLoading(false))
  }

  // 将登录返回的数据存入本地,并更新权限和 token
  function doLogin(data) {
    // id
    localStorage.setItem('id', data['id']);
    // token
    localStorage.setItem('token', data['access_token']);
    // 昵称
    localStorage.setItem('nickname', data['nickname']);
    // is_supper
    localStorage.setItem('is_supper', data['is_supper']);
    // 权限
    localStorage.setItem('permissions', JSON.stringify(data['permissions']));

    // 权限和 token 相关。
    updatePermissions();
    // 登录成功则进入系统主页或未登录前访问的页面
    // 更具体就是:切换 Url。进入主页或登录前的页面(记录在 from 中)
    // react通过history.location.state来携带参数
    // 例如 spug\src\libs\http.js 中的:history.push('/', {from: history.location})
    if (history.location.state && history.location.state['from']) {
      history.push(history.location.state['from'])
    } else {
      history.push('/home')
    }
  }

  // 获取验证码
  function handleCaptcha() {
    // 请求中...
    setCodeLoading(true);
    const formData = form.getFieldsValue(['username', 'password']);
    formData['type'] = loginType;
    // formData {username: '1', password: '2', type: 'default'}
    console.log('formData', formData)
    http.post('/api/account/login/', formData)
      // 30 秒后获得验证码
      .then(() => setCounter(30))
      .finally(() => setCodeLoading(false))
  }


  return (
    <div className={styles.container}>
      <div className={styles.formContainer}>
        {/* 仅做样式,默认选中第一个 tabpane。没有选项卡内容 */}
        <Tabs className={styles.tabs} onTabClick={v => setLoginType(v)}>
          <Tabs.TabPane tab="普通登录" key="default" />
          <Tabs.TabPane tab="LDAP登录" key="ldap" />
        </Tabs>
        {/* 使用 Form.useForm 创建表单数据域进行控制 */}
        <Form form={form}>
          <Form.Item name="username" className={styles.formItem}>
            <Input
              size="large"
              // 关闭自动完成的选项
              autoComplete="off"
              placeholder="请输入账户"
              // 人头像的 icon
              prefix={<UserOutlined className={styles.icon} />} />
          </Form.Item>
          <Form.Item name="password" className={styles.formItem}>
            <Input
              size="large"
              type="password"
              autoComplete="off"
              placeholder="请输入密码"
              // 按下回车的回调。即提交
              onPressEnter={handleSubmit}
              // 锁的icon
              prefix={<LockOutlined className={styles.icon} />} />
          </Form.Item>
          {/* 验证码。默认关闭 */}
          {/* 这里展示了 Form.Item 嵌套用法 */}
          <Form.Item hidden={!codeVisible} name="captcha" className={styles.formItem}>
            <div style={{ display: 'flex' }}>
              <Form.Item noStyle name="captcha">
                <Input
                  size="large"
                  autoComplete="off"
                  placeholder="请输入验证码"
                  prefix={<MailOutlined className={styles.icon} />} />
              </Form.Item>
              {counter > 0 ? (
                <Button disabled size="large" style={{ marginLeft: 8 }}>{counter} 秒后重新获取</Button>
              ) : (
                <Button size="large" loading={codeLoading} style={{ marginLeft: 8 }}
                  onClick={handleCaptcha}>获取验证码</Button>
              )}
            </div>
          </Form.Item>
        </Form>

        <Button
          // block 属性将使按钮适合其父宽度。
          block
          size="large"
          type="primary"
          className={styles.button}
          loading={loading}
          onClick={handleSubmit}>登录</Button>
      </div>
      {/* 网站底部统一信息。这里是`官网`、`github 地址`、`文档` */}
      <div className={styles.footerZone}>
        <div className={styles.linksZone}>
          <a className={styles.links} title="官网" href="https://spug.cc" target="_blank"
            rel="noopener noreferrer">官网</a>
          <a className={styles.links} title="Github" href="https://github.com/openspug/spug" target="_blank"
            rel="noopener noreferrer"><GithubOutlined /></a>
          <a title="文档" href="https://spug.cc/docs/about-spug/" target="_blank"
            rel="noopener noreferrer">文档</a>
        </div>
        <div style={{ color: '#fff' }}>Copyright <CopyrightOutlined /> {new Date().getFullYear()} By Spug</div>
      </div>
    </div>
  )
}
myspug 登录模块的实现
Tip:登录样式(pages\login\login.module.css)仅仅是一些样式,直接从 spug 拷贝即可
index.js
新建 pages\login\index.js 文件,内容如下:
Tip: 与 spug 中 login\index.js 类似,微做如下调整:
- 组件挂载后的一系列 store 的初始化,暂时不需要,删除
- 引用路径的调整:libs/history 改成
@/libs/history
// myspug\src\pages\login\index.js
import React, { useState, useEffect } from 'react';
import { Form, Input, Button, Tabs, Modal, message } from 'antd';
import { UserOutlined, LockOutlined, CopyrightOutlined, GithubOutlined, MailOutlined } from '@ant-design/icons';
import styles from './login.module.css';
// 调整下引用路径:libs/history 改成 @/libs/history
import history from '@/libs/history';
import { http, updatePermissions } from '@/libs';

// 函数组件
export default function () {
    // antd 官网:我们推荐使用 Form.useForm 创建表单数据域进行控制。如果是在 class component 下,你也可以通过 ref 获取数据域。(https://ant.design/components/form-cn#components-form-demo-control-ref)
    // FormInstance 经 Form.useForm() 创建的 form 控制实例。FormInstance 有一系列方法,例如
    // 注:useForm 是 React Hooks 的实现,只能用于函数组件,class 组件请查看下面的例子(https://ant.design/components/form-cn#components-form-demo-control-hooks)
    const [form] = Form.useForm();
    // 验证码倒计时
    const [counter, setCounter] = useState(0);
    // 控制登录按钮
    const [loading, setLoading] = useState(false);
    // 登录类型默认是 default
    const [loginType, setLoginType] = useState('default');
    // 验证码。默认关闭。笔者将其开启
    const [codeVisible, setCodeVisible] = useState(!false);
    const [codeLoading, setCodeLoading] = useState(false);

    // 相当于 componentDidMount() 和 componentDidUpdate()(counter 变化时会执行)
    // 定时器,重新获取验证码倒计时。
    useEffect(() => {
        setTimeout(() => {
            // 默认是 0,故不会执行。当设置有效值时会执行,例如 30
            if (counter > 0) {
                setCounter(counter - 1)
            }
        }, 1000)
    }, [counter])

    // 登录
    function handleSubmit() {
        // getFieldsValue - 获取一组字段名对应的值,会按照对应结构返回
        // form 是 FormInstance。
        const formData = form.getFieldsValue();
        // 如果显示了“验证码”却没有输入,提示
        if (codeVisible && !formData.captcha) return message.error('请输入验证码');

        // 登录中...
        setLoading(true);
        // 设置登录类型:default 或 ldap
        formData['type'] = loginType;

        // formData2 {username: '1', password: '2', captcha: '3', type: 'default'}
        console.log('formData2', formData)

        http.post('/api/account/login/', formData)
            // 官网返回: {"data": {"id": 1, "access_token": "4b6f1a9b8d824908abb9613695de57f8", "nickname": "\u7ba1\u7406\u5458", "is_supper": true, "has_real_ip": true, "permissions": []}, "error": ""}
            .then(data => {
                // 某种处理逻辑,我们可以去除这个分支
                if (data['required_mfa']) {
                    setCodeVisible(true);
                    setCounter(30);
                    setLoading(false)
                } else if (!data['has_real_ip']) { // 用户请求时没有真实ip则安全警告
                    Modal.warning({
                        title: '安全警告',
                        className: styles.tips,
                        content: <div>
                            未能获取到访问者的真实IP,无法提供基于请求来源IP的合法性验证,详细信息请参考
                            <a target="_blank"
                                href="https://spug.cc/docs/practice/"
                                rel="noopener noreferrer">官方文档</a>。
                        </div>,
                        onOk: () => doLogin(data)
                    })
                } else {
                    doLogin(data)
                }
            }, () => setLoading(false))
    }

    // 将登录返回的数据存入本地,并更新权限和 token
    function doLogin(data) {
        // id
        localStorage.setItem('id', data['id']);
        // token
        localStorage.setItem('token', data['access_token']);
        // 昵称
        localStorage.setItem('nickname', data['nickname']);
        // is_supper
        localStorage.setItem('is_supper', data['is_supper']);
        // 权限
        localStorage.setItem('permissions', JSON.stringify(data['permissions']));

        // 权限和 token 相关。
        updatePermissions();
        // 登录成功则进入系统主页或未登录前访问的页面
        // 更具体就是:切换 Url。进入主页或登录前的页面(记录在 from 中)
        // react通过history.location.state来携带参数
        // 例如 spug\src\libs\http.js 中的:history.push('/', {from: history.location})
        if (history.location.state && history.location.state['from']) {
            history.push(history.location.state['from'])
        } else {
            history.push('/home')
        }
    }

    // 获取验证码
    function handleCaptcha() {
        // 请求中...
        setCodeLoading(true);
        const formData = form.getFieldsValue(['username', 'password']);
        formData['type'] = loginType;
        // formData {username: '1', password: '2', type: 'default'}
        console.log('formData', formData)
        http.post('/api/account/login/', formData)
            // 30 秒后获得验证码
            .then(() => setCounter(30))
            .finally(() => setCodeLoading(false))
    }

    return (
        <div className={styles.container}>
            <div className={styles.formContainer}>
                {/* 仅做样式,默认选中第一个 tabpane。没有选项卡内容 */}
                <Tabs className={styles.tabs} onTabClick={v => setLoginType(v)}>
                    <Tabs.TabPane tab="普通登录" key="default" />
                    <Tabs.TabPane tab="LDAP登录" key="ldap" />
                </Tabs>
                {/* 使用 Form.useForm 创建表单数据域进行控制 */}
                <Form form={form}>
                    <Form.Item name="username" className={styles.formItem}>
                        <Input
                            size="large"
                            // 关闭自动完成的选项
                            autoComplete="off"
                            placeholder="请输入账户"
                            // 人头像的 icon
                            prefix={<UserOutlined className={styles.icon} />} />
                    </Form.Item>
                    <Form.Item name="password" className={styles.formItem}>
                        <Input
                            size="large"
                            type="password"
                            autoComplete="off"
                            placeholder="请输入密码"
                            // 按下回车的回调。即提交
                            onPressEnter={handleSubmit}
                            // 锁的icon
                            prefix={<LockOutlined className={styles.icon} />} />
                    </Form.Item>
                    {/* 验证码。默认关闭 */}
                    {/* 这里展示了 Form.Item 嵌套用法 */}
                    <Form.Item hidden={!codeVisible} name="captcha" className={styles.formItem}>
                        <div style={{ display: 'flex' }}>
                            <Form.Item noStyle name="captcha">
                                <Input
                                    size="large"
                                    autoComplete="off"
                                    placeholder="请输入验证码"
                                    prefix={<MailOutlined className={styles.icon} />} />
                            </Form.Item>
                            {counter > 0 ? (
                                <Button disabled size="large" style={{ marginLeft: 8 }}>{counter} 秒后重新获取</Button>
                            ) : (
                                <Button size="large" loading={codeLoading} style={{ marginLeft: 8 }}
                                    onClick={handleCaptcha}>获取验证码</Button>
                            )}
                        </div>
                    </Form.Item>
                </Form>

                <Button
                    // block 属性将使按钮适合其父宽度。
                    block
                    size="large"
                    type="primary"
                    className={styles.button}
                    loading={loading}
                    onClick={handleSubmit}>登录</Button>
            </div>
            {/* 网站底部统一信息。这里是`官网`、`github 地址`、`文档` */}
            <div className={styles.footerZone}>
                <div className={styles.linksZone}>
                    <a className={styles.links} title="官网" href="https://spug.cc" target="_blank"
                        rel="noopener noreferrer">官网</a>
                    <a className={styles.links} title="Github" href="https://github.com/openspug/spug" target="_blank"
                        rel="noopener noreferrer"><GithubOutlined /></a>
                    <a title="文档" href="https://spug.cc/docs/about-spug/" target="_blank"
                        rel="noopener noreferrer">文档</a>
                </div>
                <div style={{ color: '#fff' }}>Copyright <CopyrightOutlined /> {new Date().getFullYear()} By Spug</div>
            </div>
        </div>
    )
}
updatePermissions
登录页中引入了 updatePermissions(import { http, updatePermissions } from '@/libs';)。
Tip:updatePermissions 的作用用于更新 functools.js 模块中的 X_TOKEN(spug中没有前端没有清除 X_TOKEN) 和 Permission变量。
我们将 spug 中的相关代码弄过来。步骤如下:
- 在 functools.js 增加 updatePermissions:
// myspug\src\libs\functools.js

+// 准许。权限相关。模块私有
+let Permission = {
+    isReady: false,
+    isSuper: false,
+    permissions: []
+};
+

// 由 updatePermissions() 更新
export let X_TOKEN;
+
+
+// 被入口页(src/index.js)和登录页(src/pages/login/index.js)调用
+export function updatePermissions() {
+    // 读取 localStorage 项
+    // 只在登录时设置:localStorage.setItem('token'
+    X_TOKEN = localStorage.getItem('token');
+    Permission.isReady = true;
+    Permission.isSuper = localStorage.getItem('is_supper') === 'true';
+    try {
+        Permission.permissions = JSON.parse(localStorage.getItem('permissions') || '[]');
+    } catch (e) {
+
+    }
+}
- 在 libs/index.js 中将 functools.js 模块导出:
// myspug\src\libs\index.js

// 导出一切。注:没有导出默认值
export * from './functools';
- 入口页更新权限:
// myspug\src\index.js

import React from 'react';
import { history, updatePermissions } from '@/libs';

const root = ReactDOM.createRoot(document.getElementById('root'));

+ // 权限和 token 相关。
+ updatePermissions();
myspug 登录模块的验证
验证步骤如下:
- 输入
http://localhost:3000/进入登录页
-
在登录页输入登录信息,登录成功进入主页
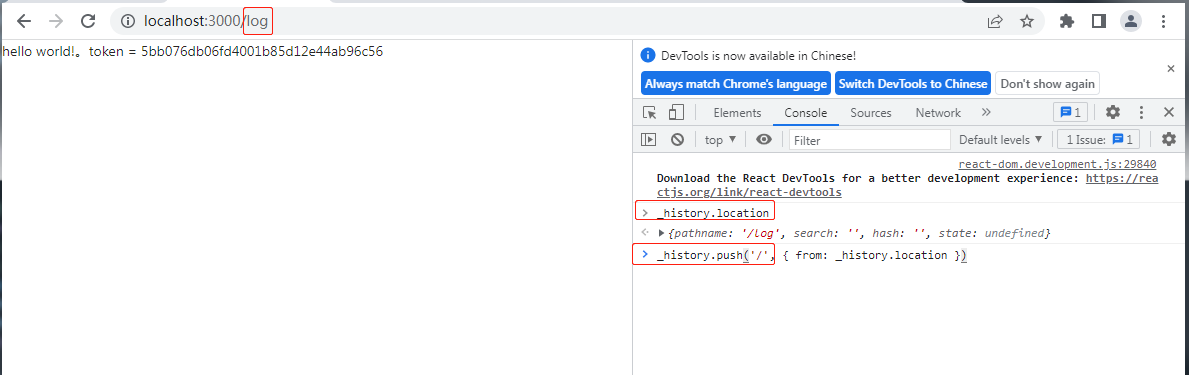
-
修改浏览器 url(
http://localhost:3000/log)回车进入系统,控制台执行_history.push('/', { from: _history.location })模拟请求过期重置到登录页,再次输入登录信息登录,回到原来页面(log)
myspug 登录bug
myspug 登录页有一个小bug,Tabs 下没有显示哪个选中了。就像这样:
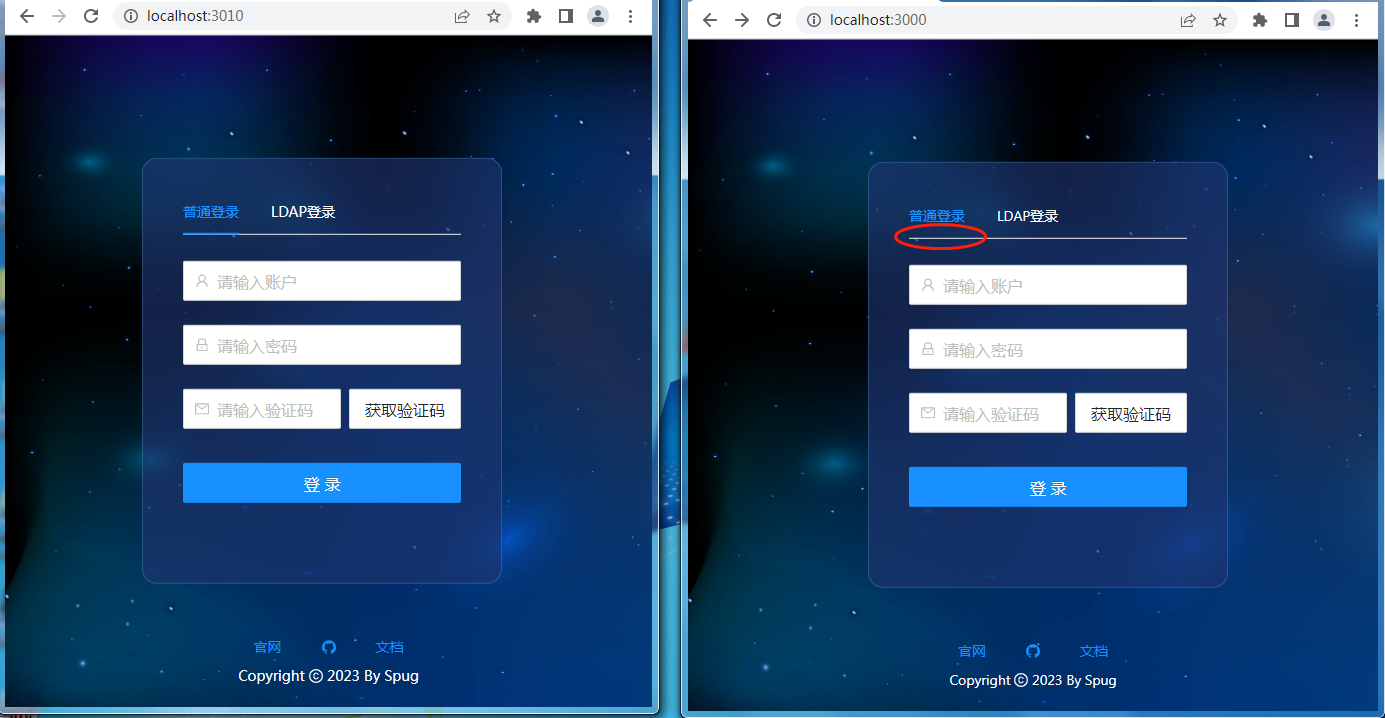
发现是选中的进度条没有动态设置宽度,width 一直为 0。怀疑是 myspug 中 antd-按需引入-css 有问题,但 antd 其他组件(例如分页、form等)没有问题,Tabs也仅发现这一个样式问题,去除按需引入 css 也没解决。
笔者暂时未深入,或许简化环境,从头开始可以找到问题
普通登录和 LDAP 登录
spug 前端这里普通登录和 LDAP 登录是相同处理的,都是输入用户名和密码。
只要公司给员工分配了 LDAP(可实现公司内部多系统的统一登录) 的用户名和密码,该员工则可直接使用 LDAP 方式登录系统,无需再重复注册。
登录标识 token
spug 中输入用户名、密码,登录成功后,后端返回数据中包含 token(即后端分配给用户的一个登录标识),前端将其保存在 localStorage 中,后续前端所有的请求都将会带上这个标识(token),后端通过这个标识识别用户否有权限访问该请求,如果 token 过期,则返回 401 告诉前端“会话过期,请重新登录”。
X_TOKEN 跨模块
spug 中有个模块(functools.js),定义了一个私有变量,导出了两个变量。
// myspug\src\libs\functools.js
let Permission = {
    isReady: false,
    ...
};

// 由 updatePermissions() 更新
export let X_TOKEN;

export function updatePermissions() {
    X_TOKEN = localStorage.getItem('token');
    Permission.isReady = true;

}
在登录模块中仅导入 updatePermissions,登录成功后会执行该方法,会给 X_TOKEN 赋值。而在其他模块(例如 http.js)仅导入 X_TOKEN,这时 X_TOKEN 就会有值。
笔者测试如下:
- 在 HelloWord.js 中引入 X_TOKEN:
// myspug\src\HelloWord.js

import { X_TOKEN } from "./libs/functools"

export default function HelloWorld() {
    return <div>hello world!。token = {X_TOKEN}</div>
}
- 登录成功后,页面会显示
hello world!。token = xxxxxxxx...
其他章节请看:
Recommend
About Joyk
Aggregate valuable and interesting links.
Joyk means Joy of geeK