

MacOS within AWS
source link: https://wilsonmar.github.io/macos-aws/
Go to the source link to view the article. You can view the picture content, updated content and better typesetting reading experience. If the link is broken, please click the button below to view the snapshot at that time.

Temporary MacOS instances without the hardware, within AWS EC2 and MacStadium
NOTE: Content here are my personal opinions, and not intended to represent any employer (past or present). “PROTIP:” here highlight information I haven’t seen elsewhere on the internet because it is hard-won, little-know but significant facts based on my personal research and experience.
You can now operate a full M1 macOS machine without the hardware, with all your own brews installed, from almost any tablet. Get a mac laptop temporarily to:
- Run mobile development jobs
- Test a new version (such as Ventura)
- Not lug your macbook everywhere
Bring up a mac in the cloud and others can use it anywhere else in the world. You can’t do that with a physical machine.
And that is scalable – can happen several macs created the same way.
Mac machines within AWS cloud
In 2022 AWS announced availability of Apple Mac mini machines within the AWS EC2 cloud as EC2 instance types. This AWS service is made possible by the AWS Nitro System virtualization infrastructure making “*.metal” server types:
-
mac1.metal are Mac Mini’s with Intel’s 8th generation (Coffee Lake) 3.2 GHz (4.6 GHz turbo) Core i7 x86 processors
-
mac2.metal has Apple’s M1 or M2 ARM (16-core Neural Engine) processors made by Apple using TSMC’s 5nm process (N5)
| Instance | Processor | vCPU cores | GiB memory | Gbps Network | Gbps EBS Bandwidth |
|---|---|---|---|---|---|
| mac1.metal | Intel x86 | 12 | 32 | 10 | 8 |
| mac2.metal | arm64 | 8 | 16 | 10 | 8 |
BLAH: As of this writing, AWS doesn’t yet support M2 processors, which is about 18% faster than M1. PROTIP: M2 can go up to 24GB or 32GB of RAM.
PROTIP: With macs in the cloud, you’re paying for convenience and scalability.
You don’t have to wait for machines to be shipped to you.
Cost?
PROTIP: If it’s only about the money, you might as well buy physical mac minis.
Mac minis from Apple are cheaper than MacBook laptops which have monitors and keyboards:
- $699 for M1 8-core CPU & GPU with 256GB storage
- $699 for M1 8-core CPU & GPU with 512GB storage
- $1099 for i5 6-core CPU & GPU with 512GB storage, 3GHz RAM
PROTIP: AWS’ minimum billing (“required by Apple”) is one day, even if you use a few minutes. That’s why AWS requires the additional mechanism of a dedicated host and unit of billing:
- mac1 US per hour $0.650 x 24 = $15.6/day = $468 per 30-day month
- mac2 US per hour $1.083 x 24 = $25.992/day = $779.76 per 30-day month
PROTIP: Prices are higher in some regions outside the US.
-
mac1 Mumbai per hour $1.14 = $27.36/day = $820.80/month (75% more than US price)
-
mac2 Frankfurt per hour $1.298 = $31.15/day = $934.56/month (20% more than US price)
AWS offers savings up to 44% off On-Demand pricing for a 3-year commitment.
See AWS Documentation.
MacStadium
Compare AWS against MacStadium.com, who have machines only in Atlanta, Dublin, Las Vegas (as of this writing).
Their prices for bare-metal macOS, billed monthly, are a fraction of what AWS charges:
CPU RAM STORAGE MONTHLY HOURLY
- Gen 4 Mac mini (G4B/G4D) Intel i7 3.2GHz 6C 32 GB 512 GB SSD $239/mo = $0.33/hour
-
Gen 4 Mac mini (G4C/G4E) Intel i7 3.2GHz 6C 64 GB 1 TB SSD $299/mo = $0.41/hour
- Gen 5 Mac mini (G5A/G5I) Apple Silicon M1 8 GB 256 GB SSD $132/mo = $0.18/hour
- Gen 5 Mac mini (G5G/G5K) Apple Silicon M1 16 GB 1 TB SSD $171/mo = $0.23/hour
Pick a Region & AWS Availability Zone
When provisioning normal instances in an availability zone that doesn’t support that instance type you get the error ERROR:
Your requested instance type (mac2.metal) is not supported in your requested Availability Zone (us-east-1b). Please retry your request by not specifying an availability zone or choosing us-east-1a, us-east-1c, us-east-1d
PROTIP: mac?.metal instances are NOT in these AWS regions (at time of this writing):
- us-west-1 (Oregon)
- ca-central-1 (Central Canada)
- sa-east-1 (Sao Paolo)
- eu-west-3 (Paris)
- ap-northeast-3 (Osaka)
PROTIP: At time of this writing, 38 “mac metal” (macOS) server type/Availability Zones combinationss (out of 554) are currently available, world-wide within AWS:
us-west-2a	mac1.metal
us-west-2a	mac2.metal
us-west-2b	mac1.metal
us-west-2b	mac2.metal
us-west-2c	mac1.metal
us-west-2c	mac2.metal
us-west-2d	mac1.metal
us-west-2d	mac2.metal

us-east-2b	mac1.metal
us-east-2c	mac1.metal
us-east-2c	mac2.metal

us-east-1a	mac2.metal
us-east-1c	mac1.metal
us-east-1c	mac2.metal
us-east-1d	mac1.metal
us-east-1d	mac2.metal

eu-west-2a	mac1.metal
eu-west-2c	mac1.metal

eu-west-1b	mac1.metal
eu-west-1b	mac2.metal
eu-west-1c	mac1.metal
eu-west-1c	mac2.metal

eu-north-1a	mac1.metal
eu-north-1b	mac1.metal

eu-central-1a	mac1.metal
eu-central-1c	mac1.metal

ap-southeast-2a	mac1.metal
ap-southeast-2b	mac1.metal

ap-southeast-1a	mac1.metal
ap-southeast-1a	mac2.metal
ap-southeast-1b	mac1.metal
ap-southeast-1b	mac2.metal

ap-south-1a	mac1.metal
ap-south-1c	mac1.metal

ap-northeast-2a	mac1.metal
ap-northeast-2d	mac1.metal

ap-northeast-1a	mac1.metal
ap-northeast-1c	mac1.metal
PROTIP: Also notice that mac metal is not in all Availability Zones within a Region.
This: For a list of specific InstanceType, adapted from this Amazon article referencing AWS CLI describe-instance-type-offerings command, which is rotated through a list of AWS Regions:
# Thanks to https://www.middlewareinventory.com/blog/run-aws-cli-commands-on-all-regions-awsall/
# PROTIP: Double-tick used instead of $() caz output to variable are recognized as a single value.
function aws_list_macs {
  export AWS_PAGER=""
  for i in `aws ec2 describe-regions --query "Regions[].{Name:RegionName}" --output text | sort -r`
  do
    export AWS_REGION="${i}"
    if [ `echo "$@"|grep -i '\-\-region'|wc -l` -eq 1 ]; then
      echo "ERROR: -–region flag cannot be used while using awsall"
      break
    fi
    aws ec2 describe-instance-type-offerings \
      --region "${AWS_REGION}" \
      --location-type "availability-zone" \
      --query "InstanceTypeOfferings[*].[Location, InstanceType]" \
      --filters "Name=instance-type,Values=${AWS_INSTANCE_TYPE}" \
      --output text  | sort
  done
  trap "break" INT TERM
}
aws_list_macs
–query was constructed based on https://docs.amazonaws.cn/en_us/cli/latest/userguide/cli-usage-filter.html
| wc -l returns a count rather than a list.
grep “metal” reduced 554 entries to 39 in the response
echo -e “\n” is not used because it’s too many blank lines.
Get yours now
You have two ways to get a mac*.metal instance:
- Option A: Use AWS GUI Manually (not preferred, but good for learning)
- Option B: Use CLI (for fast and easy)
Option A: Use AWS GUI Manually
Using the AWS Mananagement Console UI from your laptop:
- Get AWS credentials.
-
At the top upper-right, select a Region (“us-east-1”, us-east-1, or us-east-2) that supports a mac*.metal among its Availability Zones.
PROTIP: Do not use a region which does not support MacOS instances.
Security Group & pem file
- Create a folder where you will store access credentials, such as ~/projects/macos-aws
- PROTIP: As with other instance types, define a Security Group using port 22 protocol TCP source your laptop’s IP address (rather than 0.0.0.0/0 for just anyone, which is unsafe).
-
Create a pem key (such as “malx-us-east-1a.pem” in the example below) and save it to the folder.
- In Terminal: chmod 0400 malx-us-east-1a.pem
-
Define an IAM role.
Dedicated Hosts
- If you don’t see the left menu, click the “hamburger” icon at the upper-left corner.
- Select Dedicated Hosts from the left menu. (You cannot “Launch instance” with macs)
- Click “Allocate Dedicated Host”.
- Type a Name.
- For Instance family, select “mac2”.
- For Instance type, select “mac2.metal”.
- For Availability Zone, select one, such as “us-west-2a”.
- Ignore the other settings providing default values.
- Click “Allocate”.
- Hightlight and copy your Host ID (such as “h-04c3a0f681de175c8”) and Availability Zone (such as “us-west-2a”).
- VERIFY: Scroll down to see “Available”.
### Launch into dedicated Host
- Pull down the Actions list to select “Launch instance(s) onto host”.
That puts you in the “Launch an instance” UI.
- Select the “macOS” icon for a list of instance types for the region. Example for Oregon:

The “macOS” icon would NOT appear if the region chosen does not carry mac1 server types.
- If you don’t want the latest MacOS operating system (Monterey at time of this writing), click the down arrow icon to select the previus macOS release.
- In the Architecture pull-down, selec “64-bit (Mac-Arm)” for Mac2.
- Highlight and copy the AMI ID (for example, “ami-0a413e26da8676cb7” for “(Mac-Arm)” in us-west-2).
WARNING: The AMI ID changes when there is any change to operating system or other components.
- For Key pair (login), click “Create new key pair” if you haven’t already created a pem file.
- Create security group to Allow SSH traffic from “My IP”.
- In Advanced details, you cannot check “Request Spot instances”.
- Under “Tenancy”, select “Dedicated host - launch this instance on a dedicated Host”.
“The selected instance type must be launched onto a Dedicated Host. To continue, choose a Dedicated Host that has been allocated for this instance type.
- Click the “Next: Storage” to
- increase the size of the Root Volume from a default of 60 to 300 GiB (or whatever your capacity analysis runs reveal).
-
Select Volume Type:
- Magnetic (Standard)
- General Purpose SSD (gp2)
-
General Purpose SSD (gp3)
- Provisional IOPS SSD (io1)
- Provisional IOPS SSD (io2) on new Nitro-based Amazon EC2 instances using the Scalable Reliable Datagram (SRD) networking protocol
Provisioned IOPS (Input-Output Per Second) SSD volumes are designed for time-sensitive sustained I/O for sub-millisecond latency in database retrieval speed. Latency is a measurement of time it takes for individual packet to be transferred.
An example of pricing for 100 GB for a month at 1000 IOPS is the total of:
- Cost of EBS-optimized EC2 instance
- Number of 100 GB allocated
- Fixed charge for the IOPS level selected during that month (rather than the variable millions of I/O requests for standard volumes).
Throughput is a measurement of how much (Megabytes of) sequential data (such as a video file) can be transferred per second.
Up to 6 TiB (Terrabytes) can be selected for mac instance types.
PROTIP: Mac server types can obtain a maximum throughput of up to 1,000 MiB/s (Megabytes per second) by specifying Provisioned IOPS SSD (Solid State Drive) volumes of up to 64,000 IOPS (using I/O in 16 KiB blocks). This is illustrated by the orange line reaching the upper-right:

The graph illustrates the impact of both IOPS selection and the size of I/O blocks.
PROTIP: The blue line illustrates the “worst case” maximum throughut of 500 MiB/s when 2,000 IOPs is specified and using larger 256 KiB blocks.
BTW: Mac instances are not among EC2 instance types C7g, R5b, X2idn, and X2iedn which can use io2 Block Express volumes which provide the maximum throughput from any instance at 4,000 MiB/s (using smaller 16 KiB I/O blocks) when 256,000 IOPS is selected. See https://docs.aws.amazon.com/AWSEC2/latest/UserGuide/provisioned-iops.html
PROTIP: Analysis of actual and simulated peak usage is done to reveal the IOPS level needed. Specifying higher IOPS for increased capacity in many cases does not improve latency. Selection of IOPS and instance type sets a fixed expenditure per month regardless of how much was actually used.
-
Add tags per your administrator’s guidelines and examples.
Usage reports do not distinguish between io2 Block Express volumes and io2 volumes. So add tags to identify the volume used is a io2 Block Express volume.
Launch
- Click the blue “Launch” for “Success! Successfully initiated launch of instance”.
- Click “Instances” and scroll down to your Instance ID.
-
Press command+R to refresh until “Status check: Initializing” changes to “passed”. ???
CAUTION: Do not click “Launch instances” in the Instances UI.
-
Return to “Dedicated Hosts”.
Connect
- Click “Connect to instance”.
-
Click the orange “Connect” which creates a new browser window.
FIXME:
Failed to connect to your instance

EC2 Instance Connect is unable to connect to your instance. Ensure your instance network settings are configured correctly for EC2 Instance Connect. For more information, see Set up EC2 Instance Connect at https://docs.aws.amazon.com/AWSEC2/latest/UserGuide/ec2-instance-connect-set-up.html. - After Instance State is “Running”,
- Highlight the Public IPv4 address to your Clipboard.
- Proceed to Connect to AWS MacOS below.
Option B: Use AWS CLI
TODO: Daniel and I are working to get you a macOS desktop on AWS, by running a single script command: Here’s what it does:
- Install awscli and other utilities needed.
- Identify an available “mac*.metal” server type within a desired Availability Zone.
- Invoke Terraform commands to automatically:
- Create a Dedicated Host instance in AWS
- Create EC2 instance
- Install XCode command utilities, brew; use brew to install utilities, run dotfiles to configure macOS; define aliases, etc.
- Create EC2 images for each region (if requested)
- Remove files that don’t need to be left over.
References:
- https://aws.amazon.com/blogs/aws/use-amazon-ec2-m1-mac-instances-to-build-test-macos-ios-ipados-tvos-and-watchos-apps/
In a Terminal:
-
Download the malx-us-west-2.pem from the keypair (from above).
-
Define your AWS Region:
export AWS_REGION="us-west-2"
Using Terraform Dedicated Host Module
The easiest way to create an instance (repeatedly) is using automation based on Terraform.
To create for yourself:
- A dedicated_host_id
- A mac_ami_id for the region and Architecture, such as “64-bit (Mac-Arm)” for Mac2.
In a Terminal:
-
Fork to your GitHub account the “dedicated-host” Terraform module created by Daniel Dias (of Berlin, Germany):
https://github.com/DanielRDias/terraform-aws-dedicated-host
This repo makes use of a module. But originally
git clone it and cd into the download.
It references here
-
View the .gitignore file.
Notice it has “stage.auto.tfvars.example” and “stage.auto.tfvars” along with other specifications of files and folders not to upload to GitHub.
-
Rename the stage.auto.tfvars.example file to stage.auto.tfvars.
mv stage.auto.tfvars.example stage.auto.tfvars
-
Edit file stage.auto.tfvars to your preference, such as:
instance_type     = "mac2.metal"
availability_zone = "us-east-1a"
REMEMBER: Some instance_type values are not available in some Availability Zones world-wide.
TODO: Logic to switch if not available? CDK for this? Reserved instance?
What mac you already have?
If you want to replicate a specific physical macOS laptop you have:
-
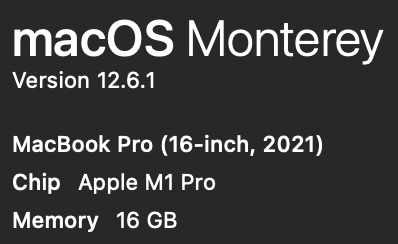
Press Shift+Command+/ for the Apple menu. Click on the Apple logo, then “About This Mac”

-
In the pop-up, notice whether it says “M1” or “M2”, and the amount of memory (16 GB?):
-
Navigate to (after creating) the folder where you add GitHub repos.
-
Obtain the repo (only the main branch at –depth 1):
git clone [email protected]:DanielRDias/terraform-aws-mac.git --depth 1
cd terraform-aws-mac
-
Navigate to one of the folders under examples folder:
cd examples
   cd Monterey_M2
### Config for your AWS
In a Terminal program
- Obtain the subnet-id value for the region you have been set to use.
aws ec2 describe-subnets --output json
{
    "Subnets": [
        {
            "AvailabilityZone": "us-west-2d",
            "AvailabilityZoneId": "usw2-az4",
            "AvailableIpAddressCount": 4091,
            "CidrBlock": "172.31.48.0/20",
            "DefaultForAz": true,
            "MapPublicIpOnLaunch": true,
            "MapCustomerOwnedIpOnLaunch": false,
            "State": "available",
            "SubnetId": "subnet-0872bb332f1aab798",
            ,,,
-
Highlight the value for “SubnetId:”, such as subnet-0872bb332f1aab798.
-
Edit file main.tf to paste the value:
subnet_id = "subnet-0872bb332f1aab798"
- In main.tf, make sure that the AWS Region specified is the same as the Subnet’s AvailabilityZone
provider "aws" {
  region = "us-east-1"
}
-
Also in maint.tf, adjust AWS tags to satisfy your company’s standards, such as project code, etc.
-
Consider other specifications that should be specified in the Inputs section of the README:
- host_recovery (disabled by default)
- Security Group (to enable only your IP address to access)
-
PROTIP: In your .bash_profile or .zshrc, define quick keys such as:
alias tfp="terraform plan"
alias tfv="tfsec"
alias tfa="terraform apply -auto-approve"
alias tfs="terraform show"
alias tfd="terraform destroy"
Run the Terraform
-
Make sure you’re connected to AWS (file ~/.aws/credentials).
-
Initialize Terraform folder:
terraform init
Example expected response:
Initializing the backend... Initializing provider plugins... - Finding latest version of hashicorp/aws... - Installing hashicorp/aws v4.37.0... - Installed hashicorp/aws v4.37.0 (signed by HashiCorp) Terraform has created a lock file .terraform.lock.hcl to record the provider selections it made above. Include this file in your version control repository so that Terraform can guarantee to make the same selections by default when you run "terraform init" in the future. Terraform has been successfully initialized! You may now begin working with Terraform. Try running "terraform plan" to see any changes that are required for your infrastructure. All Terraform commands should now work. If you ever set or change modules or backend configuration for Terraform, rerun this command to reinitialize your working directory. If you forget, other commands will detect it and remind you to do so if necessary. -
Create a run plan file:
terraform plan
-
Verify for vulnerabilities (after installing tfsec), such as:
tfsec
TODO: I’m looking into why these messages are appearing.
Result #1 HIGH Instance does not require IMDS access to require a token ─────────────────────────────────────────────────────────────────────────────────────────────────── terraform-aws-modules/ec2-instance/aws/Users/wilsonmar/github-wilsonmar/terraform-aws-mac/examples/Monterey_M2/.terraform/modules/mac.ec2_instance/main.tf:106 via main.tf:5-16 (module.mac) ─────────────────────────────────────────────────────────────────────────────────────────────────── 19 resource "aws_instance" "this" { .. 106 [ http_tokens = lookup(metadata_options.value, "http_tokens", "optional") ("optional") ... 154 } ─────────────────────────────────────────────────────────────────────────────────────────────────── ID aws-ec2-enforce-http-token-imds Impact Instance metadata service can be interacted with freely Resolution Enable HTTP token requirement for IMDS More Information - https://aquasecurity.github.io/tfsec/v1.28.0/checks/aws/ec2/enforce-http-token-imds/ - https://registry.terraform.io/providers/hashicorp/aws/latest/docs/resources/instance#metadata-options ─────────────────────────────────────────────────────────────────────────────────────────────────── Result #2 HIGH Root block device is not encrypted. ─────────────────────────────────────────────────────────────────────────────────────────────────── terraform-aws-modules/ec2-instance/aws/Users/wilsonmar/github-wilsonmar/terraform-aws-mac/examples/Monterey_M2/.terraform/modules/mac.ec2_instance/main.tf:19-154 via main.tf:5-16 (module.mac) ─────────────────────────────────────────────────────────────────────────────────────────────────── 19 ┌ resource "aws_instance" "this" { 20 │ count = local.create && !var.create_spot_instance ? 1 : 0 21 │ 22 │ ami = try(coalesce(var.ami, data.aws_ssm_parameter.this[0].value), null) 23 │ instance_type = var.instance_type 24 │ cpu_core_count = var.cpu_core_count 25 │ cpu_threads_per_core = var.cpu_threads_per_core 26 │ hibernation = var.hibernation 27 └ .. ─────────────────────────────────────────────────────────────────────────────────────────────────── ID aws-ec2-enable-at-rest-encryption Impact The block device could be compromised and read from Resolution Turn on encryption for all block devices More Information - https://aquasecurity.github.io/tfsec/v1.28.0/checks/aws/ec2/enable-at-rest-encryption/ - https://registry.terraform.io/providers/hashicorp/aws/latest/docs/resources/instance#ebs-ephemeral-and-root-block-devices ─────────────────────────────────────────────────────────────────────────────────────────────────── -
Apply the plan file created:
terraform apply -auto-approve
-
If it ran well, you should see something like:
instance_type     = "mac2.metal"
availability_zone = "us-east-1a"
If you instead see a message like this:
module.mac.module.host.aws_ec2_host.this: Creating...
╷
│ Error: allocating EC2 Host: HostLimitExceeded: Your request for accessing resources in this region is being validated, and you will not be able to launch additional resources in this region until the validation is complete. We will notify you by email once your request has been validated. While normally resolved within minutes, please allow up to 4 hours for this process to complete. If the issue still persists, please let us know by writing to [email protected] for further assistance.
│ 	status code: 400, request id: cf24ceed-6ef5-4f04-be1a-8aaebae6e374
│
│   with module.mac.module.host.aws_ec2_host.this,
│   on .terraform/modules/mac.host/main.tf line 5, in resource "aws_ec2_host" "this":
│    5: resource "aws_ec2_host" "this" {
TODO: I’m looking into the reason for the above message.
-
Allocate hosts:
aws ec2 allocate-hosts --instance-type="mac1.metal" \
--quantity=1 \
--region="us-west-2" --availability-zone="us-west-2b" \
--auto-placement="on" --host-recovery="off"
Auto-placment = on preserves the Dedicated Host for targeted launch requests, allow untargeted (no host ID specified) requests to succeed.
When Host recovery = on, it automatically restarts instances to a new replacement host if failures are detected on the Dedicated Host.
Response:
{ "hostIds": [ "h-043de1b44a0374973" ] } -
View file mapping.json for –block-device-mappings
[ { "DeviceName": "/dev/sda1", "Ebs": { "VolumeSize": 300, "VolumeType": "gp3" } } ] -
Run the instance using the image-id associated with the region selected:
aws ec2 run-instances --region="${AWS_REGION}" \
--image-id="ami-04fdffdf922f4de8e" \
--key-name="malx-us-west-2" \
--block-device-mappings file://mapping.json \
--associate-public-ip-address \
--placement="Tenancy"="host"
Connect to AWS MacOS
-
As with other instance types, use SSH to connect to your Mac instance :
ssh -i malx-us-west-2.pem [email protected]
-
Once on the Mac prompt:
sudo /System/Library/CoreServices/RemoteManagement/ARDAgent.app/Contents/Resources/kickstart \
-activate -configure -access -on \
-configure -allowAccessFor -allUsers \
-configure -restart -agent -privs -all
exit
-
Disconnect and reconnect to enable the GUI.
ssh -L 5900:localhost:5900 -i malx-us-west-2.pem [email protected]
-
Press command+spacebar for Spotlight to search for the screen-sharing app.
-
Login using your password.
-
If you selected a larger volume (above), VIDEO:
PDISK=$(diskutil list physical external | head -n1 | cut -d' ' -f1 )
sudo diskutil repairDisk $PDISK
Resize
-
Resize (which takes a few minutes):
APFSCONT=$(dikutil list physical external | grepApple_APFS | tr -s ' ' | cut -d ' ' -f8 )
sudo diskutil apfs resizeContainer $APFSCONT 0
Backups and Restore
-
Consider using my mac-setup repo to install all your utilities you want on a new Mac with a single command:
zsh -c "$(curl -fsSL https://raw.githubusercontent.com/wilsonmar/mac-setup/main/mac-setup.zsh)" -v
-
Take a snapshot backup at volume or instance level to copy across regions or accounts to create new AMI machine images.
macOS Jenkins & Kubernetes
-
VIDEO: macOS Workers with Kubernetes and Jenkins
Orka orchestrates macOS in a cloud environment using Kubernetes technology on genuine Apple hardware.
Anka is designed specifically for Mac-based CI workflows and easily integrates with existing container-based DevOps CI pipelines.
More on MacOS
This is one of a series on MacOS:
More on Cloud Computing
This is one of a series on cloud computing:
Others must know: please click to share:
MacOS within AWS was published on January 07, 2023.
Recommend
-
80
-
49
Serving SwaggerUI in Go
-
39
Introduction Interface Builder (IB) has been available on iOS for several years now. It’s often the center of debates when teams set out on new projects. Should you use programmatic layout (PL) or IB? There are...
-
69
BGP prefix hijacking is a persistent threat against Internet organizations, attributed to a lack of authorization and authentication mechanisms in the inter-domain routing system. In
-
45
CSS 的伪类选择器和伪元素选择器,让 CSS 有了更为强大的功能。 伪类大家听的多了,伪元素可能听到的不是那么频繁,其实 CSS 对这两个是有区分的。 有个错误有必要每次讲到伪类都提一下,有时你会发现伪类元素使用了两个冒号 (::) 而不是一个冒号 (:
-
54
-
81
arm_now is a qemu powered tool that allows instant setup of virtual machines on arm cpu, mips, powerpc, nios2, x86 and more, for reverse, exploit, fuzzing and programming purpose.
-
59
O ne of the main problems of machine learning part is installing software because we need to research algorithm,...
-
15
Connecting to Kibana Within an AWS VPC When you use the managed Elasticsearch service on AWS, you usually choose an encrypted connection (via KMS-managed keys), which means you can’t use just any t...
-
4
Getting Started with AWS Amplify on macOS by Kyle Lee | on 09 NOV 2022 | in
About Joyk
Aggregate valuable and interesting links.
Joyk means Joy of geeK