

11 Advanced Figma Tips & Tricks I bet you didn’t know about.
source link: https://uxplanet.org/11-advanced-figma-tips-tricks-i-bet-you-didnt-know-about-a3323d213dc1
Go to the source link to view the article. You can view the picture content, updated content and better typesetting reading experience. If the link is broken, please click the button below to view the snapshot at that time.

11 Advanced Figma Tips & Tricks I bet you didn’t know about.
Make the most out of Figma.
It’s easy to get caught up in the day-to-day grind of creating designs and meeting deadlines, so much so that sometimes there is no time left to explore and reflect on your workflow.
But it’s important to take a step back and evaluate it from time to time. Doing so can pay dividends and make your design process even more efficient.
With this in mind, in this article, I’ll share some of my favorite Figma tips and tricks that I think every designer should know about.
Let’s dive in!
It’s important to note that the keyboard shortcuts mentioned in the article are for macOS. If you are using Windows, you must use the corresponding keyboard shortcuts for your operating system.
1. Quick crop
Let’s say you’re designing a website and want to crop multiple product pictures to fit a specific area on your page.
One option is to use the masking tool to create a precise image crop. This can be time-consuming, but it can be helpful if you need to create a very specific crop.
However, if you want to crop an image quickly, you can simply use the keyboard shortcut “option + double click” to promptly crop the image. This can save you time and make the cropping process much faster and easier.
This allows you to focus quickly on the parts of an image you need to work on without spending a lot of time fiddling with the masking tool.
2. Resize without constraints
Working on a frame that you cannot freely resize is extremely frustrating. One of the challenges you may encounter when working with frames in Figma is that the objects within the frame can move or scale in unexpected ways when you resize the frame. This can be annoying and make it difficult to achieve the layout you want.
However, you can use a simple trick to prevent this from happening: ignore constraints while resizing the frame.
Hold down the “command” key on your keyboard while you drag and resize the frame. This will allow you to resize the frame without affecting the position or scale of the objects within it.
Or you can also hold Command + Option, and the resizing will be performed proportionally.
3. Tidy-up
One of the challenges of working in Figma is keeping your designs organized and tidy. Fortunately, Figma has a useful Tidy Up feature that can help you quickly and easily clean up your designs.
To use Tidy Up is to use the keyboard shortcut [⌃] + [⌥] + [T]. This allows you to quickly tidy up your designs without using your mouse.
You can also click on the Tidy Up icon in the Properties Panel, located on the far right of the alignment section.
4. Detach multiple instances.
One of the challenges you might face when working in Figma is dealing with items with many nested instances. This can make it difficult to change the design without affecting the nested instances, which can be frustrating.
However, a handy feature in Figma allows you to quickly and easily detach all nested instances from an item without losing their settings.
To use it, open your quick search menu by pressing “cmd” + “/” on your keyboard and search for “instances.” This will include a list of all the instances in your design, including nested ones.
From there, you can either detach all of the instances or just the nested ones. Detaching the instances will remove them from the parent item, but they will retain their settings, such as frames and auto-layout. This means you can change the parent item without affecting the detached instances, saving you time and effort.
5. Hand Positioning
One of the best ways to set up your hand positioning in Figma is to keep your thumb on the “Command” key. This is the most important button in Figma, and it’s the key you’ll use most frequently when working with the program.

You can use the “Command” key as a fulcrum or pivot point for your thumb and then use your other fingers to reach the other keys you need. For example, your index finger can reach keys like “Y,” “H,” and “N,” while your ring finger can move down to the “Option” key. Your pinky can move down to the “Shift” or “Tab” keys, depending on what you need to use.
It can take a little bit of practice to get used to, but once you do, you’ll be able to execute shortcut commands and navigate the program more quickly and easily.
6. Select Similar layers
At times, there may be a need to select all objects on a page with a shared property, such as color or size, to change all of them at once. This can be a valuable technique for quickly and easily editing multiple objects on a page.
To use this feature, go to the “Edit” menu and select “Select all with the same [property].” For example, if you want to select all the objects on your page with the same color, you would choose “Select all with the same Fill Color.” This will select all the objects on your page with the same property, making it easy to change them all at once.
Remember that the “Edit” menu doesn’t have an option to “Select all with the same Name.” However, a powerful plugin called Similayer can help you do this.
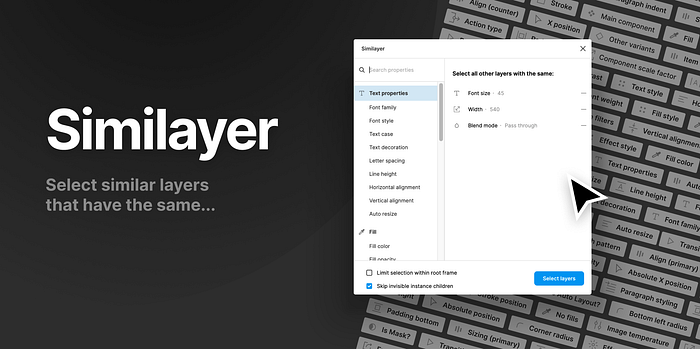
Similayer Figma Plugin
7. Figma Best Practice: One screen = One frame
One of the most important things to keep in mind when working in Figma is to use frames to organize your screen content. This means that each screen in your design should be contained within its own frame, and all of the elements on that screen should be placed inside that frame.
The benefits of this approach are numerous. First, it keeps your canvas clean and organized, which makes it easier to move things around, resize elements and export screens. Second, it allows you to quickly check the responsiveness of your design, as you can see how the elements within a frame will adjust to different screen sizes. Third, it makes it easier to know what is what, as you can clearly see the boundaries of each screen and the elements within it.
To create a frame in Figma, select the elements on your screen that you want to include in the frame, right-click, and select “Frame selection” from the menu. Alternatively, you can use the keyboard shortcut CMD+OPT+G to create a frame around your selection.
When you want to duplicate a screen, it’s important to select the entire frame (by clicking on its name) and then duplicate it. This will ensure that all of the elements on that screen are included in the duplicated frame.
8. How to Reattach Frames to Components?
If you’re dealing with “dead frames” — frames that are no longer attached to a component. Instead of manually reattaching each instance, you can use the “Master” plugin to quickly and easily reattach all dead frames.
Master Figma Plugin
To use the plugin, first install it by clicking on the provided link. Then, follow these steps:
- Select an instance of the component you want to use for your dead frames. Don’t select the dead frames yet.
- Run the “Master” plugin with the option “Save or Attach to Saved Master.”
- Select the frame(s) you want to reattach.
- Run the “Master” plugin again with the option “Save or Attach to Saved Master.”
And that’s it! Your dead frames will now be reattached to the selected component, making it easy to edit and update them as needed.
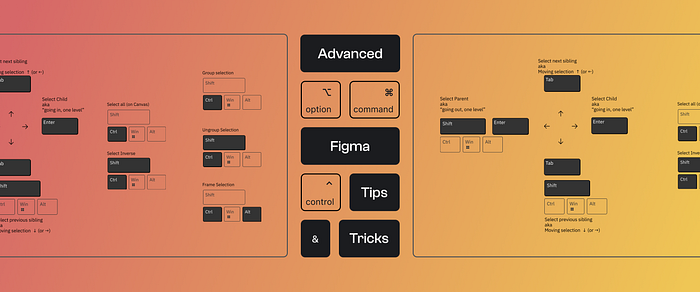
9. Select Nested Objects
This allows you to quickly and easily select objects on your canvas, regardless of their position in the hierarchy.
To use this feature, hover your cursor over the object you want to select. If the object is a frame or group, you can select it by clicking on the empty space around the object’s name. If the object is inside a frame or group, you can select it by hovering your cursor over it and clicking on it.
Another great thing about this feature is that it can multi-select objects. To do this, hold down the “command” key on your keyboard and lick and drag(or click ‘Shift’) over the objects to select.
10. Make styles out of images.
To save an image in Figma, select the image on your canvas and click on the “Styles” tab in the right-hand panel. From there, click on the “Create New Style” button and give your image a name. This will save the image as a style you can access and use whenever you need it.
One thing to remember when using this feature is that the image’s resolution can play a role in how it looks when you use it in your designs. For example, if you save a low-resolution image as a style and then use it in a large area of your design, it might look pixelated or blurry.
11. When setting the line height, use %
As we know, the line height is measured in px or pt, which can be frustrating for designers who prefer to use more generic units like the ones used in CSS.
Let’s say you want to use a line-height value like “2.5”, and you can’t set it using CSS units. However, you can use percentages (%) instead. This also allows you to change the font size without affecting the line height.
For example, if you want to use a line height of 2.5 with a font size of 10, you would calculate it as follows: 10 * 250% = 25px/pt.
It’s worth noting that even though you can set the line height using percentages in Figma, it will still be displayed in pixels when you use the inspect mode. However, this shouldn’t affect the way your design looks or behaves.
That’s it, folks! I hope you found this piece helpful. Additionally, you can checkout the complete list of Figma Shortcuts below.
See you in the next one!
Recommend
About Joyk
Aggregate valuable and interesting links.
Joyk means Joy of geeK