

Publish to Power BI from Microsoft Excel
source link: https://learn.microsoft.com/en-us/power-bi/connect-data/service-publish-from-excel
Go to the source link to view the article. You can view the picture content, updated content and better typesetting reading experience. If the link is broken, please click the button below to view the snapshot at that time.

Publish to Power BI from Microsoft Excel
- Article
- 06/06/2022
- 4 minutes to read
In this article
With Microsoft Excel 2016 and later, you can publish your Excel workbooks directly to your Power BI workspace, where you can create highly interactive reports and dashboards based on your workbook’s data. You can then share your insights with others in your organization.
When publishing a workbook to Power BI, there are few things to consider:
- The account you use to sign in to Office, OneDrive for Business (if using workbooks saved there), and Power BI must be the same account.
- You cannot publish an empty workbook, or a workbook that doesn’t have any Power BI supported content.
- You cannot publish encrypted or password protected workbooks, or workbooks with Information Protection Management.
- Publishing to Power BI requires modern authentication be enabled (default). If disabled, the Publish option is not available from the File menu.
- Publishing to Power BI from Excel Desktop is not supported for sovereign clouds.
Publish your Excel workbook
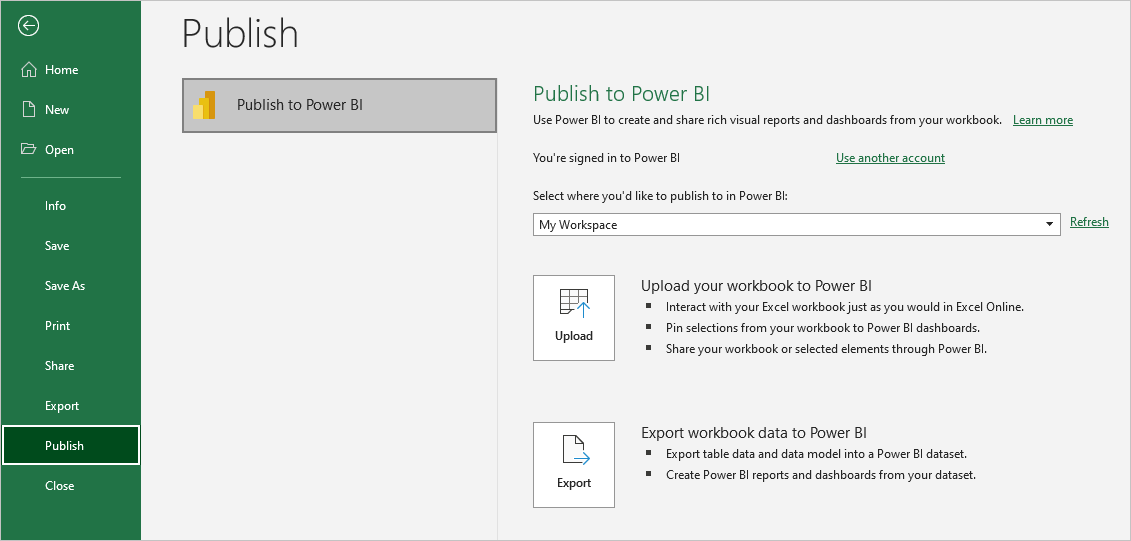
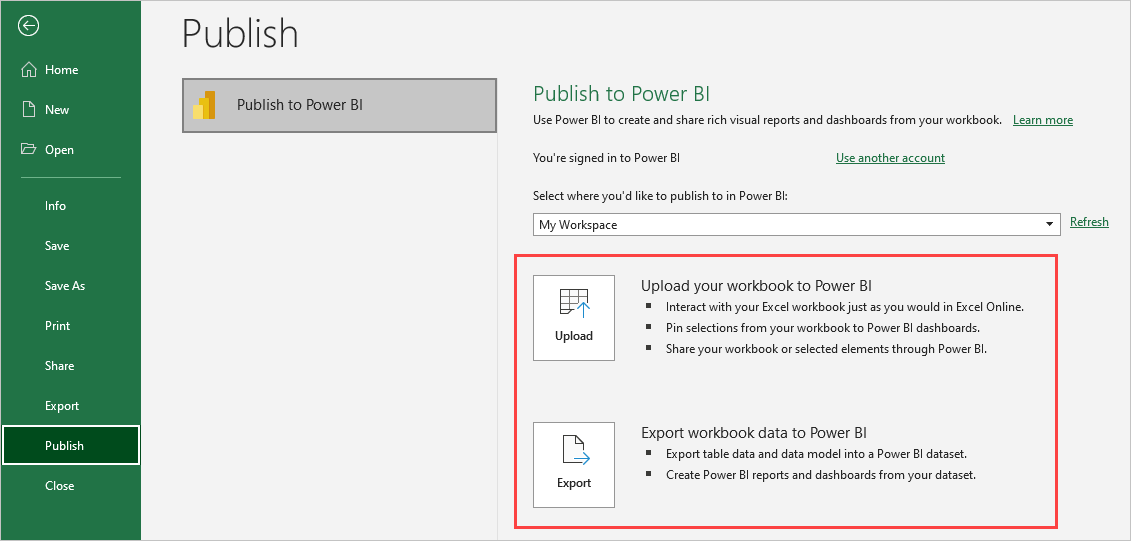
To publish your Excel workbook, in Excel, select File > Publish and select either Upload or Export.
If you Upload your workbook to Power BI, you can interact with the workbook just as you would interact using Excel Online. You can also pin selections from your workbook onto Power BI dashboards, and share your workbook, or selected elements, through Power BI.
If you select Export, you can export table data and its data model into a Power BI dataset, which you can then use to create Power BI reports and dashboards.
Local file publishing
Excel supports publishing of local Excel files. They do not need to be saved to OneDrive for Business or SharePoint Online.
Important
You can only publish local files if you're using Excel 2016 (or later) with a Microsoft 365 subscription. Excel 2016 standalone installations can Publish to Power BI, but only when the workbook is saved to OneDrive for Business or SharePoint Online.
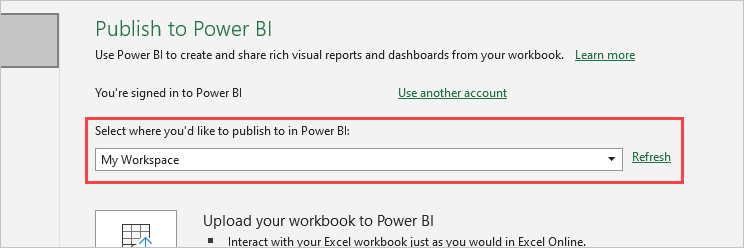
When you select Publish, you can select the workspace to which you want to publish. If your Excel file resides on OneDrive for Business, you can only publish to your My Workspace. If your Excel file resides on a local drive, you can publish to My Workspace or a shared workspace to which you have access.
Two options on how to get your workbook into Power BI.
Once published, the workbook content you publish is imported into Power BI, separate from the local file. If you want to update the file in Power BI, you must publish the updated version again, or you can refresh the data by configuring a scheduled refresh, on the workbook, or on the dataset in Power BI.
Publishing from a standalone Excel installation
When publishing from a standalone Excel installation, the workbook must be saved to OneDrive for Business. Select Save to Cloud and choose a location in OneDrive for Business.
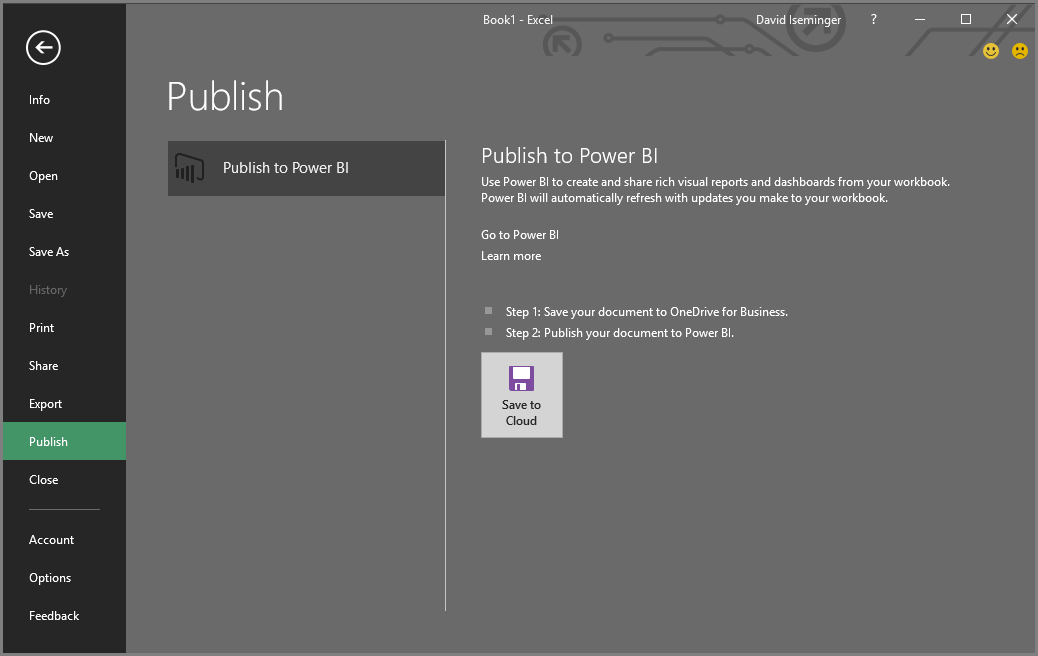
Once your workbook is saved to OneDrive for Business, when you select Publish, you have two options to get your workbook into Power BI, Upload or Export:
Upload your workbook to Power BI
When you choose the Upload option, your workbook will appear in Power BI just like it would in Excel Online. But, unlike Excel Online, you’ll have some options that enable you to help you pin elements from your worksheets to dashboards.
You can’t edit your workbook in Power BI. If you need to make some changes to the data, you can select Edit then choose to edit your workbook in Excel Online or open it in Excel on your computer. Any changes you make are saved to the workbook on OneDrive for Business.
When you Upload, no dataset is created in Power BI. Your workbook will appear in Reports, in your workspace nav pane. Workbooks uploaded to Power BI have a special Excel icon, identifying them as Excel workbooks that have been uploaded.
Choose the Upload option if you only have data in worksheets, or you have PivotTables and Charts you want to see in Power BI.
Using Upload from Publish to Power BI in Excel is a similar experience to Get Data > File > OneDrive for Business > Connect, Manage and View Excel in Power BI from Power BI in your browser.
Export workbook data to Power BI
When you choose the Export option, any supported data in tables and/or a data model are exported into a new dataset in Power BI. You can continue editing your workbook. When your changes are saved, they are synchronized with the dataset in Power BI, usually within about an hour. If you need more immediate updates, you can select Publish again from Excel, and your changes are exported immediately. Any visualizations in reports and dashboards are updated, too.
Choose the Publish option if you’ve used the Get & Transform data or Power Pivot features to load data into a data model.
Using Export is similar to using Get Data > File > OneDrive for Business > Export Excel data into Power BI from Power BI in your browser.
Publishing
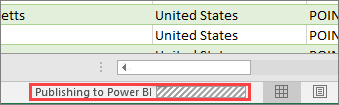
When you choose either option, Excel signs in to Power BI with your current account, then publishes your workbook to your Power BI workspace. You can monitor the status bar in Excel to see how the publish process is progressing.
When complete, you can go to Power BI directly from Excel.

Next steps
Excel data in Power BI
More questions? Try the Power BI Community
Recommend
About Joyk
Aggregate valuable and interesting links.
Joyk means Joy of geeK