

Secure AWS AppSync with IAM permissions using the AWS CDK
source link: https://aws.amazon.com/blogs/mobile/secure-aws-appsync-with-iam-permissions-using-the-aws-cdk/
Go to the source link to view the article. You can view the picture content, updated content and better typesetting reading experience. If the link is broken, please click the button below to view the snapshot at that time.

Secure AWS AppSync with IAM permissions using the AWS CDK
by Michael Liendo | on 09 NOV 2022 | in AWS Amplify, AWS AppSync, AWS Cloud Development Kit, Best Practices, Customer Solutions, Developer Tools, Front-End Web & Mobile, Technical How-to | Permalink | Comments | Share
In a previous post, we explored how a public API Key for AWS AppSync provides a simple way of allowing access to resources, however, it does come with the following tradeoffs:
- Expiring after a certain amount of time.
- The key is passed on the
x-api-keyheader of the request. Making it easy for bad actors to abuse the API. - Not having a concept of roles, or differentiating permissions.
When configuring an Amazon Cognito identity pool with an unauthenticated role, we can solve for the above concerns while still allowing guests to interact with our backend services without needing a login mechanism.
This post will provide an overview of AWS IAM permissions as they relate to Cognito identity pools. Also, we’ll learn how to configure an AppSync API to use IAM permissions in the CDK, thus allowing a frontend application to make protected queries and mutations.
Understanding IAM permissions
To best grasp how and when IAM permissions are useful, we have to understand some of the underlying pieces that it takes to get them to work.
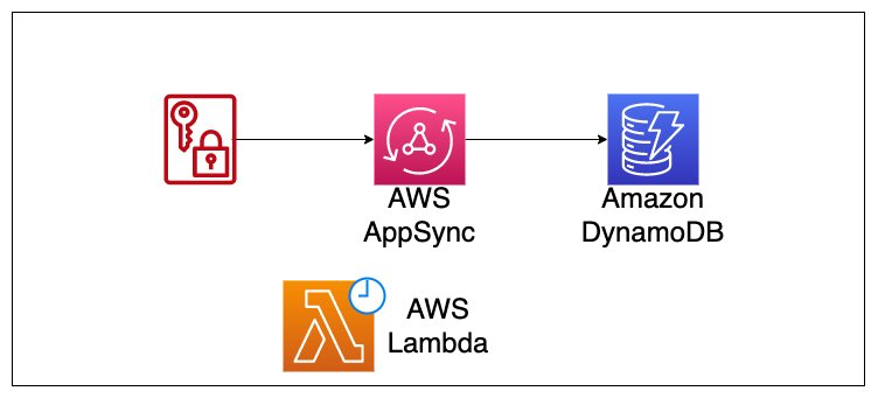
For a user or AWS service to talk to another service, IAM permissions need to grant that action.
This could be a AWS Lambda function calling an Amazon DynamoDB API or as we’ll see in this post, a guest user wanting to call our AppSync API.
The point is if a guest user wants access to our data, but doesn’t provide an API Key and isn’t part of our userpool, we can still authorize them by providing short-lived, temporary credentials. However, in order to do that, we’ll have to set up an Amazon Cognito identity pool.
Where a Cognito user pool serves as a directory for who has authenticated in our application, a Cognito identity pool allows us to determine what kind of authorization they have.
To expand on this, user pools enable the following access patterns:
- Getting data for all logged-in users
- Getting data for users in a particular group
- Getting data for a single user, based on their ID.
The access token from Cognito provides this information as claims.
In contrast, Cognito identity pools have a concept of users or services and each makes use of either an unauthenticated or authenticated role.
While at face value this may seem limited, the benefit is that both types of identities can be given access to our services.
Project Setup
As mentioned, this project will make use of the same backend repository from the previous blog post. To continue from that project, run the following command:
git clone [email protected]:focusOtter/cdk-appsync-guests.git && cd $_ && git checkout guest-iam-permissions
Once in the project directory, install the necessary packages by running the following command:
npm install
This project is set up such that it contains an API that scans a User table for user information. That data is inserted via a Lambda function that runs on a CRON schedule.
In addition, install the dependencies needed for our Lambda function by changing into its folder and again running npm install.
With our project setup, open up the project in your code editor and begin working in the lib/guest-user-backend-stack.ts file.
Setting up Amazon Cognito for authentication
This project makes use of the L2 constructs for creating an identity pool. This package is not yet part of the official CDK library. This package can be viewed in your
package.jsonfile.
Configuring a frontend application to make use of a Cognito identity pool requires a user pool to be created. As such, an added benefit of this solution is that if we needed to have customers sign in do a certain part of our frontend, doing so becomes trivial. We’ll discuss setting that up in a future post.
Begin by importing the modules that we’ll be needing. At the top of your file, add the following:
import { AccountRecovery, UserPool, UserPoolClient, VerificationEmailStyle } from 'aws-cdk-lib/aws-cognito'

import {
    IdentityPool,
    UserPoolAuthenticationProvider,
} from '@aws-cdk/aws-cognito-identitypool-alpha'
Next, directly underneath the call to super(), paste in the following to create your user pool:
const userPool = new UserPool(this, 'UserDemoPool', {
  selfSignUpEnabled: true,
  accountRecovery: AccountRecovery.PHONE_AND_EMAIL,
  userVerification: {
    emailStyle: VerificationEmailStyle.CODE,
  },
  autoVerify: {
    email: true,
  },
  standardAttributes: {
    email: {
      required: true,
      mutable: true,
    },
  },
})
const userPoolClient = new UserPoolClient(this, 'UserDemoPoolClient', {
  userPool,
})
const identityPool = new IdentityPool(this, 'IdentityDemoPool', {
  identityPoolName: 'identityDemoForUserData',
  allowUnauthenticatedIdentities: true,
  authenticationProviders: {
    userPools: [
      new UserPoolAuthenticationProvider({ userPool, userPoolClient }),
    ],
  },
})
The first portion of the code is used to create our Cognito user pool. For posterity, we’ll set up a Cognito as the default authorization mode since that’s common in many applications. However, we’ll use IAM permission as a secondary authorization type.
The main portion is the new identityPool().
To allow guests to receive their temporary credentials, we set the allowUnauthenticatedIdentities flag to true.
In addition, we tie our Identity Pool to our User Pool by adding it as an authenticationProviders.
Updating the API
As mentioned, we’ll set Cognito user pools as the default authorization type, and allow unauthenticated IAM users to call the listUsers Query on our schema. To accomplish this, replace the current API construct with the following:
const api = new GraphqlApi(this, 'User API', {
  name: 'User API',
  schema: Schema.fromAsset(path.join(__dirname, 'schema.graphql')),
  authorizationConfig: {
    defaultAuthorization: {
      authorizationType: AuthorizationType.USER_POOL,
      userPoolConfig: {
        userPool,
      },
    },
    additionalAuthorizationModes: [
      {
        authorizationType: AuthorizationType.IAM,
      },
    ],
  },
})

api.grantQuery(identityPool.unauthenticatedRole, 'listUsers')
Let’s take a look a the list of code.
The power of the L2 AppSync construct, and the L2 Identity Pool construct combined means that we can add the ability to query our API to our unauthenticated role in an elegant and readable way.
Updating the Schema
The last part before deploying our application is to update our schema so that it is aware of what types of authorization it should check for.
Replace the current schema with the following:
type Query {
  listUsers(limit: Int, nextToken: String): UserConnection
      @aws_iam
      @aws_cognito_user_pools
}

type User @aws_iam {
  userId: ID!
  firstname: String!
  lastname: String!
  picture: AWSURL!
}

type UserConnection @aws_iam {
  items: [User!]
  nextToken: String
}
Not much changed from the previous schema aside from adding a few authorization directives that tell AppSync what access permissions to allow. Because Cognito user pools are the default authorization type, applying the directive to the listUsers query will automatically cascade down to its nested fields so long as they are not part of a separate table.
In contrast, because IAM is a secondary auth type, we must manually cascade the directive.
Deploying our application
In order for our frontend to take advantage of our new setup, we’ll need to output values for our API and Cognito services. To do that, add the following to the lines of code to our stack file:
new CfnOutput(this, 'UserPoolId', {
  value: userPool.userPoolId,
})

new CfnOutput(this, 'UserPoolClientId', {
  value: userPoolClient.userPoolClientId,
})

new CfnOutput(this, 'IdentityPoolId', {
  value: identityPool.identityPoolId,
})

new CfnOutput(this, 'GraphQLAPIID', {
  value: api.apiId,
})

new CfnOutput(this, 'GraphQLURL', {
  value: api.graphqlUrl,
})
To deploy the application, run the following command:
npx aws-cdk deploy —outputs-file ./frontend-config.json
Once deployed, you should have a config file generated for you that looks similar the following:
{
  "GuestUserBackendStack": {
    "UserPoolClientId": "zyxw9876",
    "GraphQLAPIID": "abcd1234",
    "UserPoolId": "us-east-1_OUC1dLipV",
    "GraphQLURL": "https://abcdefg.appsync-api.us-east-1.amazonaws.com/graphql",
    "GraphQLAPIKey": "012345",
    "IdentityPoolId": "us-east-1:9829a415-d241-4862-91f1-1111111111"
  }
}
These are the values that we’ll need on our frontend.
Testing in our frontend
We’ll reuse the same frontend as the previous post. To get up and running in one step, run the following code snippet:
git clone [email protected]:focusOtter/appsync-apikey-pagination-frontend.git && cd $_ && git checkout iam-with-cognito-api && npm install
That long script will clone the repo, change into the directory, checkout the correct branch, and install the dependencies.
From there, change the values located in pages/_app.js so that the values match what was output from our CDK backend.
When specifying the
aws_appsync_authenticationTypefield, note that only the default auth type is needed.
Lastly, in each of the API calls to fetchUserQuery, set the authMode to AWS_IAM
Start the application by running the following:
npm run dev
Assuming enough time has elapsed, you should see something similar to the following:
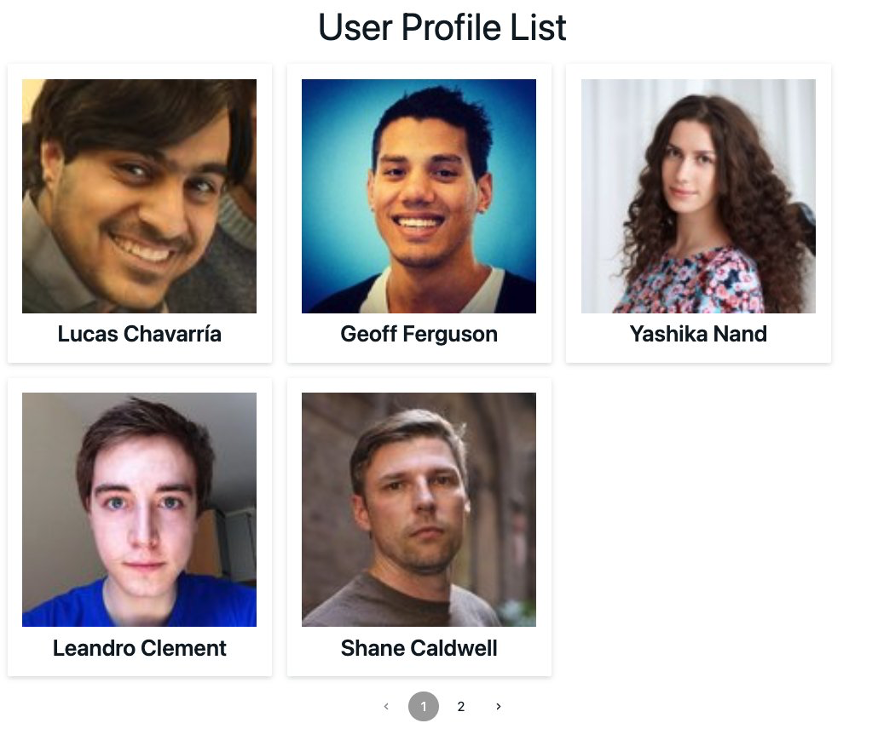
Feel free to perform a smoke test by switching the authMode to API_KEY to see the request fail with a 401(unauthorized) message.
Cleanup
Because this application has a CRON job associated with it, after verifying everything is working, be sure to destroy the stack by running the following command:
npx aws-cdk destroy
Conclusion
In this post we discussed how to tighten the authorization strategy on our AppSync API by using Amazon Cognito and IAM permissions. In addition, by only using the AWS Amplify JavaScript libraries on the frontend, we saw how frontend teams can use Amplify à la carte, as opposed to its entire suite of services.
Understanding these concepts both in isolation and in combination not only help build out more complex applications as shown in the Building a full-stack chat application with AWS and NextJS post but also to enable fullstack teams to prioritize security without compromising on velocity.
To learn more about AWS AppSync and its rich set of features, refer to the service page.
Recommend
About Joyk
Aggregate valuable and interesting links.
Joyk means Joy of geeK