

人脸识别还能这么玩
source link: https://www.51cto.com/article/721625.html
Go to the source link to view the article. You can view the picture content, updated content and better typesetting reading experience. If the link is broken, please click the button below to view the snapshot at that time.

人脸识别还能这么玩
今天我们来扩展一下,用人脸玩飞机大战。虽然思路跟手势识别类似,但代码量比手势识别版稍多。
使用的人脸算法是毫秒级的,帧率能到 30,用电脑CPU运行也很流畅。
下面我分享下项目实现过程,文末获取项目完整的源代码。
准备飞机大战程序
Github上找到一个Python版本的飞机大战程序,安装Pygame即可运行。
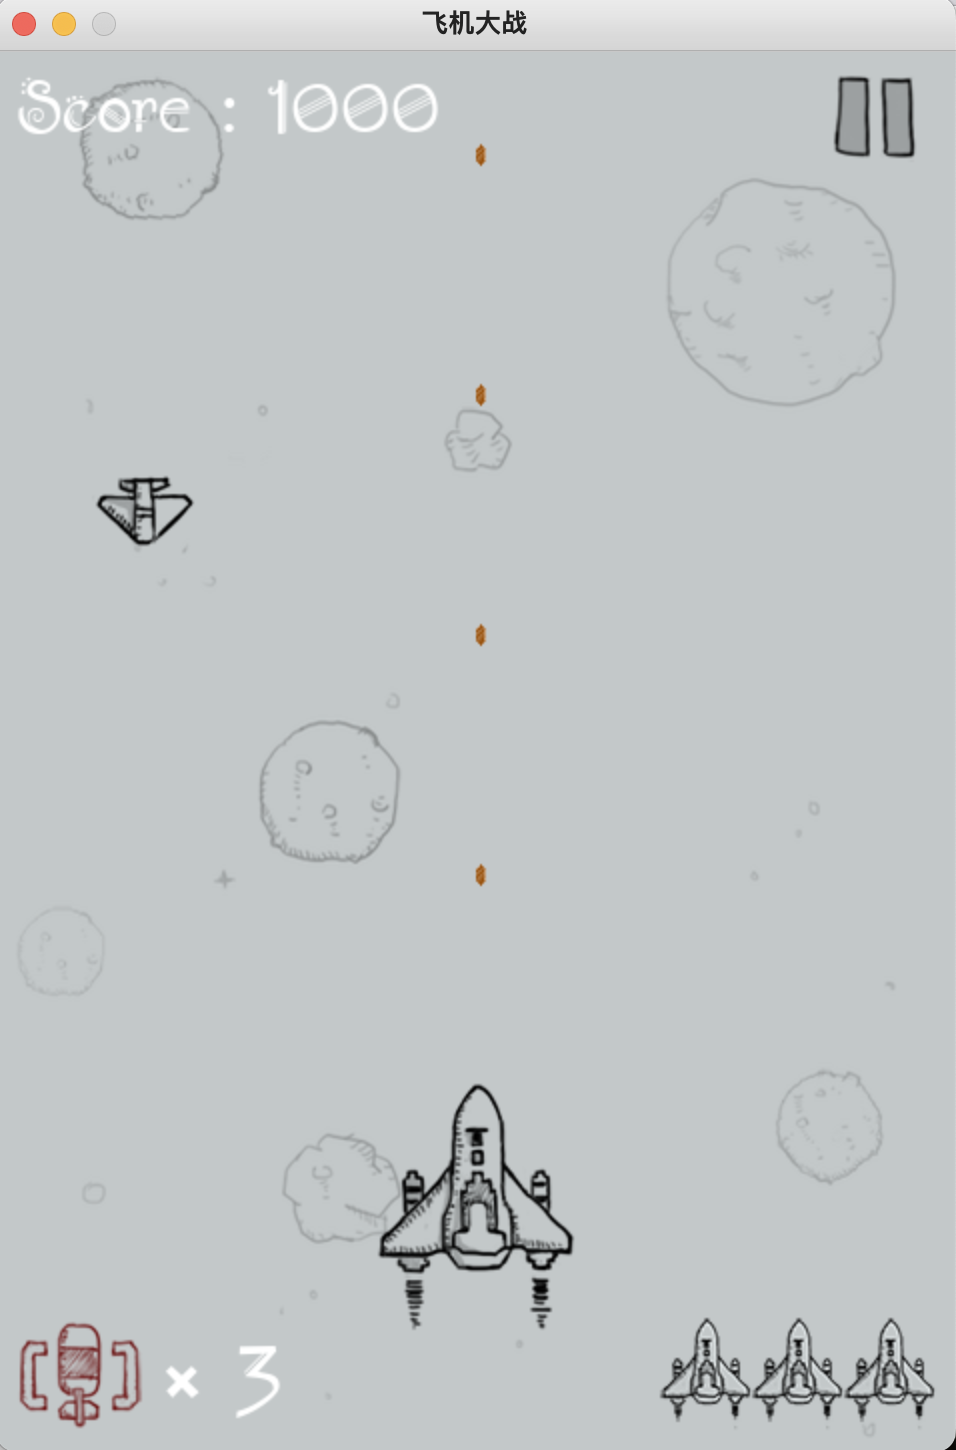
用键盘的A、D、W、S键用来控制飞机的移动方向,分别对应左、右、上、下。
所以,接下来我们要做的是识别人脸,并对人脸姿态进行估计,将估计后的结果映射到左、右、上、下,从而控制飞机的运行。
这里,我们用opencv读取摄像头中的视频流。
将视频流中的每一帧送入mediapipe中的人脸识别模型,进行识别。
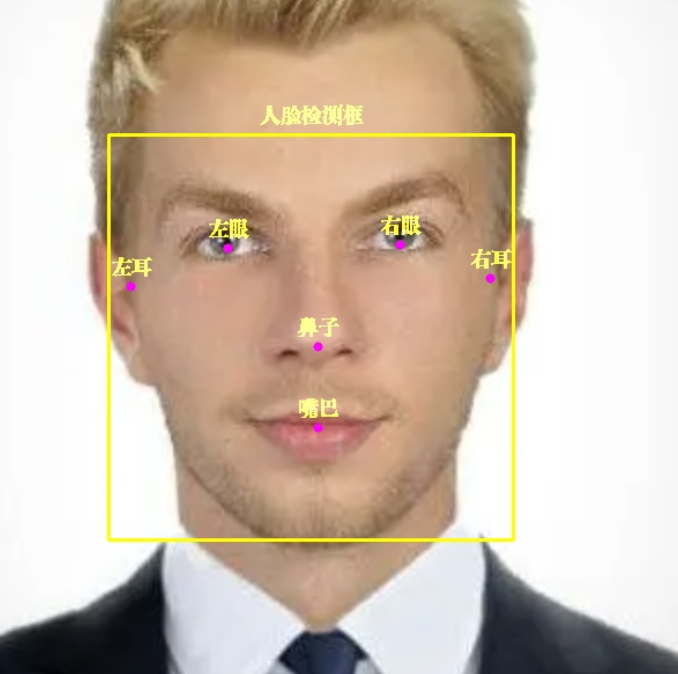
图片 mediapipe 不止能识别人脸,还能标注出人脸 6 个关键点左眼、右眼、左耳、右耳、鼻子、嘴巴。
核心代码:
with self.mp_face_detection.FaceDetection(
        model_selection=0, min_detection_confidence=0.9) as face_detection:
    while cap.isOpened():
        success, image = cap.read()
        image = cv2.cvtColor(image, cv2.COLOR_BGR2RGB)
        results = face_detection.process(image)
        image = cv2.cvtColor(image, cv2.COLOR_RGB2BGR)
        if results.detections:
            for detection in results.detections:
                # 获取人脸框坐标
                face_box = detection.location_data.relative_bounding_box
                face_w, face_h = int(face_box.width * frame_w), int(face_box.height * frame_h)
                face_l = int(face_box.xmin * frame_w) + face_w
                face_t = int(face_box.ymin * frame_h)
                face_r, face_b = face_l - face_w, face_t + face_h
                # 显示人脸框
                cv2.rectangle(image, (face_l, face_t), (face_r, face_b), (0, 255, 255), 2)
                self.draw_zh_img(image, self.face_box_name_img, (face_r + face_l) // 2, face_t - 5)

                pose_direct, pose_key_points = self.pose_estimate(detection)
                # 显示人脸 6 个关键点
                for point_name in FaceKeyPoint:
                    mp_point = self.mp_face_detection.get_key_point(detection, point_name)

                    point_x = int(mp_point.x * frame_w)
                    point_y = int(mp_point.y * frame_h)

                    point_color = (0, 255, 0) if point_name in pose_key_points else (255, 0, 255)
                    cv2.circle(image, (point_x, point_y), 4, point_color, -1)
                    # 显示关键点中文名称
                    point_name_img = self.face_key_point_name_img[point_name]
                    self.draw_zh_img(image, point_name_img, point_x, point_y-5)
这里有个小知识点需要大家注意下。
代码中用draw_zh_img来显示中文,由于opencv不支持直接显示中文。因此,我用PIL模块中Image方法提前绘制中文图片,并转为opencv格式。
在需要的时候,直接与视频流合并,效率高,不掉帧。
人脸姿态估计
之前手势识别,我们用相邻帧来判断手势的移动。人脸姿态估计只用当前帧就可以,相对容易一些。
我们通过人脸 6 个关键点的坐标距离,就可以判断出人脸的姿态

这里,左耳和鼻子的水平距离很近,因此,我们可以估计脸向左转,从而可以用只飞机向左移动。
同样的,用其他关键点,我们可以估计出人脸向右转、向上(抬头)和向下(低头)
核心代码:
# 左耳与鼻子水平距离,判断面部左转
left_ear_to_nose_dist = left_ear.x - nose_pos.x
# 右耳与鼻子水平距离,判断面部右转
nose_to_right_ear_dist = nose_pos.x - right_ear.x

# 鼻子与左眼垂直距离,判断面部向上
nose_to_left_eye_dist = nose_pos.y - left_eye.y
# 左耳与左眼垂直距离,判断面部向下
left_ear_to_left_eye_dist = left_ear.y - left_eye.y

if left_ear_to_nose_dist < 0.07:
    # print('左转')
    self.key_board.press_key('A')
    time.sleep(0.07)
    self.key_board.release_key('A')

    return 'A', [FaceKeyPoint.NOSE_TIP, FaceKeyPoint.LEFT_EAR_TRAGION]
if nose_to_right_ear_dist < 0.07:
    # print('右转')
    self.key_board.press_key('D')
    time.sleep(0.07)
    self.key_board.release_key('D')
    return 'D', [FaceKeyPoint.NOSE_TIP, FaceKeyPoint.RIGHT_EAR_TRAGION]
姿态控制飞机移动
识别出人脸姿态,我们就可以用程序控制键盘,从而控制飞机移动。
这里我用PyKeyboard模块控制键盘按键。
self.key_board = PyKeyboard()
# print('左转')
self.key_board.press_key('A')
time.sleep(0.07)
self.key_board.release_key('A')
press_key和release_key函数分别是按键和释放按键。
它们之间,调用了time.sleep(0.07)控制按键的时长,按键时间长,则飞机移动距离就长,反之,按键时间短,则飞机移动距离就短,大家可以根据自己的需求来调节。
Recommend
About Joyk
Aggregate valuable and interesting links.
Joyk means Joy of geeK