

Creating a JWT Bearer Token
source link: https://davidgiard.com/creating-a-jwt-bearer-token
Go to the source link to view the article. You can view the picture content, updated content and better typesetting reading experience. If the link is broken, please click the button below to view the snapshot at that time.

Creating a JWT Bearer Token
A Bearer Token is a token that can be sent with a web request. It is an encrypted string that indicates under which account the request will run, validates the authenticity of that request, and (potentially) contains some information about that account.
Microsoft Azure can generate a JSON Web Tokens (JWT) when it validates an account. A JWT can be used as a Bearer Token.
This article describes how to generate a JWT.
In order to successfully generate a JWT, you must register an application with Azure Active Directory (described in this article); generate a Client Secret (described in this article); and you must grant the appropriate Microsoft Graph permissions to the account (described in this article).
You will need the following information from the Application Registration step:
-Tenant ID -Client ID -Client Secret
To generate a new JWT, send an HTTP POST request to https://login.microsoftonline.com/{{TenantID}}/oauth2/v2.0/token
where {{TenantID}} is the Tenant ID of the Azure subscription recorded above.
You can do this in code or using a CURL command or using a tool like Postman, I will demonstrate how to make this API call using Postman.
In Postman, create a new request, select POST from the HTTP Verb dropdown, and enter into the URL textbox "https://login.microsoftonline.com/{{TenantID}}/oauth2/v2.0/token", replacing {{TenantID}} with the Tenant ID recorded above.
This is shown in Fig. 1.

Fig. 1
Select the "Body" tab, select the "x-www-form-urlencoded" radio button, and enter the following Key-Value pairs:
| Key | Value |
|---|---|
| client_id | (the Client ID recorded above) |
| client_secret | (the Client Secret recorded above) |
| scope | https://graph.microsoft.com/.default |
| grant_type | client_credentials |
This is shown in Fig. 2.
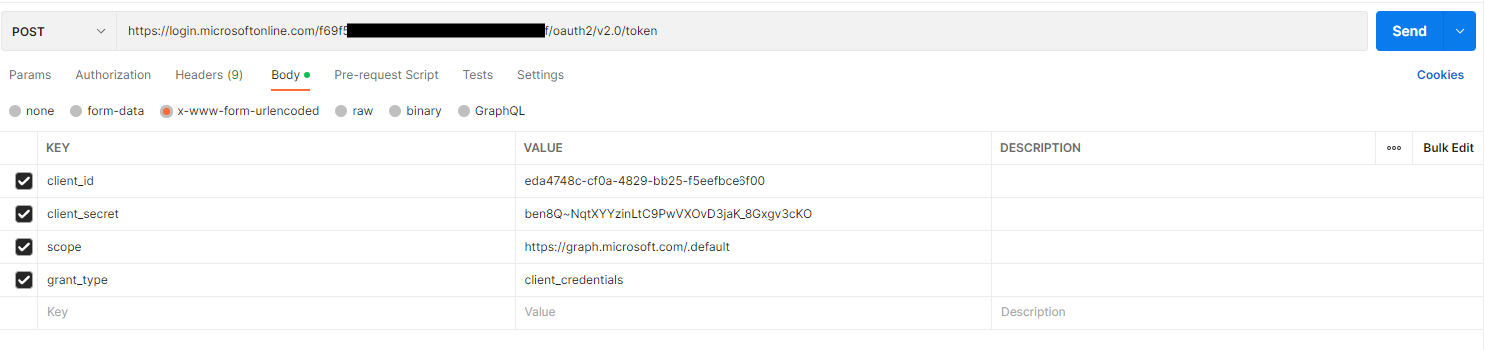
Fig. 2
Click the [Send] button to send the HTTP POST request. You should receive a response, similar to the one in Fig. 3.
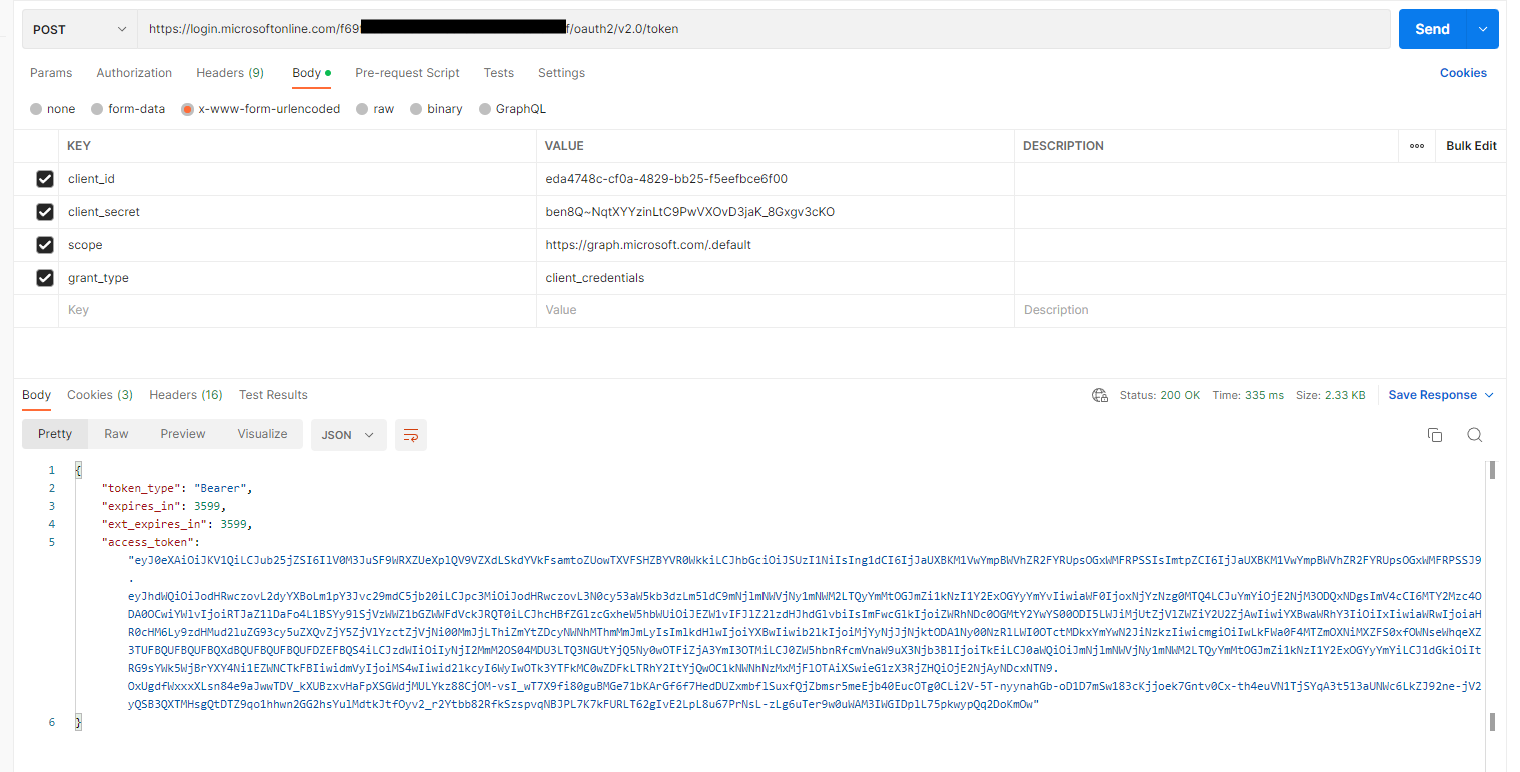
Fig. 3
The resulting JSON includes a node named "access_token". Copy and save this value (without the surrounding quotation marks). You will need it later.
The access token is an encrypted JSON object. You can view this object by pasting it into the form at https://jwt.ms, as shown in Fig. 4.
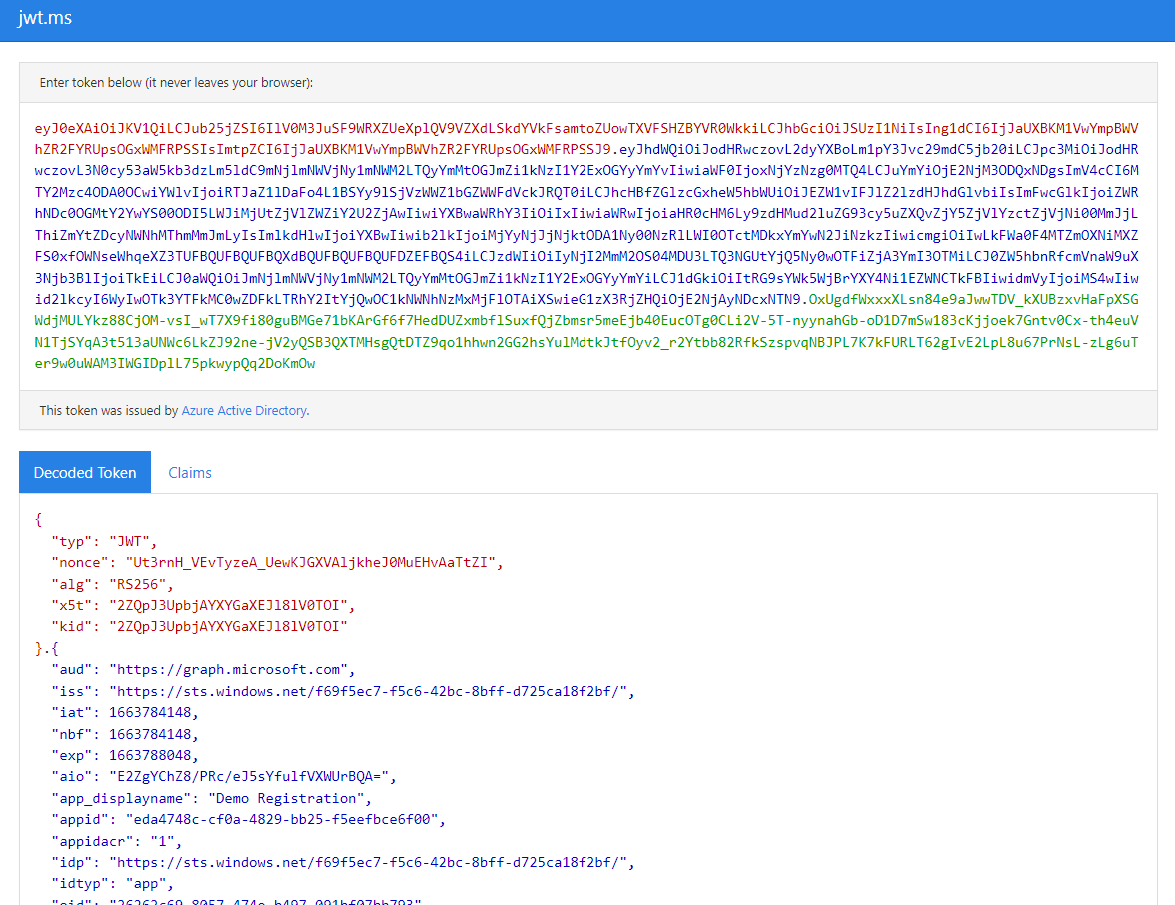
Fig. 4
Now that you have a JWT, you can pass this in the header of an HTTPS request to identify to the API which account is making the request.
Recommend
About Joyk
Aggregate valuable and interesting links.
Joyk means Joy of geeK