

【地平线旭日X3派试用体验】从开机到点灯(第一节)
source link: https://developer.horizon.ai/forumDetail/106482341031035958
Go to the source link to view the article. You can view the picture content, updated content and better typesetting reading experience. If the link is broken, please click the button below to view the snapshot at that time.

官方的数据手册其实写的非常详细了,这里算是记录下自己的开机过程和几个注意点。
官方使用手册地址:https://developer.horizon.ai/api/v1/fileData/documents_pi/index.html
一,上电前准备。
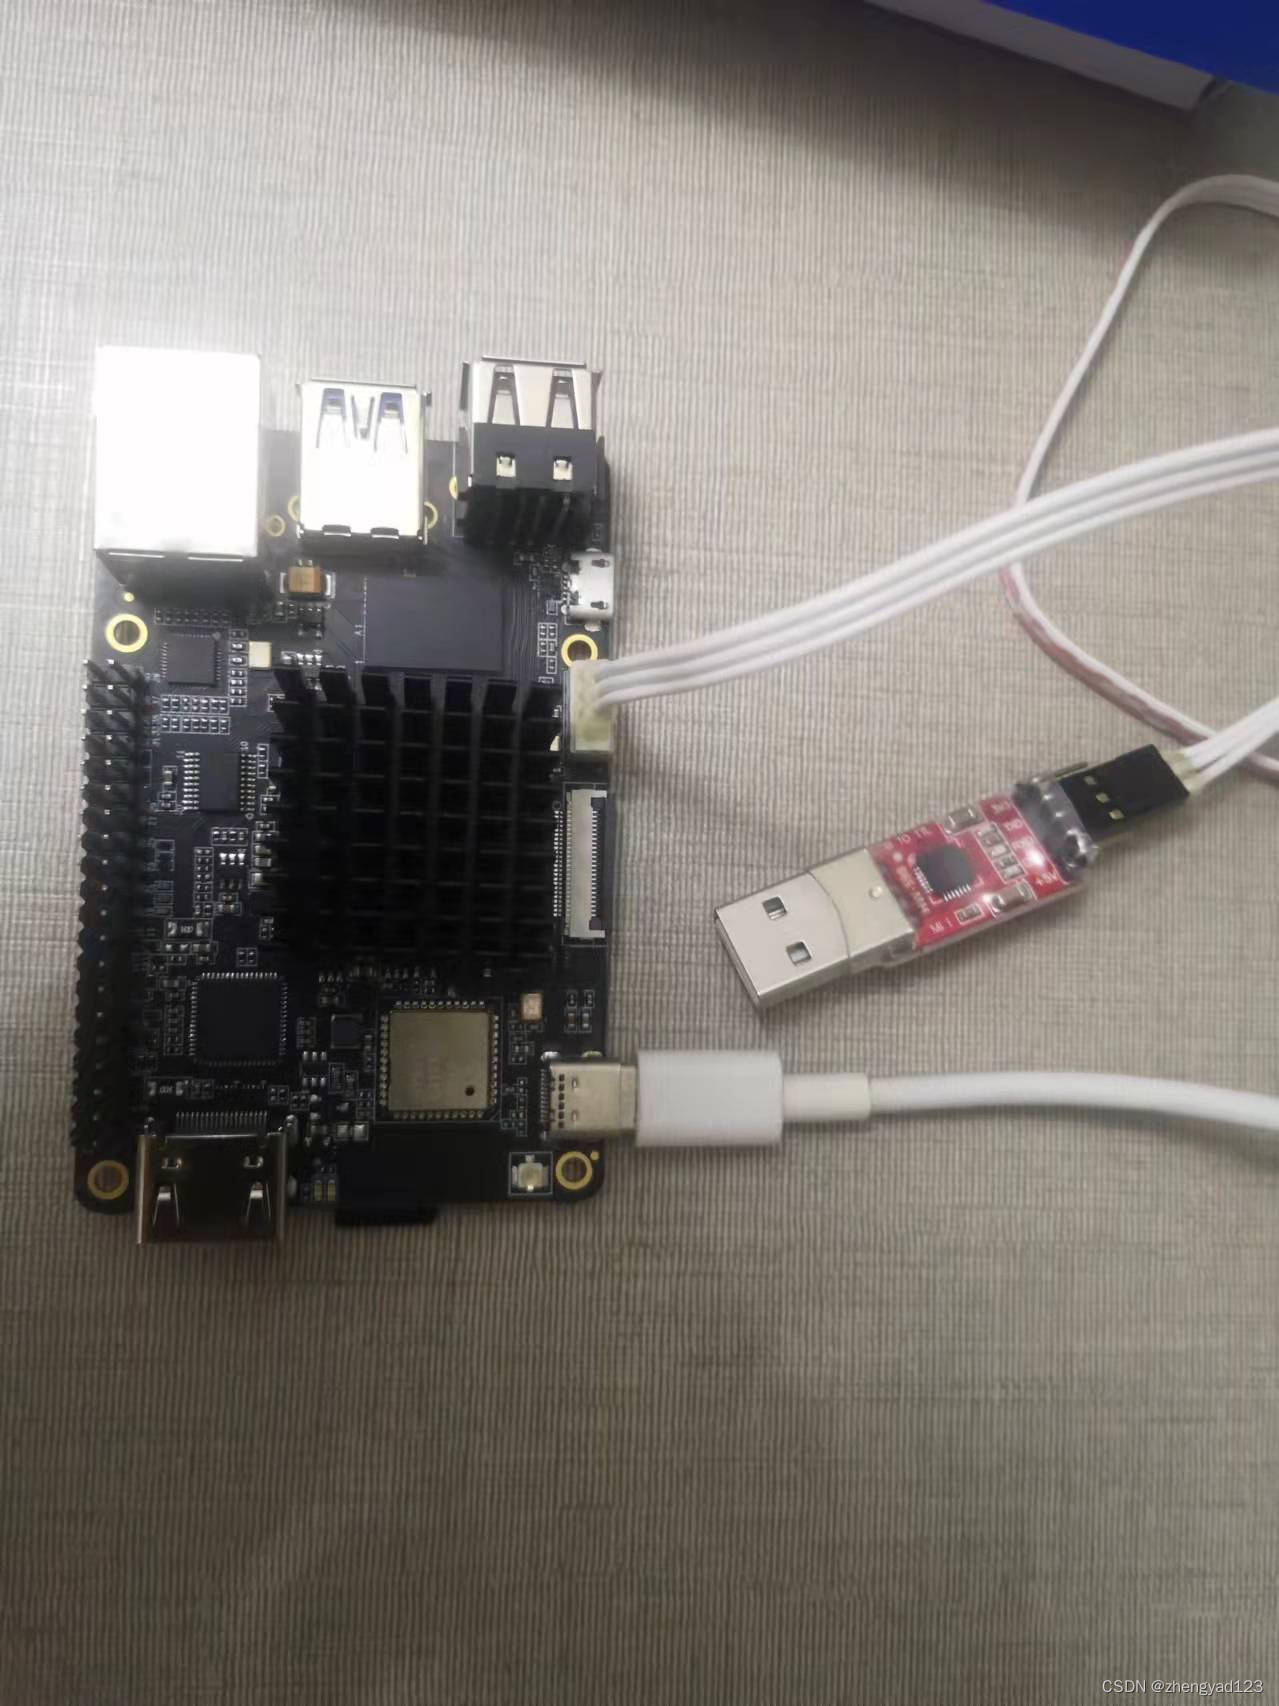
1,熟悉开发板主要接口
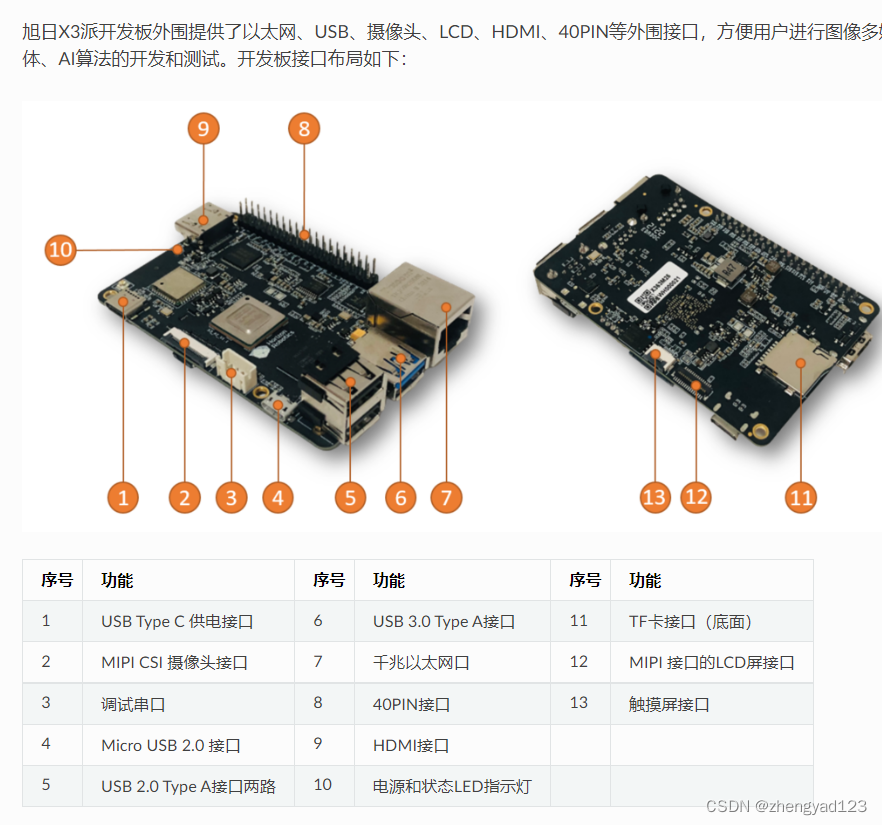
官方标配没有电源和存储卡,需要另配。
2,准备电源一个,至少5V ,2A。

USB Type C 供电接口如下
3,存储卡一张。

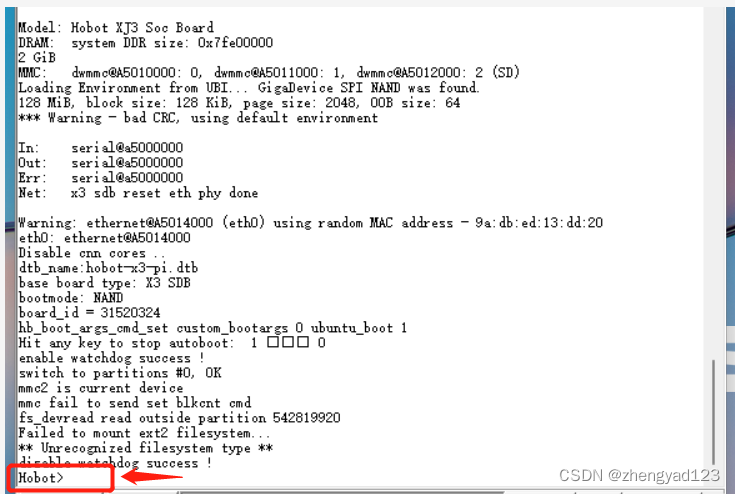
重要说明:最好准备一张质量好点的高速存储卡。
一开始随便找了一张卡,通过串口查看状态,是进不去ubunt系统的,串口输出终端为hobot>
并且,板子上会亮红灯和绿灯。串口信息如下:
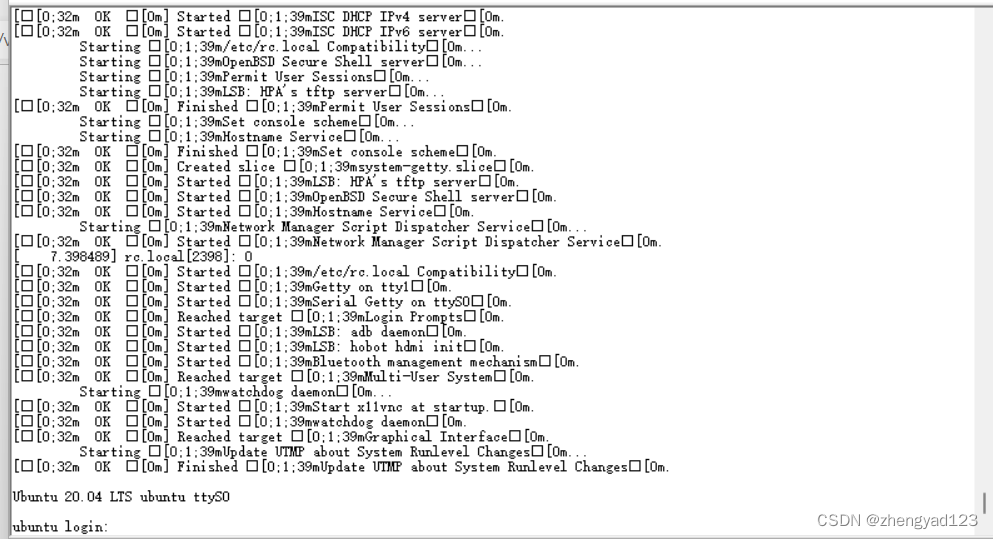
后来,买了一张闪迪 高速内存卡

烧录系统,正常启动,启动后,只亮红灯,串口输出终端为Ubuntu。串口信息如下:
二,烧录系统
提前准备好TF卡和烧录镜像,我使用的Ubuntu Server版本。

使用的烧录工具是balenaEtche, 下载地址:https://developer.horizon.ai/resource

使用方法,官方介绍很详细了,不在重复,如下:
https://developer.horizon.ai/api/v1/fileData/documents_pi/Quick_Start/Quick_Start.html#balenaetcher
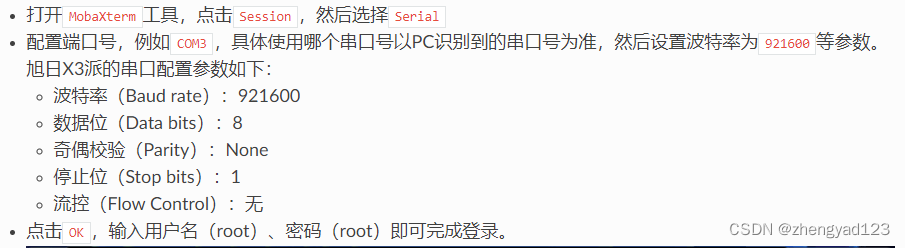
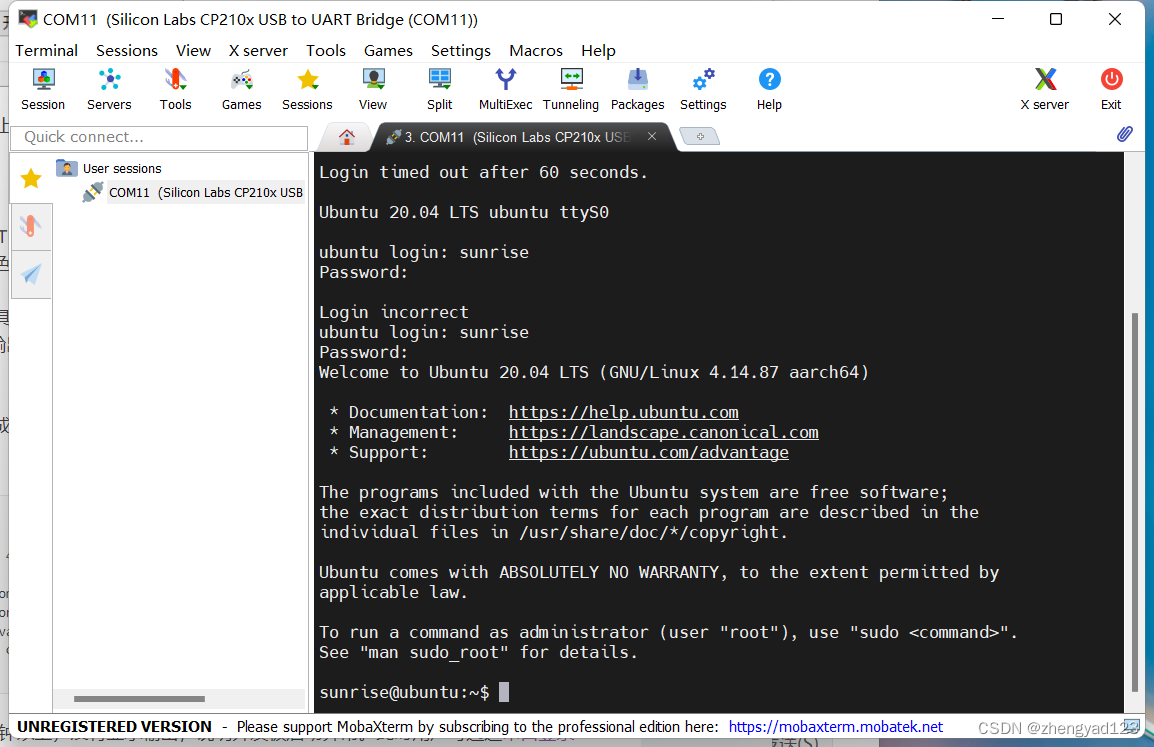
三,串口驱动安装和MobaXterm使用。
1,串口驱动。
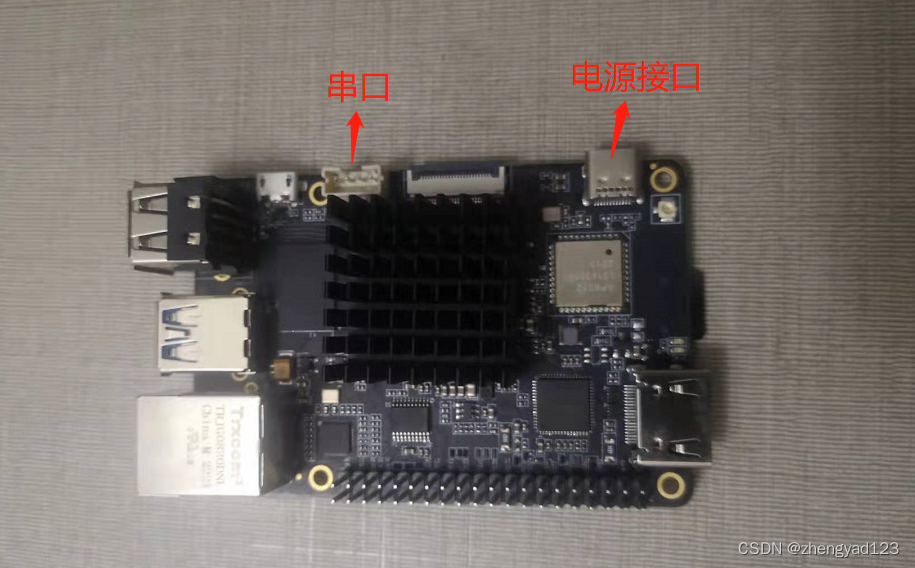
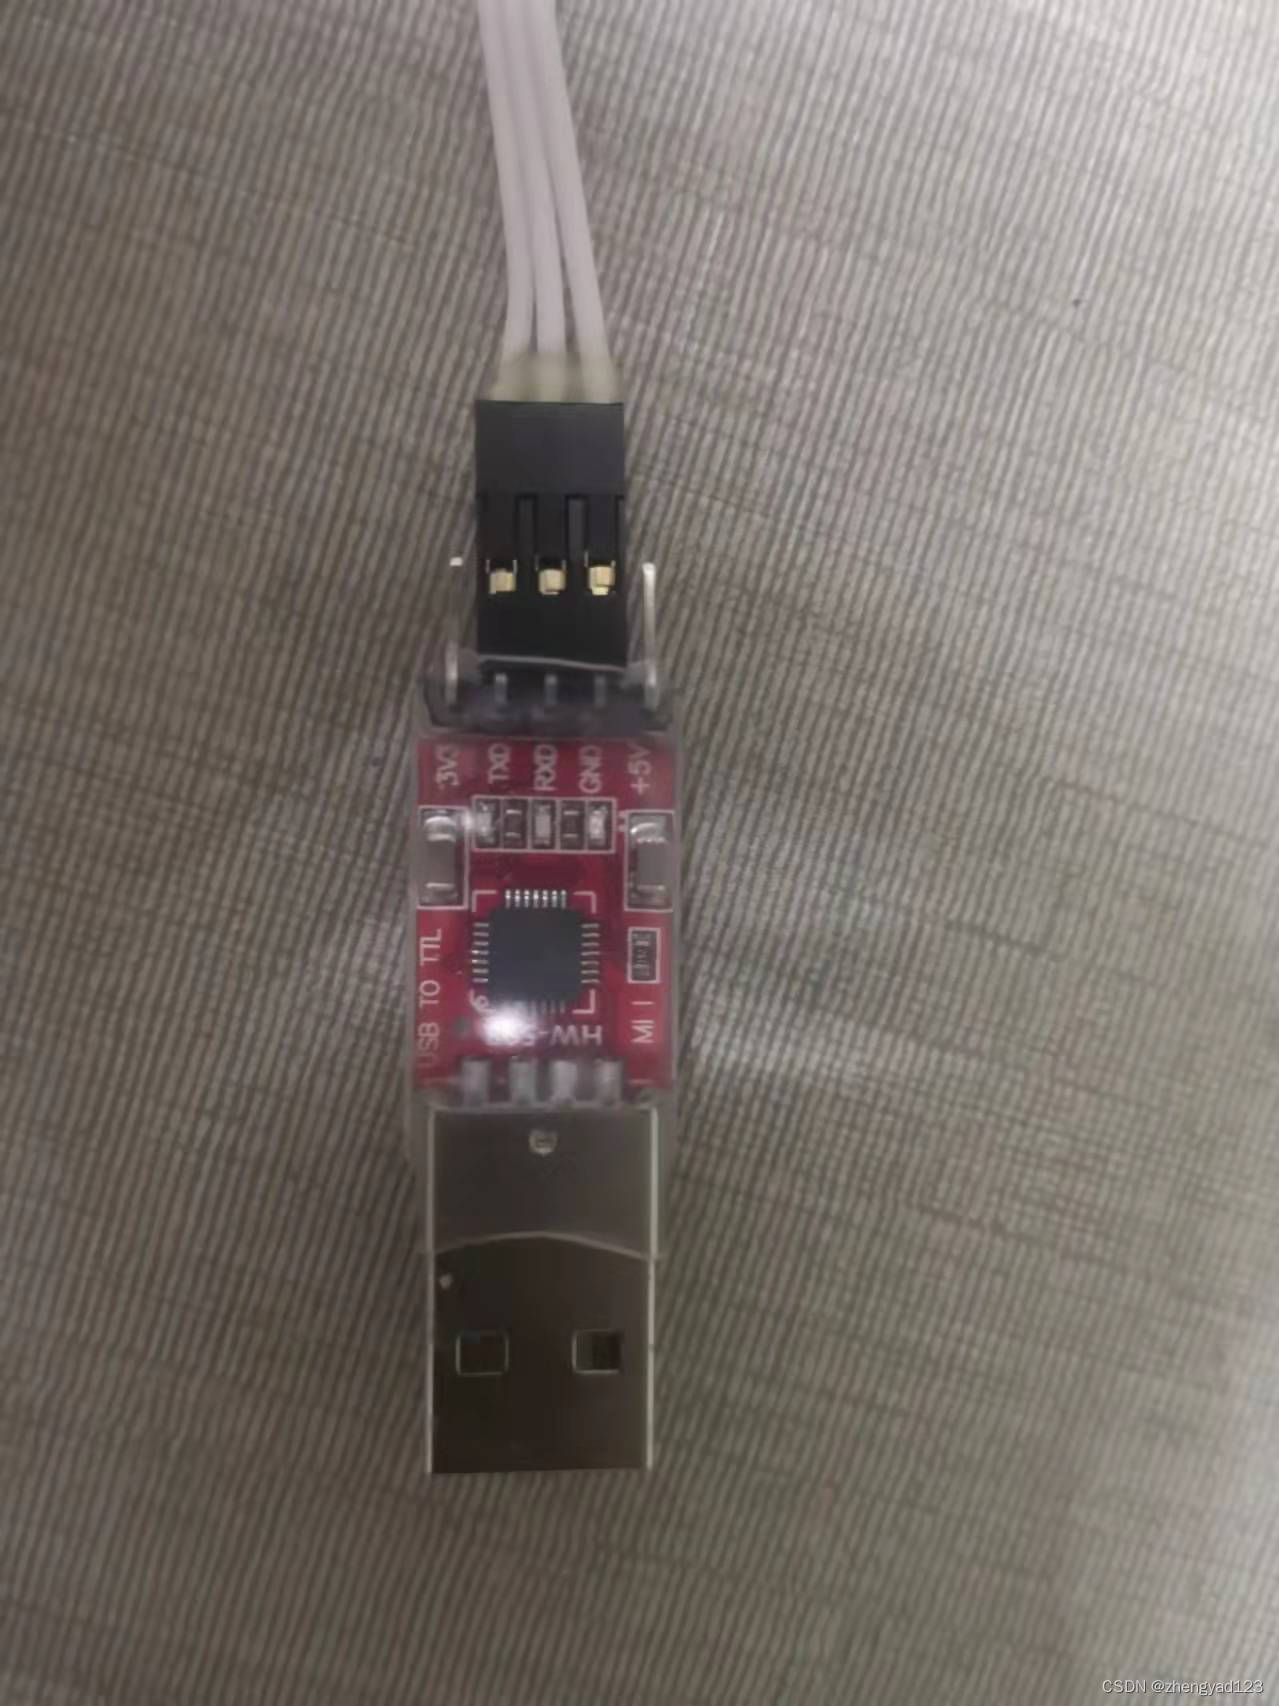
开发板使用的USB转串口的芯片为CP2012。驱动程序可以在上面的地平线官方提供资源下载地址去下载,我电脑之前装过,所以这里不记录了。注意按下图接线。
2,MobaXterm。
家庭版下载地址:
https://mobaxterm.mobatek.net/download-home-edition.html
使用方法:
四,点灯。
系统正常启动来了,点灯就简单了,旭日X3派内置了点灯程序led_blinks。
led_blinks是一个shell脚本程序,通过控制LED指示绿灯的GPIO管脚来使绿灯亮和灭。除了不带参数的运行外,它还支持以下三个参数选项:
- normal:与不加参数是的效果一样,指示灯亮灭间隔1秒钟
- fast:指示灯亮灭间隔300毫秒,闪烁较快
- slowly:指示灯亮灭间隔2秒钟,闪烁较慢
输入指令:
sunrise@ubuntu:~$ sudo led_blinks
好了,可以看到绿灯闪起来了
Recommend
About Joyk
Aggregate valuable and interesting links.
Joyk means Joy of geeK