

The Easiest Tricks To Make Windows 11 Look Even More Like MacOS
source link: https://www.slashgear.com/1060309/the-easiest-tricks-to-make-windows-11-look-even-more-like-macos/
Go to the source link to view the article. You can view the picture content, updated content and better typesetting reading experience. If the link is broken, please click the button below to view the snapshot at that time.

The Easiest Tricks To Make Windows 11 Look Even More Like MacOS
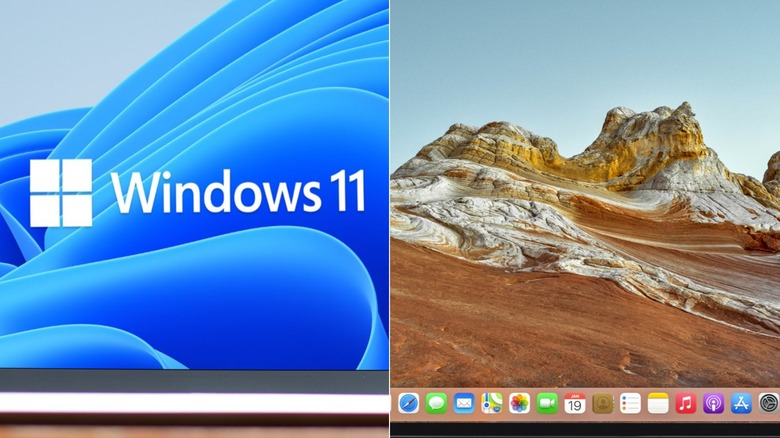
Having been developed by two different tech giants, Windows and MacOS are a world apart. Windows can run on different desktop and laptop setups, while MacOS is exclusive to eight types of computer only (via Apple). Windows has the taskbar and File Explorer, while MacOS has the dock and Finder. Naturally, even the look and feel of Windows are entirely different from that of MacOS.
If you were previously an Apple user and recently switched to a Microsoft OS, you'll most likely have a hard time navigating through the system. This is especially true since there are built-in functionalities in MacOS that Windows doesn't have.
Fortunately, you can find many ways to make your Windows device look like a MacOS. In this post, we'll walk you through some of the easiest tips and tricks to make you feel more at home with Windows. And unlike other risky ways, these ones won't significantly change your computer's system files or potentially break your system.
Create a transparent and centered taskbar
Among the things that make MacOS stand out is its centered dock, where you can conveniently access your frequently used apps (via Apple). In Windows, this is called the taskbar. However, unlike the taskbar, the dock doesn't fill the entire lower part of your screen as it adjusts depending on how many apps you add to it. This makes your desktop look clean and sleek.
To give Windows the same visual appeal, you can use TaskbarX. The app turns your taskbar invisible, making it appear as if it doesn't take up much of your screen. You can either buy the app from the Microsoft Store or download it for free from its GitHub page. If you go with the second option, here's how you can install the app.
- Download the .zip file for your OS.
- Extract and open the file.
- Scroll down until you see a file named TaskbarX.
- Click on the file with "Application" as the file type.
- If you see a "Windows protected your PC" screen, select "More info" and then, "Run anyway."
- Wait as your app icons automatically move to the center of the screen.
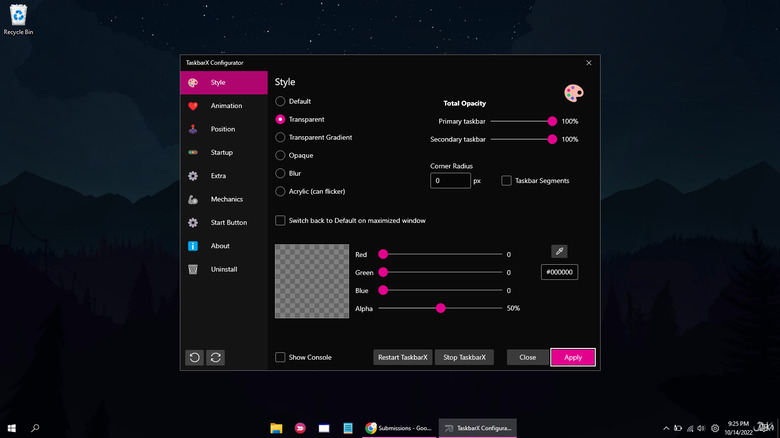
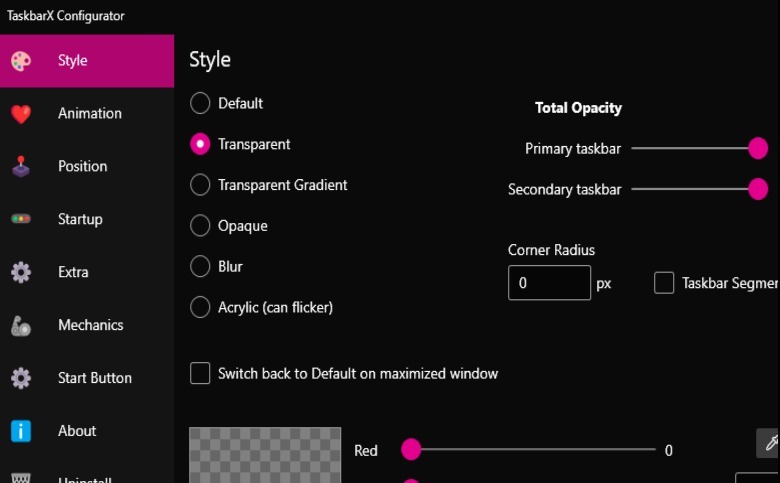
To make the taskbar transparent, go back to the extracted folder and install the TaskbarX Configurator app. You will then find the "Transparent" option under the Style tab.
It is worth noting that the app only works on Windows 10. However, there is a workaround for Windows 11 if you install ExplorePatcher.
Add grouped shortcuts to your taskbar
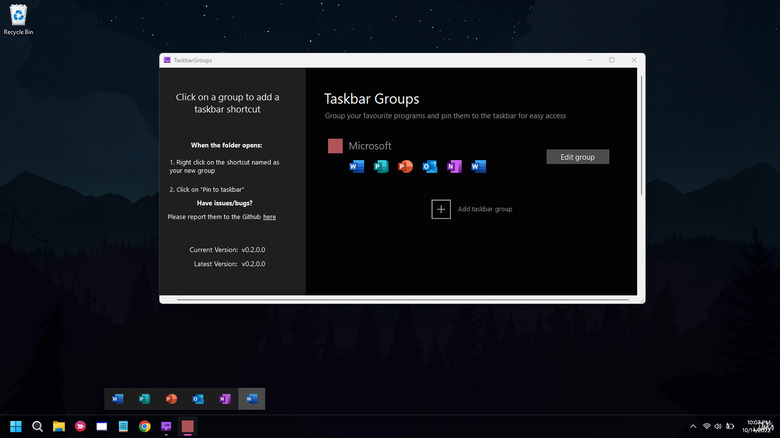
Another taskbar customization you can opt into is installing the TaskbarGroups app. This free app lets you make folders right in the taskbar, similar to what MacOS has in its dock. While it isn't the exact replica visually, it's still a nice addition to your setup. To install the Taskbar Group, follow the steps below (via GitHub):
- Go to the release page.
- Download the .zip file from the latest release available.
- Extract the .zip file.
- Click on TaskbarGroups to open the app.
- On the homepage, click on "Add taskbar group."
- Enter a name for your group.
- Choose a group icon by clicking on "Change group icon" and pick from the photos in your computer.
- Click on "Add new shortcut" to add the programs you want to include in your folder.
- Once you're done adding your programs, hit Save.
- Back on the homepage, click on the group you made. This will open your Windows File Explorer.
- Right-click on the shortcut and select "Pin to taskbar." It should now appear on your taskbar.
Get dynamic wallpapers
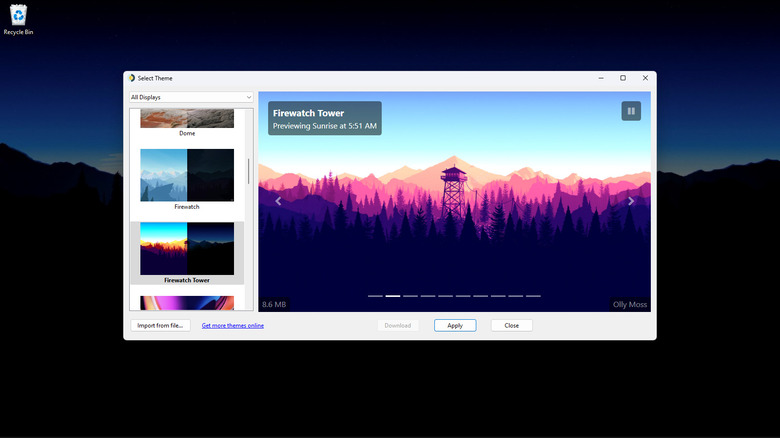
Do you love how MacOS desktop wallpaper automatically changes depending on the time of day? You can actually do that in Windows, too. Although this feature isn't built-in for Windows unlike MacOS, you can simply install the WinDynamicDesktop from the Microsoft App Store. It's completely free and very easy to set up. After installing the app, follow these steps:
- Click the system tray.
- Right-click on the WinDynamicDesktop app icon.
- Select "Configure Schedule."
- Here, you can choose whether to enter a location manually, use Windows location service, or set specific sunrise and sunset times.
- Hit OK to exit.
- Right-click on the app icon again.
- Choose "Select Theme."
- Pick from the available wallpapers or download a new one and import it.
- Click Apply to save your choice.
- Right-click on the app icon again.
- Click on "Start on Boot" for the program to launch immediately after your computer boots.
Your desktop wallpaper should now reflect the photo corresponding to your current time. This picture will change as you get through the day.
Change the cursor
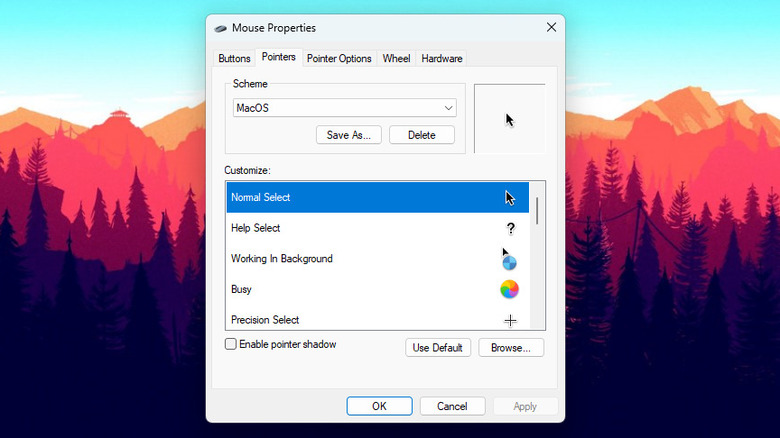
Even though changing the cursor icon might seem like a minor thing, it can actually add to the Mac-like appeal of your Windows computer. To change the cursor on your computer, here's what you need to do (via YouTube):
- Download the free MacOS cursor pack made by How to Creative.
- Extract the .zip folder.
- Open your primary drive where Windows is installed (usually drive C:).
- Go to the Windows folder and open the Cursors folder.
- Paste the extracted .zip folder inside the Cursors folder. Make sure you have administrative rights to do this.
- Close the folder.
- Open your Settings app.
- Go to the "Bluetooth & devices" tab.
- Select Mouse.
- Under "Related settings," click on "Additional mouse settings" to open the Mouse Properties dialog box.
- Go to the Pointers tab.
- Double-click on the items under "Customize" and pick the matching icon from the MacOS cursor pack.
- After changing all of the icons, hit Apply.
- Click Save As to save your settings as a new scheme.
- Click OK.
Use a Spotlight-like search bar
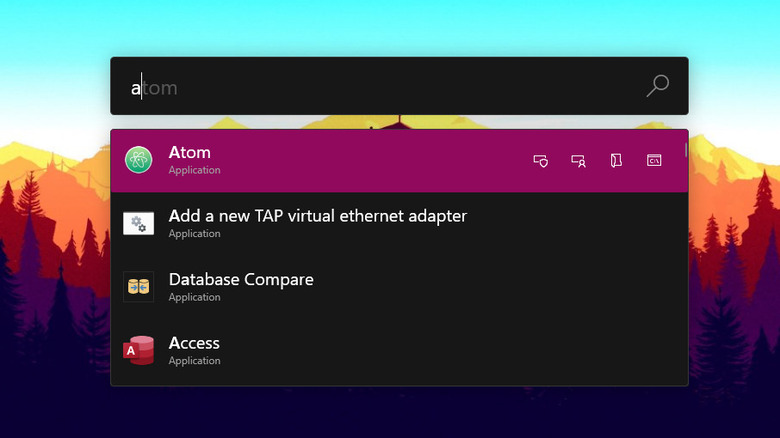
Spotlight is Apple's way of looking up Mac apps, documents, images, and practically any other item on your computer (via Apple). Sure, Windows also offers this functionality via the Start Menu, but Spotlight is more convenient as it pulls up a search bar right in the middle of your screen.
To add a Spotlight-like search bar on your Windows device, you need PowerToys. This Microsoft-developed free app contains a set of utilities that lets users tweak their computer to improve productivity. Here's how you can use PowerToys to add the centered search bar:
- Install PowerToys either via GitHub or the Microsoft Store.
- Open PowerToys.
- Go to the "PowerToys Run" tab.
- Turn on the toggle button next to "Enable PowerToys Run."
- Press Alt+Spacebar to open the centered search bar.
You can also change the keyboard shortcut and enable all types of plugins like Calculator, OneNote, Shell, and Unit Converter.
How To Fix Windows 11's Most Common Issues
Arguably, Microsoft jumped the gun with Windows 11, which had its share of issues and bugs at launch. Some of them were fixed in consequent updates, while others persist even today. Window 11 cannot be called flawless after months of tinkering around since some issues still persist and are reported by users on forums from time to time.
A few bugs that have come up are a result of settings malfunction at a deeper level while some prop-up due to anomalies in the software code. Earlier we narrowed in on the Windows 11 problems and their easy fixes. Now we've dug up more common issues that have been bugging users lately, and detailed solutions to make the overall user experience on your Windows system smoother for you.
Windows 11 slowing down SSD
Some users who have upgraded from Windows 10 to Windows 11 are experiencing reduced performance with their computers' solid-state drives (SSD). Reddit communities and Microsoft's support forum are filled with complaints of the upgrade affecting SSD write speeds. According to BetaNews, the drop in performance has been verified by benchmark tests like CrystalDiskMark. The results show reduced random write speed approaching 50 percent that of earlier performance with Windows 10 with the same hardware.
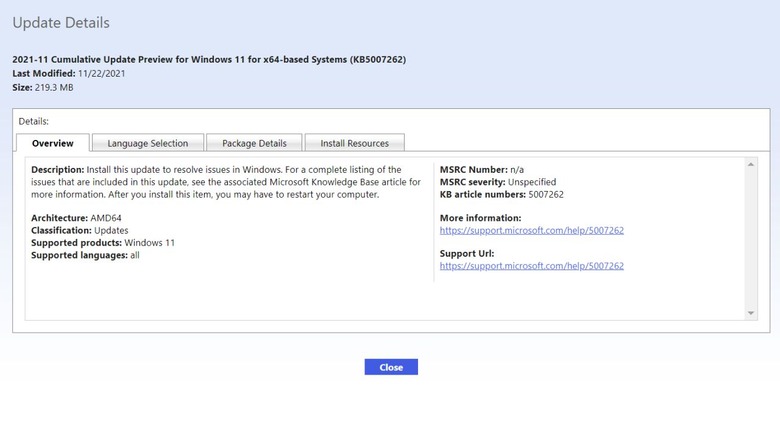
Thankfully there's a very easy fix to this head-scratching problem courtesy of an official patch from Microsoft: the KB5007262 patch. The update will not be automatically pushed out to all the Windows 11 systems – so it'll have to be installed manually. Anyone experiencing the issue with SSD speed can head over to the Microsoft Update Catalog and download the patch. The description of the update says the update patches the issue with NVMe, SSD, and hard drive performance which occurs due to NTFS USN journaling being enabled. Apparently, the USN journal on disk C: is enabled by default.
Error 0x80070070 while upgrading
For users upgrading from Windows 10 to the new operating system, an irksome error can be a roadblock. We are talking about the error code 0x80070070, which occurs when there isn't adequate space to install the required setup on your system. It pops-up mostly as an error code with string 0x80070070 – 0x50011, 0x80070070 – 0x50012, or 0x80070070 – 0x60000. Rather than removing apps and software to make up for space, an easy fix (via Windows Central) can make things easier for you.
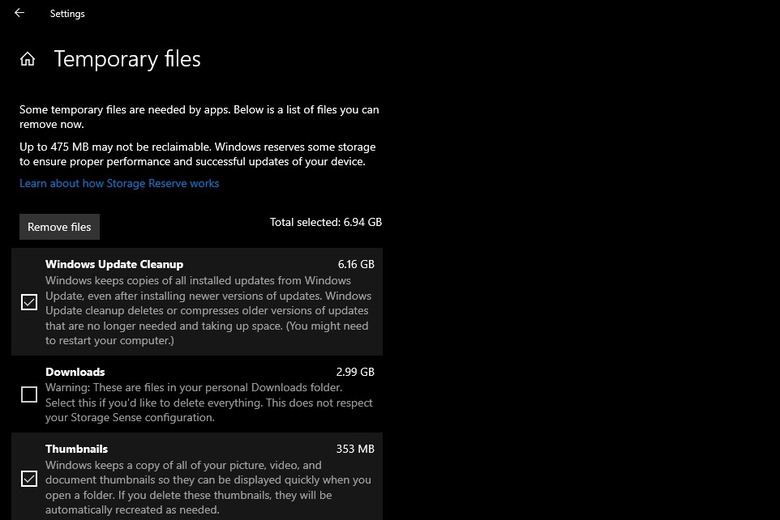
Removing temporary files from your system will (quite possibly) deliver the space you'll need to continue operating your PC. To remove temporary files from your PC, go to Settings, click on System and then click on Storage. Here you'll find a section called Temporary files. Clicking on it further opens up a section where you can choose which temporary files to get rid of. Make sure you do not remove the "Windows Setup temporary files" or "Windows ESD installation files", these are upgrade files of the OS.
Google Chrome not working
If you're unable to use Chrome on Windows 11, this could be due to a wide number of reasons. It could be due to compatibility issues, corrupted files, or conflicting app behavior. To troubleshoot, you can restart your system and check back on Chrome to see if it is working fine. Else head over to the Google Chrome icon, right-click on it and select Properties. Then click on the Compatibility tab and select Run compatibility troubleshooter. At your own risk, you may also want to try to disable any antivirus program you have installed on the system – or whitelist Google Chrome from its settings.
If this doesn't fix the problem, you may need to delete the folder containing the profile data for Google Chrome. To do this, press Windows key + R to open the Run dialog box; here enter "%USERPROFILE%\AppData\Local\Google\Chrome\User Data" and trace the Default folder and create a copy of it to backup files. Then delete the folder. No success yet? You may have to flush the DNS cache (via Guiding Tech) by opening Terminal with the shortcut Window key + X. Here type the command "ipconfig/flushdns" and press Enter.
If the issue persists, you may be required to reset the network setting by pressing the Windows key + I shortcut. In the window select "Network & Internet" and click on the Advance network settings. Under the "More Settings" tab select the Network reset option.
Search not working correctly
Windows 11 has a strange bug that freezes the search bar, resulting in your inability to type addresses or search queries. Users have also reported being unable to see files and apps when typing in the search bar. If none of the obvious fixes such as restarting the PC or Search and Indexing troubleshooter have worked for you, then the first option is to restart the SearchHost.exe manually. To do this, open the Task Manager by pressing Ctrl+Alt+Del and look for the "SearchHost.exe" file. Then select End Task and click on End Process.
Alternatively, you can restart the Windows Search service (via Make Use of) by pressing Win+R to open the Run dialog box. Thereafter enter "services.msc" to open the Services console, and seek out Windows Search. Double click on it to launch the Properties window. Now click the Stop button and then click on Start.
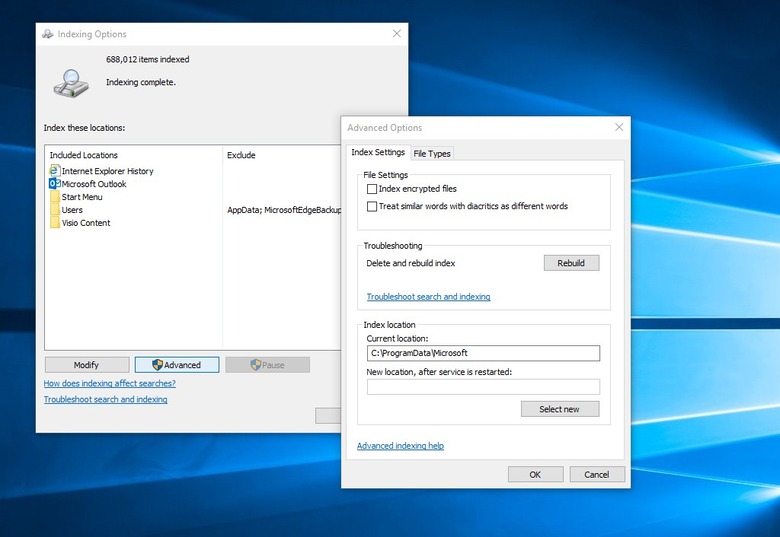
For users who are having difficulty with the search queries, the best option is to rebuild the search index. Open Settings by pressing Win+I, click on Privacy & Security, and then on the right pane select Searching Windows. In the window that opens, select Advanced indexing options at the bottom, thereafter, select the Advanced button. Here click the Rebuild option; this will fix the indexing issue and the files or apps should now show up as usual.
Color rendering bug
Some users have been reporting a very strange bug (via Windows Latest) with an upgraded Windows 11 package that renders colors on HDR screens incorrectly. This is utterly frustrating for editors or professionals who have to frequently use third-party image editing software. This is most noticeable when white colors are shaved or white or lighter backgrounds are added. The offset hues look bright yellow when they are supposed to be pure white.
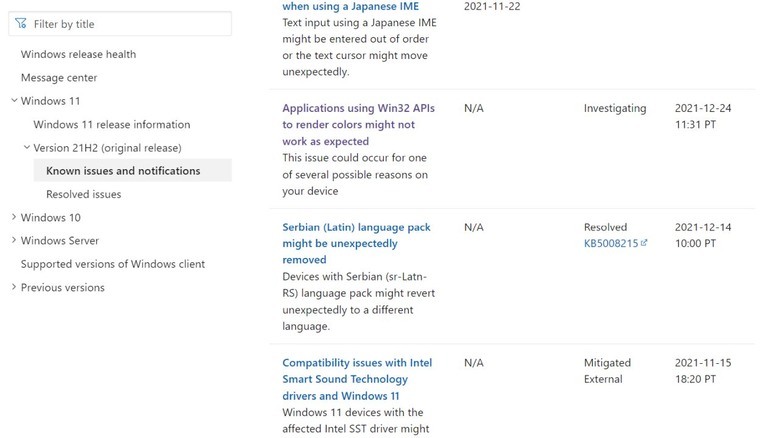
Microsoft has publicly acknowledged this bug, detailing the reason. It happens when the Win32 APIs return unexpected information or errors under a certain set of conditions on a few displays.
Microsoft has emphasized that the bug does not affect all color profile management programs, and claims that they are working on the color issue affecting the Windows 11 version 21H2. The fix is expected to roll out in late January. Users who are experiencing this issue may have one choice: remain patient and install the Windows update patch as soon as it arrives. Microsoft suggests (in official documentation linked above) that they expect an update and fix by "late January."
Recommend
About Joyk
Aggregate valuable and interesting links.
Joyk means Joy of geeK