

CentOS 8.2 对k8s基础环境配置 - 娇小赤雅
source link: https://www.cnblogs.com/huaxiayuyi/p/16795089.html
Go to the source link to view the article. You can view the picture content, updated content and better typesetting reading experience. If the link is broken, please click the button below to view the snapshot at that time.

一、基础环境配置
1 IP 修改
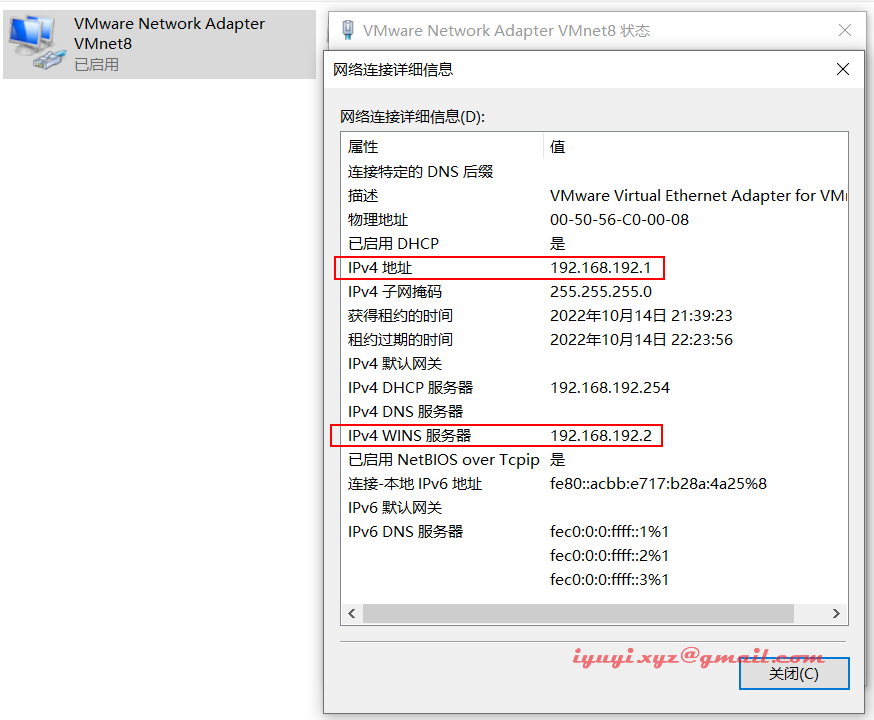
机器克隆后 IP 修改,使Xshell连接上
[root@localhost ~]# vi /etc/sysconfig/network-scripts/ifcfg-ens160
TYPE="Ethernet"
PROXY_METHOD="none"
BROWSER_ONLY="no"
BOOTPROTO="static" # 配置静态IP,防止修改
DEFROUTE="yes"
IPV4_FAILURE_FATAL="no"
IPV6INIT="yes"
IPV6_AUTOCONF="yes"
IPV6_DEFROUTE="yes"
IPV6_FAILURE_FATAL="no"
IPV6_ADDR_GEN_MODE="stable-privacy"
NAME="ens160"
UUID="d20c4f2e-c799-46e6-9a7a-0579c1791c27"
DEVICE="ens160"
ONBOOT="yes"
IPADDR="192.168.192.10" # 修改ip地址
PREFIX="24"
GATEWAY="192.168.192.2" # 修改网关地址
IPV6_PRIVACY="no"
DNS1=114.114.114.114 # DSN配置上,不然使用域名会找不到的
DNS2=8.8.8.8
重启网卡,并测试好不好使
[root@localhost software]# nmcli c reload ens160
[root@localhost software]# nmcli c up ens160
Connection successfully activated (D-Bus active path: /org/freedesktop/NetworkManager/ActiveConnection/5)
[root@localhost software]# 重启完后测试
[root@localhost software]# ping 114.114.114.114
PING 114.114.114.114 (114.114.114.114) 56(84) bytes of data.
64 bytes from 114.114.114.114: icmp_seq=1 ttl=128 time=30.8 ms
64 bytes from 114.114.114.114: icmp_seq=2 ttl=128 time=30.6 ms
64 bytes from 114.114.114.114: icmp_seq=3 ttl=128 time=28.10 ms
64 bytes from 114.114.114.114: icmp_seq=4 ttl=128 time=30.1 ms
64 bytes from 114.114.114.114: icmp_seq=5 ttl=128 time=34.4 ms
^C
--- 114.114.114.114 ping statistics ---
5 packets transmitted, 5 received, 0% packet loss, time 14ms
rtt min/avg/max/mdev = 28.999/30.978/34.430/1.841 ms
2 设置主机名
hostnamectl set-hostname kube-master01
hostnamectl set-hostname kube-node01
hostnamectl set-hostname kube-node02
hostnamectl set-hostname kube-vip
3 配置hosts本地解析
cat > /etc/hosts <<EOF
127.0.0.1   localhost localhost.localdomain localhost4 localhost4.localdomain4
::1         localhost localhost.localdomain localhost6 localhost6.localdomain6

192.168.192.10 kube-master01
192.168.192.20 kube-node01
192.168.192.30 kube-node02
192.168.192.40 kube-vip
EOF
4 关闭防火墙 / Selinux / Swap
为了避免额外的干扰,需要关闭防火墙,对于公有云,内网端口一般全开放,外网端口通过安全组控制
# 关闭防火墙
[root@localhost ~]# systemctl stop firewalld
[root@localhost ~]# systemctl disable firewalld
Removed /etc/systemd/system/multi-user.target.wants/firewalld.service.
Removed /etc/systemd/system/dbus-org.fedoraproject.FirewallD1.service.

# 关闭Selinux
# 永久关闭
[root@localhost ~]# sed -i "s#^SELINUX=.*#SELINUX=disabled#g" /etc/selinux/config
# 临时关闭
[root@localhost ~]# setenforce 0
# 检查
[root@localhost ~]# /usr/sbin/sestatus -v
SELinux status:                 enabled

# 先查看 Swap有没有
[root@localhost ~]# free -m
              total        used        free      shared  buff/cache   available
Mem:           1800        1208         122          15         469         417
Swap:          2047          15        2032
# 关闭 Swap 分区,Swap 会影响性能
[root@localhost ~]# swapoff -a && sysctl -w vm.swappiness=0
vm.swappiness = 0
[root@localhost ~]# sed -ri '/^[^#]*swap/s@^@#@' /etc/fstab
# 在确认下 [查看swap一行全是0就正确]
[root@localhost ~]# free -m
              total        used        free      shared  buff/cache   available
Mem:           1800        1210         110          25         479         406
Swap:             0           0           0
[root@localhost ~]# cat /etc/hosts
127.0.0.1   localhost localhost.localdomain localhost4 localhost4.localdomain4
::1         localhost localhost.localdomain localhost6 localhost6.localdomain6
# 主机名解析
[root@localhost ~]# echo "127.0.0.1 $(hostname)" >> /etc/hosts
[root@localhost ~]# cat /etc/hosts
127.0.0.1   localhost localhost.localdomain localhost4 localhost4.localdomain4
::1         localhost localhost.localdomain localhost6 localhost6.localdomain6
127.0.0.1 localhost.localdomain
5 YUM 源配置
本地或者自建服务器都需要配置 YUM 源,如果是云服务器由于本身就有对应云的 YUM 源,不需要配置
# 备份旧的 yum 源
cd /etc/yum.repos.d/
mkdir backup-$(date +%F)
mv *repo backup-$(date +%F)

# 上面看不懂,这有简单的
[root@localhost yum.repos.d]# mkdir /etc/yum.repos.d.bak
[root@localhost yum.repos.d]# cp /etc/yum.repos.d/* /etc/yum.repos.d.bak/
[root@localhost yum.repos.d]# ls /etc/yum.repos.d.bak/

# 添加阿里云 yum 源
[root@localhost yum.repos.d]# curl http://mirrors.aliyun.com/repo/Centos-7.repo -o ali.repo
  % Total    % Received % Xferd  Average Speed   Time    Time     Time  Current
                                 Dload  Upload   Total   Spent    Left  Speed
100  2523  100  2523    0     0  13637      0 --:--:-- --:--:-- --:--:-- 13637
6 基础依赖安装
由于服务器最小化安装,需要安装一些常用的依赖和工具,否则后面安装可能会报错
# 安装 epel 源
[root@localhost yum.repos.d]# yum -y install epel-release
[root@localhost yum.repos.d]# yum clean all
33 files removed
[root@localhost yum.repos.d]# yum makecache

# 安装常用依赖
yum -y install gcc glibc gcc-c++ make cmake net-tools screen vim lrzsz tree dos2unix lsof \
    tcpdump bash-completion wget openssl openssl-devel bind-utils traceroute \
    bash-completion glib2 glib2-devel unzip bzip2 bzip2-devel libevent libevent-devel \
    expect pcre pcre-devel zlib zlib-devel jq psmisc tcping yum-utils device-mapper-persistent-data \
    lvm2 git device-mapper-persistent-data bridge-utils container-selinux binutils-devel \
    ncurses ncurses-devel elfutils-libelf-devel ack

# 升级服务器
yum -y update
注意:yum 安装出错,看最后一个报错标题里面找。
7 配置时间同步
本地或者自建服务器都需要配置时间同步,如果是云服务器由于本身就有对应云的时间同步机制,不需要配置
echo "# 互联网时间同步" >> /var/spool/cron/root
echo "*/5 * * * * /usr/sbin/ntpdate time2.aliyun.com >/dev/null 2>&1" >> /var/spool/cron/root
9 互相免密
Master 节点执行以下操作
ssh-keygen -t rsa

# 定义 master 列表
MASTER_LIST=(
192.168.192.10
192.168.192.30
)

# 配置免密登录
for i in ${MASTER_LIST[@]};do
    ssh-copy-id -i /root/.ssh/id_rsa.pub root@$i
done

# yes
# 输入密码
10 内核升级
在 Kubernetes 的 Github 仓库中:
有提到关于内核版本的问题:
- Faster mount detection for linux kernel 5.10+ using openat2 speeding up pod churn rates. On Kernel versions less 5.10, it will fallback to using the original way of detecting mount points i.e by parsing /proc/mounts.
- 这意味着内核
5.10版本以后会使用 openat2 进行更快的挂载检测,所有可以将内核升级到 5.10 以后,但没必要最新。 - 这里使用的是
5.11.16版本,更新于 2021 年 4 月。如果想安装其它版本可以去下面网站下载:http://193.49.22.109/elrepo/kernel/el7/x86_64/RPMS/
创建用于存放安装包并下载
mkdir -p /opt/software/kernel
cd /opt/software/kernel
wget http://193.49.22.109/elrepo/kernel/el7/x86_64/RPMS/kernel-ml-5.11.14-1.el7.elrepo.x86_64.rpm
wget http://193.49.22.109/elrepo/kernel/el7/x86_64/RPMS/kernel-ml-devel-5.11.14-1.el7.elrepo.x86_64.rpm
yum localinstall -y kernel-ml*
# 设置内核启动顺序
grub2-set-default 0 && grub2-mkconfig -o /etc/grub2.cfg
# 查看默认内核
grubby --default-kernel注意:CentOS 8.2 对以上内核升级需要安装各种依赖。
CentOS 7.9 升级内核 kernel-ml-5.6.14版本:https://www.cnblogs.com/huaxiayuyi/p/16788084.html
Centos 8.2 升级内核通过elrepo源:https://www.cnblogs.com/huaxiayuyi/p/16794239.html
8 系统优化
对系统打开文件数进行修改,提升性能
cat >> /etc/security/limits.conf << EOF
# 打开文件优化配置
* soft nofile 655360
* hard nofile 655350
* soft nproc 655350
* hard nproc 655350
* soft memlock unlimited
* hard memlock unlimited
EOF

cat /etc/security/limits.conf
11 加载模块
ipvs模块配置
kube-proxy开启ipvs的前置条件
创建配置文件
内核 4.19+版本 nf_conntrack_ipv4 已改为 nf_conntrack ,4.18以下使用 nf_conntrack_ipv4即可。
安装 ipvsadm,节点通信需要用到 LVS,所有需要安装 ipvsadm。ipset 和 ipvsadm (便于查看 ipvs 的代理规则)
yum -y install ipvsadm ipset sysstat conntrack libseccomp配置 ipvs 模块(内核 4.19 版本以前使用 nf_conntrack_ipv4,以后使用 nf_conntrack)
modprobe -- ip_vs
modprobe -- ip_vs_rr
modprobe -- ip_vs_wrr
modprobe -- ip_vs_sh
modprobe -- nf_conntrack

cat > /etc/modules-load.d/ipvs.conf << EOF
ip_vs
ip_vs_lc
ip_vs_wlc
ip_vs_rr
ip_vs_wrr
ip_vs_lblc
ip_vs_lblcr
ip_vs_dh
ip_vs_sh
ip_vs_fo
ip_vs_nq
ip_vs_sed
ip_vs_ftp
ip_vs_sh
nf_conntrack
ip_tables
ip_set
xt_set
ipt_set
ipt_rpfilter
ipt_REJECT
ipip
EOF
重新加载配置
# 加载内核配置 警告忽略
systemctl enable --now systemd-modules-load.service
[root@localhost etc]# lsmod | grep --color=auto -e ip_vs -e nf_conntrack
ip_vs_ftp 16384 0
ip_vs_sed 16384 0
ip_vs_nq 16384 0
ip_vs_fo 16384 0
ip_vs_dh 16384 0
ip_vs_lblcr 16384 0
ip_vs_lblc 16384 0
ip_vs_wlc 16384 0
ip_vs_lc 16384 0
ip_vs_sh 16384 0
ip_vs_wrr 16384 0
ip_vs_rr 16384 0
ip_vs 176128 24 ip_vs_wlc,ip_vs_rr,ip_vs_dh,ip_vs_lblcr,ip_vs_sh,ip_vs_fo,ip_vs_nq,ip_vs_lblc,ip_vs_wrr,ip_vs_lc,ip_vs_sed,ip_vs_ftp
nf_conntrack_tftp 20480 3 nf_nat_tftp
nf_nat 49152 4 nf_nat_tftp,nft_chain_nat,xt_MASQUERADE,ip_vs_ftp
nf_conntrack 159744 7 xt_conntrack,nf_nat,nf_conntrack_tftp,nft_ct,nf_nat_tftp,xt_MASQUERADE,ip_vs
nf_defrag_ipv6 24576 2 nf_conntrack,ip_vs
nf_defrag_ipv4 16384 1 nf_conntrack
libcrc32c 16384 4 nf_conntrack,nf_nat,xfs,ip_vs
# 或者
[root@localhost etc]# cut -f1 -d " " /proc/modules | grep -e ip_vs -e nf_conntrack
ip_vs_ftp
ip_vs_sed
ip_vs_nq
ip_vs_fo
ip_vs_dh
ip_vs_lblcr
ip_vs_lblc
ip_vs_wlc
ip_vs_lc
ip_vs_sh
ip_vs_wrr
ip_vs_rr
ip_vs
nf_conntrack_tftp
nf_conntrack12 优化系统参数
添加内核调优参数,某些参数对 Kubernetes 集群很重要(不一定是最优,各取所有)
cat >> /etc/sysctl.d/user.conf << EOF
# 内核调优
net.ipv4.ip_forward = 1
net.bridge.bridge-nf-call-iptables = 1
net.bridge.bridge-nf-call-ip6tables = 1
fs.may_detach_mounts = 1
vm.overcommit_memory=1
vm.panic_on_oom=0
fs.inotify.max_user_watches=89100
fs.file-max=52706963
fs.nr_open=52706963
net.netfilter.nf_conntrack_max=2310720
net.ipv4.tcp_keepalive_time = 600
net.ipv4.tcp_keepalive_probes = 3
net.ipv4.tcp_keepalive_intvl =15
net.ipv4.tcp_max_tw_buckets = 36000
net.ipv4.tcp_tw_reuse = 1
net.ipv4.tcp_max_orphans = 327680
net.ipv4.tcp_orphan_retries = 3
net.ipv4.tcp_syncookies = 1
net.ipv4.tcp_max_syn_backlog = 16384
net.ipv4.ip_conntrack_max = 65536
net.ipv4.tcp_timestamps = 0
net.core.somaxconn = 16384
EOF
1 单独指定配置文件加载
sysctl -p /etc/sysctl.d/user.conf2 手动加载所有的配置文件
[root@localhost etc]# sysctl --system
* Applying /usr/lib/sysctl.d/10-default-yama-scope.conf ...
kernel.yama.ptrace_scope = 0
* Applying /usr/lib/sysctl.d/50-coredump.conf ...
kernel.core_pattern = |/usr/lib/systemd/systemd-coredump %P %u %g %s %t %c %h %e
* Applying /usr/lib/sysctl.d/50-default.conf ...
kernel.sysrq = 16
kernel.core_uses_pid = 1
kernel.kptr_restrict = 1
net.ipv4.conf.all.rp_filter = 1
net.ipv4.conf.all.accept_source_route = 0
net.ipv4.conf.all.promote_secondaries = 1
net.core.default_qdisc = fq_codel
fs.protected_hardlinks = 1
fs.protected_symlinks = 1
* Applying /usr/lib/sysctl.d/50-libkcapi-optmem_max.conf ...
net.core.optmem_max = 81920
* Applying /usr/lib/sysctl.d/50-pid-max.conf ...
kernel.pid_max = 4194304
* Applying /usr/lib/sysctl.d/60-libvirtd.conf ...
fs.aio-max-nr = 1048576
* Applying /etc/sysctl.d/99-sysctl.conf ...
* Applying /etc/sysctl.d/user.conf ...
net.ipv4.ip_forward = 1
vm.overcommit_memory = 1
vm.panic_on_oom = 0
fs.inotify.max_user_watches = 89100
fs.file-max = 52706963
fs.nr_open = 52706963
net.netfilter.nf_conntrack_max = 2310720
net.ipv4.tcp_keepalive_time = 600
net.ipv4.tcp_keepalive_probes = 3
net.ipv4.tcp_keepalive_intvl = 15
net.ipv4.tcp_max_tw_buckets = 36000
net.ipv4.tcp_tw_reuse = 1
net.ipv4.tcp_max_orphans = 327680
net.ipv4.tcp_orphan_retries = 3
net.ipv4.tcp_syncookies = 1
net.ipv4.tcp_max_syn_backlog = 16384
net.ipv4.tcp_timestamps = 0
net.core.somaxconn = 16384
* Applying /etc/sysctl.conf ...
完成后就可以重启服务器
reboot重启完成,在查看 ipvs 的配置效果
lsmod | grep --color=auto -e ip_vs -e nf_conntrack1 域名解析不了
ping: baidu.com: Name or service not known
0curl: (6) Could not resolve host: mirrors.aliyun.com
[root@localhost ~]# vi /etc/sysconfig/network-scripts/ifcfg-ens160
...
GATEWAY="192.168.192.2" # 修改网关地址
IPV6_PRIVACY="no"
# 域名解析,网关也要对
DNS1=114.114.114.114
DNS2=8.8.8.8
[root@localhost software]# nmcli c reload ens160
[root@localhost software]# nmcli c up ens160
[root@localhost yum.repos.d]# ping baidu.com
PING baidu.com (110.242.68.66) 56(84) bytes of data.
64 bytes from 110.242.68.66 (110.242.68.66): icmp_seq=1 ttl=128 time=24.0 ms
64 bytes from 110.242.68.66 (110.242.68.66): icmp_seq=2 ttl=128 time=26.5 ms
^C
--- baidu.com ping statistics ---
2 packets transmitted, 2 received, 0% packet loss, time 4ms
rtt min/avg/max/mdev = 24.005/25.233/26.462/1.238 ms2 yum 安装出错
[root@localhost yum.repos.d]# yum -y install epel-release
CentOS-8 - AppStream                                                                                       81  B/s |  38  B     00:00
Error: Failed to download metadata for repo 'AppStream': Cannot prepare internal mirrorlist: No URLs in mirrorlist
如果仍然需要运行旧CentOS 8,可以在/etc/yum.repos中更新repos.d使用vault.centos.org代替mirror.centos.org
修改下面两个文件
cd /etc/yum.repos.d
vi CentOS-Base.repo
vi CentOS-AppStream.repo
CentOS-BaseOS.repo的内容修改为
[baseos]
name=CentOS Linux $releasever - BaseOS
#mirrorlist=http://mirrorlist.centos.org/?release=$releasever&arch=$basearch&repo=BaseOS&infra=$infra
#baseurl=http://mirror.centos.org/$contentdir/$releasever/BaseOS/$basearch/os/
baseurl=https://vault.centos.org/centos/$releasever/BaseOS/$basearch/os/
gpgcheck=1
enabled=1
gpgkey=file:///etc/pki/rpm-gpg/RPM-GPG-KEY-centosofficial
CentOS-AppStream.repo的内容修改为
[appstream]
name=CentOS Linux $releasever - AppStream
#mirrorlist=http://mirrorlist.centos.org/?release=$releasever&arch=$basearch&repo=AppStream&infra=$infra
#baseurl=http://mirror.centos.org/$contentdir/$releasever/AppStream/$basearch/os/
baseurl=https://vault.centos.org/centos/$releasever/AppStream/$basearch/os/
gpgcheck=1
enabled=1
gpgkey=file:///etc/pki/rpm-gpg/RPM-GPG-KEY-centosofficial再执行yum -y install epel-release命令,发现成功了!
三、安装 k8s
CentOS 8.2 安装 kubernetes-1.25.1:https://www.cnblogs.com/huaxiayuyi/p/16794583.html
__EOF__
Recommend
About Joyk
Aggregate valuable and interesting links.
Joyk means Joy of geeK