

How To Livestream On Instagram Using Your Computer
source link: https://www.slashgear.com/1035223/how-to-livestream-on-instagram-using-your-computer/
Go to the source link to view the article. You can view the picture content, updated content and better typesetting reading experience. If the link is broken, please click the button below to view the snapshot at that time.

How To Livestream On Instagram Using Your Computer
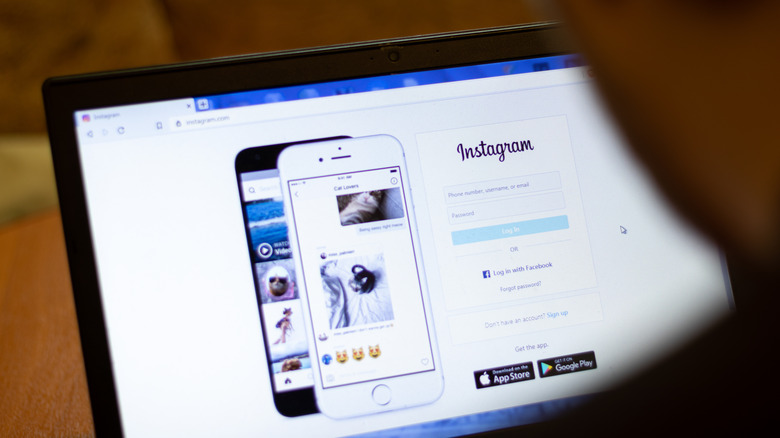
One of Instagram's most useful features for content creators is Instagram Live. It's an additional setting for Instagram Stories that allows you to jump on the app, share real-time videos of yourself, communicate with your followers, and respond to comments from your audience as they come in. This feature is easy to get to through any of Instagram's mobile apps, but if you're more of a desktop computer user, you may be wondering if it's possible to stream on the platform using your PC.
According to Instagram, there is, in fact, a way to stream live content from a computer using its Live Producer platform on the Instagram.com website. The feature integrates with popular third-party streaming programs, linking the software with your Instagram livestream via a unique stream key. At the time of writing, Instagram Live Producer is only available through the Instagram website and is offered as a limited rollout to its users, though that will hopefully change in the future. The support does offer some major benefits over mobile streaming, however, including the ability to use more than one microphone and access to the feature offered by the desktop software.
Technical things to note before you livestream
If you don't have one already installed on your computer, download a third-party program to use for livestreaming on Instagram via your desktop computer. Some of the applications that Instagram recommends are Streamlabs, OBS, and StreamYard. Once you choose and install one, you should go through the app's settings and make sure that the video and audio format specifications are properly set up before you hit record.
Based on Instagram's initial testing of the feature, having the video set at a 16:9 aspect ratio is highly recommended, with the resolution set at 1280 x 720 and the frame rate at 30fps. If needed, Instagram Live Producer can support a frame rate value of 60fps, as well, but because of early bugs, the stream may still be seen as 30fps on Live Producer's preview page. Recommended audio settings include a sample rate of 44.1 kHz and a stereo channel layout. Suggested bitrates for the streaming output are 2,250 to 6,000 Kbps for video and up to 256 Kbps for audio, Instagram says.
According to TechCrunch, certain Instagram Live features will not be available through Live Producer, such as pinning comments, accessing responses to Q&A stickers, fundraising, live shopping, and live rooms. All you can really do through a computer-based Instagram Live broadcast is view comments and make responses on camera while Live Producer is running. Additionally, there's also no way to add a moderator to a Live Producer livestream, so you'll have to manage comments and viewers on your own. This may change in the future, however, as Instagram refines the feature.
How to generate a unique livestream URL and key

Once you have all of the necessary video, audio, and output settings adjusted to Instagram's recommended values, here's how you can get a special link and code for your chosen third-party streaming program, which you will need to connect it with Instagram and begin your broadcast from a computer:
- Launch the streaming application.
- On the app's main screen, find the area where you're supposed to plug in your server URL and stream key to start broadcasting directly on Instagram — you will need this for later. It will probably be in "Settings" under "Stream" or a similarly named submenu, though it varies based on the software.
- On your preferred web browser, go to Instagram's website.
- Click the + icon on the top-right corner of the page to add a post. You'll know if you have access to the Instagram Live Producer feature when you can view and select "Live" from the dropdown menu.
- Once you're inside of the "Go live" page, type in a title for your live stream video in the "Add a title" text field, then select an audience from the dropdown. "Practice" will only be viewable to you, while "Public" will share your stream with your followers.
After you hit the Next button, Instagram should pull up a screen that contains a unique stream URL as well as a stream key. Do note that these links are dynamic and will change every time you access Live Producer, according to Instagram.
How to connect your computer to Instagram and begin streaming

Now that you have the links required to integrate your chosen streaming platform with Instagram, here's how you can start streaming through Instagram Live on your laptop or desktop:
- Go to your streaming app's Stream page.
- Select Instagram from the list of integrated services and use your Instagram login credentials to connect the account. Skip to Step 6 if the integration is successful.
- If it's not on the list, select Custom or Custom RTMP.
- Copy the stream URL and paste it into your streaming application's Server field. Do the same for the stream key.
- Hit the button that will apply the changes to your streaming program and follow the onscreen instructions if there are any.
- Tweak your video's settings within your streaming software until its layout is according to your desired preferences.
- In your streaming application, hit the button that will start your livestream. Instagram's Live Producer viewer should show exactly what the broadcast coming from your streaming app looks like, but it may take several seconds to update.
Once the preview on Live Producer is confirmed to be the same as the one on the streaming application, hit "Go live" to start the livestream on Instagram. This should automatically pull up the comments tab where you can see and respond to comments from your followers or livestream viewers.
How to end and save your Instagram livestream on a computer

To ensure that your livestream stops recording in a seamless manner, make sure that you end it on Instagram by clicking "End live video" before you stop it in your streaming app. Otherwise, the video will continue showing the last frame as a still until you end it on Instagram. A completed video of your concluded livestream should show up in Instagram's Live Archive, provided that you have it enabled. This can only be done through one of Instagram's mobile apps:
- Launch Instagram on your mobile device and go to your profile page.
- Tap the Menu icon (three horizontal lines) located on the top-right corner of the screen.
- Select the Settings option, then go to Privacy.
- Hit the Live option, then make sure the "Save Live to Archive" setting is enabled.
Instagram Live videos can be accessed and kept through the Live Archive page for a maximum of 30 days. This is where you can view, save, and download your previous livestreams. Again, these actions can only be achieved through Instagram's mobile apps:
- Launch Instagram on your mobile device and go to your profile page.
- Tap the Menu icon (three horizontal lines) located on the top-right corner of the screen and select Archive.
- Hit the dropdown menu at the top of the screen and go to "Live archive."
The Instagram livestream you just recorded on your desktop computer should be there if it was ended correctly. You can share it on your Instagram profile or download it onto your mobile device.
12 Hidden Netflix Features You Probably Didn't Know About
Netflix has become a ubiquitous part of our lives, having replaced the video rental stores of yesteryear and spawned colloquial slang like "Netflix and Chill." Having Netflix on in the background is so common the company went as far as checking in on you every few episodes to make sure you're alright.
It's easy to forget Netflix's humble beginnings as DVD-by-mail service launched in the late '90s — you can still rent DVDs and Blu-ray's from them through a separate subscription, if you're so inclined — and no one could have predicted how successful they'd become, certainly not their competitors.
Despite how completely the streaming service has embedded itself into our lives, there are a number of features the average user may not be familiar with. In order to maximize the value of your monthly subscription fee, we're here to show you twelve lesser-known features you can use to make the most of your binge session.
Remove the "Are You Still Watching?" Prompt
Binge watching may not be the healthiest habit but we're all guilty of it sometimes. While we appreciate Netflix checking in on us to see if we're still awake, gently prodding us with a digital stick to take a break, get up and stretch, maybe even go outside and step into the Sun, sometimes it's a little much.
If you're going to binge, you're going to binge. The last thing you need is some faceless user interface guilt-tripping you every time you watch more than three episodes in a row. For a service so closely associated with the word "chill," Netflix has a shocking lack of it sometimes. Luckily, there's a solution.
Browser extensions like Never Ending Netflix can override the prompt, letting you watch your favorite show from sunup to sundown in peace. It also offers additional features for streamlining your viewing experience including skipping title sequences and skipping the "Next Episode" countdown.
Did you really watch 28 episodes in a row, or did you just watch one really long movie? That's a question for your therapist and future philosophers, you've got snacks to eat and a body-shaped couch imprint to make.
Host a Digital Watch Party
Sometimes you want to watch a movie with your friends and family, but you don't actually want to see anyone in person. Maybe there's a global pandemic on, or maybe you're having one of those introvert/extrovert days when you want two contradictory things at once. The human mind is an enigma, and we won't pretend to understand it.
Teleparty — previously called Netflix Party — is a browser extension which allows you to host virtual movie nights. The extension is free and set up is relatively simple. All you have to do is install Teleparty, pin it to your toolbar, open the video you want to watch, and start your party. Once you hit play, everyone in the party can watch the same content at the same time and there's even a chat window in a sidebar to make it feel a little closer to actually watching a movie together with your friends.
As of earlier this year, Teleparty added support for additional streaming services including Hulu, Disney+, and HBO, and they're planning to add more services in the future.
Customize Your Subtitles
If you spent your younger years going to loud concerts and turning up the volume too high in your headphones, you might be experiencing some hearing loss and prefer to hit the subtitles when you watch TV or movies. Subtitles aren't just for the deaf or hard of hearing, though. Surveys suggest a growing number of people prefer to have the subtitles on regardless of their hearing status and that's especially true among young people.
Streaming also gives viewers access to content from other parts of the world they might not previously have had access to. Netflix has a growing library of foreign language content, from indie foreign films to manga. We don't want to get into the subs vs. dubs debate, that's a conversation for another time, but we do want to make sure you know how to get the most out of your subtitles.
Netflix's subtitle preference menu offers a number of customization options. You can choose from seven different fonts, three text sizes, and eight colors. There are also five options for shadows, and the ability to add a background or window, to make the words pop a little more clearly on the screen.
You can preview any combination of these options in the preference menu. Unlike some of the other features in this list, these preferences aren't limited to computer viewing. They'll show up on any supported device.
Turn Your TV Into an Audio Experience
From the silent films of early cinema up through the modern day, television and movies have largely remained a visual experience. The nature of the medium has had a tendency to alienate, however unintentionally, those with visual impairment, but not anymore.
Whether you're experiencing vision loss, or you just want to enjoy your favorite shows and movies without being tied to a screen, Netflix offers audio descriptions for a large and growing selection of their content.
You can access this feature through a browser, a phone app, or on your television. Once you've started a show, simply navigate to the Audio and Subtitles menu — it looks like a speech bubble — and select Audio Description.
Now a narrator will add brief descriptions of actions and settings between lines of dialogue to paint a picture of what's happening on screen, transforming a traditionally visual medium into and auditory one. If you're a fan of audiobooks or radio plays, this might be for you.
The translation isn't perfect, but no adaptation from one medium to another ever is. Still, it's great for experiencing content you're already familiar with in a new way while you're otherwise occupied, and it offers an enhanced experience for people for people who might otherwise have to rely on the dialogue alone.
Delete Your Viewing History
We're living in a world of ever-decreasing privacy. It sometimes feels as though every move we make is laid down inside our digital permanent record. The GPS in your phone tracks where you go each day, all of your internet searches and online traffic are catalogued and codified, and the embarrassing things you posted to Twitter, or Facebook, or Myspace, when you were a teenager live on the internet forever.
The same is true of your Netflix viewing history. The streaming platform uses that information to serve up new content you might be interested in, but that doesn't mean your roommate, partner, or parents need to know about it.
There are a number of reasons you might want to remove a title from your viewing history. Maybe you don't want your roommate to know you've been watching the same guilty pleasure on repeat for two weeks. Maybe you don't want your partner to know you watched the latest episode of your favorite show without them. Either way, Netflix has you covered.
By visiting the viewing activity page, no one ever need know what you've been watching. Simply go to your history, click the icon to hide the offending content from your viewing history, and it will be removed from your records within 24 hours.
It's important to note, however, that doing so also removes it from the recommendation algorithm. So, Netflix won't offer you similar content unless you watch that title again.
Password Protect Your Profile
It's not uncommon for people to share a single Netflix account with friends and family. Sharing an account can be convenient but it can also be annoying, especially if someone else's viewing habits are interfering with your streaming experience.
Some of that can be alleviated by creating separate user profiles but there's nothing to stop another user — your kid, for example — from accessing your profile and watching content you'd rather they not be exposed to. There's also nothing to stop them from watching 156 episodes of Pokémon in a row and messing up your recommendations.
Except that there actually is something to stop them. Everyone knows a password is protected to access the account, but you can also pin lock your profile so that other users sharing your account can't access it.
Open up Netflix in a browser and hover over the arrow in the top-right corner, then click Account. Scroll down to the Profile & Parental Controls section and select your profile. There, you'll find a Profile Lock option which allows you to set up a pin code for access.
You'll never have to deal with your sibling messing up your watch history again, and you can also avoid some of the viewing history deletions from the previous section. With only four digits your privacy and algorithmic integrity is secured.
Add Ratings From Trusted Sources
With so much new content dropping all the time, it can be hard to know what's worth watching and what you should avoid. Recommendations from friends and family go a long way, but only if you have similar tastes and even then, you can burn through a season quickly, leaving you searching for something new.
In the age of the internet there's no need for you to make those decisions alone, almost anything can be crowdsourced and finding content recommendations is no exception. There are a number of reputable review aggregator sites like Metacritic and IMDB which provide ratings scores from professional critics and viewers. Getting to that data, however, means looking up movies or TV shows one at a time. Luckily, there's an easier solution.
The Trim browser extension lets you incorporate ratings information from IMDB, Rotten Tomatoes, and Metacritic without having to pull out your phone or open a separate tab. Ratings appear right on the Netflix home screen at a glance. It also allows you to fade out selections based on minimum rating scores and release date, making finding your next obsession that much easier.
Download Videos to Watch Offline
Streaming allowed us to do away with bulky physical media collections and access an endless supply of movies from our phones, computers, or televisions. The only catch is it requires a secure internet connection in order to work.
That's all fine if you're at home or have access to a reliable wireless connection while you're out and about. What happens if your power or internet goes out? What about if you're on a road trip, travelling through remote areas where wireless connections can be spotty? Losing access to the internet also means losing access to your entertainment. Netflix has a workable solution and this one doesn't require any extensions; it's built into the service by design.
Netflix allows you to download select movies and episodes to your phone or computer for offline viewing. It requires a little advance planning but is a perfect solution if you find yourself without a good connection.
Downloading isn't available for every title and there are some limitations to the amount of time you can keep a title once it's downloaded, but a well-planned stockpile should get you through a connection drought.
The process is simple, just open the app on your phone and navigate to the title you want. If it's available for download, you'll see a button just below the play option. Once it's on your device you can watch to your heart's content, or until it expires. Never pay for an internet connection on an airplane again.
Request a Title
The nature of streaming services means that titles come and go. Something you intended to watch might disappear before you get the chance, or it might never have been available at all. Relying on streaming services means being at the mercy of whatever content they've negotiated licensing agreements for. It's sort of like being at a friend's house and only being able choose from what they happen to have on the shelf.
If you find that there's something you'd really like to see, but it isn't available among its more than 15,000 titles, don't despair. You can help Netflix decide what to add to the platform by requesting a title.
Decisions about which titles they acquire are complex and often involve a number of factors including existing rights agreements. They also take regional tastes into account, and that's something you can impact, by sending them your wish list.
Netflix provides a simple form for sending requests. It's unlikely that an individual request will result in the sudden appearance of your favorite underappreciated movie or show, but every flood is made of single drops of water and enough request could move the needle.
Casting your vote for new content could alert Netflix to shifting tastes and it doesn't cost you anything to make your voice heard.
Use Category Codes to Find the Perfect Watch
Netflix has thousands of titles available but only a fraction of them are presented on your homepage. The interface takes your viewing activity into account when deciding what to populate, but it's still only a small glimpse into the deep collection of content available. Your next favorite show might be hiding beneath the rubble where you'll never find it, at least not without help.
Sure, you can search for titles one at a time and hope to get lucky, or you can make the job easier by whittling down the choices to precisely what you're looking for with category codes. Netflix categorizes all of its content with tags and each of those tags has an associated code. The trick is knowing what they are. Lucky for you, the collective knowledge of the internet has compiled a comprehensive list of Netflix's category codes.
If you want an action movie, you'll find everything Netflix has under code 1365. If that's not specific enough, you can drill down into subgenres. How about an action comedy? You'll find them with code 43040.
Open Netflix in a browser and replace the number string at the end of the URL with the code of your choosing. Voila, the user interface will refresh with only the sort of titles you're looking for. Suddenly, a suite of previously hidden content is at your fingertips and the more you use this trick, the more your ordinary homepage will reflect your tastes.
Let Netflix Roulette Choose For You
When we were kids, we were happy to watch the same movie on repeat for weeks or months at a time. Having only a small collection of VHS tapes or DVDs to choose from meant figuring out what your favorites were and sticking with them.
Streaming services have the opposite problem. The sheer number of options can be overwhelming, and you can easily find yourself scrolling and scrolling until your food goes cold and your eyelids grow heavy, paralyzed by indecision.
When that happens, it's time to take yourself out of the equation entirely and leave the decision up to someone — or something — else. In this case, a computer. Netflix Roulette is a fun tool by Reelgood which allows you to select a genre, IMDB score, and a number of other options before hitting a randomizer which decides what you should watch.
If you're feeling especially brave you can leave all of those options blank and choose from everything Netflix has to offer. Creating an account opens up the options even wider by allowing you to incorporate content from other streaming services like Amazon Prime, HBO Max, Disney+, and more.
Life requires plenty of difficult decisions, choosing your entertainment doesn't have to be one of them.
Become a Beta Tester for the Newest Features
The above features should go a long way toward enhancing your Netflix prowess and making you the master of your own personal streaming domain. However, if you find that they aren't enough to satisfy your viewing experience, you can sign up to become a beta tester and get access to all of the newest features before anyone else.
Netflix is constantly working to improve their user interface but, like any company feeling out a new version of their product, they benefit from feedback before a full rollout. Signing up to be a beta tester gives you the option of being the guinea pig for new features before they become available to the wider customer base.
Log into your Netflix account on a browser, hover over the arrow next to your profile picture in the top-right corner and select Account. Under Settings, you'll see an option for Test Participation. Toggle the switch to the On setting and you're off to the races.
You may not see any immediate changes but when Netflix is ready to test a new feature, you'll be among the first users to experience whatever the future of streaming entertainment has to offer.
Recommend
About Joyk
Aggregate valuable and interesting links.
Joyk means Joy of geeK