

在 Ubuntu 上搭建 WireGuard 服务器,实现远程登录
source link: https://www.eefocus.com/communication/526769
Go to the source link to view the article. You can view the picture content, updated content and better typesetting reading experience. If the link is broken, please click the button below to view the snapshot at that time.

在本文中,我将向大家展示如何在 Ubuntu 上搭建 WireGuard 服务器,从而实现远程登录。
首先,我们先来了解一下,什么是 WireGuard?
WireGuard 简介
WireGuard 是一款非常简单快捷的 VPN 工具,采用了最先进的加密技术。它的目标是比 IPsec 更快,更简单,更精简易用,同时避免大规模配置的麻烦。WireGuard 被设计为通用 VPN,用于在嵌入式接口和超级计算机上运行,适用于多种不同环境。WireGuard 最初是为 Linux 内核发布的,现在已经可广泛部署并且跨平台支持(Windows,macOS,BSD,iOS,Android)。WireGuard 目前发展迅速,并且已经被认为是业内最安全,最易用和最简单的 VPN 解决方案。
WireGuard 基本概念
WireGuard 中涉及到几个基本概念:
-
Peer:WireGuard 中的节点。
-
私钥(Private key):每个节点自己的私钥,可以使用wg genkey 生成。
-
公钥(Public key):每个节点自己的公钥,可以使用wg pubkey 生成。
-
AllowedIPs:定义每个节点允许通过的IP 地址段。
下面是 WireGuard 的配置步骤:
1、创建虚拟网卡 eth0
2、使用私钥和对端的公钥对其进行配置建立连接
3、通过接口开始交换数据包
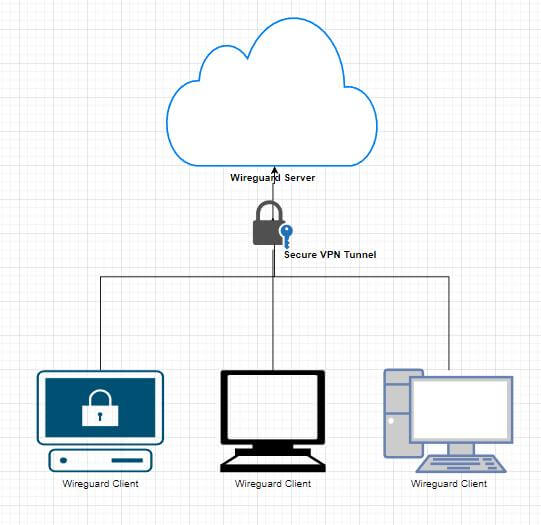
以上为建立一个 WireGuard VPN 链接的过程,建立好后,A 设备与 B 设备互相需要保证虚拟网卡的 IP 在相同网段中,并且这个网段被 WireGuard 的配置文件 AllowedIPs 所允许通过,最后,在 WireGuard 中的所有数据报文,都采用 UDP 的方式发送。
WireGuard 安装
前期准备
云端服务器 x 1
系统:Ubuntu Server 18.04.1 LTS 64bit
可访问网络的 PC x 1
系统:Windows11
Ubuntu 服务器 IP 地址 42.192.113.207
WireGuard 主端虚拟 IP 地址 172.16.1.11
WireGuard 对端虚拟地址:172.16.1.14
安装 WireGuard 服务器
sudo apt install -y wireguard
安装Wireguard服务器
sudo apt install -y wireguard

配置 WireGuard 服务器
进入 wireguard 目录

使用命令生成一对公钥与私钥


注意查看 WireGuard 生成的 PublicKey 是

WireGuard PC 对端客户端配置
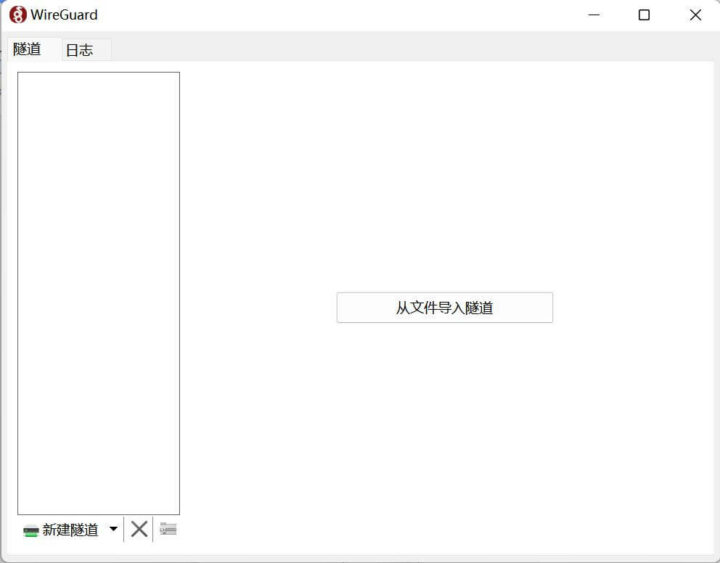
新建空隧道
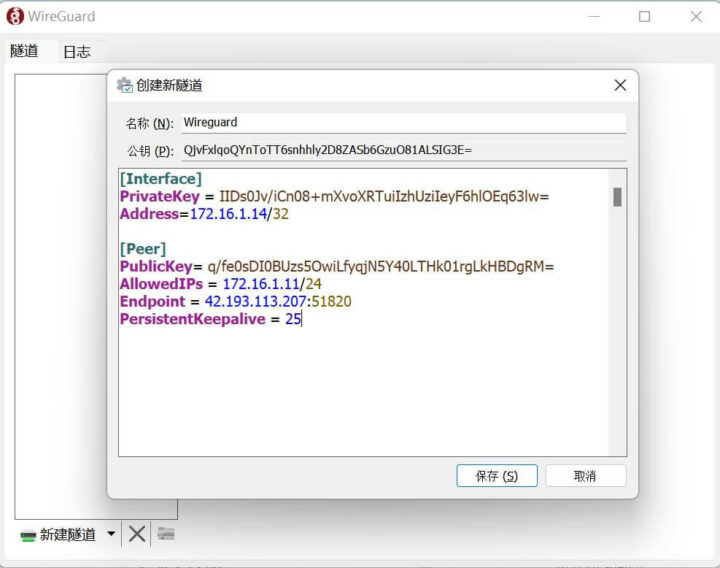
获得对端 PublicKey

文件配置:
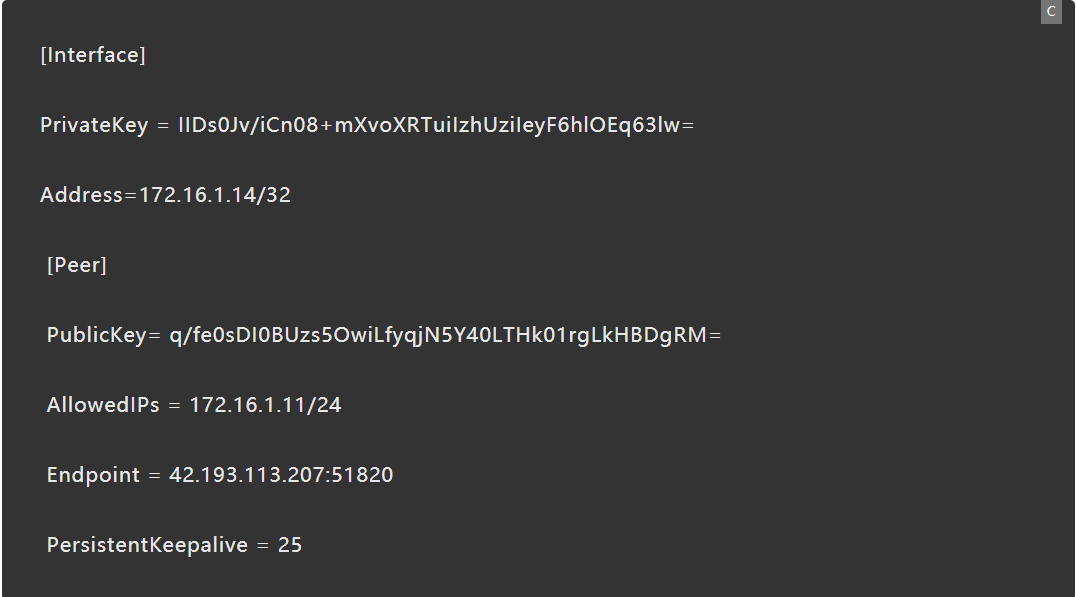
WireGuard 主端文件配置
创建服务器配置文件 wg0.conf

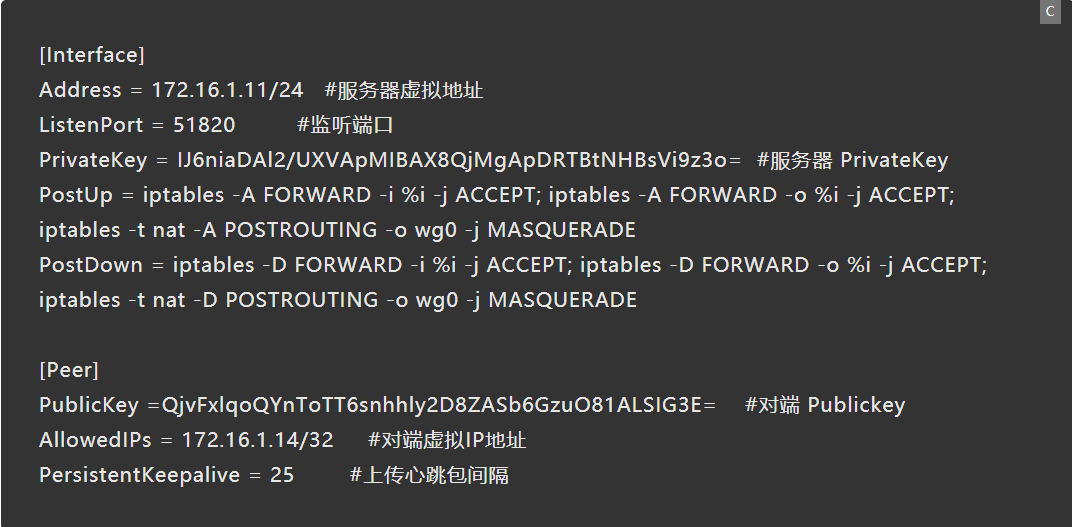
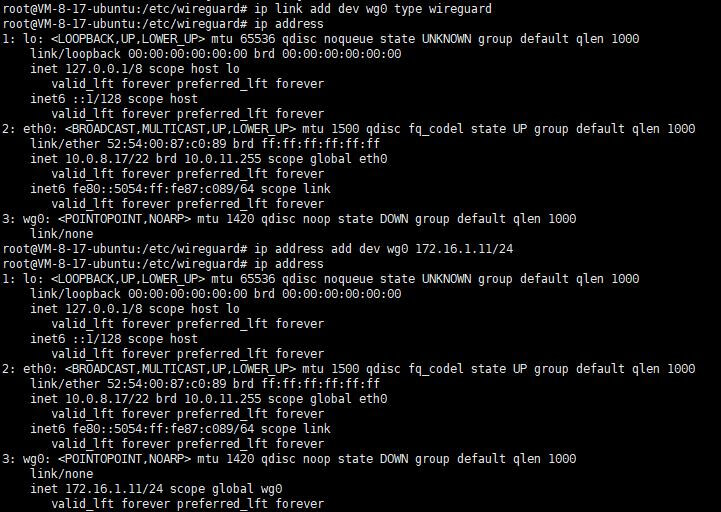
创建网卡配置文件,文件名为 wg0

网络接口配置虚拟 IP 地址(此虚拟 IP 地址为前期准备中的 172.16.1.11/24)
ip address add dev wg0 172.16.1.11/24 ip address
创建一个私钥,用于 WireGuard 使用,并配置权限禁止他人访问
wg genkey | tee /tmp/private-key chmod 600 /tmp/private-key wg set wg0 private-key /tmp/private-key listen-port 51820
启动网络接口
ip link set wg0 up ip address
此时我们创建好了本地节点,需要配置哪些节点是我们的对端,才能建立网络连接。
通过 PC 安装的 WireGuard 客户端连接 WireGuard 服务器
wg 查看连接状态
备注:其他相关命令
1、启动 WireGuard
wg-quick up wg0
2、停止 WireGuard
wg-quick down wg0
3、查看 WireGuard 运行状态
4、WireGuard 配置说明
在上文的基础上,大家需要额外注意以下这些内容:
1、如果你存在多个 [Peer] ,则在下面直接增加一个新的 [Peer] 栏目;
2、如果多个 Peer 存在不同的 IP,请不要让 AllowedIPs 存在重叠的 IP 地址段(比如配置多个相同 /24 只有一个生效);
3、Endpoint 既支持以域名的方式访问,也支持以 IP 的方式访问;
4、会话链接的建立只要保证两端数据在一台设备上成功协商,即使动态 IP 地址变更也不会影响 VPN 的稳定性;
5、ListenPort 不添加会自动生成高位端口用来 peer,以及主从结构下,从端不填写 listenport;
6、Table 参数可以使用 auto 和 off,两者分别对应"自动注入路由"和"禁止注入"。不配置采用 auto;
7、如果你是主从结构,需要让从端在配置中将从端的"AllowedIPs ="补写一条内容 0.0.0.0/0,::0 以允许所有流量;
8、PreUp,PostUp,PreDown,PostDown 这四个命令参数,是作为 wg-quick 快速设置/删除接口之前/之后由 bash(1)执行的四条命令,常用于配置自定义 DNS 或防火墙规则。 特殊字符串 %i 作为变量替代所控制的 INTERFACE 配置名。每个命令参数都支持多条命令,参数内的多条命令将按前后顺序依次执行,分隔符为 ; 分号。
版权声明:与非网经原作者授权转载,版权属于原作者。文章观点仅代表作者本人,不代表与非网立场。文章及其配图仅供工程师学习之用,如有侵权或者其他问题,请联系本站作侵删。 侵权投诉
Recommend
About Joyk
Aggregate valuable and interesting links.
Joyk means Joy of geeK