

我的Vue之旅、05 导航栏、登录、注册 (Mobile) - 小能日记
source link: https://www.cnblogs.com/linxiaoxu/p/16739927.html
Go to the source link to view the article. You can view the picture content, updated content and better typesetting reading experience. If the link is broken, please click the button below to view the snapshot at that time.

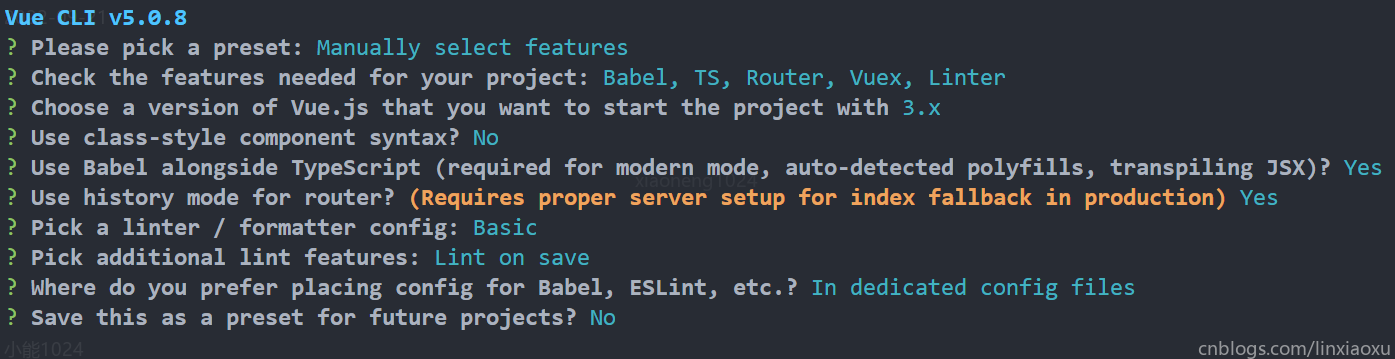
第一期 · 使用 Vue 3.1 + TypeScript + Router + Tailwind.css 构建手机底部导航栏、仿B站的登录、注册页面。
alicepolice/Vue-05 (github.com)
导入bootstrap-icons-vue
bootstrap-icons-vue - npm (npmjs.com)
导入Tailwind
在 Vue 3 和 Vite 安装 Tailwind CSS - Tailwind CSS 中文文档
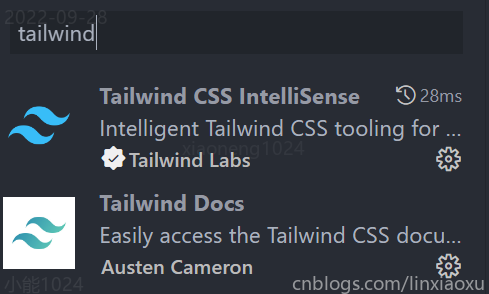
安装VSCODE插件
构建目录文件
PS C:\Users\小能喵喵喵\Desktop\Vue\Homework\homework2\src> tree /f
C:.
│   App.vue
│   index.css
│   main.ts
│   shims-vue.d.ts
│
├───assets
│       3.png
│       4.png
│       logo.png
│
├───components
│       BottomBar.vue
│
├───router
│       index.ts
│
├───store
│       index.ts
│
└───views
        AboutView.vue
        HomeLoginView.vue
        HomeView.vue
        LoginView.vue
        RegisterView.vue
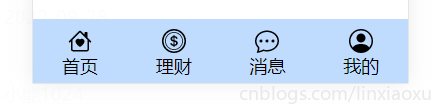
构建底部导航栏
Router
- redirect用于访问网站根目录的时候跳转至特定哈希锚点对应的页面
const routes: Array<RouteRecordRaw> = [
  {
    path: '/',
    name: '',
    redirect: () => {
      return { name: "home" }
    }
  },
  {
    path: '/home',
    name: 'home',
    component: HomeView
  },
  {
    path: '/login',
    name: 'login',
    component: LoginViewVue
  },
  {
    path: '/register',
    name: 'register',
    component: RegisterViewVue
  },
  {
    path: '/about',
    name: 'about',
    component: AboutViewVue
  }
]
App.vue
使用 typescript 语法明确规定了setBottomFlag接收的布尔类型,同时严格规定 vue 应用实例 data 函数返回的对象中变量的类型,即 as 语法。
v-show="bottomFlag" 用于隐藏导航栏,setBottomFlag 由各个 router-view 负责 emit 触发。
<template>
  <router-view @set-bottom-flag="setBottomFlag" />
  <BottomBar v-show="bottomFlag" :items="bottomItems" />
</template>


<script lang="ts">
import { defineComponent } from "vue";
import BottomBar from "@/components/BottomBar.vue";

type BottomItem = {
  text: string;
  icon: string;
  routerName: string;
};

export default defineComponent({
  name: "App",
  components: {
    BottomBar,
  },
  data() {
    return {
      bottomItems: [
        { text: "首页", icon: "b-icon-house-heart", routerName: "home" },
        { text: "理财", icon: "b-icon-coin", routerName: "about" },
        { text: "消息", icon: "b-icon-chat-dots", routerName: "about" },
        { text: "我的", icon: "b-icon-person-circle", routerName: "about" },
      ] as BottomItem[],
      bottomFlag: true as boolean,
    };
  },
  methods: {
    setBottomFlag(value: boolean): void {
      this.bottomFlag = value;
    },
  },
});
</script>
BottomBar.vue
这里使用了 windtail css 功能性类语法,具体信息可以通过官方文档查到。
在vue3.1中,router-link的tag已经被废除,需要使用插槽的方式。给 router-link 添加 custom v-slot="{ navigate }"。navigate 是触发导航的函数。 @click = "navigate" 通过对其他标签的点击间接触发router-link的导航函数。
custom -> <router-link> 是否不应将其内容包装在 <a> 标记中。
icon的生成使用了动态控件,依赖外部传进去的数组 ->:is
// 来自 App.vue 的数组传递给了当前的 props -> items
bottomItems: [
{ text: "首页", icon: "b-icon-house-heart", routerName: "home" },
{ text: "理财", icon: "b-icon-coin", routerName: "about" },
{ text: "消息", icon: "b-icon-chat-dots", routerName: "about" },
{ text: "我的", icon: "b-icon-person-circle", routerName: "about" },
] as BottomItem[],
<template>
  <div
    class="
      box-border
      h-16
      absolute
      container
      bg-blue-200
      bottom-0
      left-0
      flex flex-nowrap
      items-center
    "
  >
    <div v-for="(item, index) in items" :key="index" style="width: 100%">
      <router-link :to="{ name: item.routerName }" custom v-slot="{ navigate }">
        <div @click="navigate" class="text-center">
          <div class="pt-2">
            <component :is="item.icon" class="m-auto text-2xl" />
            <div class="text-lg">
              {{ item.text }}
            </div>
          </div>
        </div>
      </router-link>
    </div>
  </div>
</template>
<script lang="ts">
export default {
  props: {
    items: Array,
  },
};
</script>
修改HomeView.vue
在Home页面下默认显示底部导航栏,在挂载的时候通知父组件事件。
this.$emit("set-bottom-flag", true);
<template>
  <div class="text-6xl">主页面 HELLO WORLD</div>
</template>

<script lang="ts">
import { defineComponent } from "vue";

export default defineComponent({
  name: "HomeView",
  components: {},
  mounted() {
    this.$emit("set-bottom-flag", true);
  },
});
</script>
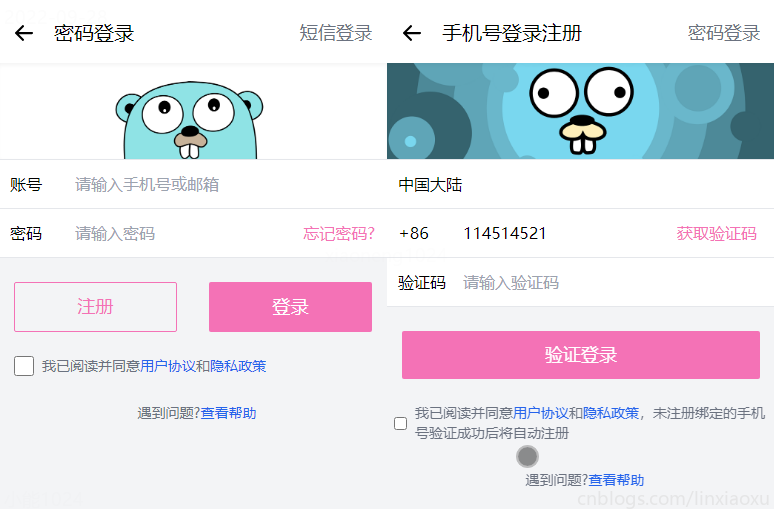
构建登录、注册
对于按钮和表单元素之类的小型组件,与简单的 CSS 类相比,创建模板片断或 JavaScript 组件通常会感觉过重。
官方建议使用 @layer components { ... } 指令包装自定义组件样式,以告诉 Tailwind 这些样式属于哪一层。
在 src/index.css 中定义表单标签、按钮标签共用的 Tailwind CSS 样式集合
/* ./src/index.css */
@tailwind base;
@tailwind components;
@tailwind utilities;

@layer components {
  .login-register-input {
    @apply inline-block bg-white focus:outline-none py-3 pl-3 appearance-none leading-normal;
  }
  .login-register-solid-button{
    @apply
    focus:outline-none
    text-white
    bg-pink-400
    font-medium
    rounded-sm
    text-lg
    px-5
    py-2.5
    mb-2
  }
  .login-register-hollow-button{
    @apply
    focus:outline-none
    text-pink-400
    border-pink-400 border
    font-medium
    rounded-sm
    text-lg
    px-5
    py-2.5
    mb-2
  }
  .login-register-checkbox{
    @apply
    ml-2
    text-sm
    font-medium
    text-gray-500
    dark:text-gray-300
    text-left
  }
}
LoginView.vue
router-link
注意 router-link 的用法,这里分别绑定了左箭头、短信登录。主要靠如下语法。
 custom v-slot="{ navigate }
// 上: router-link标签中的属性, 下: 绑定实现像a标签那样具备跳转功能的标签
 @click="navigate"
动态绑定背景图片方式
require 从依赖项返回导出。是同步过程,不会触发对服务器的请求。编译器会确保依赖项可用。
<div
class="bg-cover bg-center h-24 shadow-inner"
:style="{
'background-image': 'url(' + banner + ')',
}"
></div>
  data() {
    return {
      banner: require("../assets/3.png"),
    };
  }
更多资料可参考
https://stackoverflow.com/questions/67193179/how-can-i-link-background-image-vue-cli
https://stackoverflow.com/questions/35242272/vue-js-data-bind-style-backgroundimage-not-working
输入密码的时候切换背景
依托两个事件,通过当前光标对表单标签的进出实现。
@focusin="changeIMG('4.png')"
@focusout="changeIMG('3.png')"
  methods: {
    changeIMG(src: string): void {
      this.banner = require(`../assets/${src}`);
    },
  },
<template>
  <div class="container bg-gray-100 absolute inset-0">
    <div class="box-border bg-white border-b-1 border-b-black h-16 p-2">
      <router-link :to="{ name: 'home' }" custom v-slot="{ navigate }">
        <b-icon-arrow-left-short
          class="inline-block text-4xl align-middle mr-3 mt-2"
          @click="navigate"
        />
      </router-link>

      <span class="text-xl absolute top-5">密码登录</span>
      <router-link :to="{ name: 'register' }" custom v-slot="{ navigate }">
        <span
          class="text-lg absolute right-4 top-5 text-gray-500"
          @click="navigate"
          >短信登录</span
        >
      </router-link>
    </div>

    <div
      class="bg-cover bg-center h-24 shadow-inner"
      :style="{
        'background-image': 'url(' + banner + ')',
      }"
    ></div>
    <div class="border-y">
      <div class="login-register-input w-1/6">账号</div>
      <input
        id="username"
        class="login-register-input w-5/6"
        type="text"
        placeholder="请输入手机号或邮箱"
      />
    </div>
    <div class="border-b">
      <div class="login-register-input w-1/6">密码</div>
      <input
        id="password"
        class="login-register-input w-3/6"
        type="text"
        placeholder="请输入密码"
        @focusin="changeIMG('4.png')"
        @focusout="changeIMG('3.png')"
      />
      <div class="login-register-input pl-8 w-2/6 text-pink-400 text-center">
        忘记密码?
      </div>
    </div>
    <div class="text-center pt-6 flex justify-around">
      <button type="button" class="login-register-hollow-button w-5/12">
        注册
      </button>
      <button type="button" class="login-register-solid-button w-5/12">
        登录
      </button>
    </div>
    <div class="text-center pt-4">
      <div class="flex items-center align-top">
        <input
          id="link-checkbox"
          type="checkbox"
          value=""
          class="ml-4 w-5 h-5 bg-gray-100 rounded"
        />
        <label
          for="link-checkbox"
          class="ml-2 text-sm font-medium text-gray-500 text-left"
          >我已阅读并同意<a href="#" class="text-blue-600">用户协议</a>和<a
            href="#"
            class="text-blue-600"
            >隐私政策</a
          ></label
        >
      </div>
    </div>
    <div class="text-center pt-6">
      <label class="login-register-checkbox">
        遇到问题?<a href="#" class="text-blue-600">查看帮助</a>
      </label>
    </div>
  </div>
</template>

<script lang="ts">
import { defineComponent } from "vue";

export default defineComponent({
  name: "LoginView",
  components: {},
  data() {
    return {
      banner: require("../assets/3.png"),
    };
  },
  methods: {
    changeIMG(src: string): void {
      this.banner = require(`../assets/${src}`);
    },
  },
  mounted() {
    this.$emit("set-bottom-flag", false);
  },
});
</script>
RegisterView.vue
部分功能与 Login.view 类似。
表单填入更改标签颜色
当输入手机号时,获取验证码会由灰变成粉色。将字体颜色从固定的class抽取出放入动态class绑定计算属性。每当phone发生变化即可改变颜色。
      <div
        class="login-register-input w-2/6 text-center"
        :class="changeGetCodeColor"
      >
        获取验证码
      </div>
  computed: {
    changeGetCodeColor(): string {
      if (this.phone == "") {
        return "text-gray-400";
      } else {
        return "text-pink-400";
      }
    },
  },
<template>
  <div class="container bg-gray-100 absolute inset-0">
    <div class="box-border bg-white border-b-1 border-b-black h-16 p-2">
      <router-link :to="{ name: 'home' }" custom v-slot="{ navigate }">
        <b-icon-arrow-left-short
          class="inline-block text-4xl align-middle mr-3 mt-2"
          @click="navigate"
        />
      </router-link>

      <span class="text-xl absolute top-5">手机号登录注册</span>
      <router-link :to="{ name: 'login' }" custom v-slot="{ navigate }">
        <span
          class="text-lg absolute right-4 top-5 text-gray-500"
          @click="navigate"
          >密码登录</span
        >
      </router-link>
    </div>

    <div
      class="bg-cover bg-center h-24 shadow-inner"
      :style="{
        'background-image': 'url(' + banner + ')',
      }"
    ></div>
    <div>
      <select id="countries" class="login-register-input w-full border-y">
        <option selected value="CN">中国大陆</option>
        <option value="US">美国</option>
        <option value="CA">加拿大</option>
        <option value="FR">法国</option>
        <option value="DE">德国</option>
      </select>
    </div>
    <div class="border-b">
      <div class="login-register-input w-1/6">+86</div>
      <input
        id="phone"
        class="login-register-input w-3/6"
        type="text"
        placeholder="请输入手机号码"
        v-model="phone"
      />
      <div
        class="login-register-input w-2/6 text-center"
        :class="changeGetCodeColor"
      >
        获取验证码
      </div>
    </div>
    <div class="border-b">
      <div class="login-register-input w-1/6">验证码</div>
      <input
        id="code"
        class="login-register-input w-5/6"
        type="text"
        placeholder="请输入验证码"
        @focusin="changeIMG('4.png')"
        @focusout="changeIMG('3.png')"
      />
    </div>
    <div class="text-center pt-6">
      <button type="button" class="login-register-solid-button w-11/12">
        验证登录
      </button>
    </div>
    <div class="text-center pt-4">
      <div class="flex items-center align-top">
        <input
          id="link-checkbox"
          type="checkbox"
          value=""
          class="login-register-checkbox"
        />
        <label
          for="link-checkbox"
          class="
            ml-2
            text-sm
            font-medium
            text-gray-500
            dark:text-gray-300
            text-left
          "
          >我已阅读并同意<a
            href="#"
            class="text-blue-600 dark:text-blue-500 hover:underline"
            >用户协议</a
          >和<a
            href="#"
            class="text-blue-600 dark:text-blue-500 hover:underline"
            >隐私政策</a
          >,未注册绑定的手机号验证成功后将自动注册</label
        >
      </div>
    </div>
    <div class="text-center pt-6">
      <label
        class="
          ml-2
          text-sm
          font-medium
          text-gray-500
          dark:text-gray-300
          text-left
        "
      >
        遇到问题?<a
          href="#"
          class="text-blue-600 dark:text-blue-500 hover:underline"
          >查看帮助</a
        >
      </label>
    </div>
  </div>
</template>

<script lang="ts">
import { defineComponent } from "vue";

export default defineComponent({
  name: "RegisterView",
  components: {},
  data() {
    return {
      banner: require("../assets/3.png"),
      phone: "",
    };
  },
  methods: {
    changeIMG(src: string): void {
      this.banner = require(`../assets/${src}`);
    },
  },
  computed: {
    changeGetCodeColor(): string {
      if (this.phone == "") {
        return "text-gray-400";
      } else {
        return "text-pink-400";
      }
    },
  },
  mounted() {
    this.$emit("set-bottom-flag", false);
  },
});
</script>
一些零散的知识补充
Module not found: Error: Can't resolve 'sass-loader'
Module not found: Error: Can't resolve 'sass-loader'
解决方法: 运行如下命令后重新启动服务
npm install sass-loader -D
npm install node-sass -D
声明式、命令式
命令式UI:构建全功能UI实体,然后在UI更改时使用方法对其进行变更。
声明式UI:描述当前的UI状态,并且不需要关心它是如何过渡到框架的。
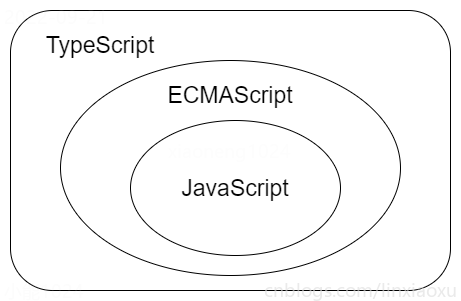
TS、ECMA、JS 关系
配置NPM镜像
npm config set registry=http://registry.npm.taobao.org
var hello = "hello world"
console.log(hello)
npm install -g typescript
tsc helloworld ::编译ts
node helloworld ::运行js
当使用var声明一个变量的时候,该变量会被提升到作用域的顶端,但是赋值的部分并不会被提升。
console.log(hello)
var hello = "hello world"
而let、const不会,实际开发中建议尽量使用用 let 和 const 代替var。
好用的网站
Tailwind CSS Select / Listbox Form - Free Examples (tailwind-elements.com)
Bootstrap Icons · Official open source SVG icon library for Bootstrap (getbootstrap.com)
__EOF__
Recommend
About Joyk
Aggregate valuable and interesting links.
Joyk means Joy of geeK