

spring项目中starter包的原理,以及自定义starter包的使用 - 写不完作业还要玩
source link: https://www.cnblogs.com/oldoldcoder/p/16654425.html
Go to the source link to view the article. You can view the picture content, updated content and better typesetting reading experience. If the link is broken, please click the button below to view the snapshot at that time.

MAVEN项目中starter的原理
一.原始方式
我们最早配置spring应用的时候,必须要经历的步骤:1.pom文件中引入相关的jar包,包括spring,redis,jdbc等等 2.通过properties或者xml配置相关的信息 3.不断调试直到可以使用。
问题:时间长,复杂,同时在写下一个项目的时候大概率要经过相同的模式配置才能达到可以使用的状态。同时在众多的jar中,我们需要相互配置依赖间的版本关系,十分的复杂
原始版本:
我们就想到能不能把这些jdbc整合起来,类似于深度学习中anaconda下载依赖一样去管理,依赖间的关系不需要我们去负责,而是交给spring去管理。
starter版本:

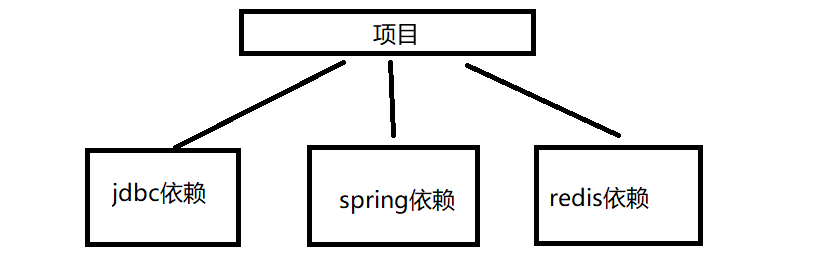
我们可以将starter包看作是一个包装箱,把复杂的事情都交给了spring负责,官方维护starter包会导入的东西。而我们只需要知道那个starter包是有什么用处,例如:spring-boot-starter-web是负责spring web项目的依赖。
<dependency> <groupId>org.springframework.boot</groupId> <artifactId>spring-boot-starter-web</artifactId> </dependency>二.starter内部详情

starter文件也只是一个pom文件,而不是jar,它的目的也是去自动的引入其他的jar文件,上图展示的spring-boot-starter-web中的依赖就有spring-boot-starter。
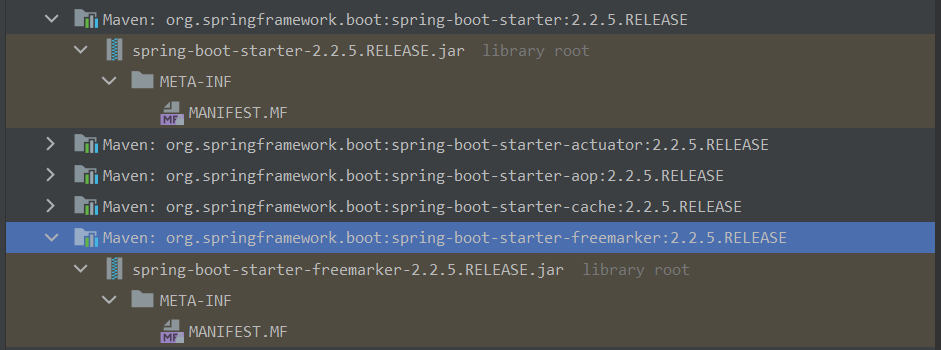
starter只是一个pom文件
下面也就是starter的关键所在,请问我们为什么引入了starter之后只需要配置一点点的个性化设置,例如创建application.properties仅仅配置端口等等就可以完成启动应用?是谁帮助我们配置了其他复杂的信息?
引出自动配置
三.自动配置
1.自动配置类的梳理
自动配置主要通过xxxAutoConfiguration这些类来实现,我们查找一个这样的类来进行示例演示

上图是DataSourceAutoConfiguration这个自动配置类,我们可以看到类上的几个注解。
- @Configuration 将该类标记为配置类,@Configuration注解的类可以看作是能生产让Spring IoC容器管理的Bean实例的工厂
- @ConditionalOnClass表示某个类位于类路径上时候,才会实例化这个bean
- @EnableConfigurationProperties注解的作用是使@ConfigurationProperties注解生效。如果只配置@ConfigurationProperties注解,在spring容器中是获取不到yml或者properties配置文件转化的bean的。
我们点击@EnableConfiguration注解中的@DataSourceProperties进去查看

可以查看到这里使用@configurationPropertes,@ConfigurationProperties注解的作用是把yml或者properties配置文件转化为bean。
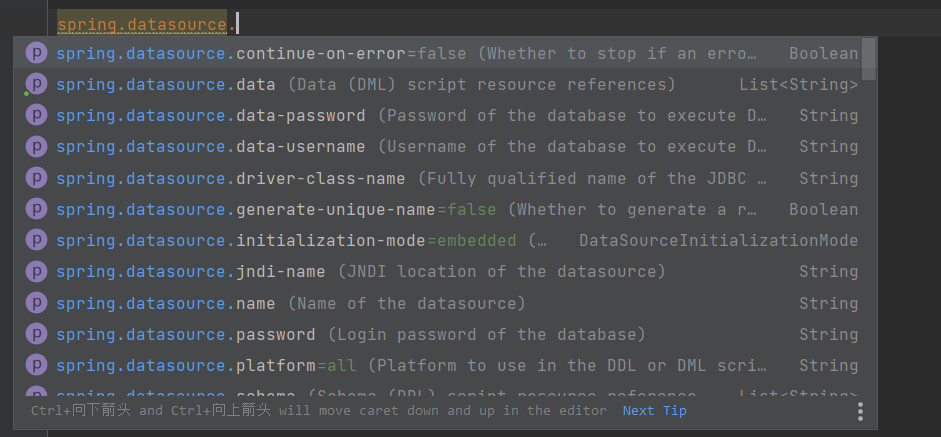
同时这里也设置了prefix前缀,在我们项目的application.properties中配置的时候,提示的就是这些bean实例中的属性。
所以是使用@ConfigurationProperties和@EnableConfigurationProperties这两个注解来完成将一个包含众多属性的类来注册成为可供springIoc容器管理的bean。
而这个bean的注册过程是在各个XXXAutoConfiguration类中完成的。
2.如何发现依赖包中的bean
我们都知道springboot默认扫描启动类下面的主类和子类的bean来完成注解,但是并没有包括依赖包中的类,那么依赖包中的bean是如何被发现和加载的?
关键在于@SpringBootApplication这个注解
注解层次:
-
@springbootApplication
-
@SpringBootConfiguration:和@Configuration相同的用处,并且将里面通过@bean注解标注的方法的返回值作为bean对象注册到ioc容器之中。
获得bean的两种方式,一种是在配置类中通过方法返回,一种是直接在类上注解@bean(或者相同的注解,类似@Mapper等)来注册为bean实例
-
@EnableAutoConfiguration:借助@Import的支持,收集和注册依赖包中相关的bean定义。
-
@Import({AutoConfigurationImportSelector.class}):该注解扫描依赖包下需要注册为bean的自动配置类。
protected List<String> getCandidateConfigurations(AnnotationMetadata metadata, AnnotationAttributes attributes) { List<String> configurations = SpringFactoriesLoader.loadFactoryNames(this.getSpringFactoriesLoaderFactoryClass(), this.getBeanClassLoader()); Assert.notEmpty(configurations, "No auto configuration classes found in META-INF/spring.factories. If you are using a custom packaging, make sure that file is correct."); return configurations; }SpringFactoriesLoader.loadFactoryNames方法调用loadSpringFactories方法从所有的jar包中读取META-INF/spring.factories文件信息。
而Spring.factories中key/value中就有一个key是:org.springframework.boot.autoconfigure.EnableAutoConfiguration,后面跟着的都是需要AutoConfigurationImportSelector来进行注册的自动配置类
# Auto Configure org.springframework.boot.autoconfigure.EnableAutoConfiguration=\ org.mybatis.spring.boot.autoconfigure.MybatisLanguageDriverAutoConfiguration,\ org.mybatis.spring.boot.autoconfigure.MybatisAutoConfiguration -
@AutoConfigurationPackage
-
@Import({Registrar.class}):Registrar就是扫描启动类目录下的所有bean并且注册,具体实现通过下列代码:
static class Registrar implements ImportBeanDefinitionRegistrar, DeterminableImports { Registrar() { } public void registerBeanDefinitions(AnnotationMetadata metadata, BeanDefinitionRegistry registry) { AutoConfigurationPackages.register(registry, (new AutoConfigurationPackages.PackageImport(metadata)).getPackageName()); } public Set<Object> determineImports(AnnotationMetadata metadata) { return Collections.singleton(new AutoConfigurationPackages.PackageImport(metadata)); } }
-
-
-
注解层次图示:

3.如何加载发现的bean
如果要让一个普通类交给Spring容器管理,通常有以下方法:
- 使用 @Configuration与@Bean 注解
- 使用@Controller @Service @Repository @Component 注解标注该类,然后启用@ComponentScan自动扫描
- 使用@Import 方法
springboot中使用了@Import 方法
@EnableAutoConfiguration注解中使用了@Import({AutoConfigurationImportSelector.class})注解,AutoConfigurationImportSelector实现了DeferredImportSelector接口,
DeferredImportSelector接口继承了ImportSelector接口,ImportSelector接口只有一个selectImports方法。
selectImports方法返回一组bean,@EnableAutoConfiguration注解借助@Import注解将这组bean注入到spring容器中,springboot正式通过这种机制来完成bean的注入的。
关于@import注解的加载可以查看这个文章:https://zhuanlan.zhihu.com/p/147025312
ps:晕乎乎的,我只看懂了一部分。
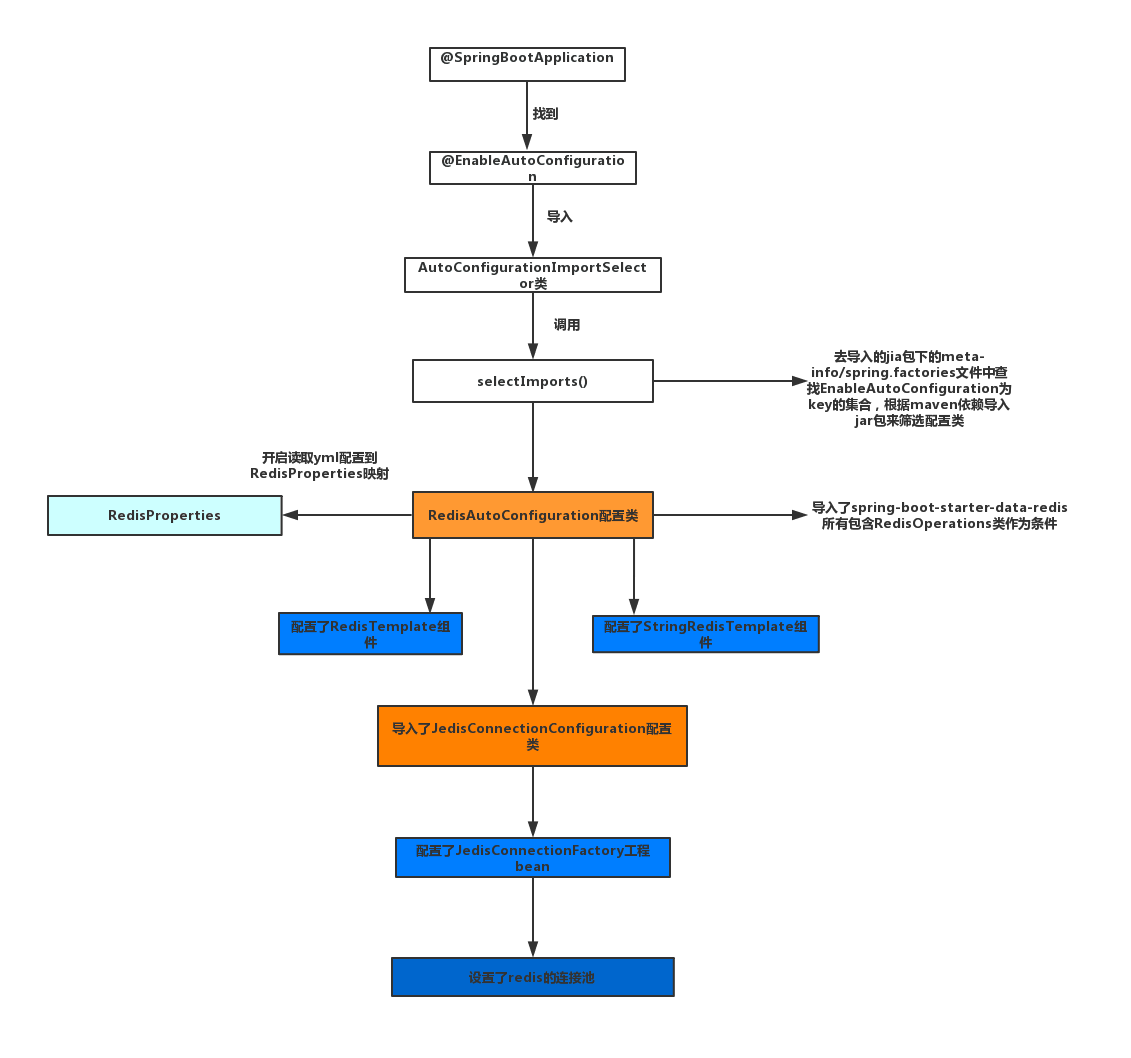
加载redisAutoConfiguration的流程图示
四.自定义starter
下面我们演示自定义starter的流程:
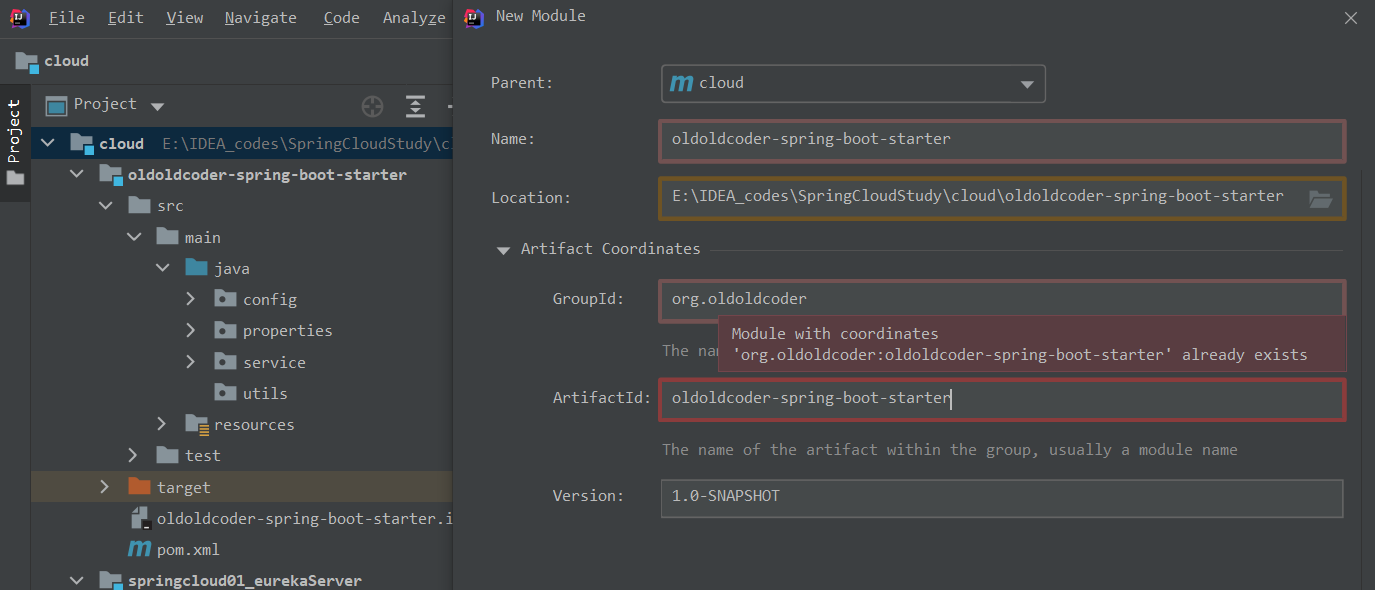
我们确定好自定义starter的GAV(groupId,ArtifactId,Version),这里需要注意的是ArtifactId的命名,对于spring进行管理的starter包,命名规则是:spring-boot-starter-xxx,而为了区别spring进行管理的starter包,自定义的starter包一般命名规则是:xxx-spring-boot-starter,例如mybatis官方推出的starter包:mybatis-spring-boot-starter。
groupId使用自己域名的反写即可。
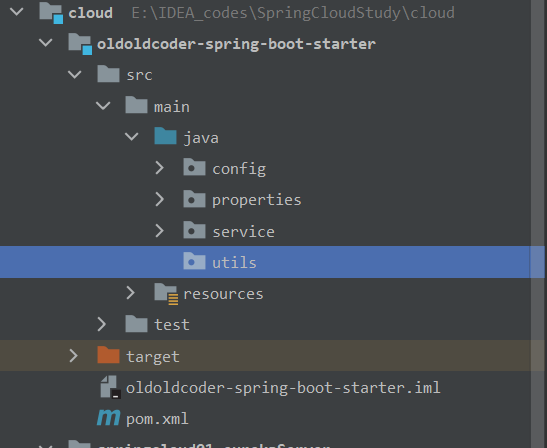
项目结构如下:
1.pom文件导入依赖
<dependencies> <dependency> <groupId>org.springframework.boot</groupId> <artifactId>spring-boot-configuration-processor</artifactId> <version>2.7.3</version> <optional>true</optional> </dependency> <dependency> <groupId>org.springframework.boot</groupId> <artifactId>spring-boot-starter</artifactId> <version>2.7.1</version> <optional>true</optional> </dependency> <dependency> <groupId>org.projectlombok</groupId> <artifactId>lombok</artifactId> <version>1.18.24</version> </dependency> </dependencies>依赖:spring-boot-configuration-processor 作用:导入之后会自动生成元数据(meta-data),在application.properties配置的时候会有提示。
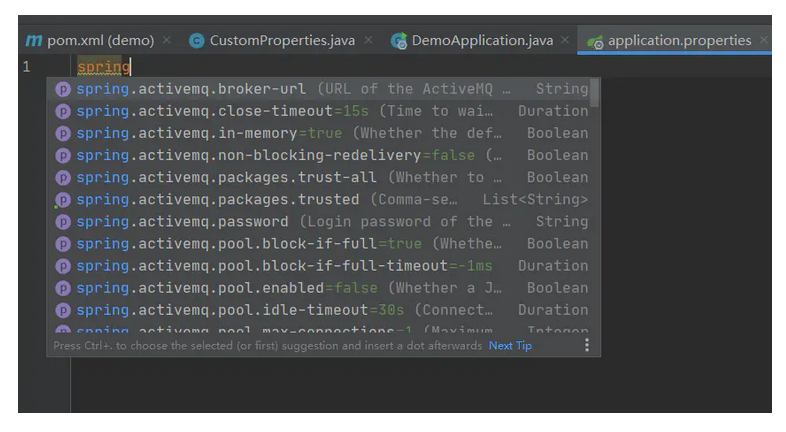
由于是自动生成,在你配置了@ConfigurationProperties之后就会自动生成元数据,在你写application.properties的时候就会进行自动提示。

当无法提示的时候多次clean,之后再compile然后在install发布。
具体可以看这个博客 https://blog.csdn.net/wangleleb/article/details/104904348
依赖: spring-boot-starter 作用:是为了使用前面提到的自动配置的注解。注解@ConfigurationProperties和@EnableConfigurationProperties两个注解都在spring-boot-context包中
2.编写代码
编写自动配置类代码:
package properties; import lombok.Getter;import lombok.Setter;import org.springframework.boot.context.properties.ConfigurationProperties; @ConfigurationProperties(prefix = "demo")@Getter@Setterpublic class DemoProperties{ private String var1; private String var2; }编写service代码:
package service; import lombok.AllArgsConstructor; @AllArgsConstructorpublic class DemoService { public String var1; public String var2; public String variable(){ return this.var1 + " " + this.var2; } }编写config类:
@Configuration@EnableConfigurationProperties(DemoProperties.class)// 只有当name的值与havingValue的值相同的时候加载@ConditionalOnProperty( prefix = "demo", name = "isopen", havingValue = "true")public class DemoConfig { @Resource private DemoProperties demoProperties; @Bean public DemoService demoService(){ return new DemoService(demoProperties.getVar1(),demoProperties.getVar2()); }}关于这里@ConditionOnProperty这个注解,该注解的大概含义就是,对于前缀是demo的属性,底下的值isopen为true时候,该自动配置类才会生效。
编写spring.factories
将key:EnableAutoConfiguration-->DemoConfig这个类
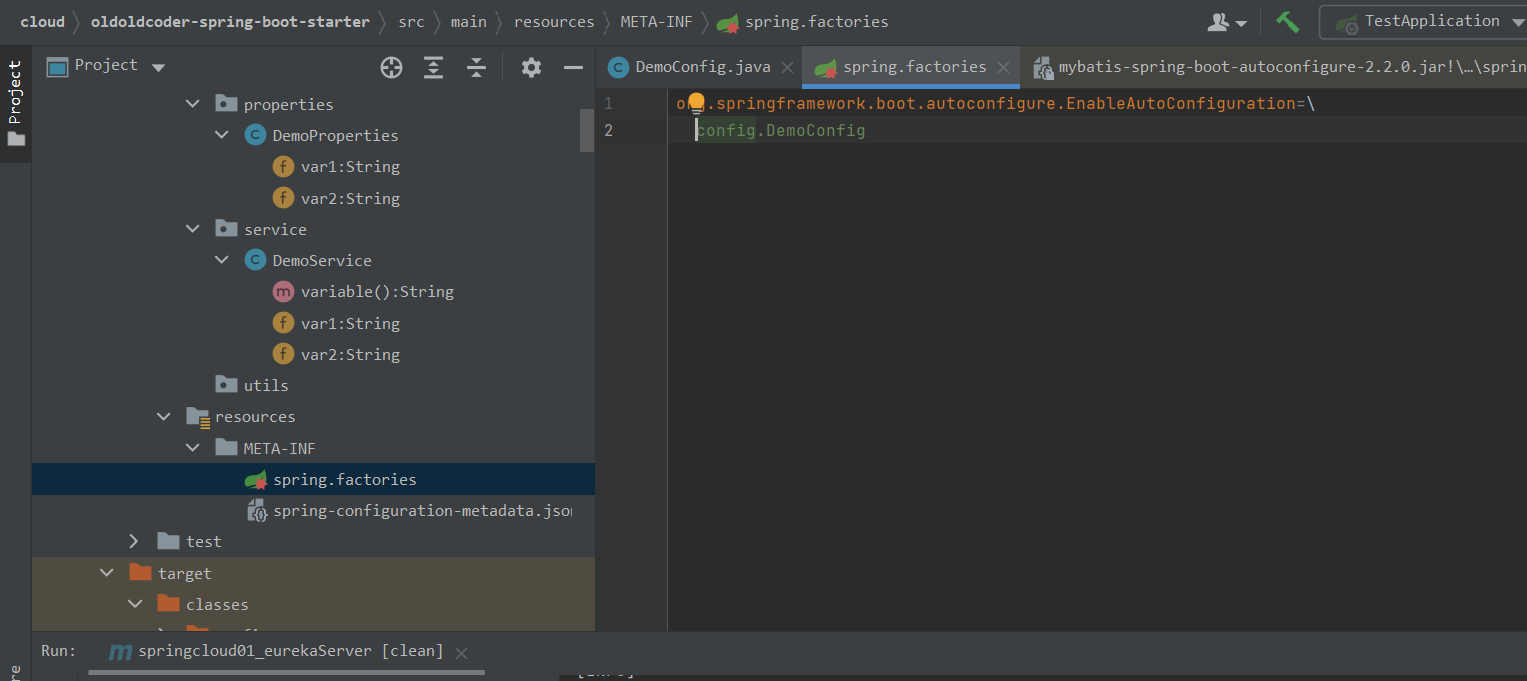
使用maven命令:mvn clean compile install 清理,编译,发布到本地仓库中去
4.其他项目引入
<!--引入我写的starter--><dependency> <groupId>org.oldoldcoder</groupId> <artifactId>oldoldcoder-spring-boot-starter</artifactId> <version>1.0-SNAPSHOT</version></dependency>配置资源文件

# 使用自己写的starter
demo.isopen=true
demo.var1=var1
demo.var2==var2
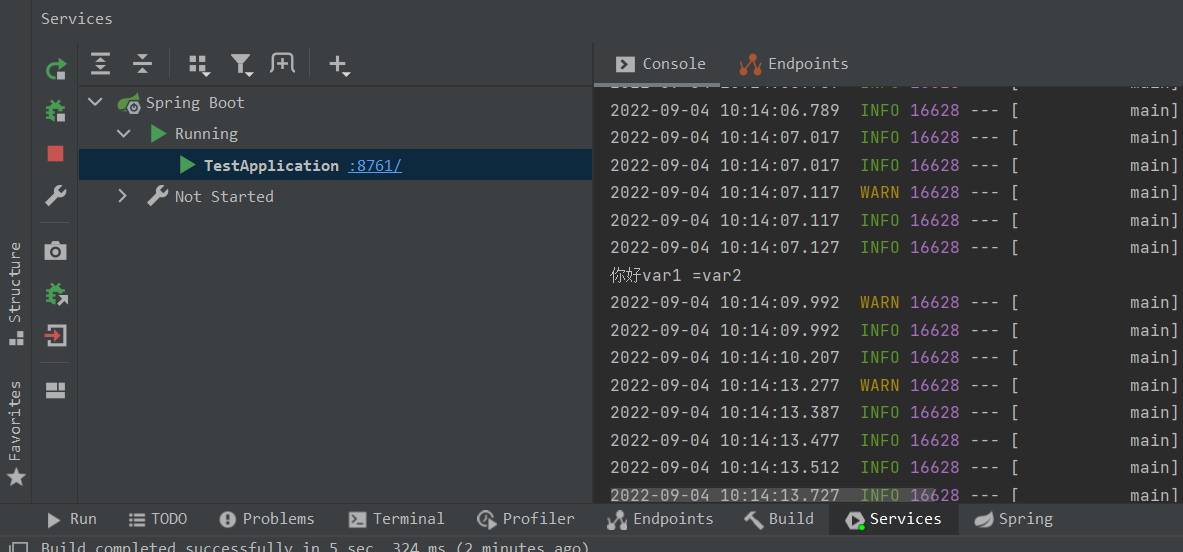
随便编写一个类验证
@Componentpublic class TestService { @Resource private DemoService demoService; @PostConstruct public void test(){ System.out.println("你好"+demoService.variable()); }}结果
Recommend
About Joyk
Aggregate valuable and interesting links.
Joyk means Joy of geeK