

How to save enum with associated value in UserDefaults using Swift
source link: https://sarunw.com/posts/how-to-save-enum-associated-value-in-userdefaults-using-swift/
Go to the source link to view the article. You can view the picture content, updated content and better typesetting reading experience. If the link is broken, please click the button below to view the snapshot at that time.

How to save enum with associated value in UserDefaults using Swift
Table of Contents
The UserDefaults is a database that means to store small key-value pairs kept across launches of your app.
We usually use this to store a user's preferences. For example, you can allow users to specify their preferred light/dark mode.
The problem is only String, Data, Number, Date, Array, and Dictionary are supported.
Enumeration, which is a type that we usually use to represent an option isn't supported.
For example, you might want to define a dark/light mode option as an enum like this:
enum ColorPreference {
    case light
    case dark
    case system
}
We can classify an enum into two categories.
- Enumerations with raw value.
- Enumerations with associated value.
We already discussed the first approach here.
In this article, I will show you how to save enum with associated value in UserDefaults.
How to save enum with associated value in UserDefaults
For demonstration, we create a Role enum to keep a user's role.
enum Role {
    case guest
    case member(String?)
}
If we save this enum to UserDefaults, you will get a runtime exception.
UserDefaults.standard.set(
    Role.guest,
    forKey: "role")
// Attempt to insert non-property list object example_enum_userdefaults.Role.guest for key role (NSInvalidArgumentException)
To read/write enum with associated value to UserDefaults, we need to do two things.
- We make it conform to the
Codableprotocol. - We encode/decode before reading/writing it to UserDefaults.
Make Enumerations conform to Codable protocol
Swift 5.5 introduced Codable synthesis for enums with associated values. You can make an enum with associated values conform to Codable by simply adopting it.
enum Role: Codable {
    case guest
    case member(String?)
}
Role.guest would be encoded to.
{
  "guest": {}
}
And Role.member("Sarunw") would be encoded to.
{
    member =     {
        "_0" = "Sarunw"
    };
}
The result might not be what you expected. I suggest you read more about it here to learn more about "Codable synthesis for enums with associated values".
Once the enum conforms to the Codable protocol, you have two ways to read and write them to UserDefaults.
Since UserDefautl supported both Data and Dictionary, we can save our enum either in the form of:
- Dictionary
Let's see how to do it and learn the differences.
Read and write enumerations by Data
We can encode/decode Codable protocol to/from Data using JSONEncoder and JSONDecoder.
In this example, we read/write our enum to UserDefaults by converting it to Data.
let userDefaults = UserDefaults.standard

// Write
if let data = try? JSONEncoder().encode(Role.member("Sarunw")) {
    userDefaults.set(
        data,
        forKey: "role")
}

// Read
if let savedData = userDefaults.data(forKey: "role") {
    let role = try? JSONDecoder().decode(Role.self, from: savedData)
}
For writing, we encode our enum to Data and then save it to UserDefaults.
For reading, we get back saved Data and decode back to Role.
Read and write enum using Data is straightforward, the only downside is you can't set default value using plist.
You can populate UserDefaults from plist, read more about it here.
plist supports a Data type, but I think it isn't practical to manually write a Data in a plist.
Read and write enumerations by Dictionary
To be able to set default value for enum type using dictionary, you have to do one extra step converting Data type to Dictionary.
You can easily do this with the help of JSONSerialization.
In this example, we read/write our enum to UserDefaults by converting it to Dictionary.
let userDefaults = UserDefaults.standard

// Write
if let data = try? JSONEncoder().encode(Role.member("Sarunw")),
   let dict = try? JSONSerialization.jsonObject(with: data, options: .allowFragments)
{
    userDefaults.set(
        dict,
        forKey: "role")
}

// Read
if let rawDictionary = userDefaults.dictionary(forKey: "role"),
   let dictData = try? JSONSerialization.data(withJSONObject: rawDictionary)
{
    let role = try? JSONDecoder().decode(Role.self, from: dictData)
}
For writing, we do an extra step converting Data to Dictionary using JSONSerialization before saving it to UserDefaults.
For reading, we get back saved Dictionary, converting it to Data, then decode it back to Role.
Populate default values from plist
With this approach, you can populate your data from a plist file.
First, create a plist file with a dictionary representing an enum you want to be your default value.
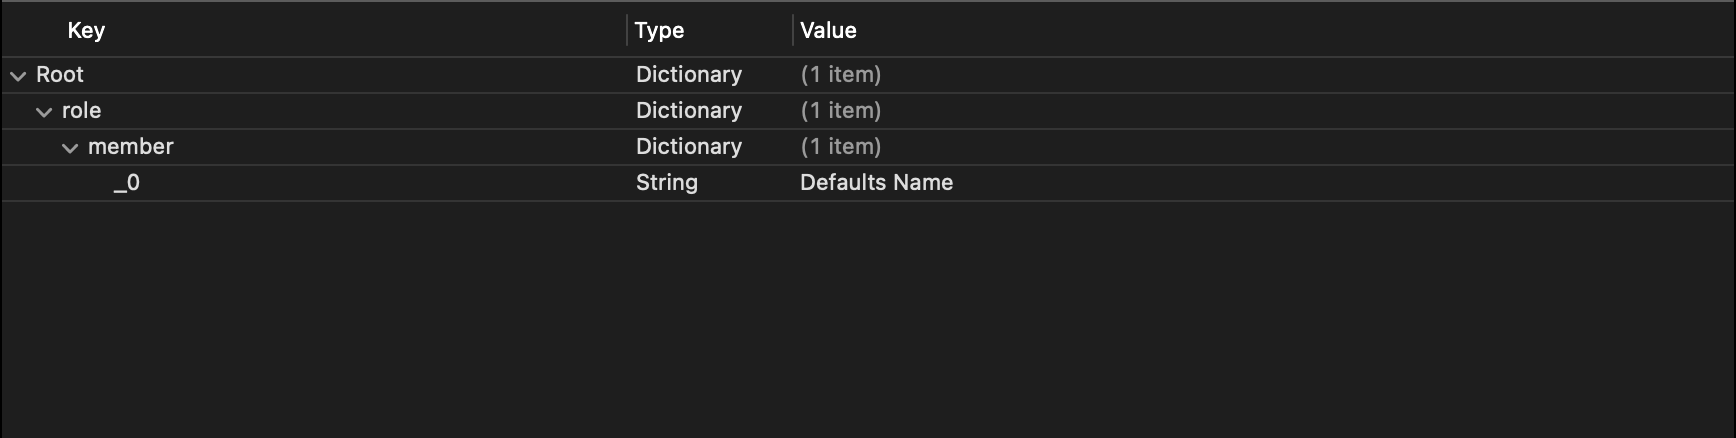
A dictionary representing an enum.
Then, load the plist and register it to UserDefaults.
let userDefaults = UserDefaults.standard

let infoPlistPath = Bundle.main.url(forResource: "defaults", withExtension: "plist")!

let infoPlistData = try! Data(contentsOf: infoPlistPath)
let defaultDict = try! PropertyListSerialization.propertyList(from: infoPlistData, options: [], format: nil) as! [String: Any]

userDefaults.register(defaults: defaultDict)
After that, you can read the default value out the same way.
let userDefaults = UserDefaults.standard

// Read default values from plist
let infoPlistPath = Bundle.main.url(forResource: "defaults", withExtension: "plist")!

let infoPlistData = try! Data(contentsOf: infoPlistPath)
let defaultDict = try! PropertyListSerialization.propertyList(from: infoPlistData, options: [], format: nil) as! [String: Any]

userDefaults.register(defaults: defaultDict)

// Read default role enum
let rawValue = userDefaults.dictionary(forKey: "role")!
let dictData = try! JSONSerialization.data(withJSONObject: rawValue)
let role = try? JSONDecoder().decode(Role.self, from: dictData)Recommend
About Joyk
Aggregate valuable and interesting links.
Joyk means Joy of geeK