

Database seeding: Doctrine data fixtures vs Phinx
source link: https://www.dotkernel.com/php-development/database-seeding-doctrine-data-fixtures-vs-phinx/
Go to the source link to view the article. You can view the picture content, updated content and better typesetting reading experience. If the link is broken, please click the button below to view the snapshot at that time.

Database seeding: Doctrine data fixtures vs Phinx
Seeding the database means populating the database with initial values, it’s commonly used for seeding the user roles and user accounts.
Seeding the database the right way is no easy feat, and we will see why.
Previous versions of DotKernel 3 used cakephp/phinx for seeding the database. While the package did a great job at populating the database, we wanted more. We wanted more flexibility – so we started to search for alternatives.
Because we are using Doctrine as our database abstraction layer, the obvious choice was to give doctrine/data-fixtures a shot and use it as our database seeder, instead of phinx – but there’s a catch.
The catch
Using the doctrine/data-fixtures package provides a concrete implementation of data fixtures, without a CLI interface.
We need a way to interact with the fixtures, so we created a package (dotkernel/dot-data-fixtures) to provide a CLI interface. While there are alternatives that can achieve this out-of-the-box we wanted something slim (in terms of dependencies) and easy to use.
NOTE:
The package dotkernel/dot-data-fixture does NOT depend on other DotKernel packages. The only dependency is Doctrine
Installation
Run the following command in you project directory:
$ composer require dotkernel/dot-data-fixturesRegister the package’s ConfigProvider.php in config/config.php.
\Dot\DataFixtures\ConfigProvider::class,In doctrine.global.php (or your custom doctrine config file) add a new key fixtures, in the doctrine array, the value should be a valid path to a folder where your fixtures can be found.
return [
    'dependencies' => [ ... ],
    'doctrine' => [
        ...,
        'fixtures' => getcwd() . '/data/doctrine/fixtures',
    ],
];
Make sure the path is valid before proceeding to the next step.
The fixtures can be found in the /data/doctrine/fixtures folder, but you can create a custom folder for them. We choose this location because the migrations live in the /data/doctrine/migrations folder.
The last step is to register 2 commands.
We will register the commands to work with the doctrine default CLI but you can register them as normal commands also.
Create a new php file bin/doctrine if you don’t have it already and paste the below code block.
<?php
use Doctrine\ORM\Tools\Console\ConsoleRunner;
use Doctrine\ORM\Tools\Console\EntityManagerProvider\SingleManagerProvider;
require_once 'vendor/autoload.php';
$container = require getcwd() . '/config/container.php' ;
$entityManager = $container->get(\Doctrine\ORM\EntityManager::class);
$commands = [
$container->get(Dot\DataFixtures\Command\ExecuteFixturesCommand::class),
$container->get(Dot\DataFixtures\Command\ListFixturesCommand::class),
];
ConsoleRunner::run(
new SingleManagerProvider($entityManager),
$commands
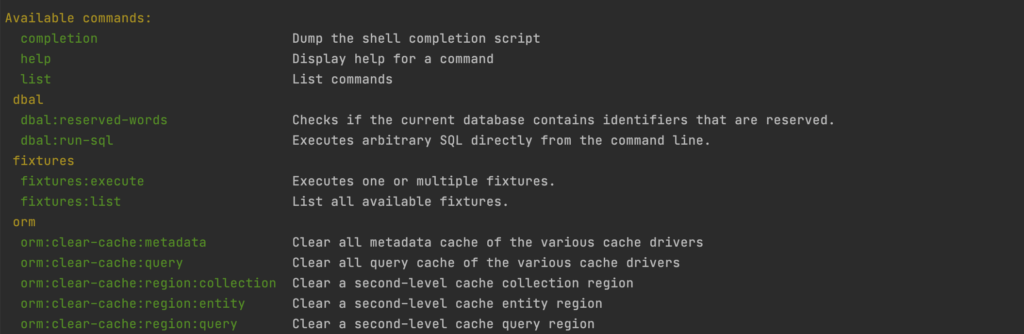
);The installation is complete, we can verify it by running the following command in our terminal.
php bin/consoleIt should print out all the doctrine CLI commands available, including our fixtures commands.
Usage
List all available fixtures, by order of execution:
php bin/doctrine fixtures:list

By using this command you can check the execution order of your fixtures before executing them.
Executing fixtures:
To execute all fixtures run : php bin/doctrine fixtures:execute
To run a specific fixture run : php bin/doctrine fixtures:execute --class={FixtureClassName}
Example :
php bin/console fixtures:execute --class=RoleLoaderCreating fixtures
When creating fixtures, we need to :
- Create the fixture in the configured folder (
/data/doctrine/fixtures). - Implement
Doctrine\Common\DataFixtures\FixtureInterfaceinterface.
Example :
<?php

namespace Frontend\Fixtures;

use Doctrine\Common\DataFixtures\FixtureInterface;
use Doctrine\Persistence\ObjectManager;
use Frontend\User\Entity\UserRole;

/**
 * Class RoleLoader
 * @package Frontend\Fixtures
 */
class RoleLoader implements FixtureInterface
{
    public function load(ObjectManager $manager): void
    {
        $adminRole = new UserRole();
        $adminRole->setName('admin');

        $userRole = new UserRole();
        $userRole->setName('user');

        $guestRole = new UserRole();
        $guestRole->setName('guest');

        $manager->persist($adminRole);
        $manager->persist($userRole);
        $manager->persist($guestRole);

        $manager->flush();
    }
}
Ordering fixtures
We can order fixtures using 2 methods :
- By Order – you can specify the order of execution, by implementing
OrderedFixtureInterfaceinterface. - By dependencies – let’s you specify dependency fixtures, chaining fixtures and executing them in the right order
Practical example:
Requirements: Seed the database with a new admin user.
We will use the second method to order fixtures and need 2 fixtures to achieve this, one of them will create a new user and the other will create a new admin role. In this case the order matters, we can’t create the admin user without having an admin role.
Create new php file in data/doctrine/fixtures with the name RoleLoader.php.
This fixture will be executed first and create our user roles.
<?php

namespace Frontend\Fixtures;

use Doctrine\Common\DataFixtures\FixtureInterface;
use Doctrine\Persistence\ObjectManager;
use Frontend\User\Entity\UserRole;

/**
 * Class RoleLoader
 * @package Frontend\Fixtures
 */
class RoleLoader implements FixtureInterface
{
    public function load(ObjectManager $manager): void
    {
        $adminRole = new UserRole();
        $adminRole->setName('admin');

        $userRole = new UserRole();
        $userRole->setName('user');

        $guestRole = new UserRole();
        $guestRole->setName('guest');

        $manager->persist($adminRole);
        $manager->persist($userRole);
        $manager->persist($guestRole);

        $manager->flush();
    }
}
The second fixture is UserLoader.php and will contain the following code:
<?php

namespace Frontend\Fixtures;

use Doctrine\Common\DataFixtures\DependentFixtureInterface;
use Doctrine\Common\DataFixtures\FixtureInterface;
use Doctrine\Persistence\ObjectManager;
use Frontend\User\Entity\User;
use Frontend\User\Entity\UserDetail;
use Frontend\User\Entity\UserRole;

class UserLoader implements FixtureInterface, DependentFixtureInterface
{
    public function load(ObjectManager $manager): void
    {
        $user = new User();
        $user->setIdentity('[email protected]');
        $user->setPassword(password_hash('admin', PASSWORD_DEFAULT));
        $user->setIsDeleted(false);
        $user->setHash('hash');

        $userDetail = new UserDetail();
        $userDetail->setUser($user);
        $userDetail->setFirstName('Admin');

        $user->setDetail($userDetail);

        $roleRepository = $manager->getRepository(UserRole::class);

        /** @var UserRole $adminRole */
        $adminRole = $roleRepository->findOneBy(['name' => UserRole::ROLE_ADMIN]);

        $user->addRole($adminRole);

        $manager->persist($user);

        $manager->flush();
    }

    public function getDependencies(): array
    {
        return [
           RoleLoader::class
        ];
    }
}
Notice how UserLoader.php implements 2 interfaces, FixtureInterface and DependentFixtureInterface.
The method getDependencies() returns an array containing the dependencies (fixtures) that need to be executed prior to the current one.
After running all the fixtures using php bin/doctrine fixtures:execute the output should look like this:

RoleLoader was executed before UserLoader because UserLoader had RoleLoader as a dependency.
To wrap things up, we implemented a database seeder and saw a practical example of how to use it.
More details about Fixtures in this blogpost: https://matthiasnoback.nl/2018/07/about-fixtures/ .
Leave a Reply Cancel Reply
Your email address will not be published. Required fields are marked *
You may use these HTML tags and attributes: <a href="" title=""> <abbr title=""> <acronym title=""> <b> <blockquote cite=""> <cite> <code> <del datetime=""> <em> <i> <q cite=""> <s> <strike> <strong>
Save my name, email, and website in this browser for the next time I comment.
Recommend
About Joyk
Aggregate valuable and interesting links.
Joyk means Joy of geeK