

使用VS Code 搭建 platformio 平台 - 浇筑菜鸟
source link: https://www.cnblogs.com/jzcn/p/16643104.html
Go to the source link to view the article. You can view the picture content, updated content and better typesetting reading experience. If the link is broken, please click the button below to view the snapshot at that time.

一、需要的资源网站
arduino GitHub:https://github.com/arduino
espressif GitHub:https://github.com/espressif
platformio GitHub:https://github.com/platformio
platformio 资源搜索:https://registry.platformio.org/search
二、安装VS Code
-
下载VS Code
官网:https://code.visualstudio.com/
-
安装比较简单,这里就不赘述了
三、安装 platformio 环境
-
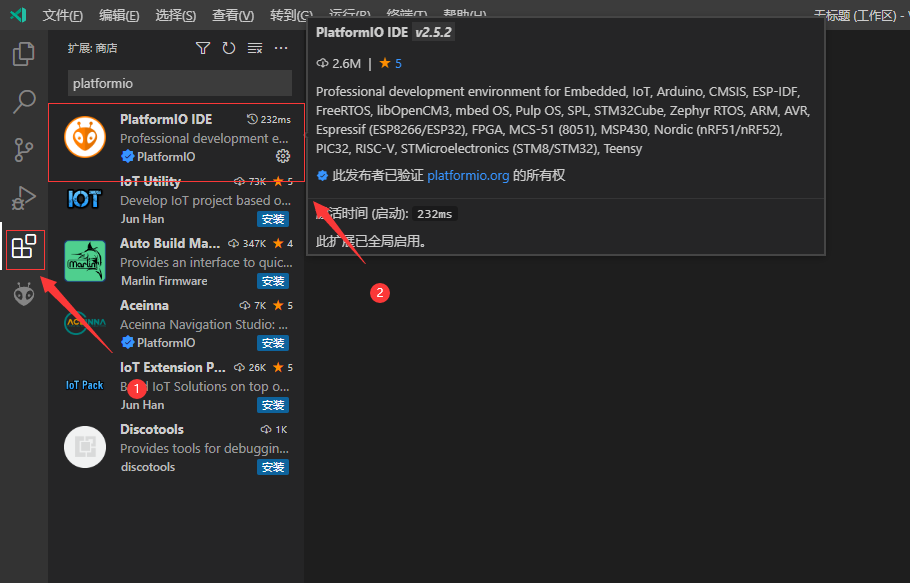
在VS Code 中搜索 platformio
-
点击安装即可
-
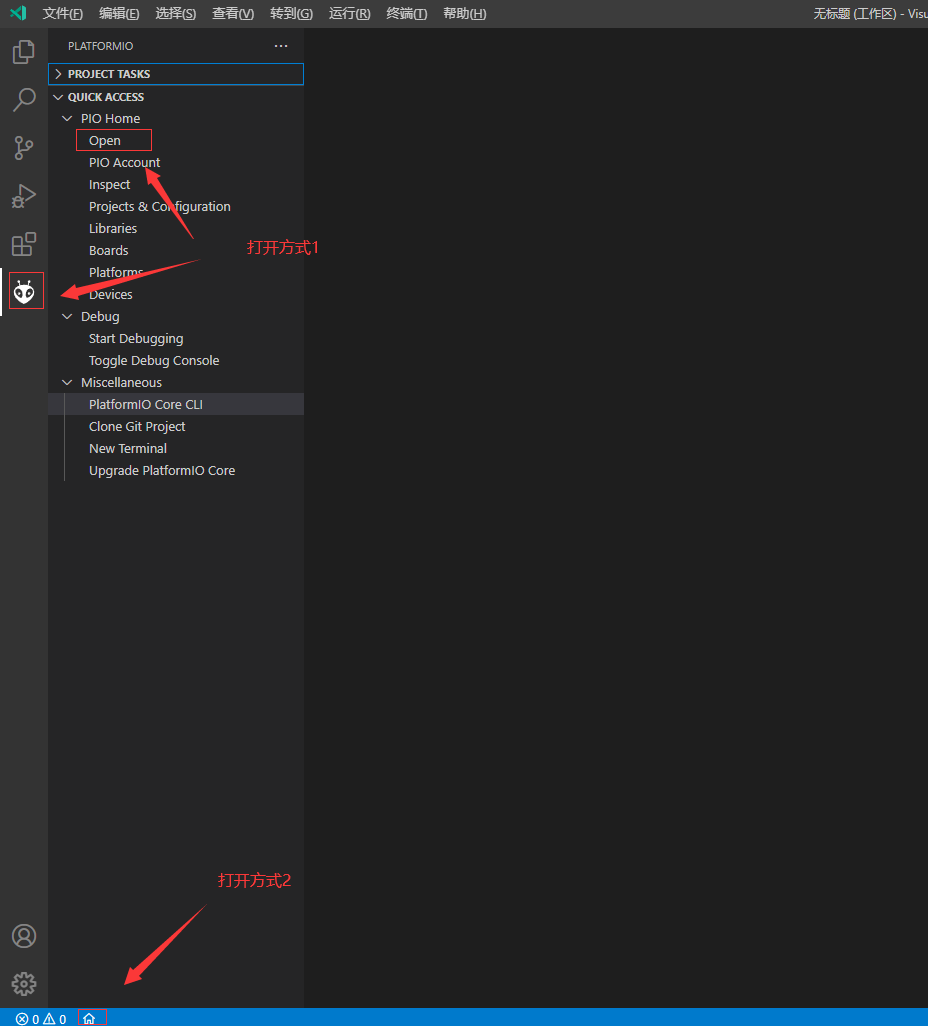
platformio 打开
-
platformio 面板
四、platformio使用
-
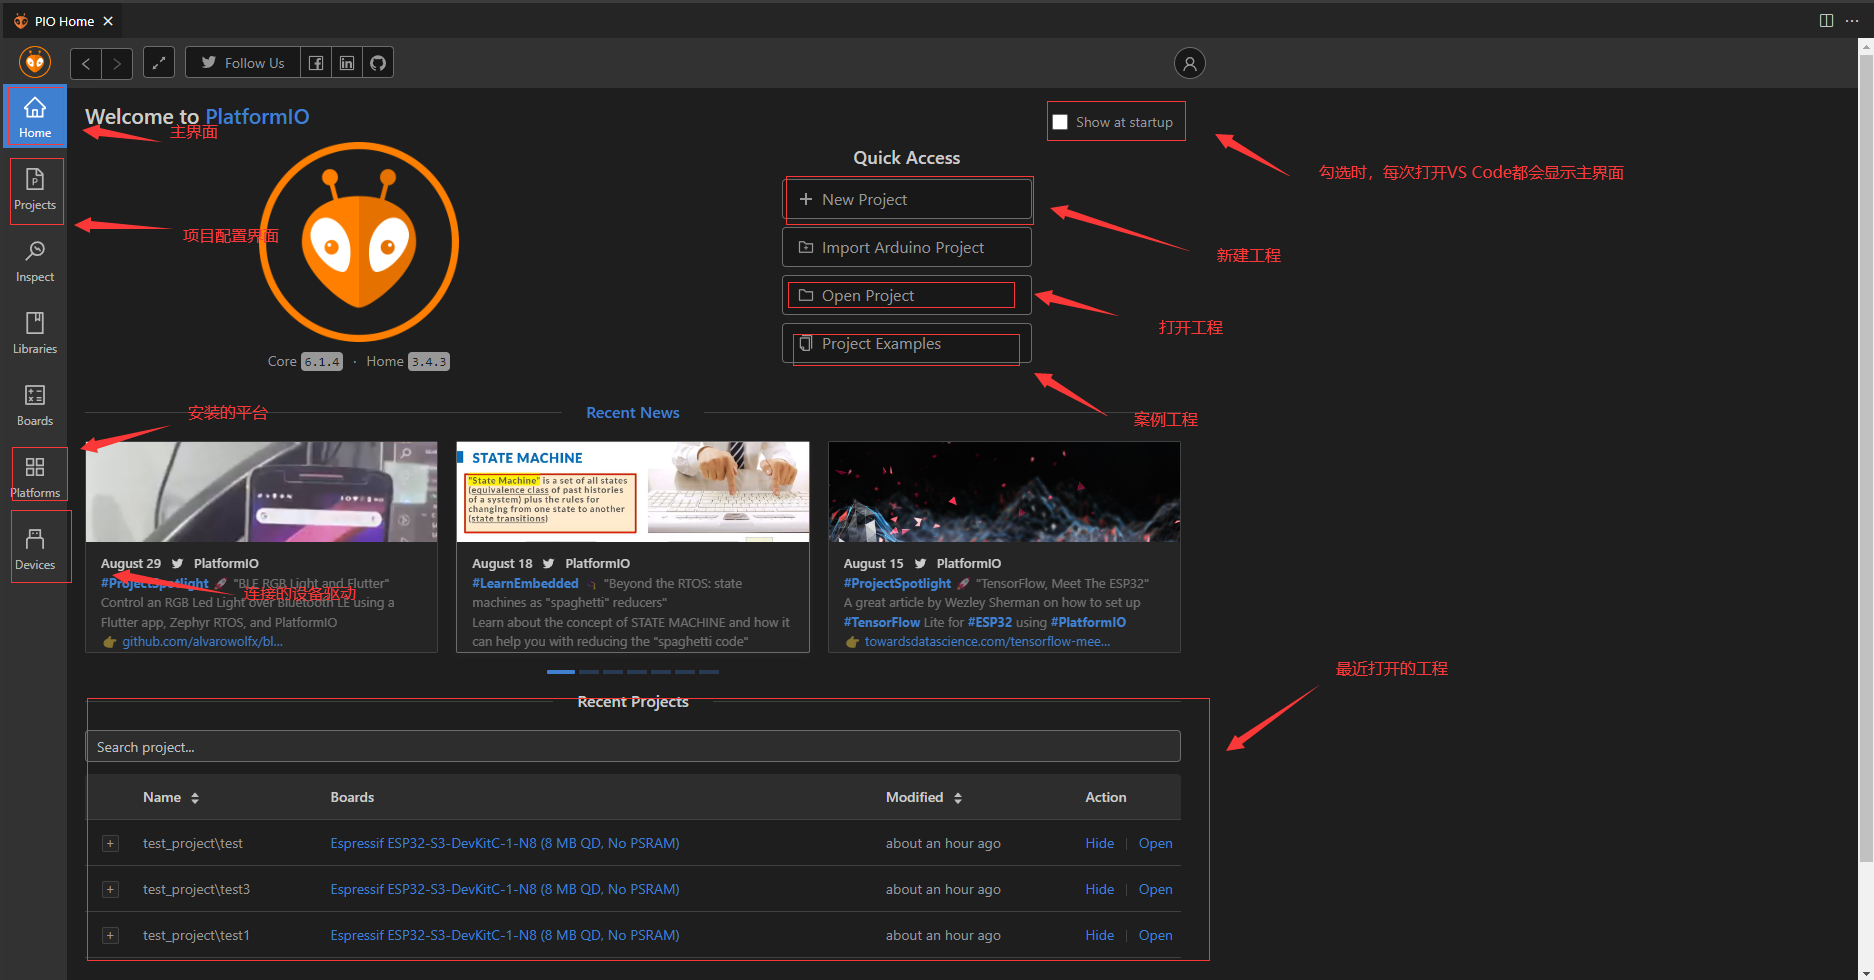
新建工程
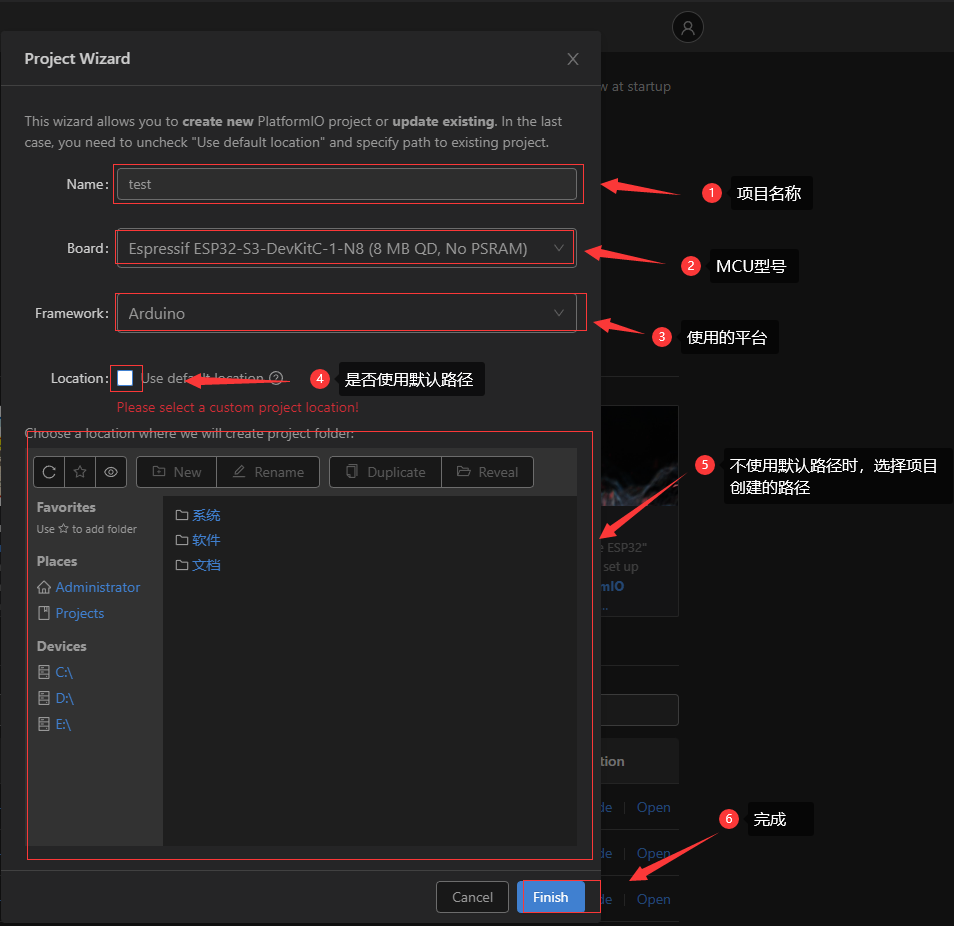
注意:
- 项目的默认路径是:C:\Users\Administrator\Documents\PlatformIO\Projects
- 首次创建项目时会很慢,如果网不好的话,等待一天都是有可能的,具体解决办法耐心看完后面的笔记
-
- .pio:存放工程编译产生的文件
- .vscode: 存放针对工程定制化的 vscode 配置文件
- include:存放统一管理的 h 头文件
- lib:存放自己编写的库文件
- src:存放工程项目的 C/C++ 源文件
- test:存放工程项目的测试文件,一般用不到
- .gitignore:git 仓库的忽略文件,方便 git 进行工程项目的版本控制
- travis.yml:持续集成的配置文件,一般用不到
- platformio.ini:项目的核心配置文件,这个会经常用到,所以得了解其中可用的配置项[4]
-
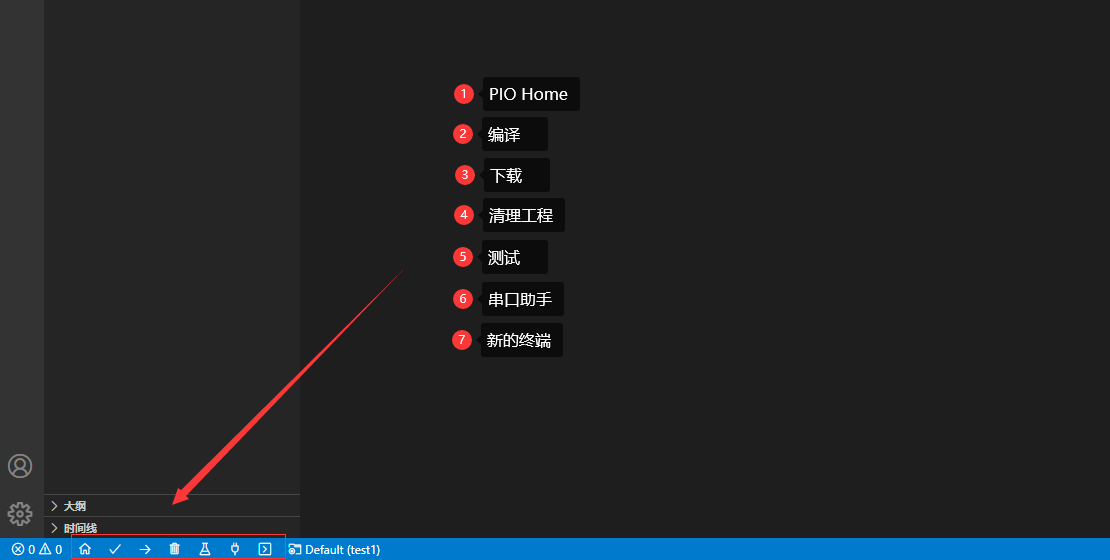
测试程序
在 src/main.cpp 文件中添加下面程序#include <Arduino.h> void setup() { // put your setup code here, to run once: pinMode(LED_BUILTIN, OUTPUT); } void loop() { // put your main code here, to run repeatedly: digitalWrite(LED_BUILTIN, HIGH); delay(1000); digitalWrite(LED_BUILTIN, LOW); delay(1000); } -
编译下载
五、新建工程比较慢的解决办法
下载慢的原因主要是因为网络不好,因为服务器都在国外,当然文件也比较大。所以首次创建项目需要耐心等待
-
更改下载仓库
在 “C:\Users\Administrator.platformio\penv\pip.conf” 文件中添加一下类容[global] index-url = https://mirrors.aliyun.com/pypi/simple/ [install] trusted-host = mirrors.aliyun.com我测试过,没有什么效果,可能是我这里的网本来就不好,详细测试方式看这位大佬的笔记
-
离线安装
这位大佬采用了离线安装的方式,我也没测试过,需要的小伙伴可以自己研究一下。 -
替换平台和包文件
这个和离线安装的方式差不多,都是需要找到已经下载的平台文件和包文件,然后进行替换。-
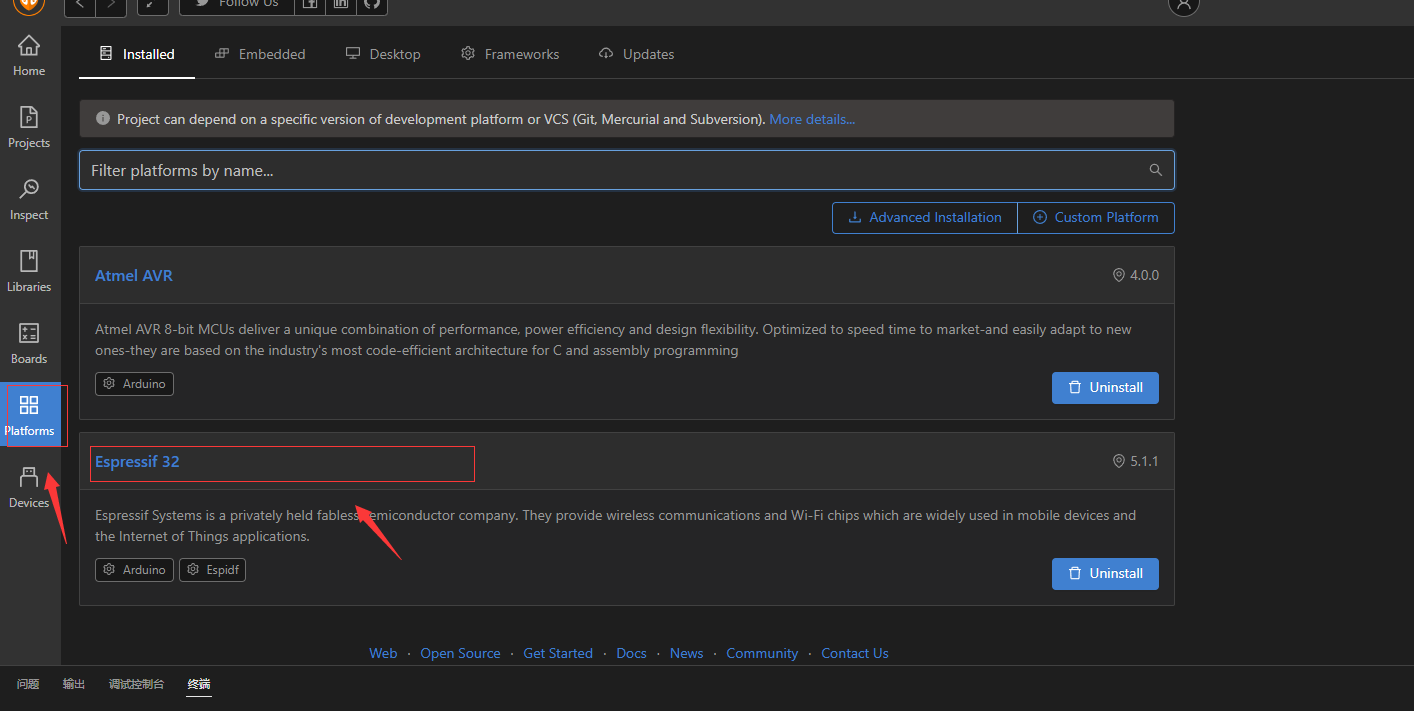
下载平台文件
在platformio GitHub 中下载自己需要的环境下载完成后,将其解压放在路径 “C:\Users\Administrator.platformio\platforms” 下,打开VS Code,即可看到平台已经安装完成,如下图所示:
-
工具包文件
点击对应的平台,可以查看需要的工具包及版本,如下图所示: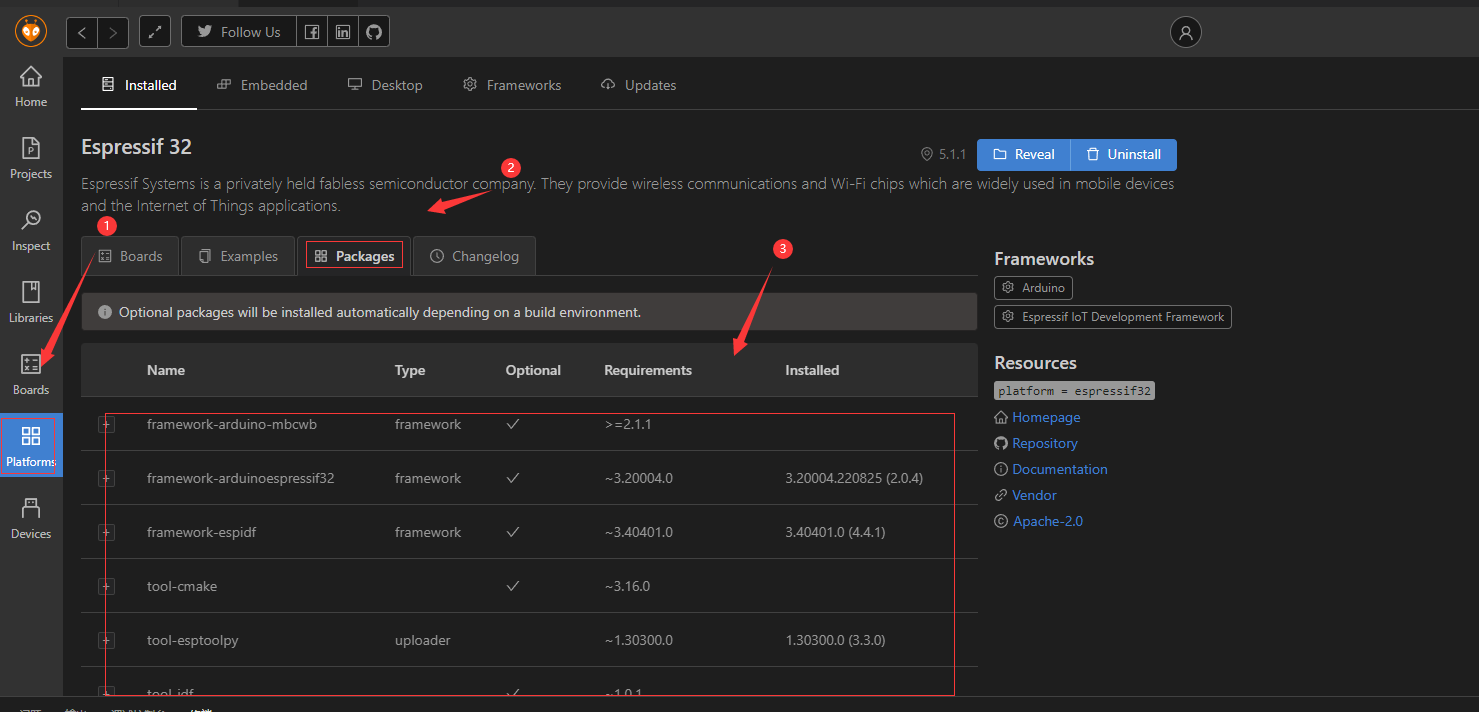
注意:
- 工具包和环境可以工作platformio仓库查看
- 包文件是自动下载的,所以就没有提供额离线的现在方式,但是我们可以找已经安装的电脑将工具包拷出来替换即可,工具包存放的路径在 “C:\Users\Administrator.platformio\packages”
- 安装好平台及工具包后在创建项目就快很多了,只需要十多分钟即可,如果还出现网不好的现场,可以通过手机热点之类的下载即可。
-
-
创建文件没进度条
这里就比较坑了,因为首次创建项目时,下载的文件还是比较大的,一共有几个G的样子,但是又没进度条,让我没等下去的耐心了,这里有一个间接的办法。
我们可以通过查看 “.platformio”文件的大小来查看下载的速度,如下图所示: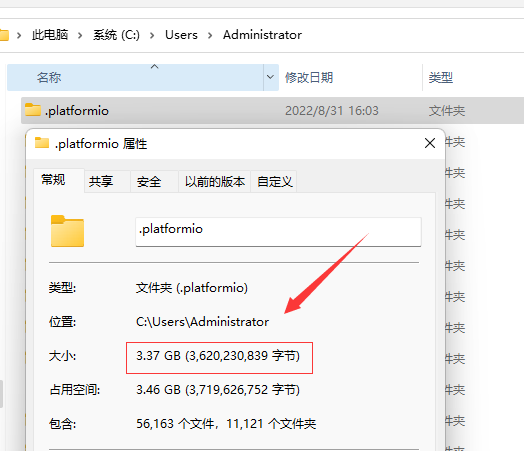
platformIO环境安装_kimiyang123的博客-CSDN博客_platformio安装:https://blog.csdn.net/kimiyang123/article/details/110871196
基本使用 - 新建项目 - 知乎:https://zhuanlan.zhihu.com/p/78722930
解决一直无法创建工程问题 - 知乎:https://zhuanlan.zhihu.com/p/444466189>
Visual Studio Code PlatformIo IDE 新建项目下载慢的解决办法:https://blog.csdn.net/ngl272/article/details/124776171
如本博客的内容侵犯了你的权益,请与以下地址联系,本人获知后,马上删除。同时本人深表歉意,并致以崇高的谢意!
Recommend
About Joyk
Aggregate valuable and interesting links.
Joyk means Joy of geeK