

十个有趣的Python高级脚本,建议收藏!
source link: https://www.51cto.com/article/717375.html
Go to the source link to view the article. You can view the picture content, updated content and better typesetting reading experience. If the link is broken, please click the button below to view the snapshot at that time.


大家好,我是菜鸟哥。
在日常的工作中,我们总会面临到各式各样的问题。
其中不少的问题,使用一些简单的Python代码就能解决。比如不久前的复旦大佬,用130行Python代码硬核搞定核酸统计,大大提升了效率,节省了不少时间。
今天,菜鸟哥就带大家学习一下10个Python脚本程序。虽然简单,不过还是蛮有用的。有兴趣的可以自己去实现,找到对自己有帮助的技巧。
1、Jpg转Png
图片格式转换,以前J哥可能第一时间想到的是【格式工厂】这个软件。
如今编写一个Python脚本就能完成各种图片格式的转换,此处以jpg转成png为例。
有两种解决方法,都分享给大家。
# 图片格式转换, Jpg转Png
# 方法①
from PIL import Image
img = Image.open('test.jpg')
img.save('test1.png')
# 方法②
from cv2 import imread, imwrite
image = imread("test.jpg", 1)
imwrite("test2.png", image)
2、PDF加密和解密
如果你有100个或更多的PDF文件需要加密,手动进行加密肯定是不可行的,极其浪费时间。
使用Python的pikepdf模块,即可对文件进行加密,写一个循环就能进行批量加密文档。
# PDF加密
import pikepdf
pdf = pikepdf.open("test.pdf")
pdf.save('encrypt.pdf', encryption=pikepdf.Encryption(owner="your_password", user="your_password", R=4))
pdf.close()
有加密那么便会有解密,代码如下。
# PDF解密
import pikepdf
pdf = pikepdf.open("encrypt.pdf", password='your_password')
pdf.save("decrypt.pdf")
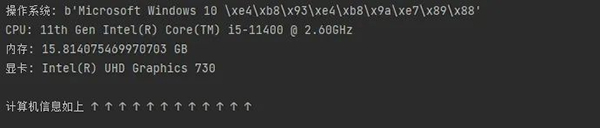
pdf.close()3、获取电脑的配置信息
很多小伙伴可能会使用鲁大师来看自己的电脑配置,这样还需要下载一个软件。
使用Python的WMI模块,便可以轻松查看你的电脑信息。
# 获取计算机信息
import wmi
def System_spec():
   Pc = wmi.WMI()
   os_info = Pc.Win32_OperatingSystem()[0]
   processor = Pc.Win32_Processor()[0]
   Gpu = Pc.Win32_VideoController()[0]
   os_name = os_info.Name.encode('utf-8').split(b'|')[0]
   ram = float(os_info.TotalVisibleMemorySize) / 1048576
   print(f'操作系统: {os_name}')
   print(f'CPU: {processor.Name}')
   print(f'内存: {ram} GB')
   print(f'显卡: {Gpu.Name}')
   print("\n计算机信息如上 ↑ ↑ ↑ ↑ ↑ ↑ ↑ ↑ ↑ ↑ ↑ ↑")
System_spec()
就以J哥自己的电脑为例,运行代码就能看到配置。
4、解压文件
使用zipfile模块进行文件解压,同理也可以对文件进行压缩。
# 解压文件
from zipfile import ZipFile
unzip = ZipFile("file.zip", "r")
unzip.extractall("output Folder")
5、Excel工作表合并
帮助你将Excel工作表合并到一张表上,表内容如下图。
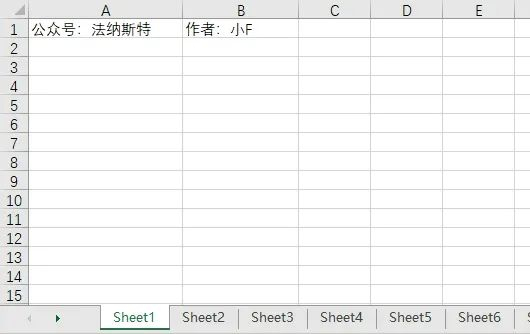
6张表,其余表的内容和第一张表都一样。
设置表格数量为5,将会合并前5张表的内容。
import pandas as pd
# 文件名
filename = "test.xlsx"
# 表格数量
T_sheets = 5
df = []
for i in range(1, T_sheets+1):
sheet_data = pd.read_excel(filename, sheet_name=i, header=None)
df.append(sheet_data)
# 合并表格
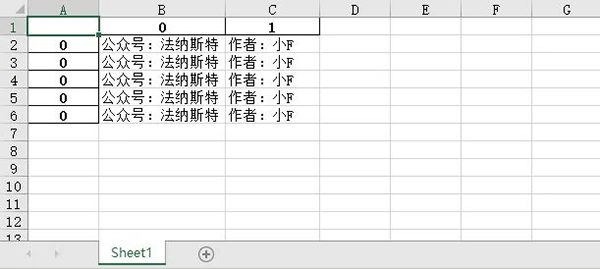
output = "merged.xlsx"
df = pd.concat(df)
df.to_excel(output)结果如下。
6、将图像转换为素描图
和之前的图片格式转换有点类似,就是对图像进行处理。
以前大家可能会使用到美图秀秀,现在可能就是抖音的滤镜了。
其实使用Python的OpenCV,就能够快速实现很多你想要的效果。
# 图像转换
import cv2
# 读取图片
img = cv2.imread("img.jpg")
# 灰度
grey = cv2.cvtColor(img, cv2.COLOR_BGR2GRAY)
invert = cv2.bitwise_not(grey)
# 高斯滤波
blur_img = cv2.GaussianBlur(invert, (7, 7), 0)
inverse_blur = cv2.bitwise_not(blur_img)
sketch_img = cv2.divide(grey, inverse_blur, scale=256.0)
# 保存
cv2.imwrite('sketch.jpg', sketch_img)
cv2.waitKey(0)
cv2.destroyAllWindows()
原图如下。

素描图如下,还挺好看的。

7、获取CPU温度
有了这个Python脚本,你将不需要任何软件来了解CPU的温度。
# 获取CPU温度
from time import sleep
from pyspectator.processor import Cpu
cpu = Cpu(monitoring_latency=1)
with cpu:
   while True:
       print(f'Temp: {cpu.temperature} °C')
       sleep(2)
8、提取PDF表格
有的时候,我们需要从PDF中提取表格数据。
第一时间你可能会先想到手工整理,但是当工作量特别大,手工可能就比较费劲。
然后你可能会想到一些软件和网络工具来提取 PDF 表格。
下面这个简单的脚本将帮助你在一秒钟内完成相同的操作。
# 方法①
import camelot
tables = camelot.read_pdf("tables.pdf")
print(tables)
tables.export("extracted.csv", f="csv", compress=True)
# 方法②, 需要安装Java8
import tabula
tabula.read_pdf("tables.pdf", pages="all")
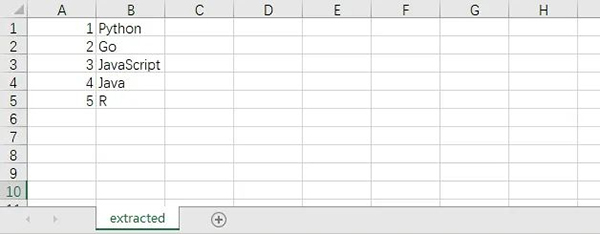
tabula.convert_into("table.pdf", "output.csv", output_format="csv", pages="all")PDF文档的内容如下,包含了一个表格。
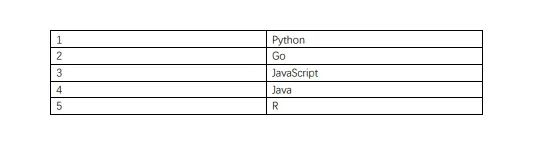
提取到的CSV文件内容如下。
该脚本将简单地截取屏幕截图,而无需使用任何屏幕截图软件。
在下面的代码中,给大家展示了两种Python截取屏幕截图的方法。
# 方法①
from mss import mss
with mss() as screenshot:
   screenshot.shot(output='scr.png')
# 方法②
import PIL.ImageGrab
scr = PIL.ImageGrab.grab()
scr.save("scr.png")
10、拼写检查器
这个Python脚本可以进行拼写检查,当然只对英文有效,毕竟中文博大精深呐。
# 拼写检查
# 方法①
import textblob
text = "mussage"
print("original text: " + str(text))
checked = textblob.TextBlob(text)
print("corrected text: " + str(checked.correct()))
# 方法②
import autocorrect
spell = autocorrect.Speller(lang='en')
# 以英语为例
print(spell('cmputr'))
print(spell('watr'))
print(spell('survice'))Recommend
About Joyk
Aggregate valuable and interesting links.
Joyk means Joy of geeK