

Micro:Bit Voting - Espruino
source link: https://www.espruino.com/MicroBit+Voting
Go to the source link to view the article. You can view the picture content, updated content and better typesetting reading experience. If the link is broken, please click the button below to view the snapshot at that time.

Micro:Bit Voting⇠
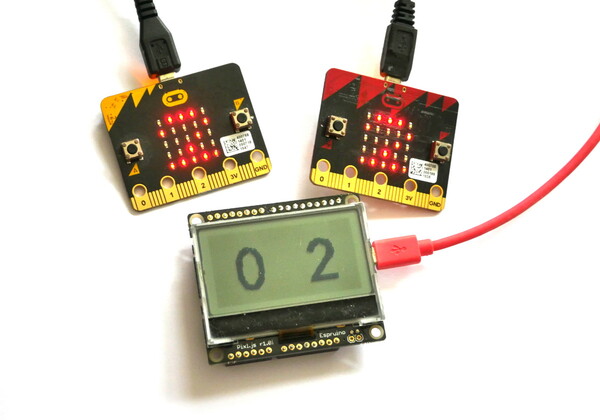
If you have a classroom of kids, one thing you might want to do is to make a voting system where children can do something with their Micro:bit and have it shown at the front of the class.
We're going to use a Pixl.js board with Espruino to receive data that is transmitted over Bluetooth by Micro:bits programmed with MakeCode and display it on the Pixl.js screen.
Because standard Eddystone Bluetooth advertising is used, multiple receivers can be made - using other Bluetooth LE Espruino devices or just a PC with special software.
Micro:Bit software⇠
- Go to MakeCode and ensure you're in
Blocksmode up the top. - Under the
Advancedheading clickAdd Package(you may have to expandAdvancedfirst)
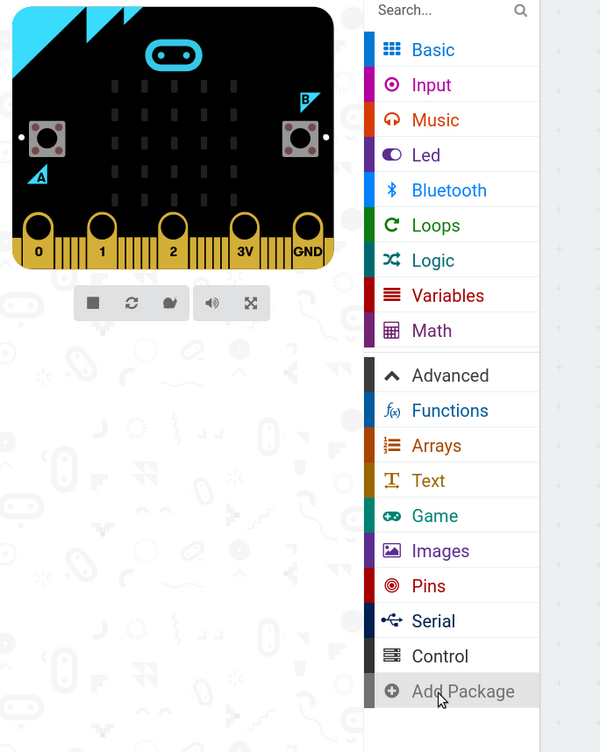
- Type
Bluetoothand click on theBluetoothpackage
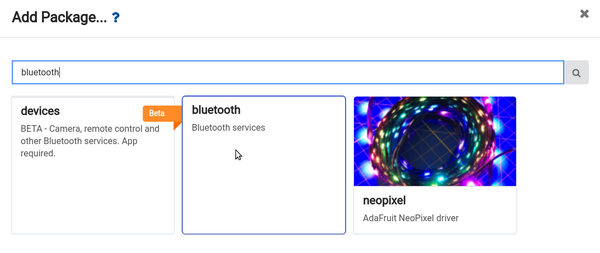
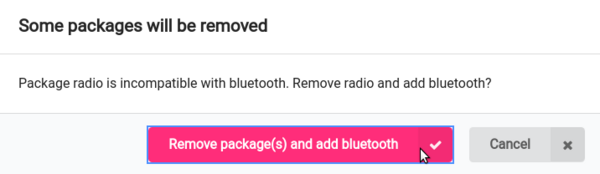
- Click
Yesto the dialog telling you that radio functions won't be available.
- Now pull in the
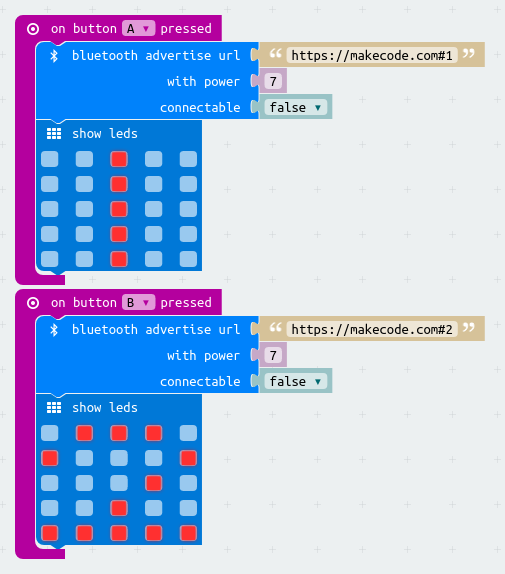
On Button A Pressedblock fromInput - Pull
bluetooth advertise urlfromBluetoothinto theOn Button A Pressed - Pull
show ledsfromBasicinto the end ofOn Button A Pressedas well - Right-click and duplicate all the blocks
- In the first block, change
https://makecode.comtohttps://makecode.com#1, and write1in theshow ledsblock - In the second block, change
On Button A PressedtoOn Button B Pressed,https://makecode.comtohttps://makecode.com#2, and write2in theshow ledsblock
Your code should look like this:
Click Download and save the file to each Micro:bit you're interested in.
Pixl.js Software⇠
On the Pixl, we'll write code that scans for any advertised URLs that contain
a # character, and use the text after the # as a vote.
For Pixl.js, follow the Getting Started Guide to get connected with the Espruino IDE.
Copy and paste the following code to the right-hand side of the IDE and click Upload,
and you're done!
// List of eddystone devices
var eddystone = {};
// List of votes
var votes = {};

// Start scanning for devices
NRF.setScan(function(dev) {
  if (dev.serviceData && dev.serviceData.feaa)
    eddystone[dev.id] = dev;
});

/* Every so often, scan over the list of devices
we have and tally up the votes */
setInterval(function() {
  // reset votes
  votes = {};
  // tally them up
  for (var id in eddystone) {
    var dev = eddystone[id];
    if (!dev.age) dev.age=0;
    dev.age++;
    // only use votes from devices we heard from recently
    if (dev.age < 40) {
      // if the URL contains a hash, the vote is what comes after
      var url = E.toString(dev.serviceData.feaa).substr(3);
      var hash = url.lastIndexOf("#");
      if (hash) {
        var vote = url.substr(hash+1);
        if (vote in votes)
          votes[vote]++;
        else
          votes[vote]=1;
      }
    }
  }
  // now display on the screen
  g.clear();
  g.setFontVector(40);
  g.setFontAlign(0,0);
  g.drawString(0|votes["1"], g.getWidth()/4, g.getHeight()/2);
  g.drawString(0|votes["2"], 3*g.getWidth()/4, g.getHeight()/2);
  g.flip();
}, 500);
Type save() to write this code to Pixl.js so it'll be run automatically
even after power is removed and restored.
More functionality⇠
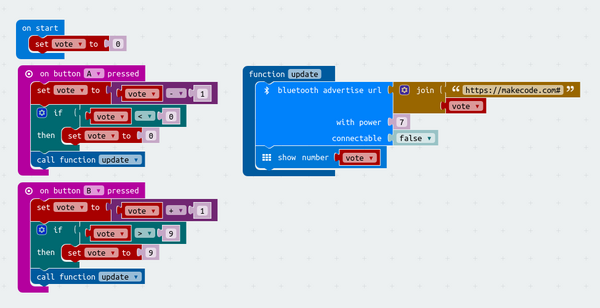
Since anything after a # is used as a vote, you can easily have more than
two items to vote with. The following code for MakeCode will vote with
a number between 0 and 9 (changed by pressing the A and B buttons)
You can then pick up the results in the votes variable. For instance to
display a bar graph instead of 2 numbers, just change the code at the end of
the setInterval to:
// now display on the screen
g.clear();
g.setFontAlign(0,0);
for (var i=0;i<10;i++) {
  g.fillRect(i*12, 55-(0|votes[i])*10, i*12+11, 55);
  g.drawString(0|votes[i], i*12+5, 60);
}
g.flip();
You could also use the Arduino connectors on the back of the Pixl.js to connect extra hardware that can be controlled by the Micro:bits, for instance motors, WiFi connection, or large LED displays.
Recommend
About Joyk
Aggregate valuable and interesting links.
Joyk means Joy of geeK