
3

1创建三层交换机
source link: https://shidawuhen.github.io/2022/08/26/1%E5%88%9B%E5%BB%BA%E4%B8%89%E5%B1%82%E4%BA%A4%E6%8D%A2%E6%9C%BA/
Go to the source link to view the article. You can view the picture content, updated content and better typesetting reading experience. If the link is broken, please click the button below to view the snapshot at that time.

本次模拟创建三层交换机,配置RIP和NAT功能,实现内网各网段互通和访问外网。
一、创建虚拟机
通过导入Template-WinSer2016-20211012.ovf,创建虚拟机,修改名称为CoreSwitch1


二、配置网段与网卡
2.1网段划分
划分出5个网段,分别跑不通流量
MGMT:主要跑管理流量
iSCSI Storage:主要跑存储流量
vMotion&FT:主要跑高可用相关的流量
服务器虚拟机网段:主要跑创建的虚拟机的流量
客户端电脑网段:跑客户端的流量

2.2Fusion创建网段
在Fusion->偏好设置里添加对应网段。切记不要勾选任何选项。

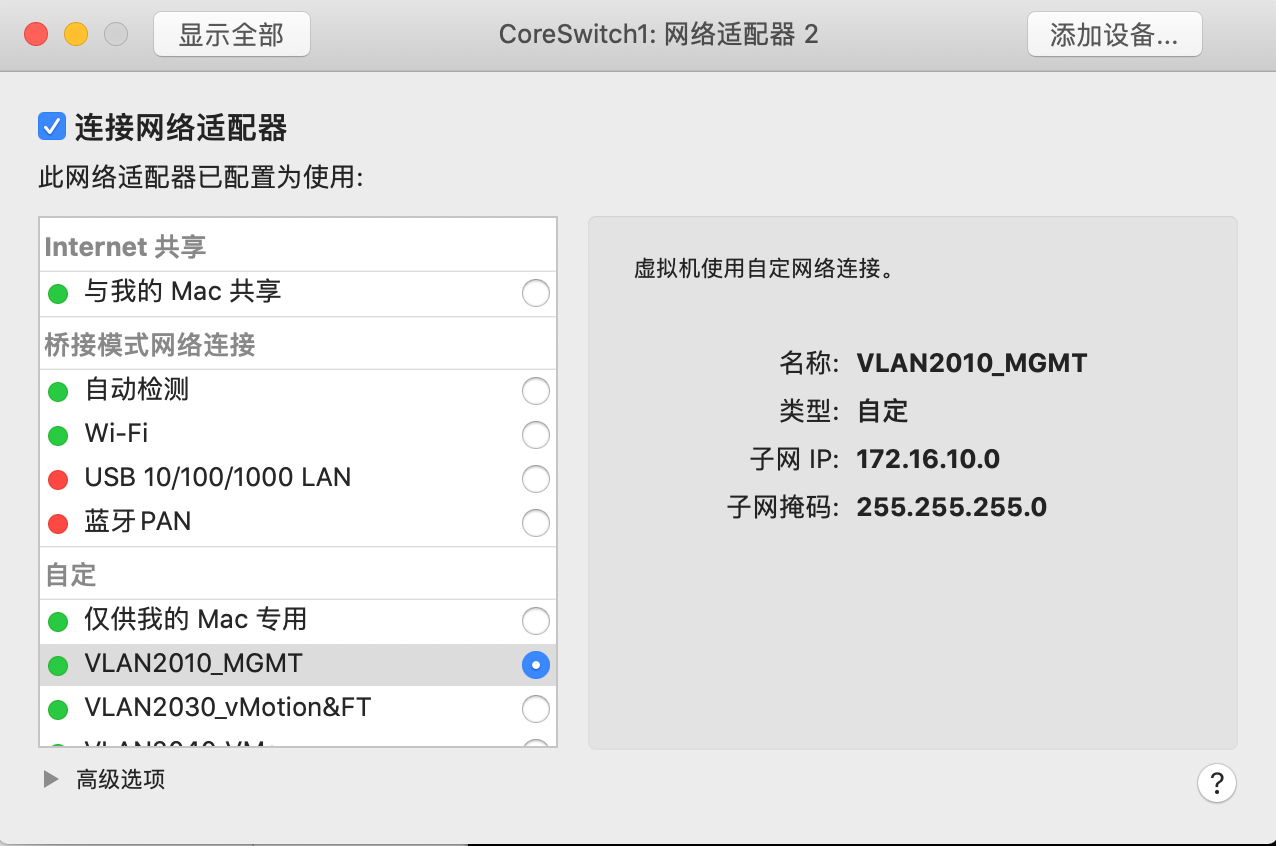
2.3配置CoreSwitch网络适配器
在CoreSwitch上添加四块网络适配器,绑定对应网段。在同一网段的机器就可相互通信了。
注意默认网卡使用桥接模式连接到外网。

配置方法如下:
2.4关闭防火墙
为了实现互访互通,防止有奇怪的事情发生,我们可以关闭防火墙。
输入wf.msc后出现下图,把红框里的都改成off。

2.5更改机器名称

2.6配置IP地址
配置交换机网关地址:

三、配置LAN间路由和NAT
3.1安装Remote Access(远程访问)
在Server Manager中选择Add Roles and Features Wizard。


3.2启动Remote Access


3.3添加RIP协议

3.4配置RIP
配置完成后,理论上不同网段可以相互访问了。


3.4配置NAT
添加后,理论上不同网段可以访问外网。


如果发现服务有失败的,可以右键重新执行。


至此,我们用WinSer2016模拟出一个虚拟交换机。
Recommend
About Joyk
Aggregate valuable and interesting links.
Joyk means Joy of geeK