

彩虹女神跃长空,Go语言进阶之Go语言高性能Web框架Iris项目实战-完善用户管理EP04
source link: https://v3u.cn/a_id_244
Go to the source link to view the article. You can view the picture content, updated content and better typesetting reading experience. If the link is broken, please click the button below to view the snapshot at that time.

彩虹女神跃长空,Go语言进阶之Go语言高性能Web框架Iris项目实战-完善用户管理EP04
书接上回,上一回我们完成了用户管理页面的构建,并且通过前端的Vue.js框架动态地获取表单数据,同时异步请求后端Iris接口进行入库操作,过程中使用函数封装可复用的逻辑。 本回我们将继续完善用户管理功能。
虽然在之前的章节中已经完成了用户添加(注册)的功能,然而我们忽略了一个重要的细节,那就是用户名(username)应该是全局唯一的字段,而添加逻辑中并未做唯一性校验,事实上唯一性校验有两种方案,一种是入库之前做一次查询,但这样会浪费一次磁盘的IO操作,另外一种就是通过唯一索引进行拦截操作,这里我们采用后者,修改model.go文件:
package model

import (
	"time"

"github.com/jinzhu/gorm"
)

type Model struct {
	ID        uint `gorm:"primary_key"`
	CreatedAt time.Time
	UpdatedAt time.Time
	DeletedAt *time.Time
}

type User struct {
	gorm.Model
	Username string `gorm:"unique;not null"`
	Password string
}
这里为User结构体的字段Username添加unique索引,随后将user表删除,重新进行数据库迁移操作:
db.AutoMigrate(&model.User{})接着查看表结构:
MySQL [irisblog]> SHOW CREATE TABLE user;
+-------+------------------------------------------------------------------------------------------------------------------------------------------------------------------------------------------------------------------------------------------------------------------------------------------------------------------------------------------------------------------------------------------------------------------------------------------------------------------------------------------------------------------------+
| Table | Create Table                                                                                                                                                                                                                                                                                                                                                                                                                                                                                                           |
+-------+------------------------------------------------------------------------------------------------------------------------------------------------------------------------------------------------------------------------------------------------------------------------------------------------------------------------------------------------------------------------------------------------------------------------------------------------------------------------------------------------------------------------+
| user  | CREATE TABLE `user` (
  `id` int(10) unsigned NOT NULL AUTO_INCREMENT,
  `created_at` datetime DEFAULT NULL,
  `updated_at` datetime DEFAULT NULL,
  `deleted_at` datetime DEFAULT NULL,
  `username` varchar(255) COLLATE utf8mb4_unicode_ci NOT NULL,
  `password` varchar(255) COLLATE utf8mb4_unicode_ci DEFAULT NULL,
  PRIMARY KEY (`id`),
  UNIQUE KEY `username` (`username`),
  KEY `idx_user_deleted_at` (`deleted_at`)
) ENGINE=InnoDB AUTO_INCREMENT=22 DEFAULT CHARSET=utf8mb4 COLLATE=utf8mb4_unicode_ci |
+-------+------------------------------------------------------------------------------------------------------------------------------------------------------------------------------------------------------------------------------------------------------------------------------------------------------------------------------------------------------------------------------------------------------------------------------------------------------------------------------------------------------------------------+
1 row in set (0.00 sec)
发现username字段已经被Gorm添加了唯一索引:UNIQUE KEY `username` (`username`)
随后修改用户添加逻辑:
app.Post("/admin/user_action/", func(ctx iris.Context) {

username := ctx.PostValue("username")
		password := ctx.PostValue("password")

fmt.Println(username, password)

md5str := mytool.Make_password(password)

user := &model.User{Username: username, Password: md5str}
		res := db.Create(user)

if res.Error != nil {

fmt.Println(res.Error)

ret := map[string]string{
				"errcode": "1",
				"msg":     "用户名不能重复",
			}
			ctx.JSON(ret)

return

}

ret := map[string]string{
			"errcode": "0",
			"msg":     "ok",
		}
		ctx.JSON(ret)

})
这里res结构体中的Error字段来返回错误,如果Error不等于nil,说明被唯一索引拦截了下来。
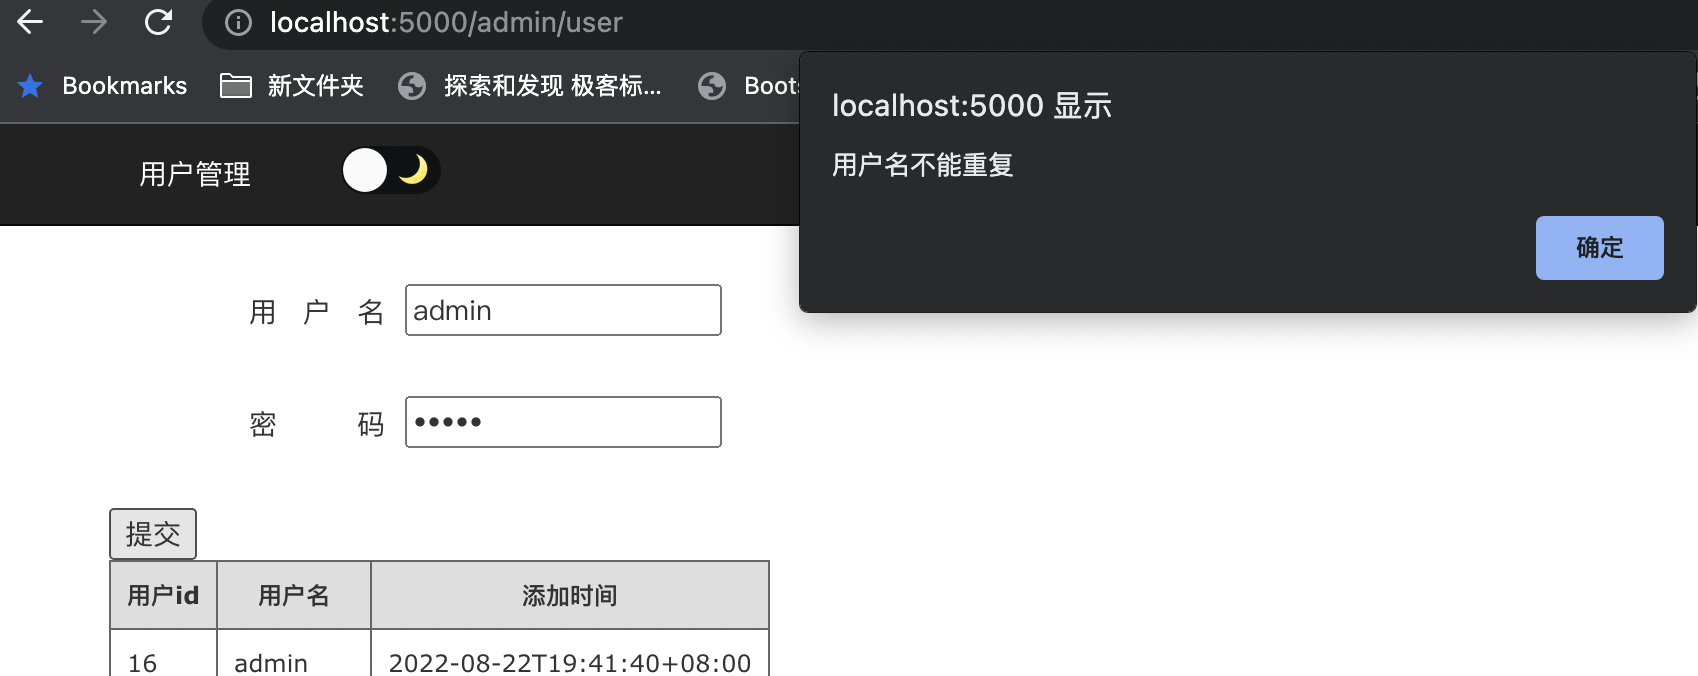
随后构建 ret 字典,声明错误码和提示信息,然后使用ctx.JSON函数序列化为Json格式返回给前端,注意别忘了用return关键字结束逻辑,否则代码会继续执行,返回值样例:
{
errcode: "1",
msg: "用户名不能重复"
}
前端接收到返回值之后,可以通过alert方法打印返回值:
submit:function(){


                    this.myaxios("http://localhost:5000/admin/user_action/","post",{"username":this.username,"password":this.password}).then(data => {
        console.log(data)
                        alert(data.msg);
      });

}
如图所示:
用户更新与删除
用户更新指的是密码的修改,首先需要构造新密码的表单变量:
data() {
                return {
                    //用户名
                    username: "",
                    //密码
                    password:"",
                    //用户列表
                    userlist:[],
                    //新密码
                    newpass:[]
                };
            },
注意,这里是动态表单,因为每一个表单会对应一个用户:
for(let i=0,l=this.userlist.length;i<l;i++){

this.newpass.push({"value":""})

}
这里每返回一个用户,就会为该用户对应生成一个value字段。
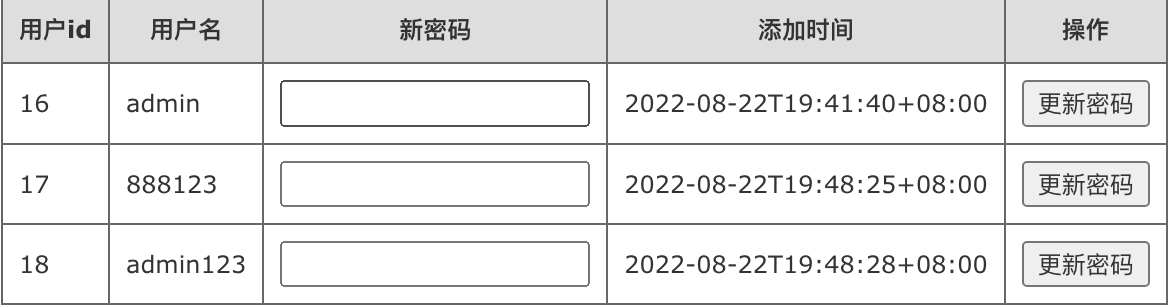
随后在循环中绑定该字段:
<table class="gridtable">

<tr>
                    <th>用户id</th>
                    <th>用户名</th>
                    <th>新密码</th>
                    <th>添加时间</th>
                    <th>操作</th>
                </tr>

<tr v-for="(item,index) in userlist">
                    <td>{{ item.ID }}</td>
                    <td>{{ item.Username }}</td>
                    <td><input type="password" v-model="newpass[index].value"  /></td>
                    <td>{{ item.CreatedAt }}</td>
                    <td><button @click="update(index)">更新密码</button></td>
                </tr>

</table>
如图所示:
随后绑定单击事件,向后端iris传递参数:
update:function(i){

console.log(this.userlist[i].ID);
                    console.log(this.newpass[i].value);

if(this.newpass[i].value == ""){
                        alert("新密码不能为空");
                        return false;
                    }

this.myaxios("http://localhost:5000/admin/user_action/","put",{"id":this.userlist[i].ID,"password":this.newpass[i].value}).then(data => {
                        console.log(data)
                        alert(data.msg);
      });


                }
这里传递的参数是用户id以及用户的新密码,注意请求方式使用Put。
随后在后端Iris中添加更新逻辑:
app.Put("/admin/user_action/", func(ctx iris.Context) {

ID := ctx.PostValue("id")
		Password := ctx.PostValue("password")

user := &model.User{}
		db.First(&user, ID)

user.Password = mytool.Make_password(Password)
		db.Save(&user)

ret := map[string]string{
			"errcode": "0",
			"msg":     "更新密码成功",
		}
		ctx.JSON(ret)

})
这里使用Put函数监听路由,随后接受参数ID和Password,注意Put和Post方式都采用ctx.PostValue函数来获取参数。
接着使用db.First(&user, ID)函数来进行主键查询,查出用户的结构体变量对象,最后调用db.Save函数来存储更新结果:
MySQL [irisblog]> select * from user where id = 16\G
*************************** 1. row ***************************
        id: 16
created_at: 2022-08-22 19:41:40
updated_at: 2022-08-23 15:41:09
deleted_at: NULL
  username: admin
  password: 202cb962ac59075b964b07152d234b70
1 row in set (0.00 sec)

MySQL [irisblog]>
可以看到,password和updated_at两个字段已经同步更新了。
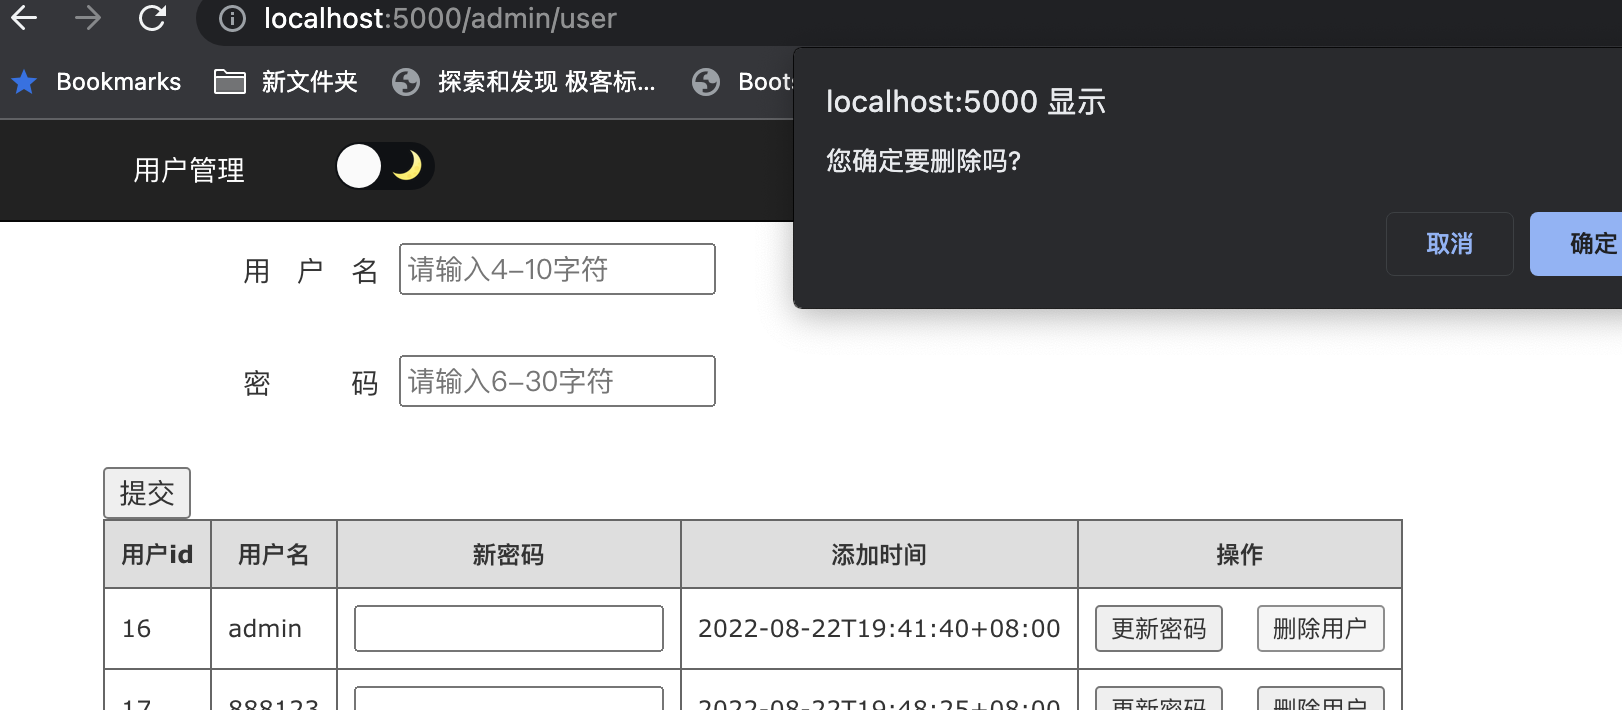
接着是删除操作,首先前端添加删除按钮:
<tr v-for="(item,index) in userlist">
                    <td>{{ item.ID }}</td>
                    <td>{{ item.Username }}</td>
                    <td><input type="password" v-model="newpass[index].value"  /></td>
                    <td>{{ item.CreatedAt }}</td>
                   <td>
<button @click="update(index)">更新密码</button>
<button @click="del(index)">删除用户</button>
</td>
</tr>随后绑定删除事件:
del:function(i){

var r=confirm("您确定要删除吗?");

if (r==true){

this.myaxios("http://localhost:5000/admin/user_action/","delete",{"id":this.userlist[i].ID}).then(data => {
                        console.log(data)
                        alert(data.msg);
                    });


                    }


                },
注意这里的请求方式是delete。
如图所示:
随后编写后端删除逻辑:
app.Delete("/admin/user_action/", func(ctx iris.Context) {

ID := ctx.URLParamIntDefault("id", 0)

db.Delete(&model.User{}, ID)

ret := map[string]string{
			"errcode": "0",
			"msg":     "删除用户成功",
		}
		ctx.JSON(ret)

})
这里使用Delete函数来监听路由,同时通过ctx.URLParamIntDefault函数获取前端请求的参数,注意Get和Delete方式获取参数的请求函数是一致的,同理,Post方式和Put方式也是相同的。
接着使用db.Delete(&model.User{}, ID)函数通过用户结构体做主键删除。
至此,完成了用户结构体的增:用户添加(唯一索引拦截);删(主键删除);改(动态表单绑定修改密码);查(结构体单项和批量查询)。该项目已开源在Github:https://github.com/zcxey2911/IrisBlog ,与君共觞,和君共勉。
Recommend
About Joyk
Aggregate valuable and interesting links.
Joyk means Joy of geeK