
3

Spring 05: 用DI(依赖注入)优化Spring接管下的三层项目架构 - nefu_wangxun
source link: https://www.cnblogs.com/nefu-wangxun/p/16609882.html
Go to the source link to view the article. You can view the picture content, updated content and better typesetting reading experience. If the link is broken, please click the button below to view the snapshot at that time.
Spring 05: 用DI(依赖注入)优化Spring接管下的三层项目架构
- 用注解改造前面Spring博客集里(指 Spring 02)Spring接管下的三层项目架构
- 对前面Spring博客集里(指 Spring 04)@Controller + @Service + @Repository 3个注解的用法进行演示
数据访问层
- 数据访问层的实现类:添加@Repository注解,专门用来创建数据访问层对象
package com.example.dao;

import com.example.pojo.User;
import org.springframework.stereotype.Repository;

/**
 * 数据访问层的实现类
 */
@Repository
public class UserMapperImpl implements UserMapper{

    //模拟用户信息导入
    @Override
    public int insertUser(User user) {
        System.out.println("用户: " + user.getName() + ", 导入成功!");
        return 1;
    }
}
业务逻辑层
- 业务逻辑层的实现类:添加@Service注解,专门用来创建业务逻辑层对象
- 同时,由于持有数据访问层的接口类型的成员变量,需要添加@Autowired注解
- 注意:对于@Autowired,这里是同源类型注入的情况3:存在接口和实现类关系的注入。上面注册了数据访问层的实现类对象,这里注入接口变量中,面向接口编程
package com.example.Service.impl;

import com.example.Service.UserService;
import com.example.dao.UserMapper;
import com.example.pojo.User;
import org.springframework.beans.factory.annotation.Autowired;
import org.springframework.stereotype.Service;

/**
 * 业务逻辑层实现类
 */
@Service
public class UserServiceImpl implements UserService {

    //数据访问层接口指向数据访问层实现类
    @Autowired
    UserMapper userMapper;

    @Override
    public int insertUser(User user) {
        return userMapper.insertUser(user);
    }
}
-
界面层:添加@Controller注解,专门用来创建界面层对象
-
同时,由于持有业务逻辑层的接口类型的成员变量,需要添加@Autowired注解,也是同源类型注入的情况3:存在接口和实现类关系的注入
package com.example.controller;

import com.example.Service.UserService;
import com.example.pojo.User;
import org.springframework.beans.factory.annotation.Autowired;
import org.springframework.stereotype.Controller;

/**
 * 界面层
 */
@Controller
public class UserController {

    //业务逻辑层接口指向业务逻辑层实现类
    @Autowired
    UserService userService;

    public int insertUser(User user){
        return userService.insertUser(user);
    }
}
applicationContext.xml
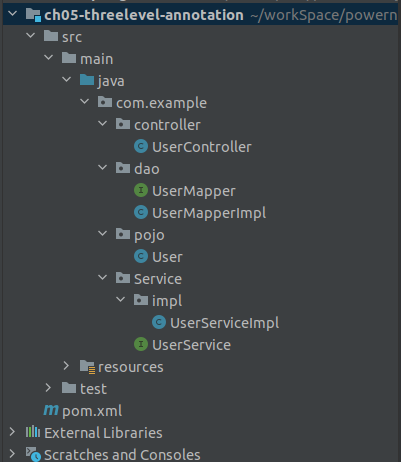
- 添加包扫描:由上面的项目结构可知,这里的包扫描可行但不是最优做法,因为pojo包根本不会交给容器创建对象但也要扫描,而且要进入impl包才能扫描到UserServiceImpl类。扫描做法以后会改进
<?xml version="1.0" encoding="UTF-8"?>
<beans xmlns="http://www.springframework.org/schema/beans"
       xmlns:xsi="http://www.w3.org/2001/XMLSchema-instance"
       xmlns:context="http://www.springframework.org/schema/context"
       xsi:schemaLocation="http://www.springframework.org/schema/beans http://www.springframework.org/schema/beans/spring-beans.xsd http://www.springframework.org/schema/context https://www.springframework.org/schema/context/spring-context.xsd">

    <!-- 添加包扫描 -->
    <context:component-scan base-package="com.example"/>

</beans>
包扫描的方式
- 分单个包进行扫描(推荐):对需要将实体类交给Spring容器进行对象创建的包分别进行扫描
    <context:component-scan base-package="com.example.controller"/>
    <context:component-scan base-package="com.example.Service"/>
    <context:component-scan base-package="com.example.dao"/>
- 一次扫描多个包,各包路径之间可用空格或逗号隔开(不直观)
<context:component-scan base-package="com.example.dao com.example.Service com.example.controller"/>
- 从根包开始扫描(不推荐):可能需要扫描许多根本不用交给容器创建对象的包,使得Spring容器的创建速度变慢,做很多无用功
<context:component-scan base-package="com"/>
package com.example.test;

import com.example.controller.UserController;
import com.example.pojo.User;
import org.junit.Test;
import org.springframework.context.ApplicationContext;
import org.springframework.context.support.ClassPathXmlApplicationContext;

public class TestInsert {

    //测试:注解改造后的Spring接管下的简单三层架构
    @Test
    public void testInsertUser(){
        //创建Spring容器
        ApplicationContext ac = new ClassPathXmlApplicationContext("applicationContext.xml");
        //从容器中获取UserController对象
        UserController uc = (UserController) ac.getBean("userController");
        //完成用户数据的导入
        uc.insertUser(new User("荷包蛋", 20, "黑河"));
    }
}
用户: 荷包蛋, 导入成功!

Process finished with exit code 0
Recommend
About Joyk
Aggregate valuable and interesting links.
Joyk means Joy of geeK